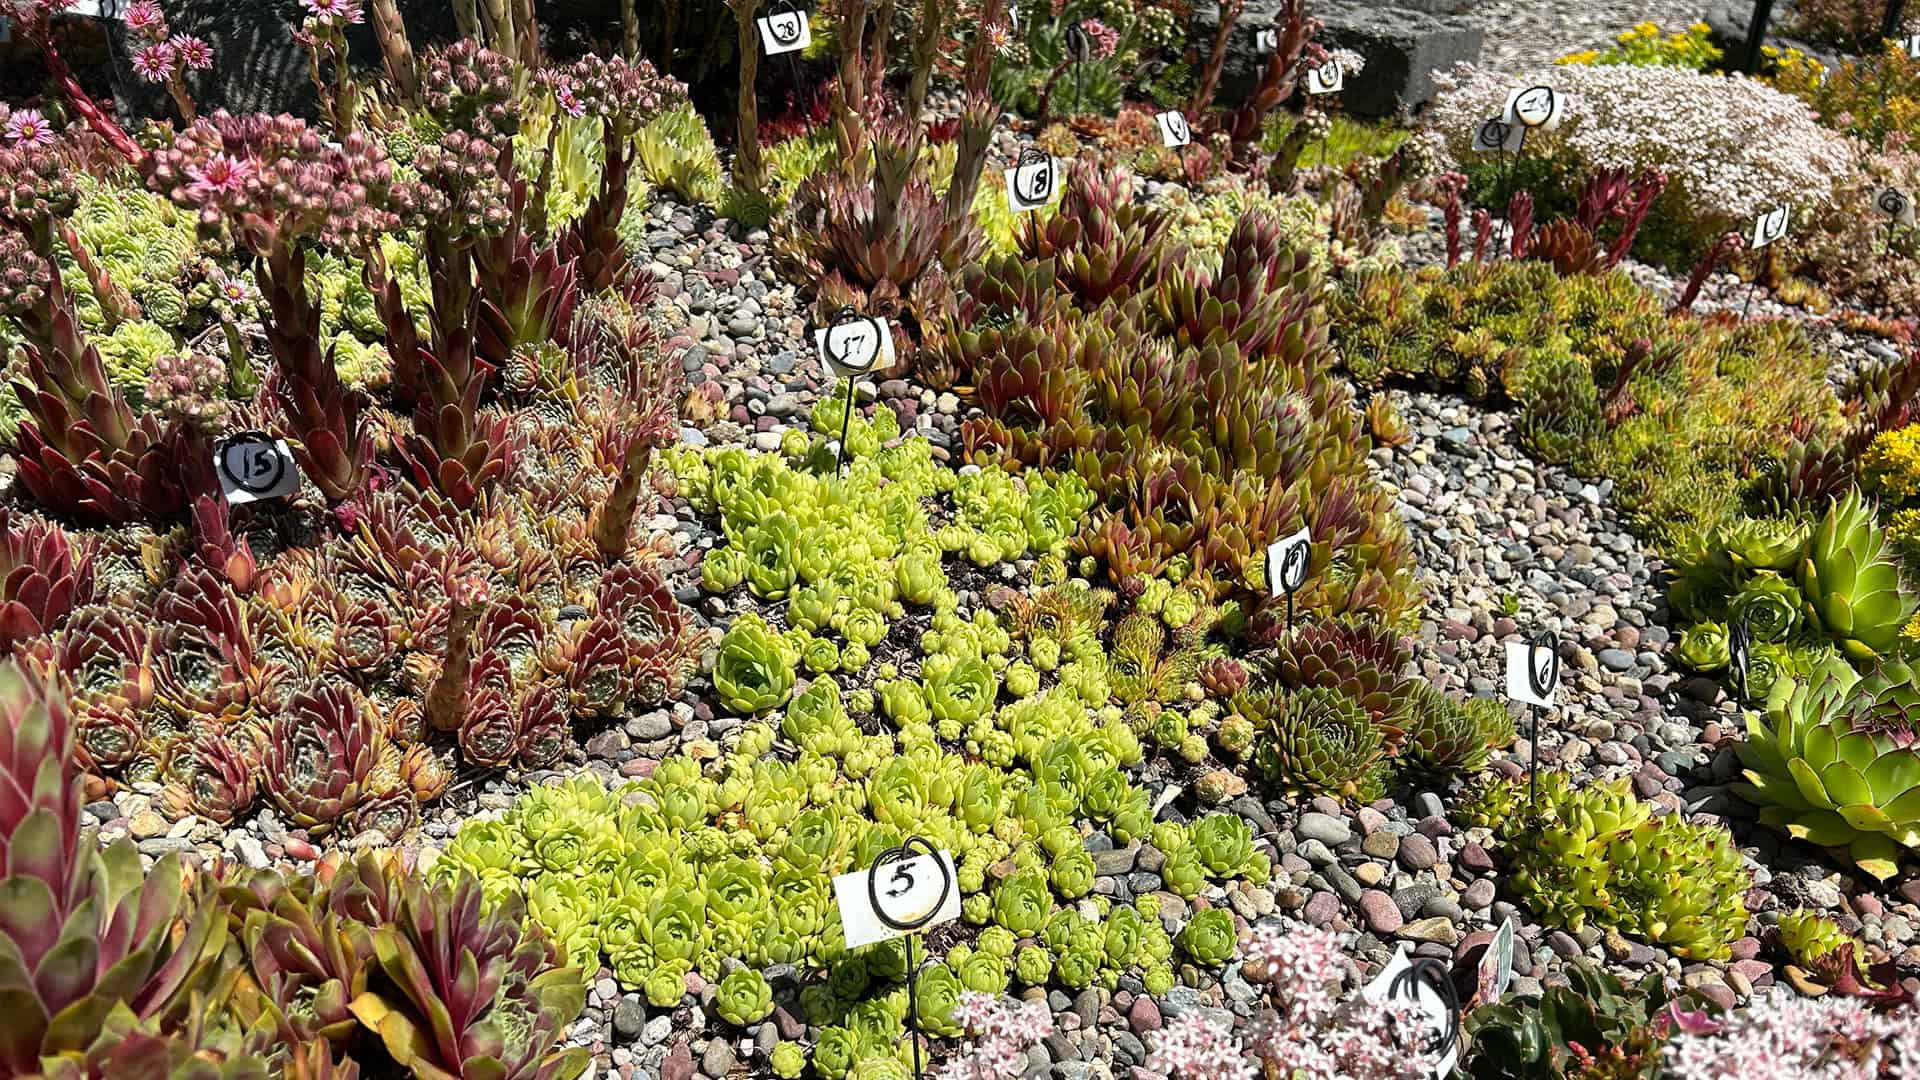
succulent plants growing in rocky soil

Post: August 21, 2026

Subscribe to the Blog >

Garden Heroes in the Late Summer Heat: Drought-tolerant Groundcovers

Once established, these hardworking groundcovers go to work providing many benefits with little help from the gardener

By Ginny Bode, WSU Extension Skagit County Master Gardener

As the warmest days of summer are here, when temps tend to creep the highest, many garden perennials need regular watering to make it through to the cooler days of fall. Not so with these tough, hardworking perennial groundcovers. These drought-tolerant beauties are workhorses in the landscape, meeting a host of needs, including weed suppression, soil moisture retention, erosion prevention, and pollinator support. And the bonus is that they are low-maintenance.

In the garden, the term groundcover can refer to many things, including various mulches, hardscape, landscape fabric, and low-growing spreading perennials and evergreens. Here we’ll focus on the abundance of drought-tolerant perennials less than 12″ tall, which will make your garden both beautiful and easier to maintain. 

low growing green plant with yellow flowers.
Low growing sedum performs well in the hot summer months. © Photo: Ginny Bode
clover looking ground cover
Sorrel works well as a groundcover in the dry areas under trees. © Photo: Ginny Bode
creamy white leaves of stone crop growing in rock garden
Stonecrop (Sedum spp.) is a large group of tough, easy-to-grow succulents that store water, making them very strong against dry heat and drought. © Photo: Ginny Bode
deep purple flowers on ground cover plant
Rockcress is a low growing evergreen perennial that is ideal for edging pathways and filling rock gardens. © Photo: Adobe Stock

The Benefits of Groundcovers

Weed Barrier
Low-growing groundcovers form a dense mat over the soil, reducing the amount of sunlight that reaches weed seeds. Their thick foliage competes with weeds for water and nutrients, making it harder for unwanted plants to establish. By quickly spreading and covering bare ground, these plants act as a natural barrier against weed growth. 
Erosion Control
Ground covers anchor the soil with their extensive root systems, holding it in place on slopes and hillsides. Their foliage reduces the impact of raindrops, minimizing soil displacement and runoff. By forming a continuous, protective layer, ground covers effectively prevent soil erosion and help maintain hillside stability.
Low Maintenance
When we say low maintenance, how low do we mean? Very low. Once established, no regular water is needed; just rake out the dead leaves or leave them as mulch for weed suppression and food for beneficial insects and salamanders. Some may need trimming to contain every so often. These groundcovers work especially well for the gardener who wants a low-maintenance alternative to grass in a restricted area, such as a hellstrip or beside a sidewalk. Some are tough enough to take foot traffic-but wear your shoes; pollinators like them too!
Pollinator Friendly
Many groundcovers produce flowers that attract bees, butterflies, and other beneficial insects. These plants provide a reliable source of nectar and pollen throughout the growing season. By supporting pollinators, ground covers contribute to a healthy and biodiverse garden ecosystem.
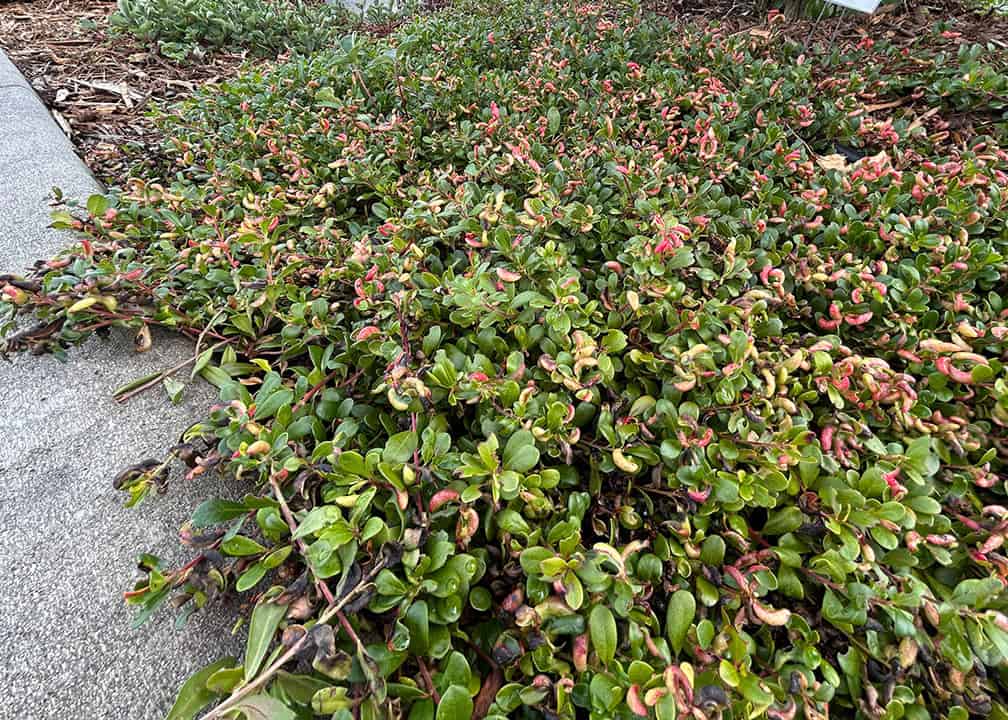
low growing dense ground cover with small leaves and berries
Kinnikinnick (Arctostaphylos uva-ursi) supports pollinators and birds. Does best in sandy areas and on slopes Photo © Ginny Bode
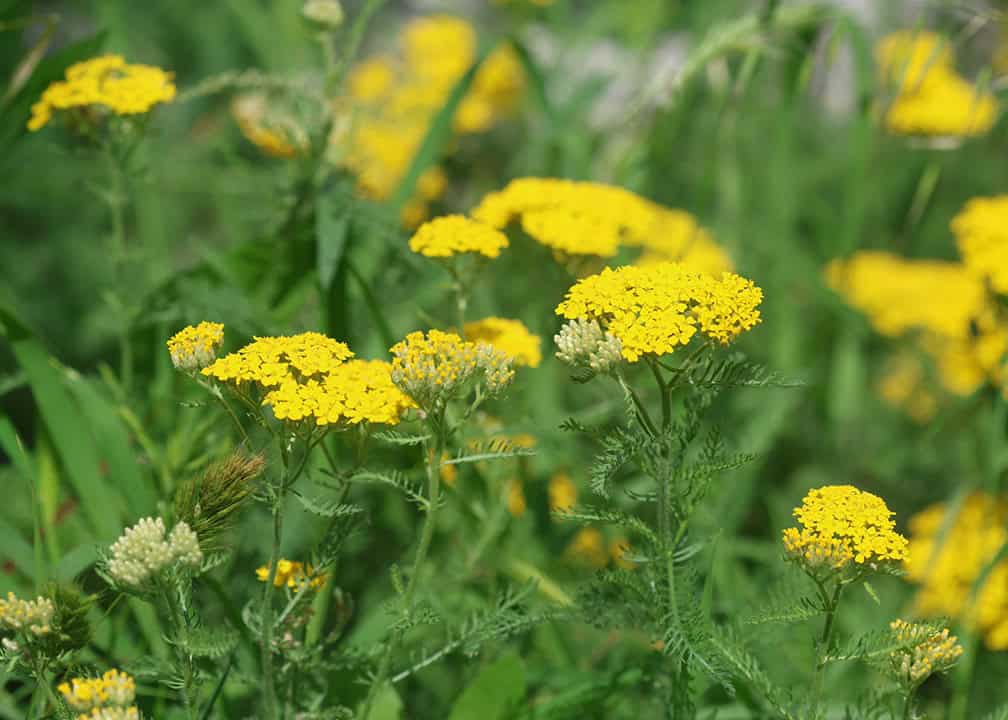
yellow flower florets on green stalks
Woolly yarrow (Achillea millefolium) Photo: © Adobe Stock
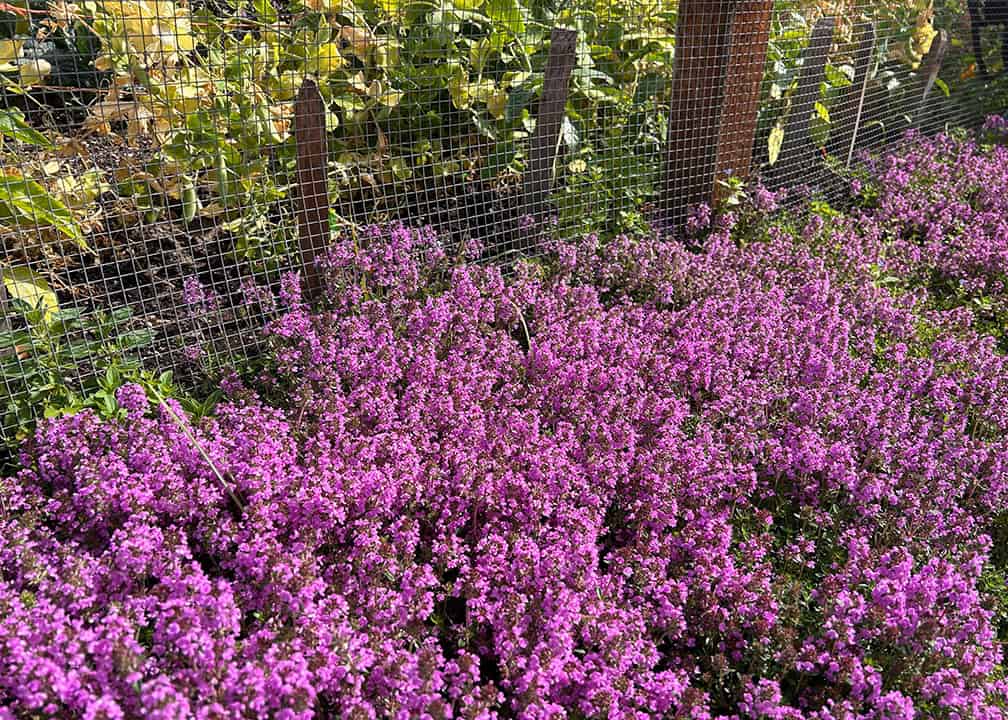
purple groundcover growing in garden
Creeping thyme (Thymus serpyllum or T. praecox) loves dry summers. In the PNW, it is important to plant in well-drained sandy soil with 6-8 hours of sunlight. It is susceptible to root rot. Provides a lovely carpet of purple blooms that can tolerate light foot traffic Photo © Ginny Bode

flower icon for WSU Master GardenerMark Your Calendar for These Free

Know & Grow Workshops


Spectacular Fall Color – How You Can Have it in Your Garden

Tuesday, September 15, 2026
1:00 pm – 2:30 pm
Prepare Your Garden for Fall and Winter
Tuesday, October 20, 2026
1:00 pm – 2:30 pm
Creating an Award-Winning Display Garden for the NW Flower and Garden Festival
Tuesday, November 10, 2026
1:00 pm – 2:30 pm
Sakuma Auditorium
16650 SR 536, Mount Vernon, WA 98273

Make your ground cover selection based on location and need.

Different drought-tolerant groundcovers will be more successful in specific conditions. Some do a better job of binding to soil on rocky slopes or in seaside conditions. Others do better with some shade.

Consider your current situation and desires:
– Is it sunny and dry during the summer months? 
– Is the area shady and dry?
– Do you have a slope that needs erosion control?
– Do you desire that it is evergreen?
– Native or native hybrid?

purple flowers with green leaves
orange butterfly thistle head

When Ralph Waldo Emerson wrote “What is a weed but a plant whose attributes have not been discovered,” he could have been looking at the native viola/violet. Despite its reputation for being invasive, it performs well as a groundcover and can be mowed. Washington state is home to 25 species of violas, which support many types of wildlife. It loves sunny meadows and damp riverbanks. It is the exclusive food source for the caterpillars of the endangered Oregon silverspot butterfly. Photo © Viola: Adobe Stock, Photo Silverspot © Richard Gardner, Bugwood.org

Sun

– Creeping raspberry aka crinkle-leaf creeper (Rubus pentalobus, synonym Rubus calycinoides)
– Rockcress (Aubrieta)-native or hybrid
– Seaside daisy ‘White Lights’ (Erigeron glaucus)
– Stonecrop family (Crassulaceae): Hens and chicks, sedum, and stonecrop are resilient, drought-tolerant succulent perennials that thrive in full sun and well-draining soil.

Shade:

– Mugworts (Artemisia pycnocephala) ‘David’s Choice’ handles sun or part shade
– Seaside daisy (Erigeron glaucus) ‘White Lights’ or ‘Cape Sebastian’
– Wild ginger (Asarum caudatum)*
– Oregon wood sorrel aka redwood sorrel (Oxalis oregana)*
– Bunchberry (cornus canadensis)*
– False lily-of-the valley (Maianthemum dilatatum)*

Slopes**

– Stonecrop (Sedum spp.)
– Rockcress (Aubrieta deltoidea)
– Hens and chicks (Sempervivum tectorum)

Evergreen:

– Kinnikinnick aka bearberry (Arctostaphylos uva-ursi)
– Stonecrop (Sedum spp.)
– Redwood creeping wintergreen (Gaultheria procumbens ‘Redwood’)-not to be confused with the invasive wintercreeper (Euonymus fortunei)


Native (*) or Hybrid:
Native plants are species that occur naturally in our region or ecosystem without human intervention, having adapted over time to the local climate and soil conditions. Nurseries have developed hybrid plants by crossbreeding plant varieties or species to create different bloom colors or more desirable traits, such as reduced aggressiveness in spreading. 
– Creeping thyme (Thymus spp.) and many color hybrids
– Turkish veronica/Turkish speedwell (Veronica liwanensis)
– Blue woolly veronica (Veronica pectinata)-well-behaved; not to be confused with ivyleaf speedwell, which is invasive in the Pacific Northwest.
wild strawberries

Woodland/wild strawberry (Fragaria vesca) is not as aggressive as beach strawberry, growing to about a foot tall. Photo © Adobe Stock

If you are interested in acquiring native ground covers, check out these and others on the Native Plant Society‘s website:

– Woodland/wild strawberry (Fragaria vesca) and beach strawberry (F. chiloensis)*
– Kinnikinnick aka bearberry (Arctostaphylos uva-ursi)*
– Foamflower (Tiarella trifoliata)*-can grow taller than 12″ in shade
– Western wild ginger (Asarum caudatum)*
– Oregon wood sorrel (Oxalis oregana)*
– Cascade rockcress* (Arabis furcata), Olympic Mountain rockcress* (Arabis olympica), and Nuttall’s rockcress* (Arabis nuttallii)


Fire Suppression 

Firewise gardening practices recommend creating a 5-foot perimeter around your home to help prevent fires. Ground covers can make this area beautiful while also deterring the possibility of fire. 

In Washington, plants with thick, juicy leaves called succulents are best for storing water. They soak up rain in the wet winter and save it for the dry summer. Plants in the sedum family rise to the top of the list because they actually store water during the heat of the summer, rather than becoming a dry and brittle fire hazard. This means that if a burning ember falls into this area, there is a greater chance it will burn out rather than flare up.
These are low-growing, drought-tolerant plants that actually store water:
– Rockcress (Arabis lyrata or A. pulchra)
– Stonecrop (Sedum spp.)
– Hens and chicks (Sempervivum spp.)
– Sea thrift (Armeria maritima)*
– Rosy pussytoes (Antennaria rosea)*

Other ideas can be found at Oregon State University’s Fire Resistant Plant Profiles.

To learn more about wildfire preparedness and how to take steps to protect your home, read our blog post on Wildfire Preparedness for the Home Landscape.

Ground Covers to Avoid: Too much of a good thing.
Because of their ability to spread, some groundcovers, when combined with perfect conditions, can be aggressive spreaders. Some, when they spread, are easy to remove; others, when they spread, you will be pulling them out for years (including cracks in the sidewalk), like vinca and violas. Before buying something that you’ve never heard of, check out its characteristics and performance.

Some of these groundcovers may perform beautifully in gardens at a different altitude with colder winters, but can take over in low-lying areas with good soils-such as the Skagit Valley. Always check your county noxious weed website before buying. Just because it is sold online doesn’t mean it is a good actor in our climate. 
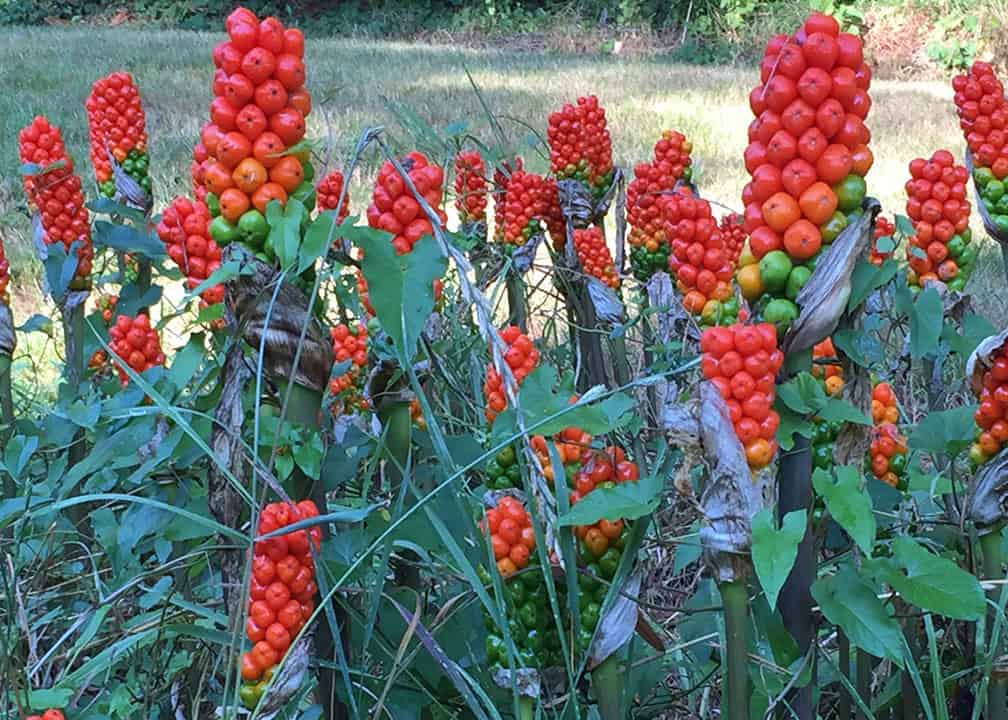
Red berries on Italian arum
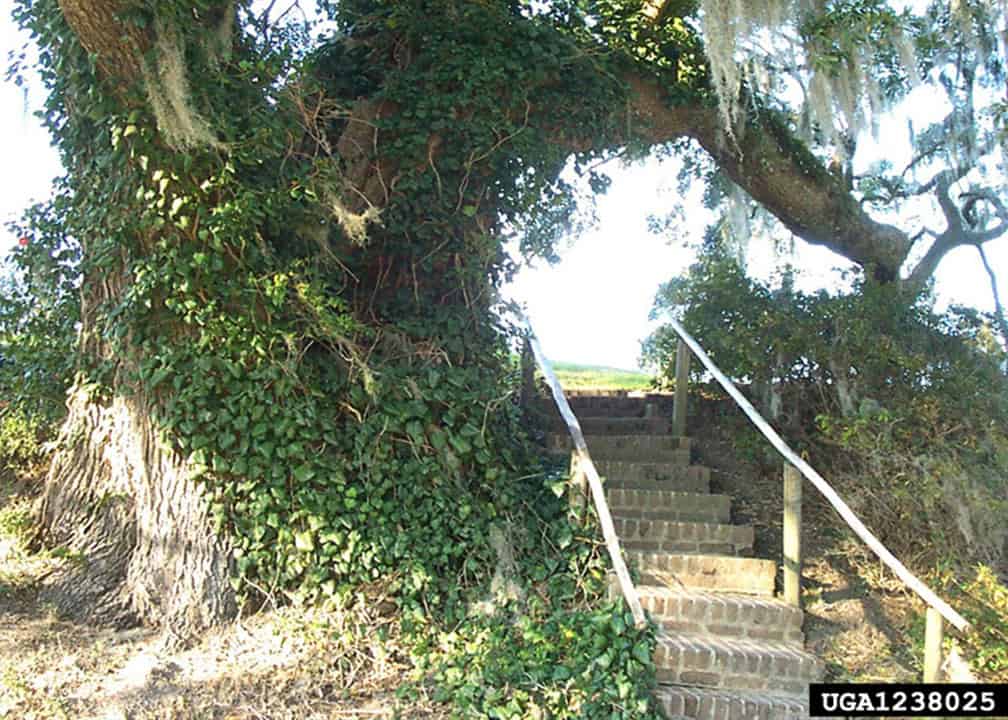
ivy crawling up tree trunk

Many older gardens in our area may have Italian arum and English ivy. Note that the aggressiveness of these plants has landed them a spot on the invasive species “Most Unwanted” list. They are difficult to eradicate and should never be planted or encouraged. Photos: Italian arum © WA Noxious Weed Board; English ivy © Randy Cyr, Greentree, Bugwood.org

Though readily available at nurseries in our area, these ground covers are best when planted in a container because they are very difficult to eradicate once they invade other areas: 

– Lily-of-the-valley (Convallaria majalis)
– Creeping jenny (Lysimachia nummularia)
– Periwinkle (Vinca minor and V. major)

Preparing for planting a groundcover

  • Create a weed-free area. A living groundcover will not suppress grass and weeds that are already in the soil. This may require digging sod or weeds out before preparing the soil for planting. Groundcovers will suppress new weeds, including horsetail, by outcompeting them for resources such as light, moisture, and nutrients.
  • Space the groundcover plants approx. 12″ apart and let them fill in. Water them for the first year and then water when they look dry. After a year or two, you will notice they begin to hold their own during the dry season, and you will need to take care of a weed or two that pops through.
  • Fall is generally the best time to plant.

Interested in larger low-maintenance groundcovers? This article covers only low-growing drought-tolerant ground covers. There are many groundcover options which are greater than 12″ tall and/or need a bit of water through the driest times of summer. These will also help protect the soil and reduce garden maintenance. 

* Native Plants

**Note: These are low growing drought-tolerant perennials which will protect the top layer of soil from washing down slope. There are many more drought-tolerant perennials which grow taller than 1 foot and send a deep tap-root, anchoring multiple layers of soil.

References and Resources:
McDougle, S. Plants You Can Walk On. Fine Gardening Magazine. Issue #152

Carter, S. Firewise Plant Materials. Colorado State University Extension. (Rev. 8/2025)

Groundcovers. University of Maryland Extension. (Rev. April 2026)

McCary, D. Our Favorite Low-Maintenance Grouncover Plants for Seattle Gardens. Seattle Sustainable Landscapes, (May 5, 2026)

alt=""

Ginny Bode

ABOUT THE AUTHOR:

Ginny Bode is a Skagit County WSU Extension Master Gardener Class of 2022 and is co-editor of the Ask a Master Gardener Blog. She enjoys the beauty of the garden in all seasons.


Questions about home gardening or becoming a master gardener may be directed to Skagit County WSU Extension Office, 11768 Westar Lane, Suite A, Burlington, WA 98233; by phone: 360-428-4270; or via the Skagit County WSU Extension website.

Washington State University Extension helps people develop leadership skills and use research-based knowledge to improve economic status and quality of life. Cooperating agencies: Washington State University, US Department of Agriculture, and Skagit County. Extension programs and policies are available to all without discrimination. To request disability accommodations contact us at least ten days in advance.

drops of rain on large puddle

Post: February 20, 2026

Subscribe to the Blog >

Tips on Collecting Rain Water

A self-sufficient gardening practice

By Jane Billinghurst, Skagit County WSU Extension Master Gardener

Originally published in April 13, 2018

Rain barrels are a low-cost, low-maintenance way for you to reduce your water bills and be more self-sufficient in your gardening practices. Rain might seem to be absent in the Skagit Valley over the summer, but Mount Vernon, for example, averages a little under one and three-quarter inches each month from May to September. If you have 1,000 square feet of roof draining into rain barrels, this comes to about 1,000 gallons of rainwater for each of these months-more than enough to fill an array of 55-gallon rain barrels around your house.

To put that into perspective, if you want to apply an extra inch of water to 500 square feet of garden each month in summer (in addition to rainfall), that will take just over 300 gallons of water a month or about half a dozen rain barrels’ worth, which means that one rain barrel is good, but multiple rain barrels are even better.

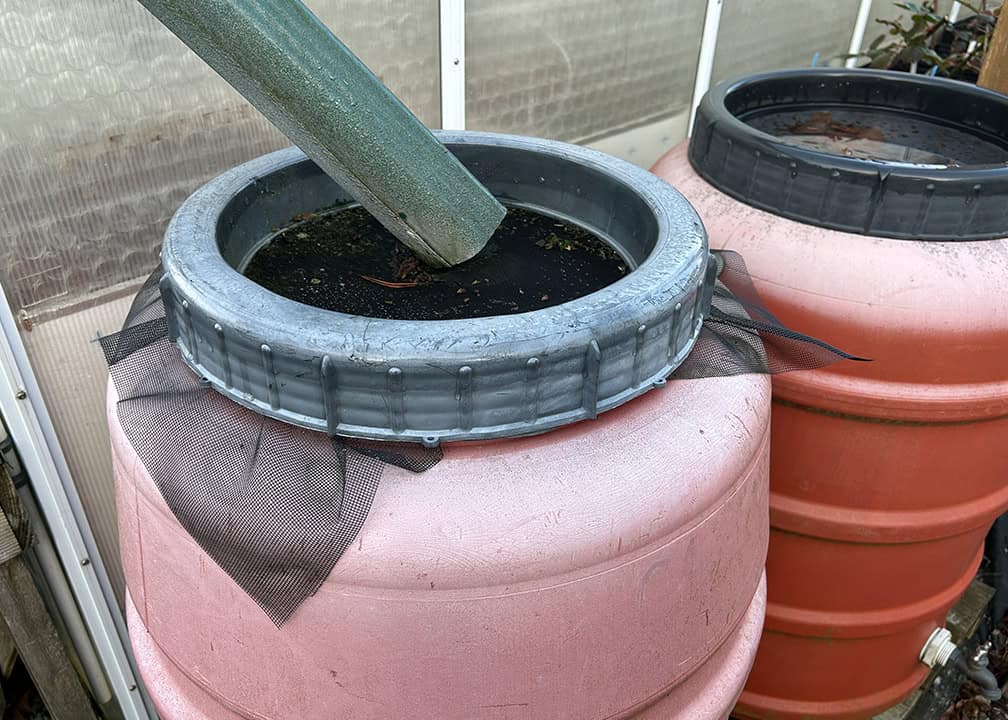
Site your rain barrels next to downspouts, then divert the downspout so the water flows directly into the barrel. Bear in mind that the barrel might overflow, which you definitely don’t want happening right next to your house. Therefore, you want to attach a hose pipe to an overflow spout at the top of the barrel and have it empty in a safe place (at least 15 square feet of porous ground is recommended at a minimum of 10 feet away from foundations or hard surfaces such as driveways or sidewalks and 5 feet away from neighboring property or rights of way).

gutter drain spout directed to mesh covered rain barrel

Direct the downspout so it flows directly into a rain barrel with a mesh guard on top to keep debris and mosquitoes out of the barrel. Photo © Skagit Master Gardener Foundation

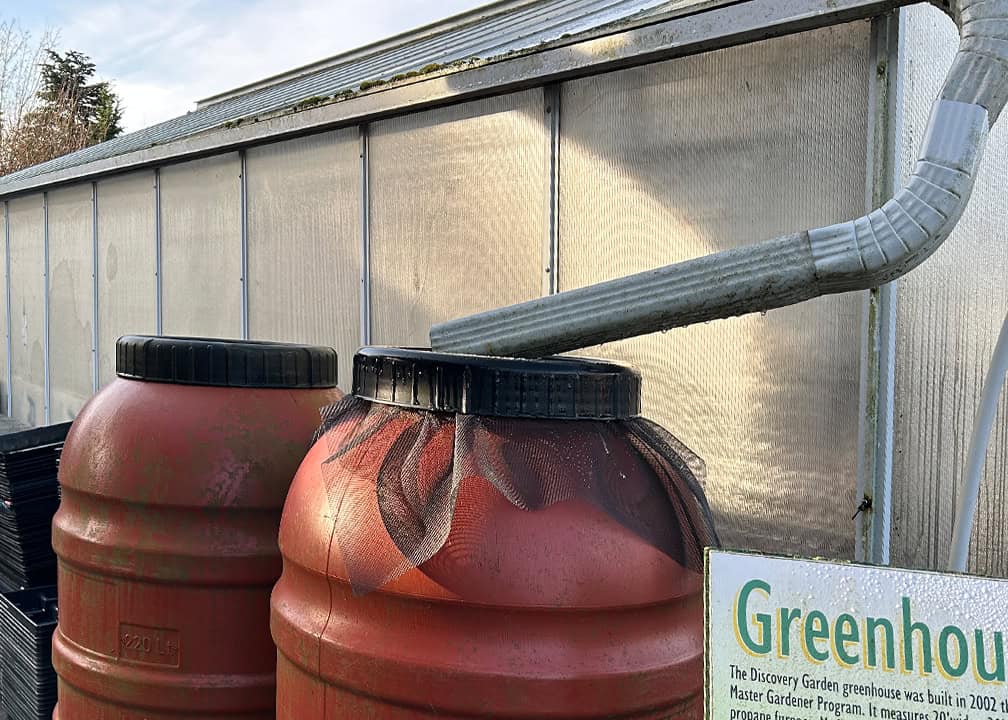
rain barrels with gutter downspout directed into top

Multiple rain barrels at the Discovery Garden, west of Mount Vernon, provide all of the water needed for seed starting and plant propagation until mid-April.  Photo © Skagit Master Gardener Foundation

Alternatively, you can install a downspout diverter that temporarily diverts rainwater from the downspout into the barrel. When the barrel is full, the diverter shuts off access to the barrel, and the rainwater flows down the spout once again.

Once you have decided where you want to place your rain barrels, what next? A 55-gallon rain barrel full of water weighs over 400 pounds. You need a sturdy base to support such a heavy weight and keep it level. The barrel also needs to be elevated enough that you can fit your watering can under the spigot and enough to provide water pressure if you are using a hose to empty the barrel.

The Skagit PUD site listed at the end of this article includes some tips on connecting a series of rain barrels together to increase the amount of rainwater you can store. Other sites offer options, as well.

Make sure you put a mesh guard on top of your rain barrels to keep mosquitoes from laying eggs in them, and remember to clean off the guard regularly to prevent it from getting clogged with debris washed down the downspout.

Use a clean, food-grade container to ensure you start with a barrel free of pollutants. The container should be opaque to keep out sunlight and prevent algae growth. Since you won’t be irrigating your plants in the winter (they won’t be growing and will get plenty of rain anyway), take the opportunity to rinse out your barrels. If you store them upside down, you won’t have to worry about them collecting water and freezing over winter, which might cause them to crack. You can set them up again in March or April when temperatures warm, plants start to grow, and there’s still lots of rain to catch.

There are several factors that affect how clean the water coming off your roof is. These include your location, the composition of your roof, and whether your roof has recently been treated with chemicals to control moss or algae. WSU publication #FS280E, “Potential Contaminants in Residential Rain Barrel Water” (see resources at the end of this article), goes over these issues in detail. To be on the safe side, avoid irrigating vegetable gardens with rainwater collected from roofs. Reserve it instead for ornamental plants in your yard and containers.

A number of online sites have useful resources on rainwater collection for our region. The Centers for Disease Control and Prevention has a page on rainwater and health. Washington State Department of Ecology covers rules for collecting rainwater. Skagit County Public Utility District has information on constructing, installing, and maintaining rain barrels. Washington State University Extension goes over potential contaminants in rain barrel water, and US Climate Data gives rainfall averages where you live if you want to calculate for yourself just how much rainwater you might be able to collect. Use the formula 0.623 gallons x square footage of the catchment area x inches of rain per month or year, depending on the length of time.

two women in overalls
Presenters: Herta Kurp and Katryna Barber

Know & Grow Series

Composting and Vermiculture for the Home Gardener

Tues., March 17 , 2026 — 1 p.m.
— Free, no registration required —

at the NWREC Sakuma Auditorium
16650 State Route 536, Mount Vernon, WA

RESOURCES:

Collecting Rainwater and Your Health. (2024) US Centers for Disease Control


Soak up the Rain. US Environmental Protection Agency.


Rainwater Collection. Department of Ecology State of Washington


US Climate Data – Mount Vernon, Washington


Chalker-Scott, L. (Rev. 2025) Potential Contaminants in Residential Rain Barrel Water. WSU Extension Publications #FS280E Washington State University, Pullman, WA


Tate, K. Rain Barrels 101: DIY Tips & Tricks for Collecting Rainwater. Skagit Public Utility District, Mount Vernon, WA

ABOUT THE AUTHOR: Jane Billinghurst became Skagit County WSU Master Gardener in 2005. 


Questions about home gardening or becoming a master gardener may be directed to Skagit County WSU Extension Office, 11768 Westar Lane, Suite A, Burlington, WA 98233; by phone: 360-428-4270; or via the Skagit County WSU Extension website.

Washington State University Extension helps people develop leadership skills and use research-based knowledge to improve economic status and quality of life. Cooperating agencies: Washington State University, US Department of Agriculture, and Skagit County. Extension programs and policies are available to all without discrimination. To request disability accommodations contact us at least ten days in advance.


AMGPost_header5
BlogHeader071623

Drip Irrigation – Design, Installation and Maintenance

With a little work up front, you’ll save time and money while preserving one of our most precious natural resources

              Subscribe to the Blog >

Water conservation is one of the nine Master Gardener Priorities

By Bob Bryan, Skagit County WSU Extension Master Gardener

Master Gardener program priorities help us navigate between horticulture, our natural resources and community needs. As trained volunteers, we are constantly learning the latest in research-based practices to advise homeowners how to maintain gardens and sustainable landscapes. Drip irrigation is a method of slowly delivering water to all types of plantings-from planters to gardens to greenhouses.

Drip irrigation is not new. In Germany in the 1920s farmers used perforated pipes to irrigate plants. Simcha Blass in Israel developed the first experimental drip irrigation system in 1959 and formed the first drip irrigation company, Netafim, in 1965. Drip irrigation places a precise amount of water where you need it, prevents overwatering, conserves water, saves money, and keeps water off foliage, reducing disease. It eliminates hours of hand watering, can be fully automated with a timer, and reduces weeding time. Drip systems can be applied to gardens, vineyards, greenhouses, row crops, window planters, deck and patio pots, existing landscapes, hillsides, or flat terrain, and is long lasting and adaptable.

A simple irrigation system that many turn to when they first transition from hand watering or overhead watering with sprinklers or spray heads is a soaker hose. Soaker hoses are made from 70% recycled rubber and 30% recycled polyethylene products. They can be bought in 25-ft, 50-ft, and 100-ft lengths. The disadvantage of soaker hoses is that they deteriorate over a few years, and they do not emit water uniformly along their length. More water is distributed at the end closer to the source. As you reach the end, less water is available for the plants. One can get the best performance from a soaker hose by using a timer, a filter, and a pressure reducer and operating it at no higher pressure than 10 psi.

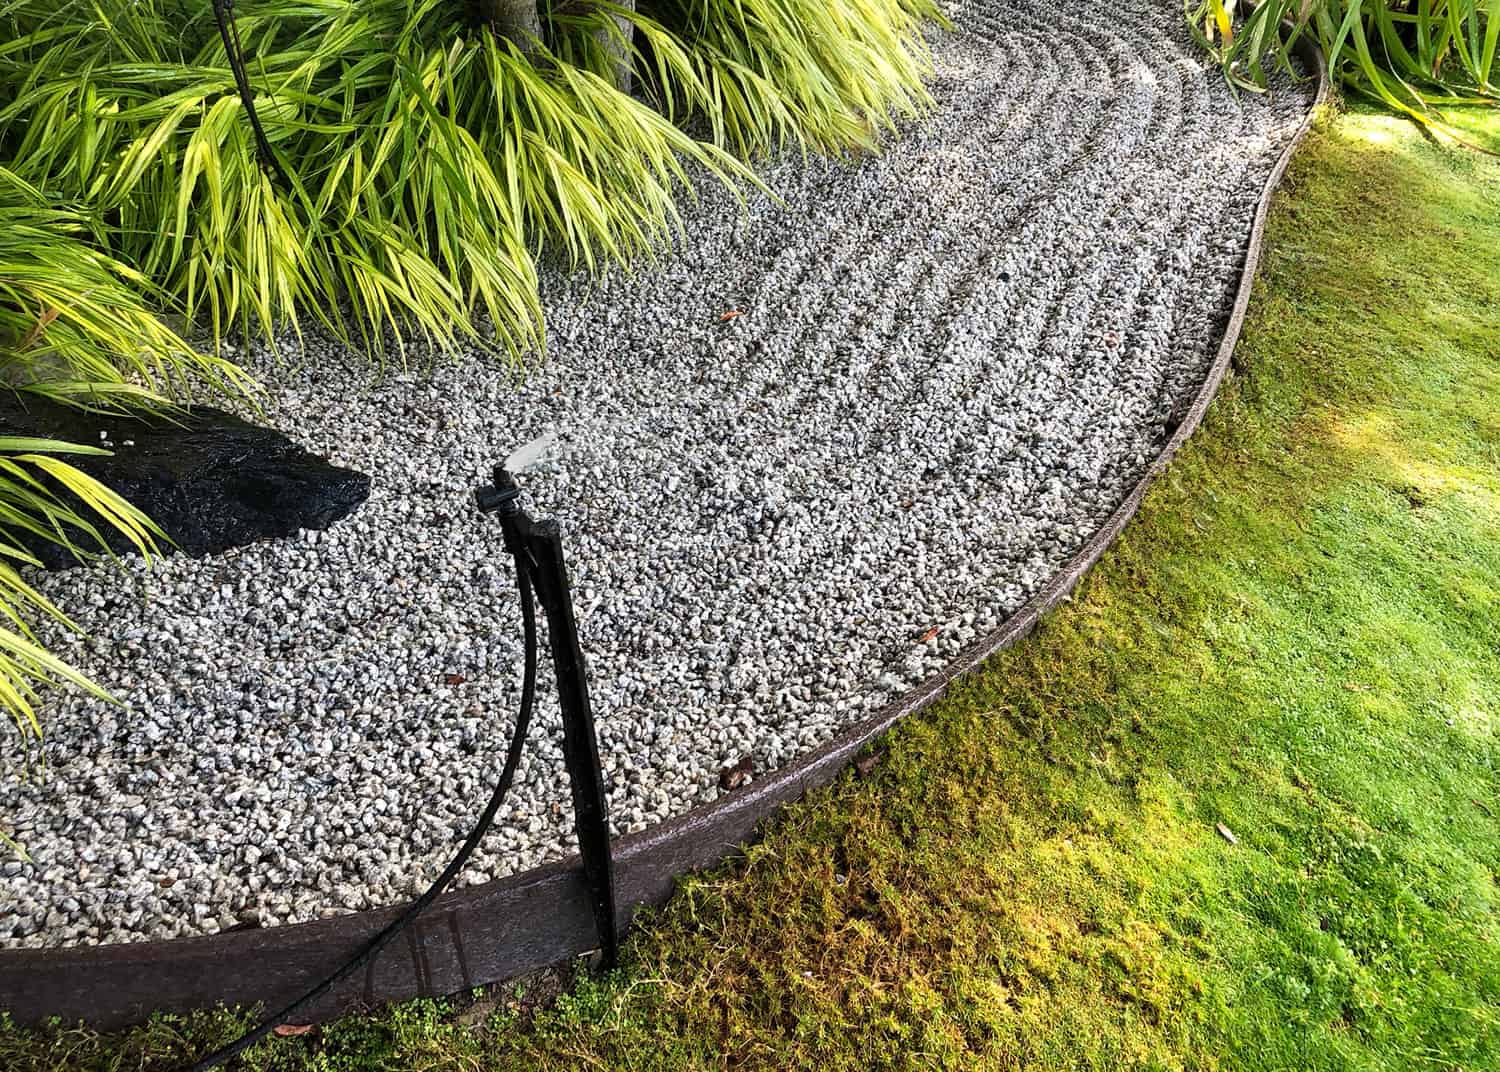
Pressure compensating shrubbler watering Japanese Garden at the Discovery Garden on Hwy 536 West of Mount Vernon
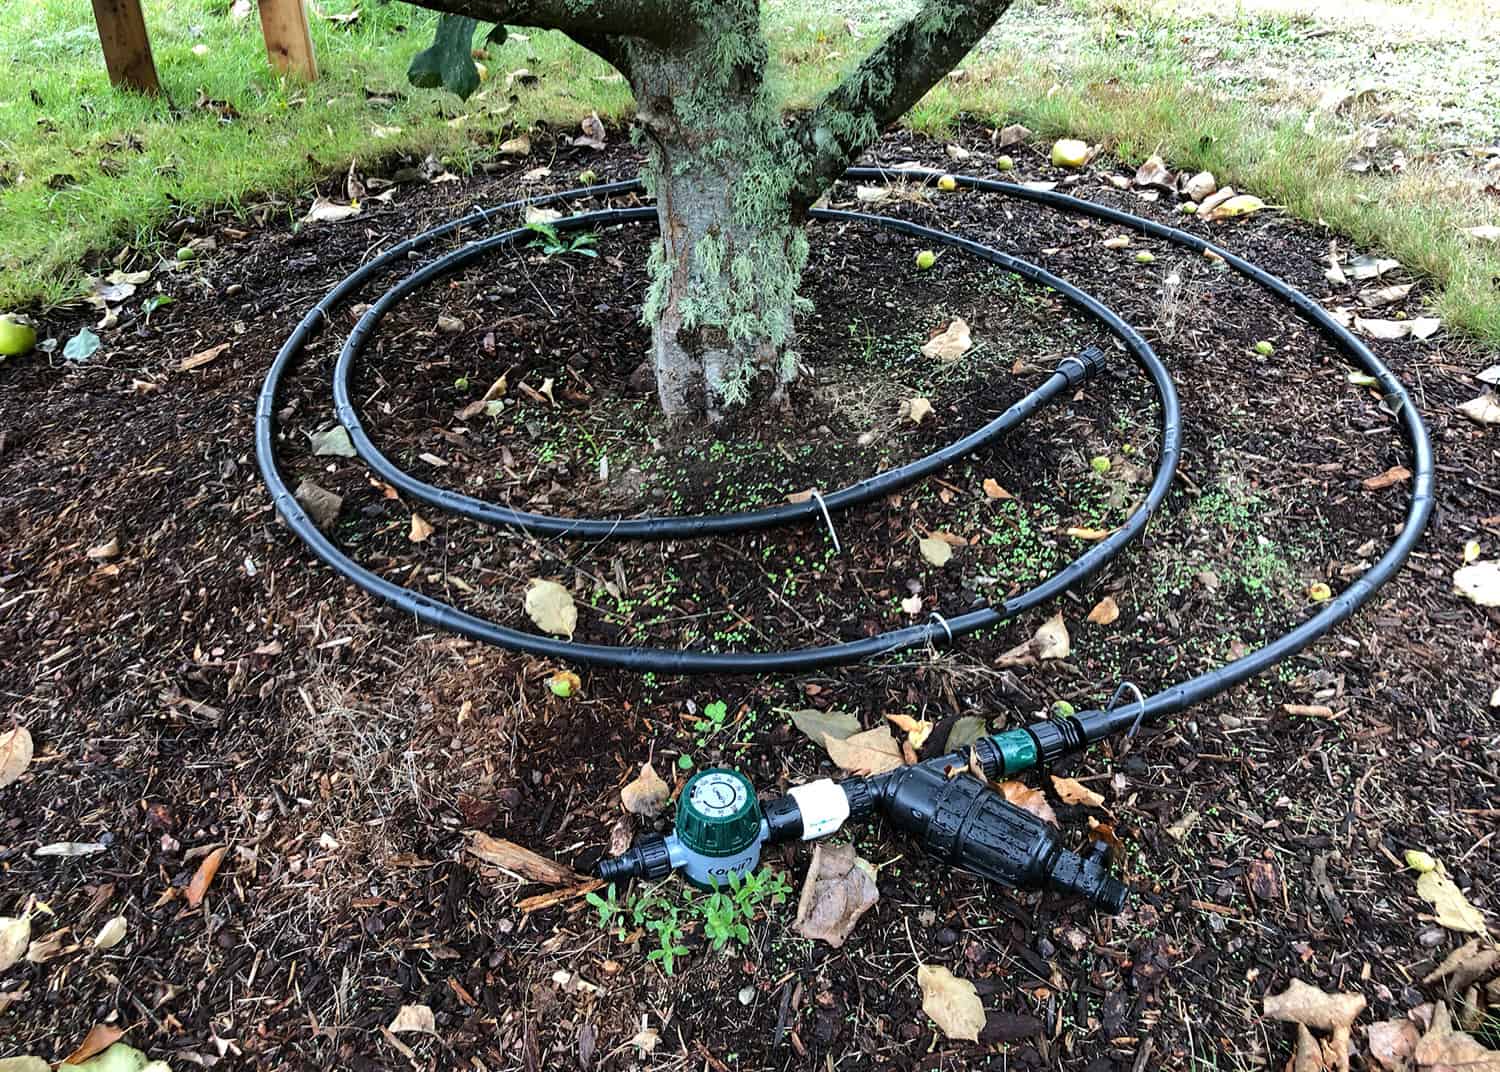
1/2-in. dripline with manual timer, filter and pressure reducer for watering a tree.

Step 1: Identify the Water Source

The first step in designing a drip irrigation system is to identify the source of water and point of connection (POC).

  • Will you use a hose bibb attached to the house water circuit or a frost-proof hydrant out in the yard?
  • Do you plan to use gravity fed water from a cistern or water tank?
  • Will you pump water from a lake or creek?

Once identified, you need to measure the flow available from the POC. Think of a drip irrigation system as a collection of emitters. Emitters allow water to flow out at specified gallons per hour (GPH). Common emitters allow 1 GPH or 2 GPH flow. The flow of water available from the POC must be capable of providing enough water to satisfy all the emitters. If you plan to have more emitters than your available flow can provide, you must divide your system into zones and then operate one zone at a time.

Identify Your Flow Rate

Measure your flow rate by placing a 5-gallon bucket beneath the POC, open the valve completely, and time the number of seconds it takes to fill the container. Then the gallons per minute (GPM) = (60 seconds per minute/number of seconds to fill) x (number of gallons).

Drip system components. Composite photos courtesy of Dripworks.

Step Two: Identify Areas you Want to Water

The second step is to decide what areas you want to water. Make a sketch. Take some measurements. This will help you determine the amount of mainline and number of branch lines you need. Mainlines are ½”, ¾”, or 1″ polypropylene, usually black. Branch lines are usually ½”.

The Parts of a Drip Irrigation System

A drip irrigation system consists of the following parts connected in this order: POC, timer, filter, pressure regulator, mainline, branch lines, end cap.

Several companies make drip irrigation parts. Parts from Hunter, Rainbird, Raindrip, Netafim and Jain can be found at big box stores, hardware stores, or landscape suppliers like Ewing Irrigation & Landscape Supply in Burlington and online like Dripworks.

All suppliers provide similar products. A note of caution: Rainbird ½” mainline is slightly smaller than Dripworks ½” mainline. Rainbird ½” polypropylene is 0.500″ inside diameter; Dripworks ½” polypropylene is 0.600″ inside diameter. Rainbird ½” mainline will not fit on Dripworks barbs in their Easy Loc fittings. Dripworks offers a reducing coupler that allows one to extend a Rainbird system to a Dripworks system. When starting from scratch, it makes sense to decide on one supplier to build your system. Both Dripworks and Rainbird products are of equal quality and diversity. I have built systems with Dripworks parts and will describe them going forward, but Rainbird parts could be substituted.


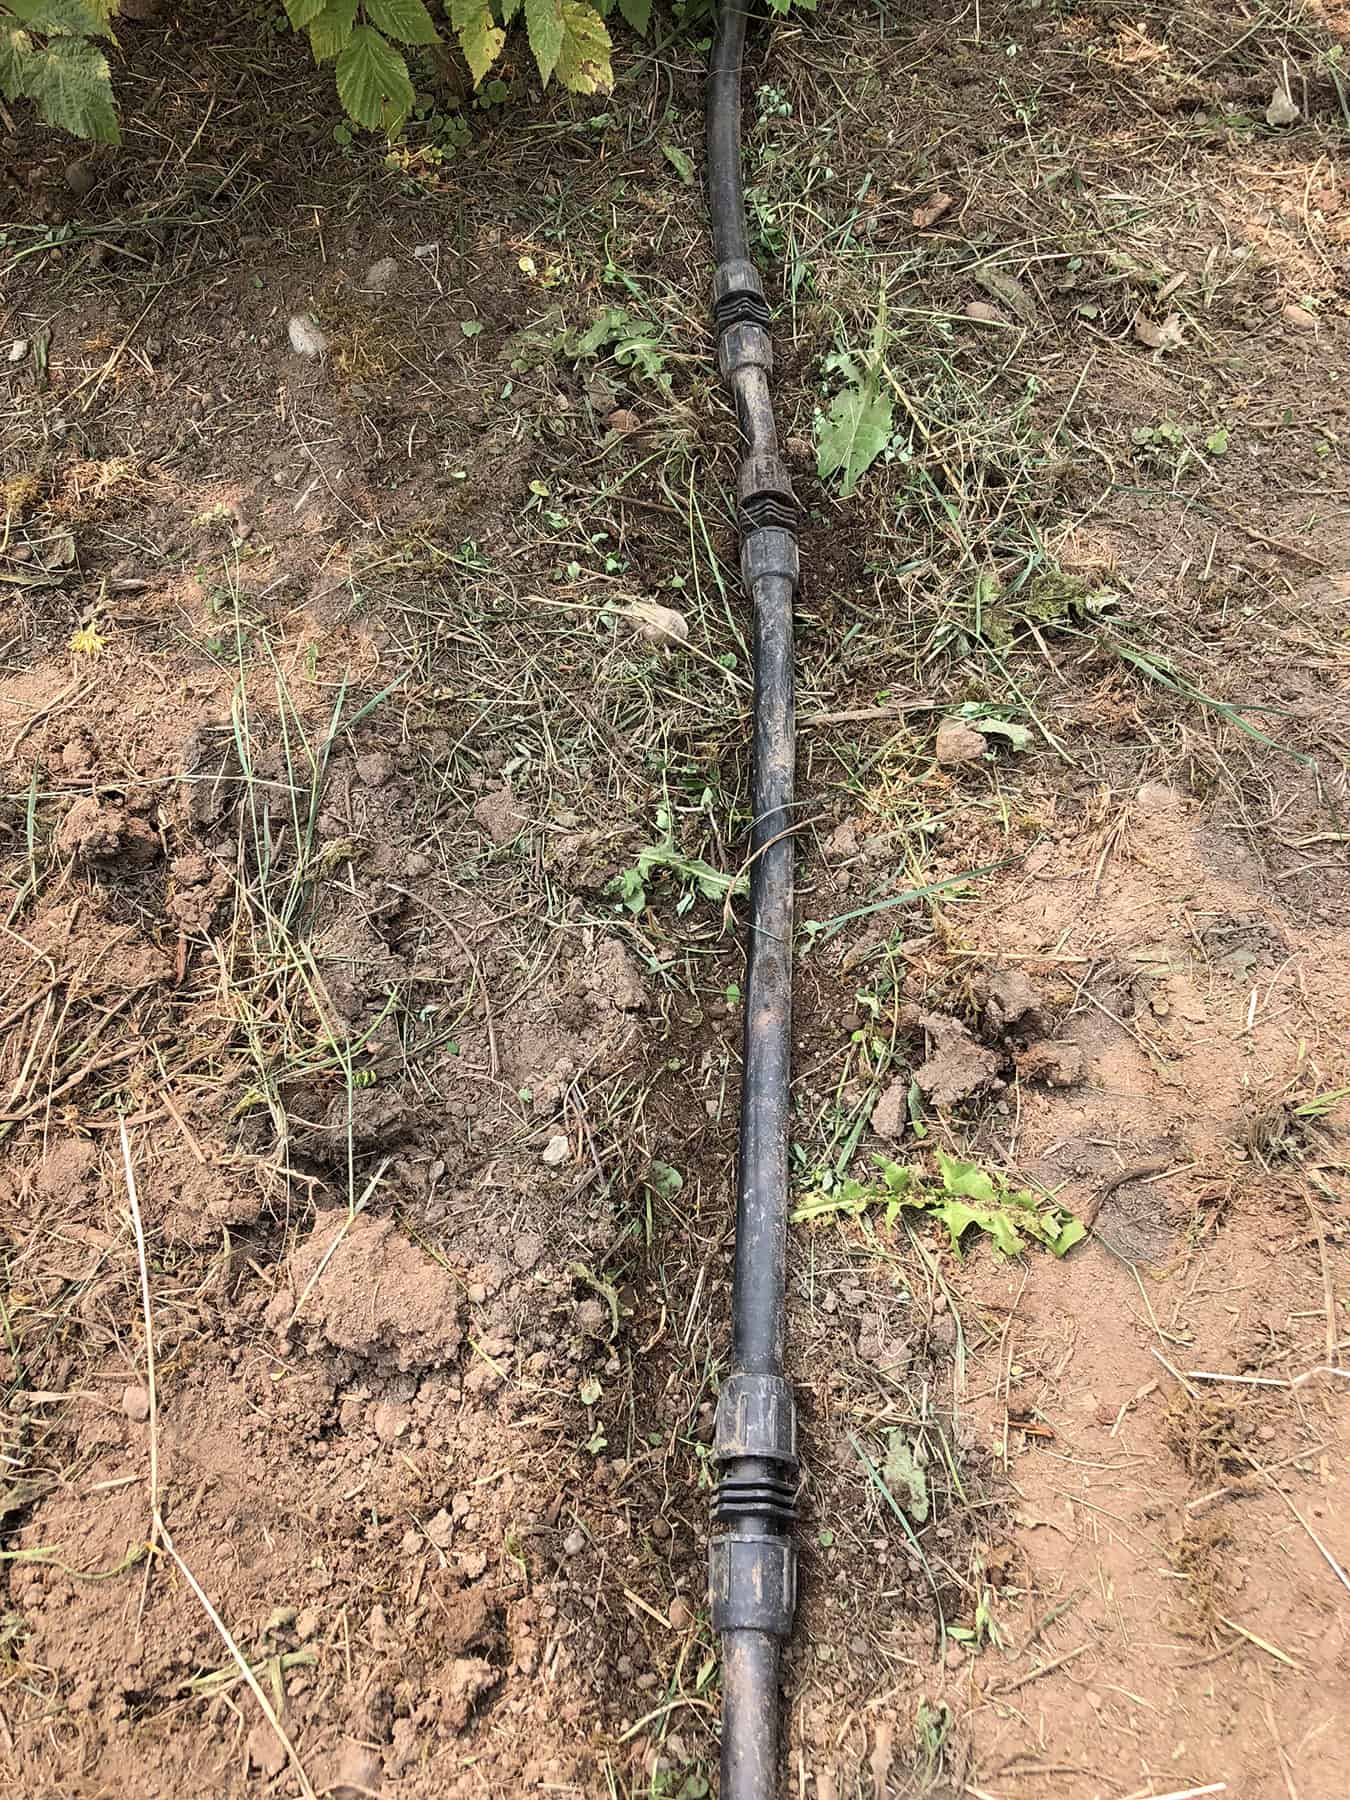
A 1/2″ mainline with multiple repairs illustrating the result of burying drip lines under mulch. Such hidden lines are invariably severed by weeding activity. © Bob Bryan
Illustration of a 3/4
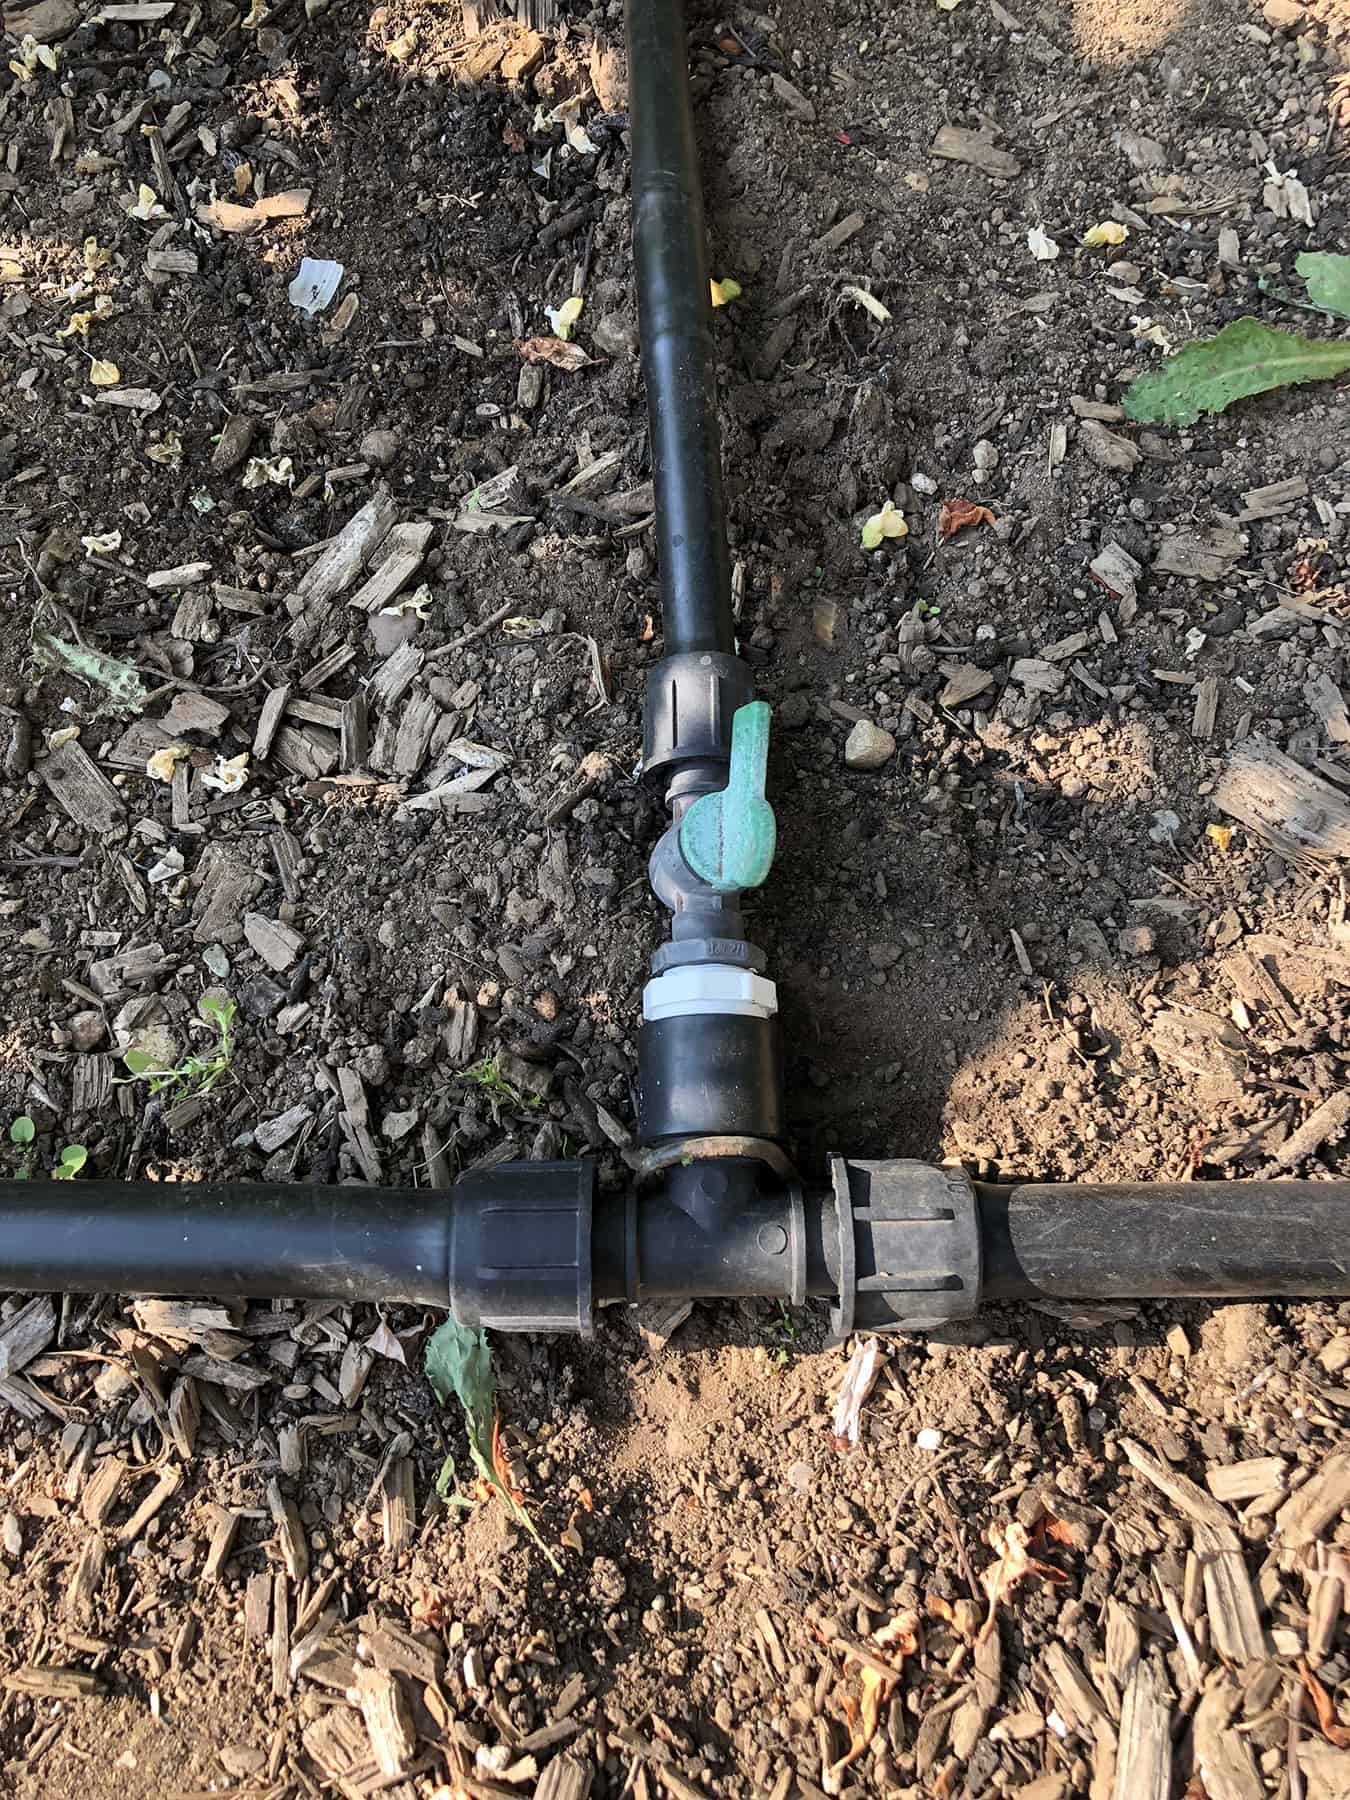
Illustration of a 3/4″ mainline with an Easy Loc “T” connected to a 1/2″ drip line through a control valve.
Photo by © Robert Bryan

Timers: A timer allows you to go on vacation knowing that your landscape and patio plants are going to be watered appropriately. Timers are wind-up, battery-powered, AC powered or solar powered. They handle one zone (wind-up) or up to 12 zones. All powered timers offer similar functions. When first powered up, you set the current time and day of the week. Next you choose which zone you are setting up (for multi-zone timers). Then, for each zone, you set the duration, days to irrigate, and a start time for each irrigation (up to four start times). Multiple start times are useful for high volume watering using shrubblers, micro-jets, mini-sprinklers, or sprayers. These devices are designed to cover areas not specific plants and can lead to run-off. You can avoid run-off by watering for multiple short intervals. Galcon LCD timers have worked well for my needs.

The type of soil in your garden will determine the irrigation schedule and emitter choice. Clay soil holds more water, is slow to absorb water, and is slow to release water. For this type of soil use 0.5 GPH emitters spaced farther apart. Loam, which is the optimal soil type, is very porous and retains moisture. Use 0.5 – 1 GPH emitters. Sandy soils are extremely porous and allow quick water flow. Use 1 – 2 GPH emitters closely spaced and water more frequently for shorter periods.

Filters: Because drip irrigation emitters contain very small channels, they are susceptible to clogging. It’s important to always include a filter after the timer. Garden filters come with hose threads or pipe threads. Screen filters remove sediment and debris that can clog a drip system. Filters are rated by filtering capability. The common terms used are mesh, the number of wires per inch and micron, the maximum particle size that can pass through the screen. Home garden screen filters are commonly used for small to medium size irrigation systems with a relatively clean water supply. Common mesh sizes are 50, 100, 150, and 200. I use Irritec hose thread Y filters with 200 mesh.

Most municipal water systems supply water at 40 – 60 psi. This is too high for drip irrigation systems. Pressure regulators come with hose threads or pipe threads. Senninger Garden Regulators are ideal for low-volume drip systems. They will regulate pressure from 10 psi to 40 psi. I use 30 psi regulators in my gardens.

In the old days (back in the 1970s) I assembled drip systems using Raindrip compression fittings. These could be bought at hardware stores or nursery centers. They come in straight couplers, elbows, tees, and hose starts. They are black plastic cylinders with compression elements at the open ends. You push the ½” polypropylene tubing into the open end wiggling it around and jacking it back and forth to force it into the fitting. Once in, it doesn’t leak. But like the Hotel California, once you check in, you can never leave. One day I was watching farm hands installing a field for strawberries near where I lived then in Carlsbad, CA. The tractor and implement produced flat-topped raised beds across the field. Then the workers laid down T-tape (also called drip tape). Then they covered the raised beds with black plastic. They made slits in the plastic and planted strawberry plants in the raise beds. The drip irrigation system was in situ. Dripworks carries the latest generation of tape technology from Toro called Aqua-Traxx drip tape. The emitters are spaced at 4″, 6″, 8″ and 12″ centers. This can be used in home gardens, but it is really meant for large commercial farms. Discovering T-tape led me to a local store that sold irrigation supplies and introduced me to a new type of drip irrigation.

Illustrating a Manifold Swivel System with, from the bottom, a female hose x 3/4
Illustrating a Manifold Swivel System with, from the bottom, a female hose x 3/4″ female pipe adapter, a 3/4″ Standard Amiad Filter, a Senninger Limit Valve (40 PSI), various Manifold Swivel parts, two 3/4″ Galcon Battery Valves, a 3/4″ Female Easy Loc hose start, a 1/2″ Female Easy Loc hose start, and a 4 Station Galcon Battery Timer. Photo by © Robert Bryan
This image shows the manifold system described in the last photo connected to a frost-proof yard hydrant by a high pressure hose. © Photo Robert Bryan

Step Three: Assembly

Back to our drip system design: the common way to start a system is to use a female hose start with swivel. Fittings to build a drip irrigation system are ½”, ¾” and 1″ Easy Loc fittings. The female hose start has a female hose swivel on one end and a locking barb on the other. Attach the female hose start to the regulator’s male threads. Work the end of the polypropylene tubing over the barb and tighten up the locking collar. To take the tubing off, loosen the locking collar and pull the tubing off the barb. All Easy Loc Fittings (a Dripworks product) work this way. When working with these fittings in the cold, it helps to keep a tube of food-grade lubricant such as Lubrifilm to lubricate the barb. Cut the polypropylene tubing with pruning shears. Continue to build out your system with couplers, tees, elbows, inline valves, and male hose end with caps for closing lines. Vendor websites have many plans for gardens of many types. They often include a helpful list of materials (because they want you to buy supplies from them). Perusing these plans will give you ideas for your garden.

Extra Tips:

If you have a long garden bed along the fence or the sidewalk, and want to irrigate the shrubs there, run a ½” mainline down the center. Install the timer, filter, pressure regulator and female hose start at the hose bibb at the house. Dig a narrow trench across the lawn, put ¾” Sch 40 PVC pipe in the trench and run the ½” polypropylene through the PVC. The PVC will protect the drip mainline from being cut by digging and weeding. Easy Loc 90° elbows put the mainline down in the trench, then bring it up in the garden bed. With the mainline in place and closed at the end with a male hose end, punch holes in the mainline with a specialty hole punch. Insert ¼” transfer barbs into the holes. If the shrubs are medium size, you can irrigate with a loop of ¼” soaker dripline. Attach the dripline to the transfer barb and close the end with a goof plug (a plug with different-sized barbs used to repair small or large holes in mainline tubing). If the shrub is small bring some ¼” polyethylene micro tubing to the plant from a transfer barb. Connect it to a Cobra Stake drip emitter (available in ½, 1, or 2 GPH).

Winterizing: Timers, filters and pressure regulators can be damaged by hard freezes. Remove the end caps off of the mainlines and drain the system. Re-install the end caps to keep out insects. Store the timers, filters, and pressure regulators indoors over winter. Remove batteries from the timers.

Setting up a drip irrigation system takes a bit of time and ingenuity, but is well worth the benefits you’ll reap as you save money and time, and have a garden full of thriving plants.

The products described and the opinions expressed above are those of the author and not meant as an endorsement. Skagit County WSU Extension Master Gardeners do not endorse any companies or commercial products.


Pressure compensating scrubber watering rose bush at the Discovery Garden. © Photo Ginny Bode
1/2-in. dripline water system with emitters at 12-in. spacing. The system is set up to water young raspberry plants in the small fruits garden at the Discovery Garden.
Photo by © Ginny Bode
1/2-in. dripline water system with emitters at 12-in. spacing. The system is set up to water young raspberry plants in the small fruits garden at the Discovery Garden.
Photo by © Ginny Bode

RESOURCES:

Learn more about setting up a drip irrigation system in the Pacific Northwest through these online sources:

https://foodsystems.wsu.edu/crops/irrigation/

https://pubs.extension.wsu.edu/drip-irrigation-for-the-yard-and-garden

https://depts.washington.edu/hortlib/pal/drip_irrigation/

http://irrigation.wsu.edu/Content/Calculators/Drip/Drip-Line-Rate.php

https://pubs.extension.wsu.edu/drought-advisory-water-conservation-in-gardens-and-landscapes


ABOUT THE AUTHOR:

Bob Bryan has been a Skagit County WSU Extension Master Gardener (EMG) since 2009. He has taught the art of drip irrigation in the Know and Grow education seminars offered by Master Gardeners.

_________

Questions about home gardening or becoming a Master Gardener may be directed to: Skagit County WSU Extension Office, 11768 Westar Lane, Suite A, Burlington, WA 98233; by phone: 360-428-4270; or via the website: www.skagit.wsu.edu/mg