AMGPost_header5
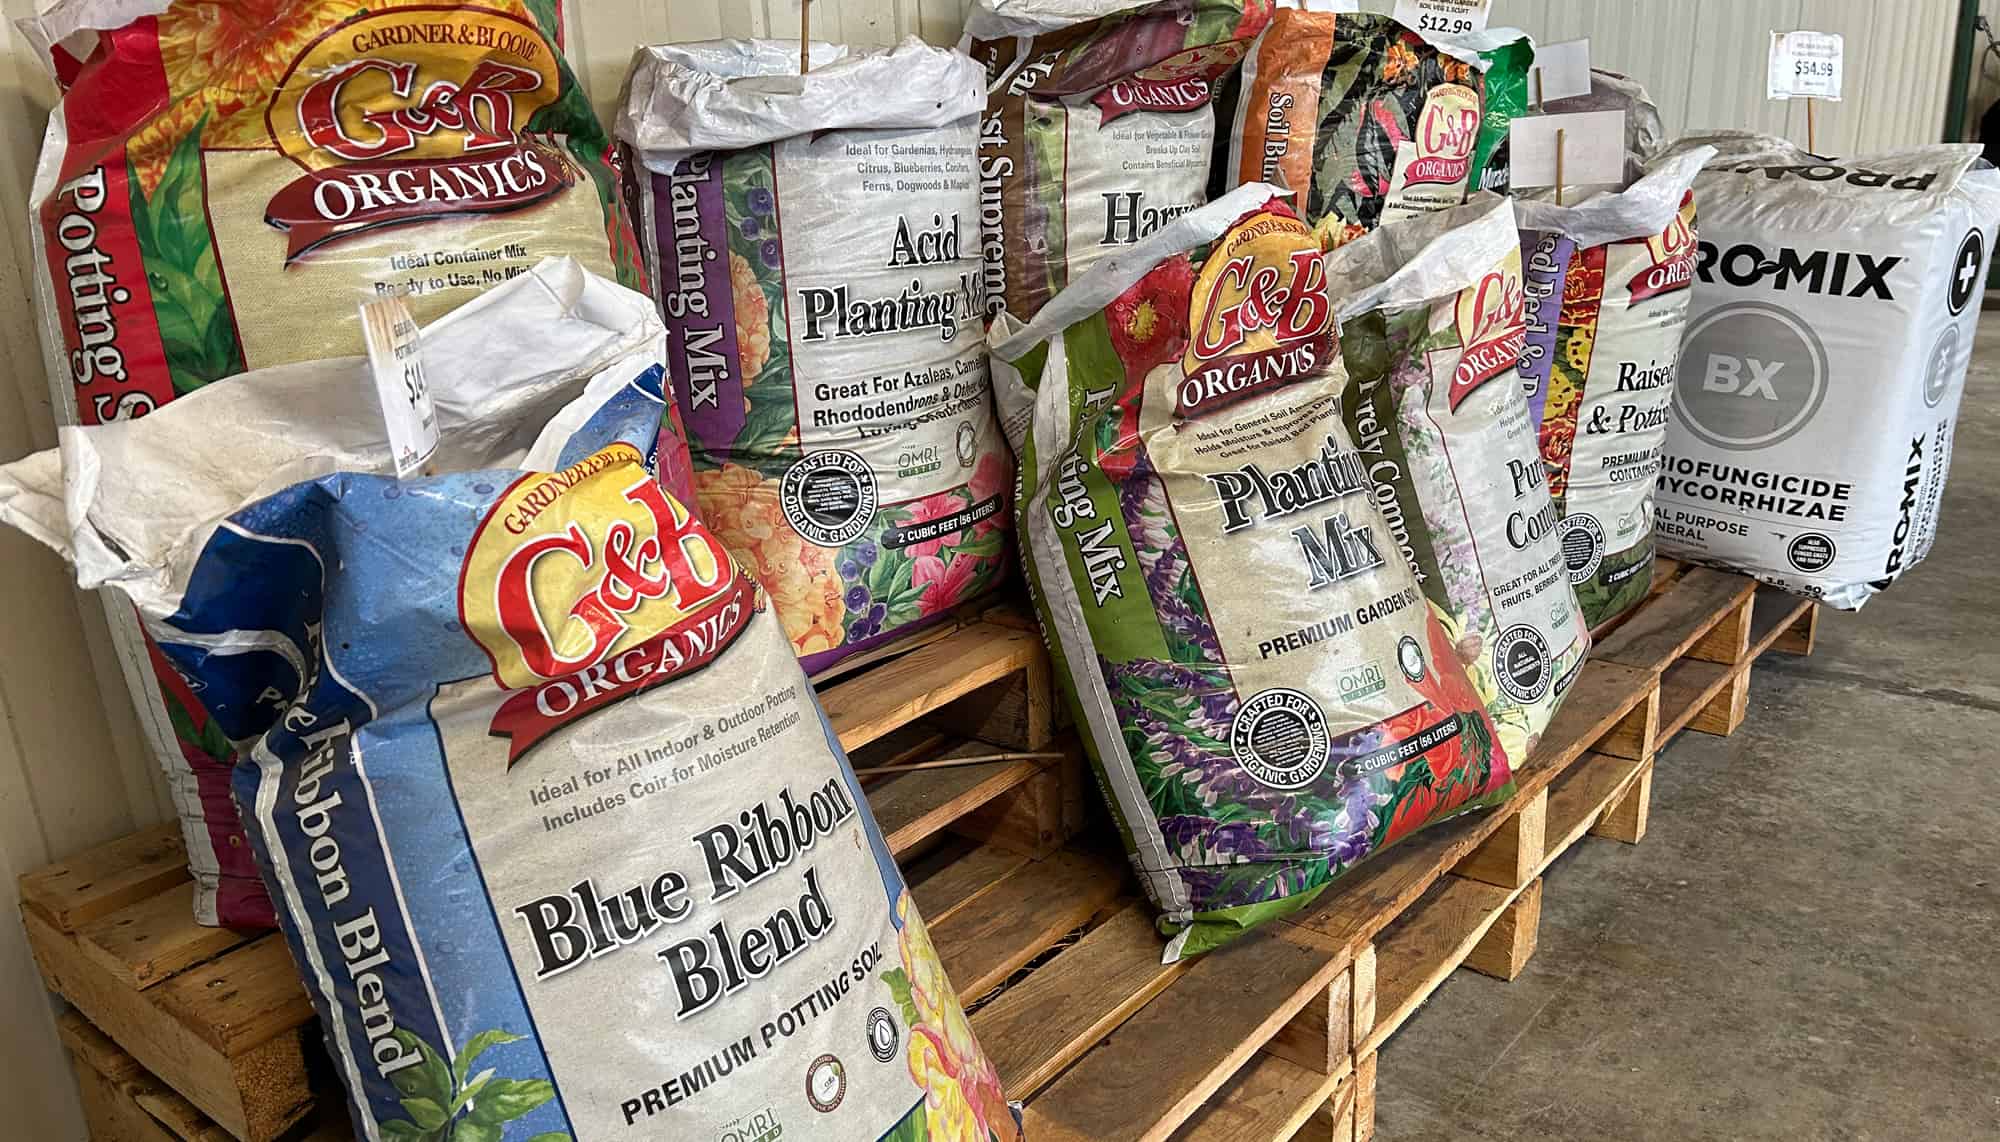
Bags of potting soil on store pallets

What’s in Your Bag of Potting Soil?

Not All Potting Soils Are Created Equal

              Subscribe to the Blog >

By: Bruce Lindsay, Skagit County WSU Extension Master Gardener

As spring advances, gardening stores offer a multitude of soil mix choices. Selection can seem daunting, so we asked fellow master gardener and soils expert Bruce Lindsay to take us on a deep dive into what potting soils are made of and how to amend commercially bagged potting soils to ensure the best success in our container and raised bed plantings.
                                                             — Ask a Master Gardener Editors
What exactly is in a bag of commercially produced potting soil?
The first step is learning the basics of soil. All soil primarily consists of sand, silt, and clay mineral particles. Sand is visible to the naked eye, ranging from 0.05 to 2mm in diameter, and is gritty to the touch. Silt is not visible to the naked eye and looks and feels like flour when it is dry. When it is wet, it feels like damp flour dough. Silt ranges from 0.002 to 0.05mm in diameter. Clay is the size of bacteria, less than 0.002mm, and has colloidal properties as the result of its net negative charge due to its crystal structure. In a natural setting, soils have pores made by plant roots and insects, which are essential for drainage and allowing air to enter the soil for roots to breathe. The size of the pores is also important for water movement and the soil’s ability to retain water.

In contrast to well-balanced mineral soil, purchased potting soil typically has very few of these properties and has several problems. But take heart, armed with scientific knowledge, gardeners can remedy many of these deficiencies.

4" pot in potting soil
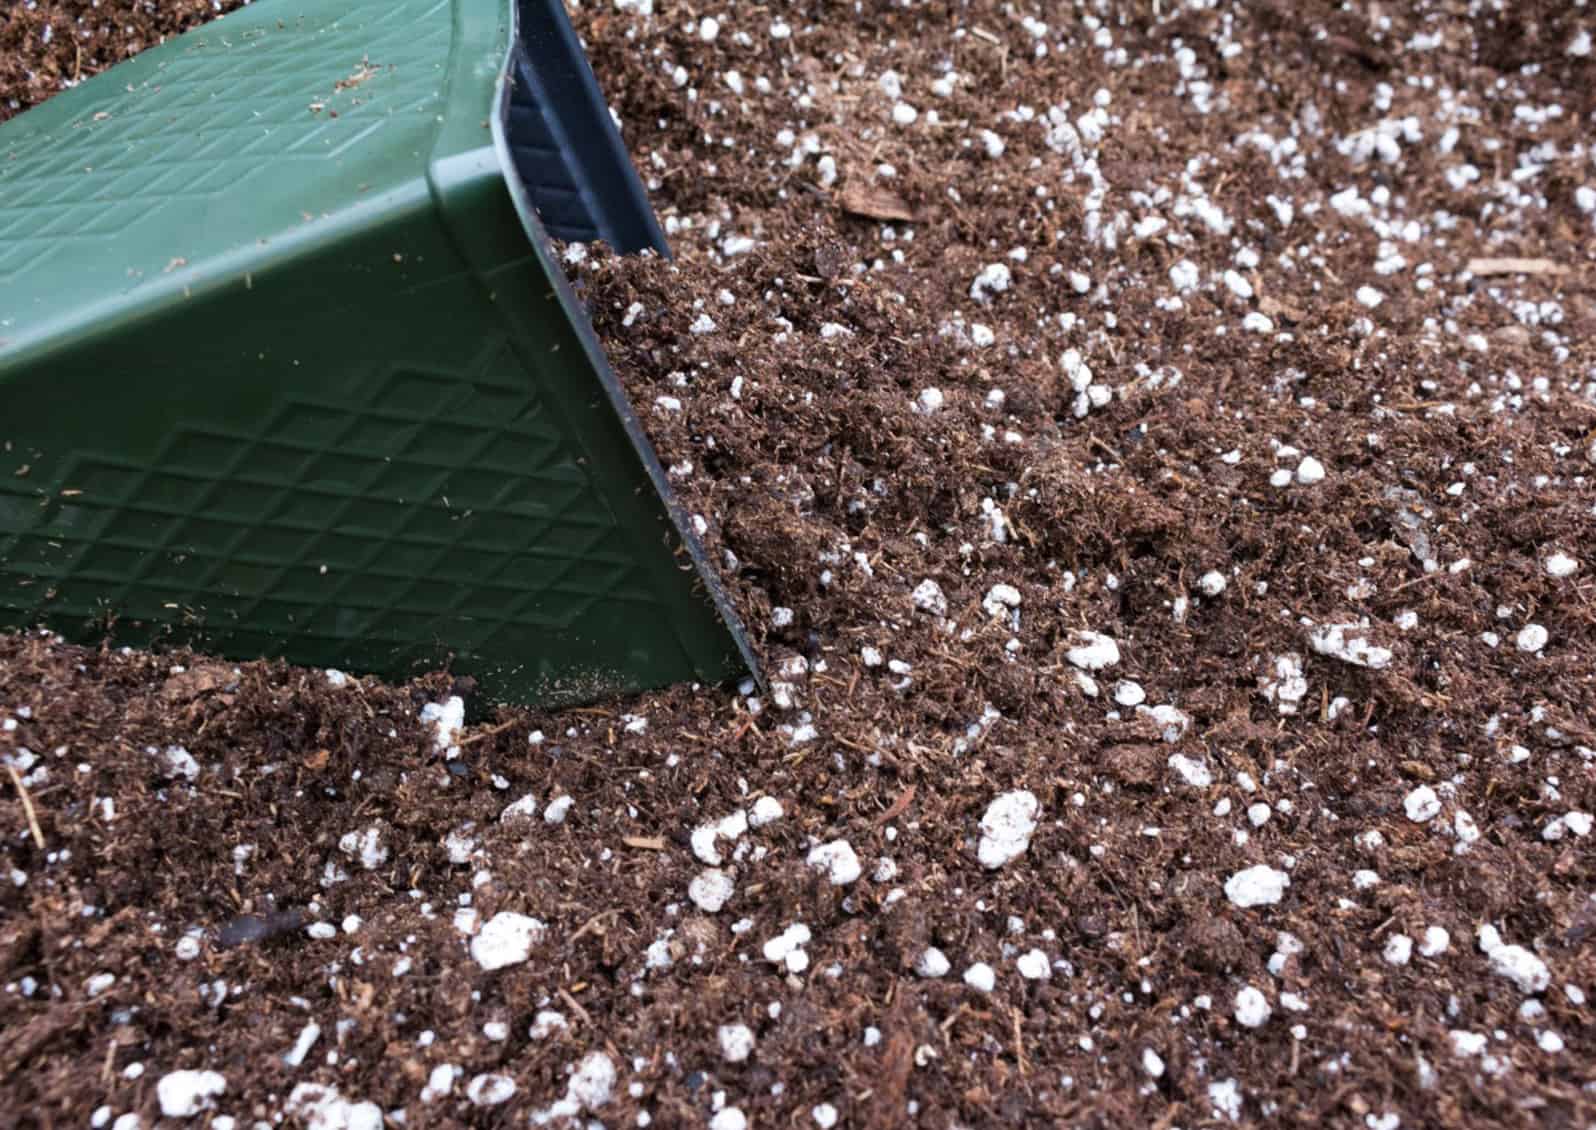
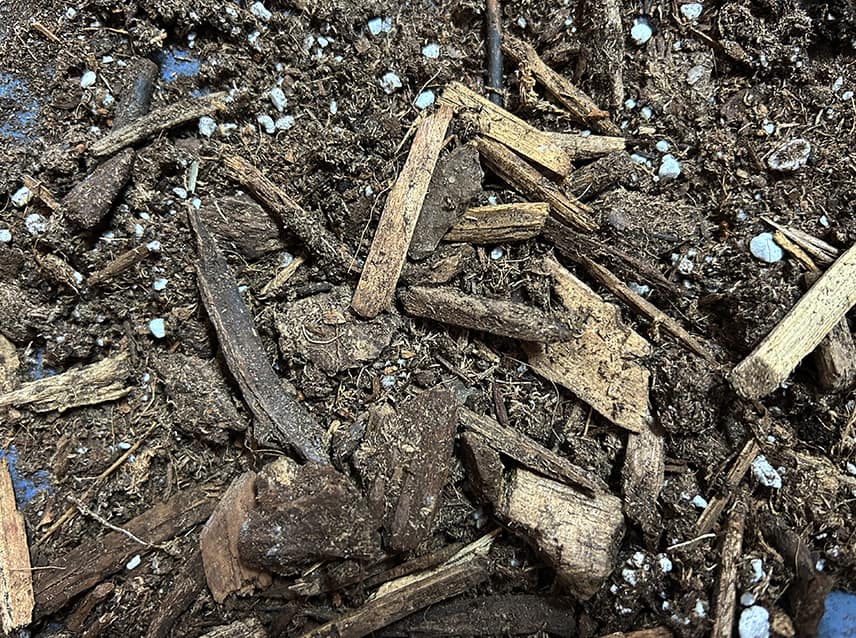
The vast majority of bagged “potting soil” consists of ground wood and bark produced from recycled forestry products (RFP). Commercially bagged soils are available in multiple mixtures containing RFP, peat moss, and other additives. © Photo: Adobe Stock
potting soil in the greenhouse
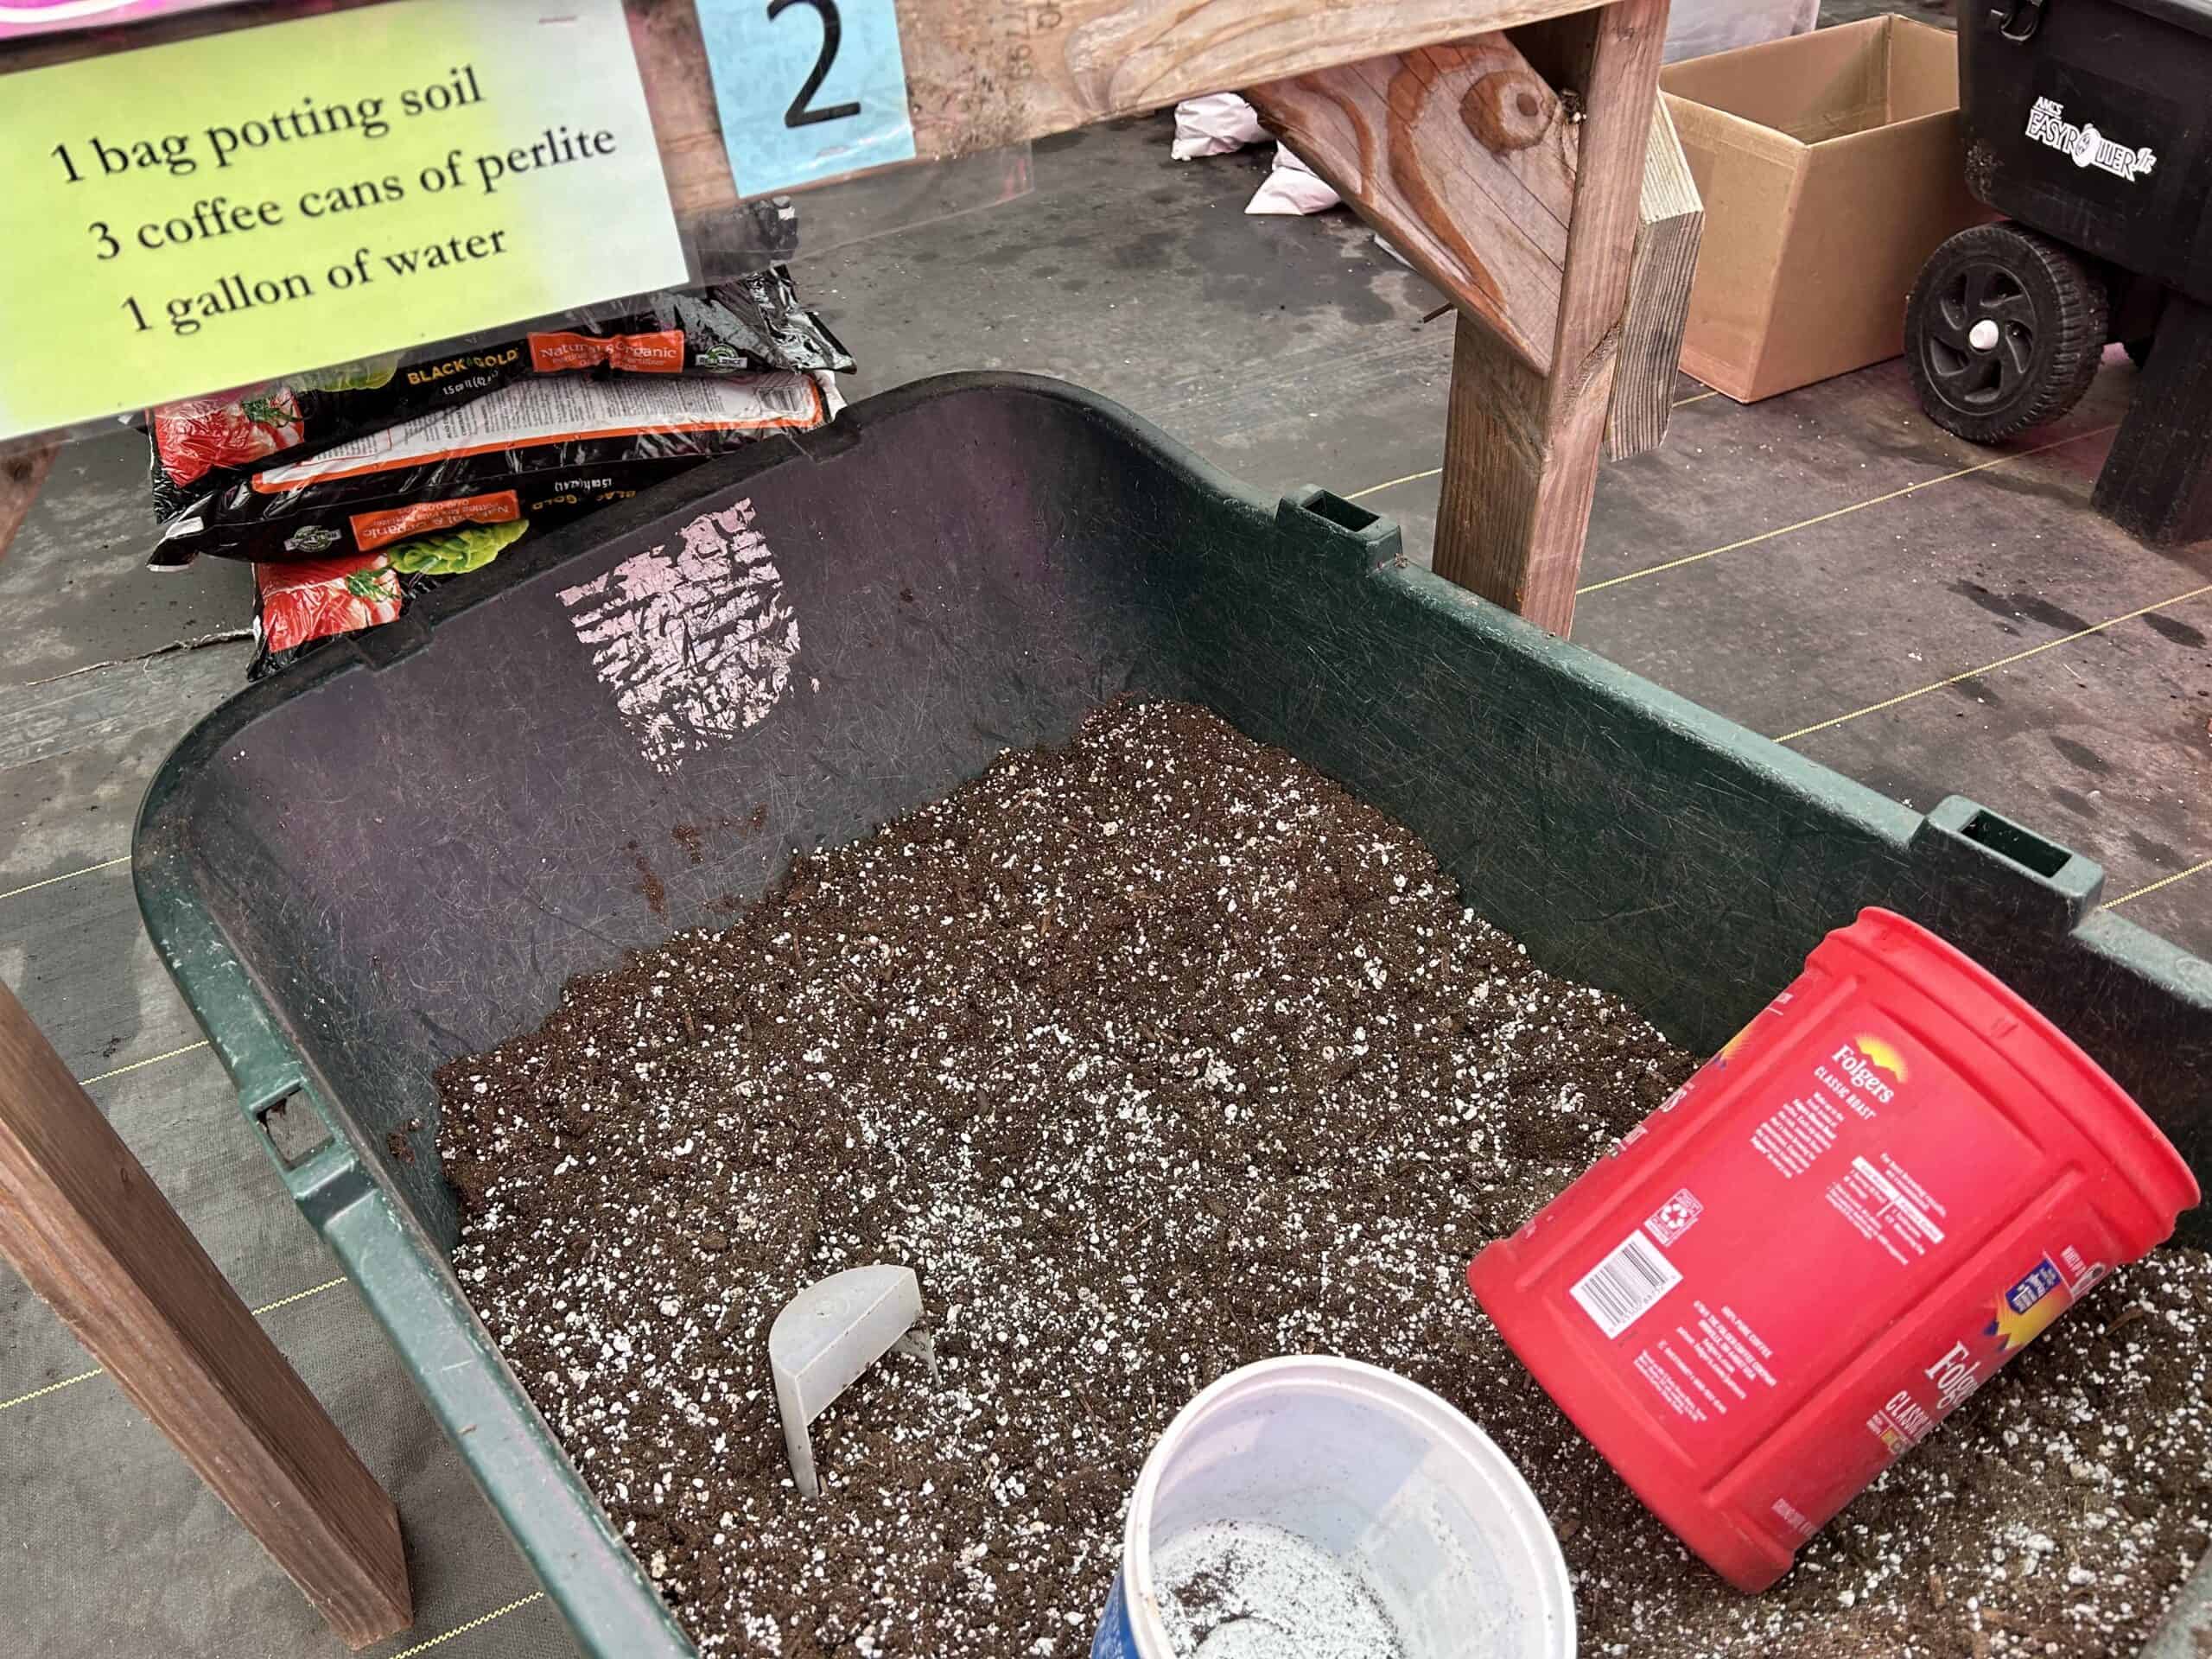
For seed starting and plant repotting, master gardeners use a moist, good quality potting soil mixed with perlite. © Skagit County WSU Extension Master Gardeners

The vast majority of bagged “potting soil” (technically called a potting “medium” even though the label calls it “soil”) consists of ground wood and bark produced from recycled forestry products (RFP). Various commercially bagged soils are available, from coarse bark to multiple mixtures of RFP, peat moss, and other additives. In contrast, mineral soil products combine mineral particles of various sizes with some added compost. The potential hazard with some commercially bagged soils is the possible presence of weeds such as horsetail (Equisetum) and the potential presence of herbicides coming from landscaping sprayed with herbicide or hay fed to animals that has been sprayed and persists through a composted state and cause damage when used as potting soil.

Dealing with Nitrogen Deficiencies 
Recycled forest products are commercially sold in large bark chunks as mulch and finer-grained material as potting soil. These products come with inherent problems that gardeners can solve with amendments. The first issue that must be addressed is the carbon-nitrogen ratio (C/N). The ground-up wood materials in these bagged soil products are often almost pure cellulose, and bacteria (microorganisms) love to eat it. When bacteria eat stuff, they make many more bacteria and require more nitrogen as they reproduce, which results in nitrogen deficiency, leading to poor plant growth.

Older leaves turning yellow while the young leaves are green is often a sign of nitrogen deficiency. Severe nitrogen deficiency results in a severe lack of growth and stunted plants. One must take care when adding nitrogen; too much will promote rapid growth and excessive foliage. It can be a tricky balance, but fertilizer with some phosphorous and potassium is best. Some fertilizers also contain micronutrients, which can be beneficial. Use a significantly diluted solution (1 TBSP per gal.) of soluble fertilizer and frequently monitor the plants to see how they are doing.

materials in potting soil
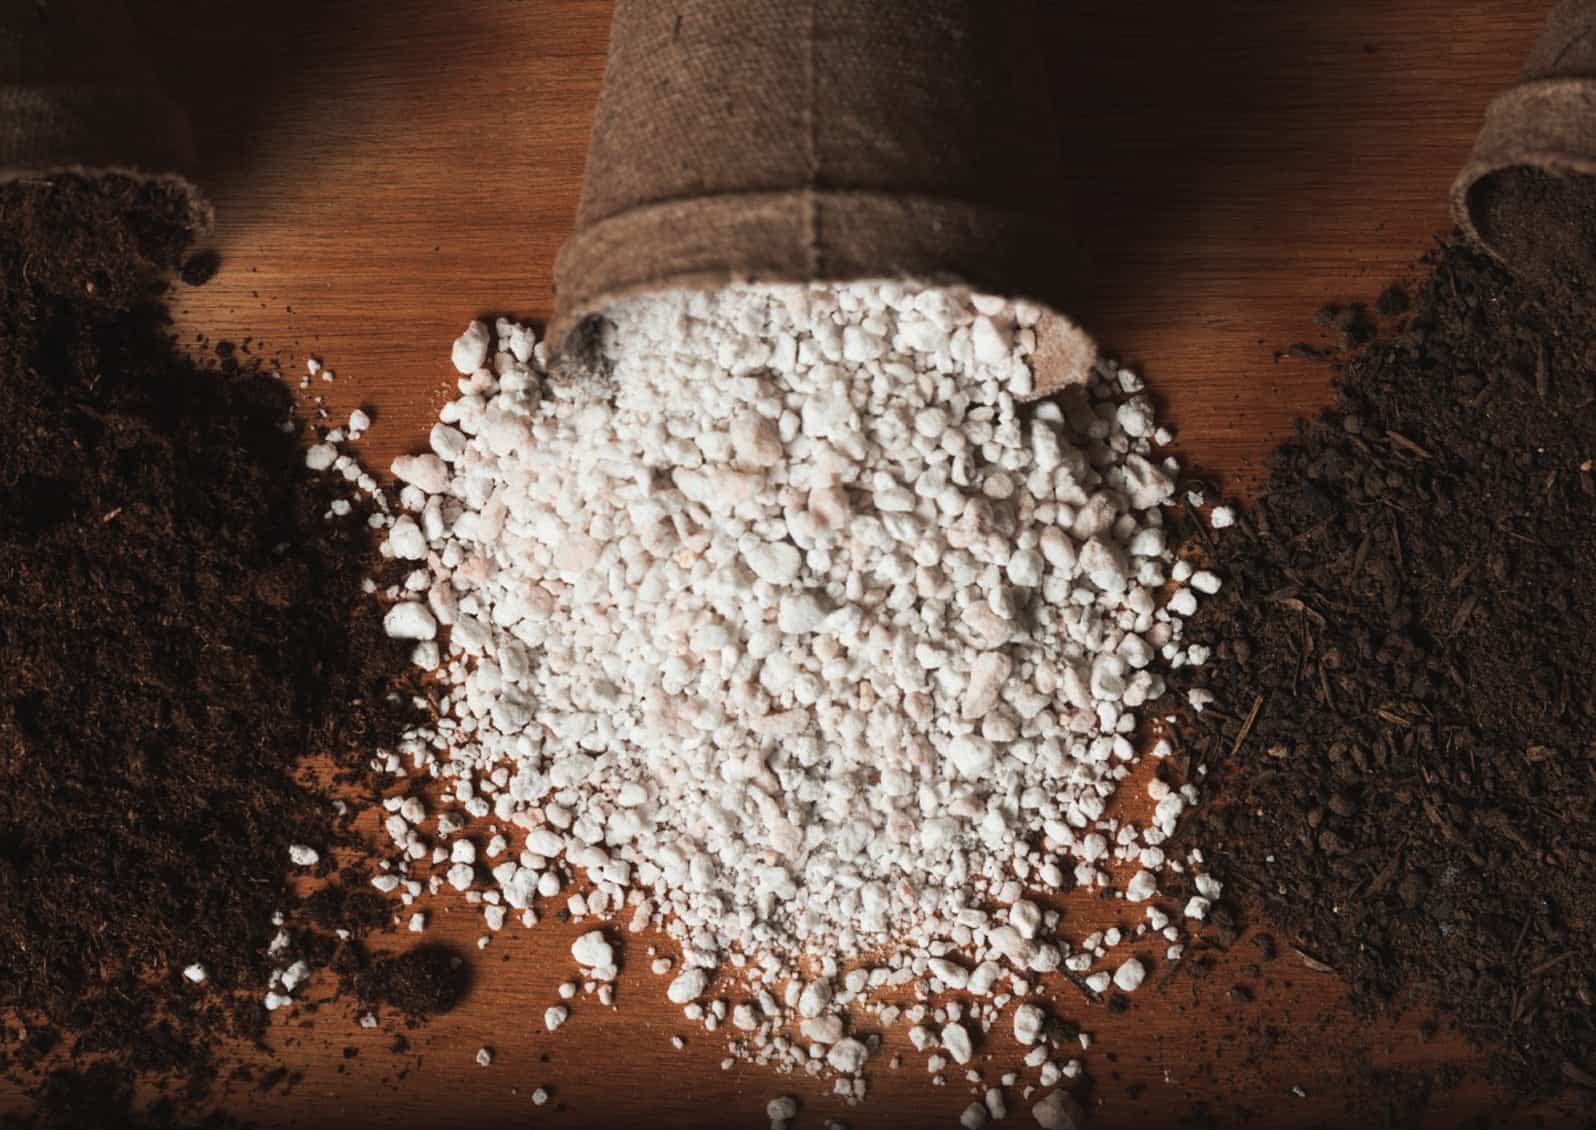
Perlite is a volcanic glass, which, when subjected to heat and pressure, it changes, puffs up like popcorn, and forms many tiny pores that can hold water.
It is surprising how much wood is included in a bag of potting soil. © Skagit County WSU Extension Master Gardeners

Since the recycled forest products used in commercially sold products are very porous, much of the fertilizer will drain through the pot in one application. To solve this problem, use well-composted materials containing organic matter or humus for effective nutrient retention. Well-composted materials should not include a lot of materials like straw and sawdust. Bacteria love sugars and cellulose, as in the “greens” of composting terminology, but bacteria have a hard time breaking down the “browns,” which contain lignin. If there were only sugars and cellulose in composting, bacteria would consume everything, and nothing would be left. The compost “browns” in soils contain materials high in lignin, resulting in “humus” as the ultimate end product of composting. One benefit of humus is that it is very good at holding water. Another significant advantage of adding well-composted materials to a soil mixture is that it will also add beneficial bacteria and fungi that are essential for many processes, just as they are in healthy mineral soils. Another benefit is that humus has a net negative charge that can hold onto cations such as potassium, calcium, and magnesium, giving the soil cation exchange capacity essential to plant growth.

The Importance of Cation Exchange Capacity (CEC)
Balanced mineral soils contain clay particles with a negative charge that hold onto the cations. Bagged potting soils containing a heavy ratio of recycled forest products do not have any clay, so the cations get leached out. To amend this problem, add well-composted materials to the RFPs. Hydrogen ions are cations that stick to negatively charged humus particles like little magnets. When fertilizers are applied, the calcium, magnesium, and potassium displace the hydrogen cations and become stuck to the humus particles. Plant roots come along, exude acids, and displace the nutritional cations, which are absorbed by the root and go up into the plant.
Wikipedia defines CEC as:
Cation-exchange capacity (CEC) is a measure of how many cations can be retained on soil particle surfaces.[1] Negative charges on the surfaces of soil particles bind positively-charged atoms or molecules (cations), but allow these to exchange with other positively charged particles in the surrounding soil water.[2] This is one of the ways that solid materials in soil alter the chemistry of the soil. CEC affects many aspects of soil chemistry, and is used as a measure of soil fertility, as it indicates the capacity of the soil to retain several nutrients (e.g. K+, NH4+, Ca2+) in plant-available form. It also indicates the capacity to retain pollutant cations (e.g. Pb2+)

Many garden centers now carry a soil amendment called humic acid (or related substances, humin and fulvic acid). These are still the subject of much scientific debate. These compounds are created by alkaline extraction and are not naturally present in soil. While humic substances may have some positive effects on root growth, home gardeners are best advised to focus on the longer-term building of soil organic matter through carbon-rich amendments such as compost (or cover crops for garden beds), etc.

The Soils Capacity to Hold Water
It is essential to slow the water down so plants have the opportunity to absorb it. Fortunately, most ornamental plants and vegetables prefer well-drained soil and do not like being in standing water for very long. In contrast, due to their fibrous material, most hanging baskets need watering once a day.

Add popped perlite and/or vermiculite to the mix to increase water retention. Perlite is a volcanic glass, which, when subjected to heat and pressure, it changes, puffs up like popcorn, and forms many tiny pores that can hold water. Perlite is the little white balls often added to soil mixes.

Vermiculate is a naturally occurring mineral that is also heated to create the golden-brown cube-like material we see added to soils. Vermiculite draws in and holds water like tiny sponges throughout the soil. You can also use coconut coir as a moisture-holding material, but soak it thoroughly before adding it to a mixture.

The water-holding capacity of pelletized wool is an exciting new material being tested. Pelletized wool is composed of the short wool fibers from the underside of sheep where the wool is also much dirtier and has plant fibers embedded; it is not suitable for processing into fabrics. This material has been a waste product of the wool industry. Recently, however, research has shown that this material is a viable amendment to soil that improves the water-holding capacity of soil and provides some slow-release nutrients. Already sold commercially this material is pelletized for ease of mixing into soil and is a productive, sustainable use for a by-product typically diverted to a landfill.

The Addition of Slow-Release Fertilizers
Bagged potting soil products often offer slow-release fertilizer additives. Beware of those using tiny plastic beads to store the nutrients. Our soils do not need synthetic materials left behind. Instead, some products use fertilizers with a mineral coating, such as limestone or gypsum, that slowly dissolves, releases the inner contents, and does not leave behind plastic residue.

Other slow-release products consist of blood, bone, and feather meal, which are by-products of meat processing. The drawback of these materials is the smell they generate. They are acceptable when used in a field but not welcome on a patio in a hanging basket. Likewise, fish emulsion is a fairly slow-release fertilizer but also has a considerable odor problem. While it is an organic fertilizer, one must consider the odor it causes and that it is a by-product of overfishing of oceans.

Adding ground limestone to the mix may be a good idea because the recycled wood product material tends to be on the acidic side. The limestone will add some alkalinity. Dolomitic limestone is even better, as it contains magnesium and will be a slow-release source of calcium and magnesium. Be sure to mix it well with the potting soil. About a cup per cubic yard should be enough. If you have access to a pH tester, use it! The soil pH indicates the availability of essential nutrients needed for plant growth. Ideally, potting soil should have a pH of about 6.5. It is important to test the pH of your soil mix before adding an amendment to raise or lower the pH.

Basic food waste from the farming, grocery, and restaurant industries is a readily available slow-release fertilizer. It is stunning that forty percent of our food production goes into landfills. An alternative is an organic liquid product made from fermented food and vegetable waste. It doesn’t stink and smells good, somewhat like soy sauce. With landfills overflowing, diverting food waste into soil improvement and garden production is one way to improve our environment.

Some people think replacing their potting soil with fresh material each year is necessary. This is only the case if there are disease issues. For instance, potting mix used for tomatoes or potatoes should not be used again for those plants because they are both susceptible to soil borne diseases. After a season of growing and watering, all the nutrients have leached out, but you can easily replace the nutrients by using the dilute fertilizer solution mentioned above. If the soluble fertilizers are too concentrated and the plants are not utilizing them, they may accumulate as salts. As time passes, some of the RFP in the potting soil will get eaten by bacteria, and the volume will decrease. In this case, add new potting soil with the amendments and mix it well with the original soil, spreading the nutrients around.

These recommendations apply to soil used in containers, raised beds and hanging baskets. It also applies to starting seeds in trays, but the seed starting soil material should be very fine to ensure good contact between the seed and the moist growth medium. When starting seeds, the soil should also drain fast enough so a fungal damp-off situation does not develop. Sphagnum peat moss tends to float to the top when watered and begins to clog pores, making it difficult to get moisture down to the bottom of the cell. Sprinkling fine vermiculite on the very top of each cell can help prevent these problems.

While forestry products recycled as commercial potting soil have drawbacks, amending these insufficiencies is an easy process. It is much better to use RFP products than to burn, bury, or dump them into the overflowing waste stream. Armed with awareness of the limitations of modern “potting soil” and knowing some remedies, gardeners can buy these products feeling confident with scientific knowledge.

REFERENCES AND RESOURCES:

Beck, L. (2023). ‘Waste Wool‘ is a Burden for Farmers. What if it Could be a Solution Instead? Retrieved from https://modernfarmer.com/2023/11/waste-wool-solution/

Brady N., Weil, R. (2017). The Nature and Properties of Soils. London, UK. Pearson Education (15th ed.)

Lehman, J., Keber, M. (2015). The Contentious Nature of Soil Organic Matter. Nature volume 528, pp 60-68.  https://www.nature.com/articles/nature16069


ABOUT THE AUTHOR :

Bruce Lindsay became a Skagit County WSU Extension Master Gardener in 2015. With an MS degree in geology and an MS degree in soil, he has mapped soils in Nevada, Arizona, California, and Washington.

Questions about home gardening or becoming a Master Gardener may be directed to: Skagit County WSU Extension Office, 11768 Westar Lane, Suite A, Burlington, WA 98233; by phone: 360-428-4270; or via the website: www.skagit.wsu.edu/mg

Upcoming Skagit Master Gardener Foundation Events:

Know & Grow:
Growing Roses in Skagit County
– Free
Presented by Virgene Link-New
April 16, 1 p.m. 
NWREC Sakuma Auditorium
(16650 State Route 536, Mount Vernon)

Free Admission & Parking
May 11, 8 a.m. to 2 p.m.
Skagit County Fairgrounds
Learn More >


A Second Act for Your Square 1-Gallon Pots at the Discovery Garden!

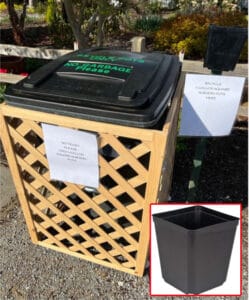
Bring your leftover square 1-gallon pots to the Discovery Garden (16650 State Route 536, Mount Vernon). The bin for recycling the square 1-gal pots is located in the parking lot, just north (to the right) of the main entrance.
We only need square 1-gallon pots like the ones pictured below (bottom right). The recycling bin will be available now through fall. Simply put your pots into the bin, and we take care of the rest!


pot recycling


AMGPost_header5
010524_Header2

Help for the Vegetable Garden Novice

Tips every first-time vegetable gardener should consider

              Subscribe to the Blog >

By Anne Hays and Cathy Markham, Skagit County WSU Extension Master Gardeners 

I am a vegetable garden rookie! There, now you know.

Some of us become gardeners later than others. I grew up moving from state to state just about every year. Our family’s unique military and government-dictated lifestyle left few opportunities for gardening growing up. As an adult, I found myself living in Alaska, spending 30-plus years tending fireweed, wild lowbush blueberries, and devils-club. Now, living in the abundantly beautiful Skagit Valley, I have the time and desire to learn how to successfully plant and grow a vegetable garden. As a novice, first-time veggie gardener, I turned to my wonderful friend and fellow Master Gardener, Cathy Markham, and asked her to mentor me through the process. The following is a journal of guidance and learning with the goal of a vibrant and bountiful vegetable garden this coming spring and summer.

Think Before You Leap

As both a gardener and a chef, Cathy has been growing a cook’s garden for many years. Both her Italian grandmother, on the central coast of California, and her mother, in the high mountain desert of Idaho, grew gardens. Cathy has never known a time when her family didn’t grow, harvest, and preserve.

Cathy advises working to get the most out of your garden space. When she teaches about gardening, she advises “Think before you leap.” Answer a couple of key questions such as “What do you want to take away from your decision to garden and what kind of commitment are you honestly willing to make regarding time, dedication, and hard work?” There are no wrong answers; it is just very helpful to define your expectations.

After many, many years of experience gained from multiple acres of gardens, and knowledge collected from gardeners who have gone before her, Cathy asks every novice vegetable gardener to consider:

Do you have a space that is prepared to plant? Is the soil in need of amending? Is there adequate water and is the sunlight appropriate for your garden space?

Is your space protected from deer, rabbits, or other animals that see your garden as a free salad bar?

Are you prepared to tend your garden frequently, checking for insects and disease, weeding, tending seedlings, and then harvesting for maximum yield?

Considering these questions will help you decide if “digging in” and starting a home vegetable garden is for you. In fairness, sometimes our lives or interests can’t support the commitment of growing a garden and it is better to support a local farm stand. Gardening is just not fun when you are constantly trying to keep your plants alive in poor soil and conditions, or when you are doing the added work of trying to keep the deer and rabbits out of your garden. If you are serious about getting a harvest for delicious eating and winter storage, the answers to these questions are important.

After listening to Cathy’s advice, considering her questions, and thinking through our commitment to becoming vegetable gardeners, my partner and I said “Yes! We are ready and committed to growing our own vegetable garden.”

This past fall, we set about building a garden space, installing six vinyl-clad trough-style raised beds which were ordered from an online source.

The start of the process of building a raised bed garden on a small, city lot. © Anne Hays/Skagit County WSU Extension Master Gardener
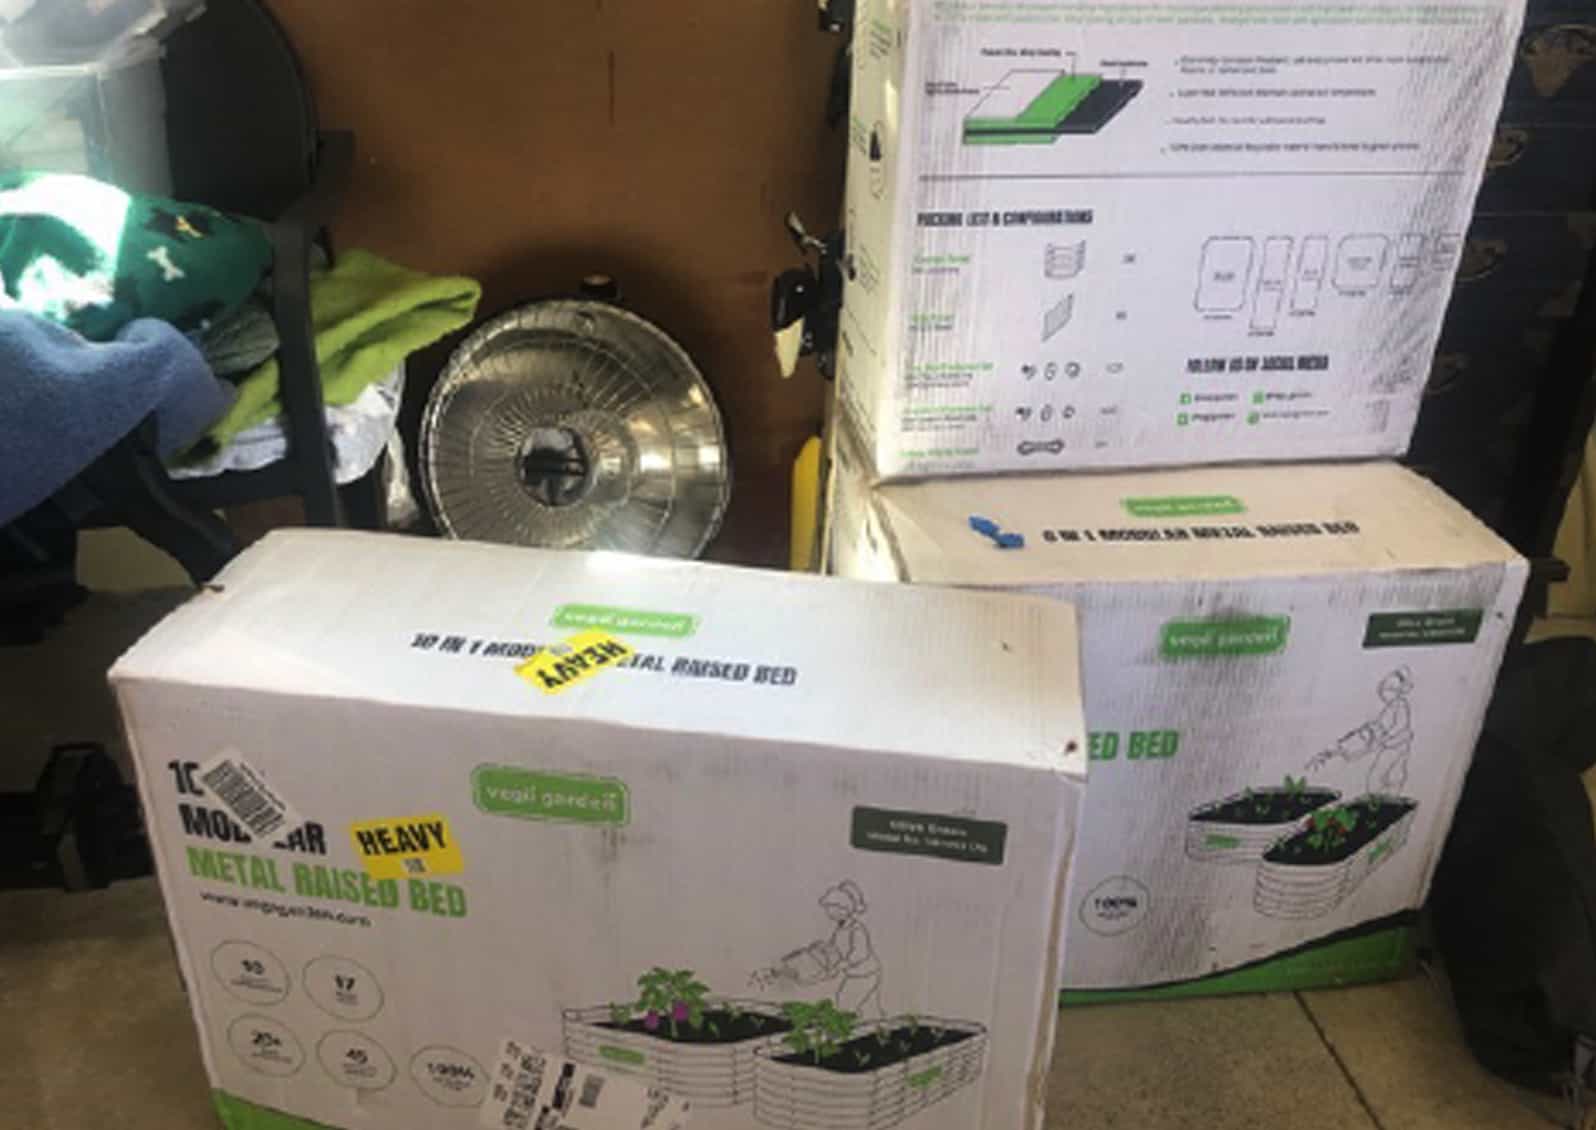
The raised bed components delivered by the online retailer. © Anne Hays/Skagit County WSU Extension Master Gardener

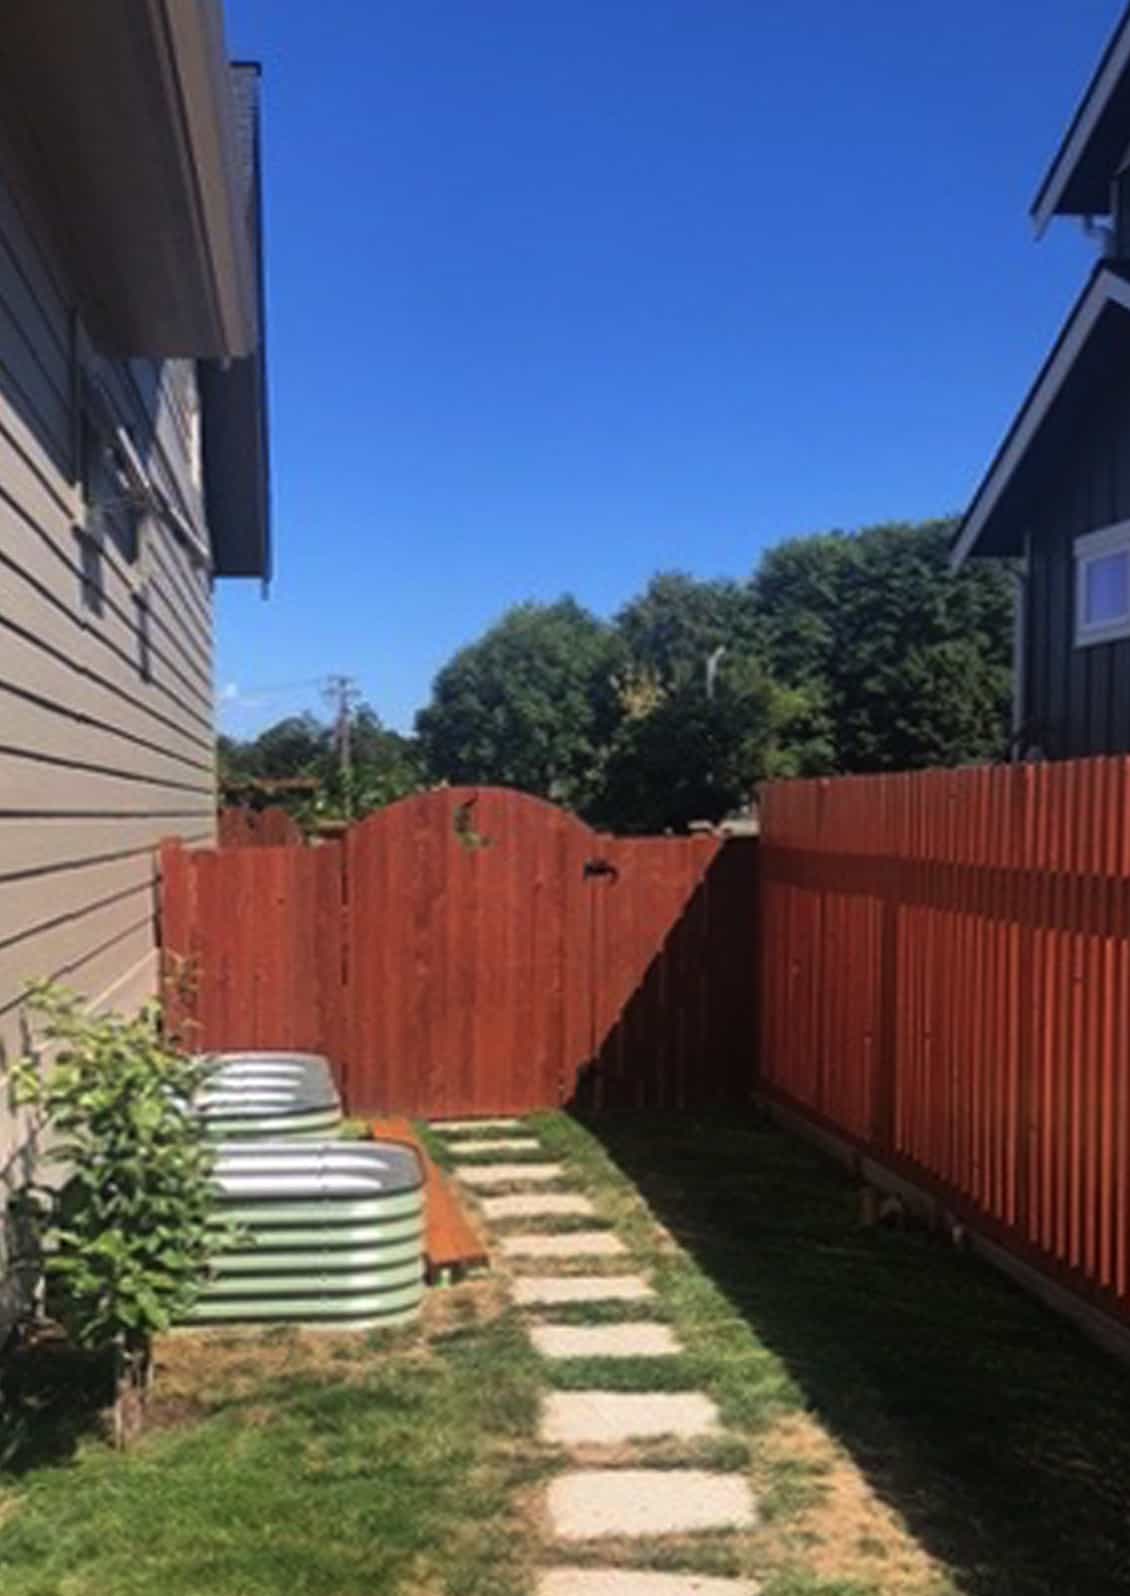
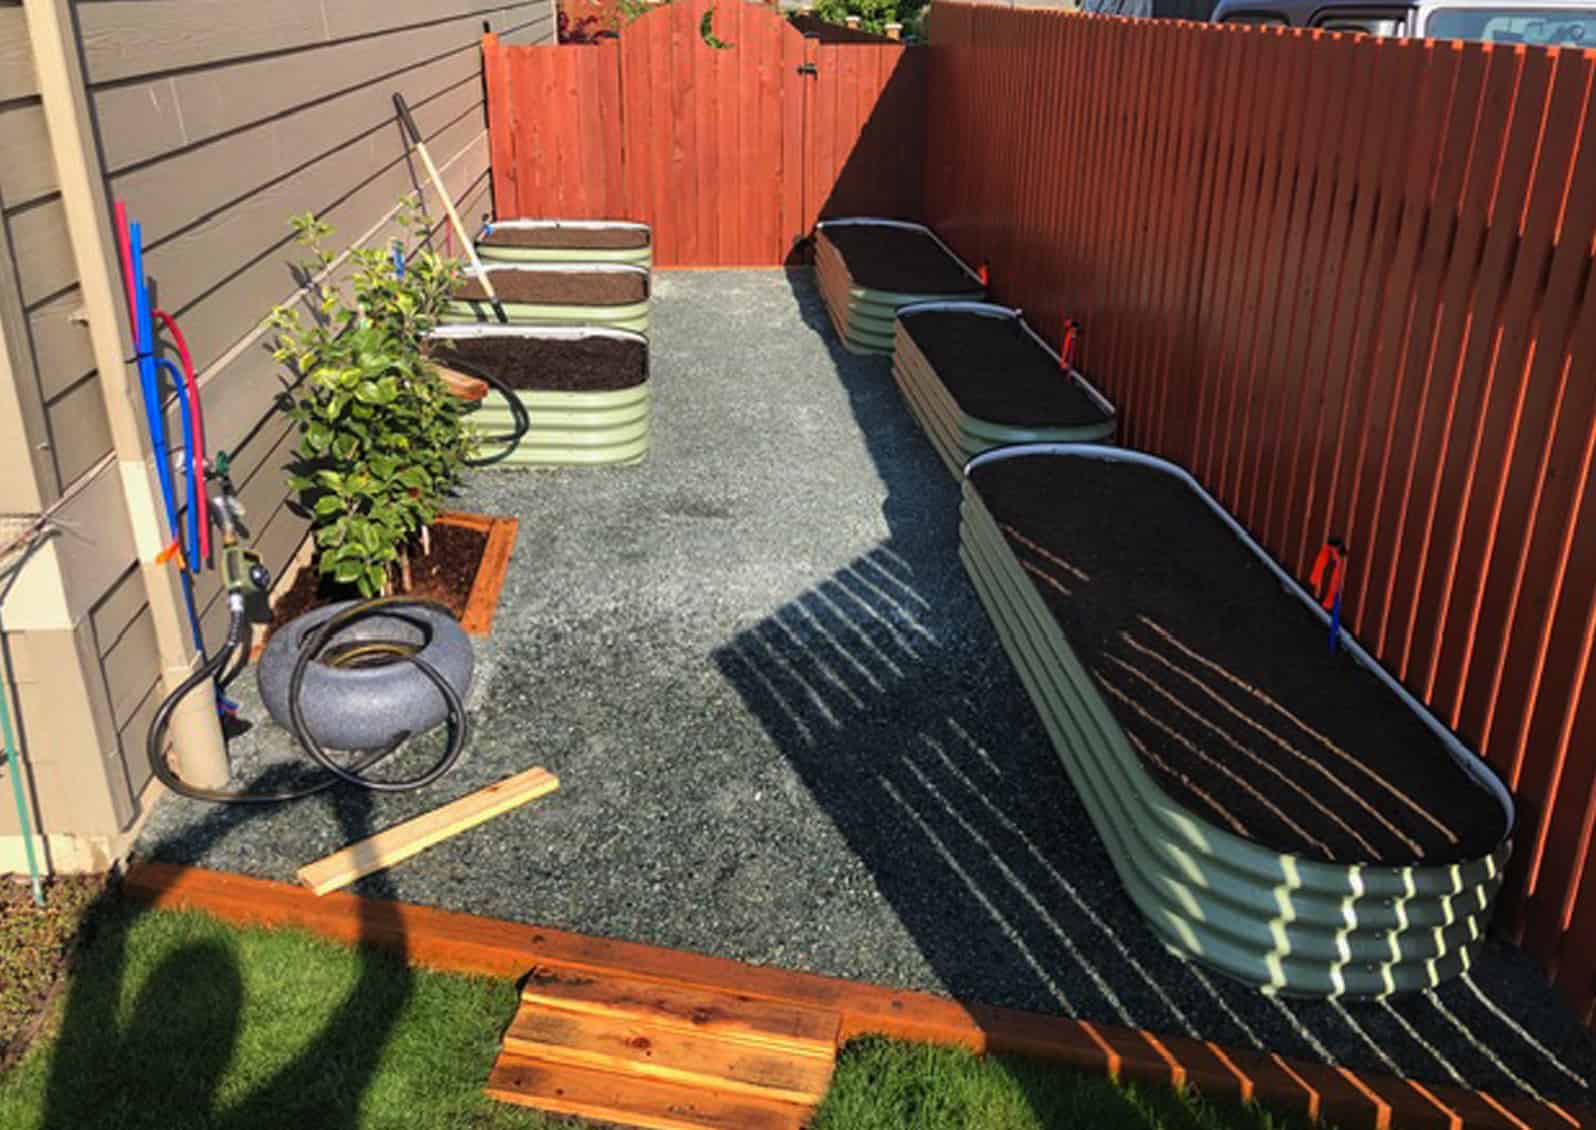
Opting to use drip irrigation, we installed the necessary infrastructure and then filled the six beds with commercially distributed topsoil. Placed next to the house on the south side, three beds measure 3.5 feet by 3.5 feet. Two beds measure 2.5 feet by 8 feet and one measuring 2 feet by 6.5 feet, adjacent to the square beds with a 6-foot path and workspace in between. We plan to attach hog-wire to the house wall for trellising above the three, square beds.

The investment, not including the raised beds, came to $539.63. Once everything was in place, we invited Cathy to visit the newly minted, naked garden. She thought the raised garden beds looked great; having the potential for lots of sun, available irrigation, and plenty of space for vertical growing! Cathy suggested getting started right away by planting winter veggies such as leeks, kale, and garlic as a first foray into the veggie gardening realm.

Rookie Alert: The eight garlic cloves purchased were about six more than most any household needs. Cathy happily adopted the surplus garlic for her garden. Then she quietly pointed out that the leeks, which by then, looked more like bunches of scallions, needed to be separated from their clumps to grow with adequate space. Who knew?

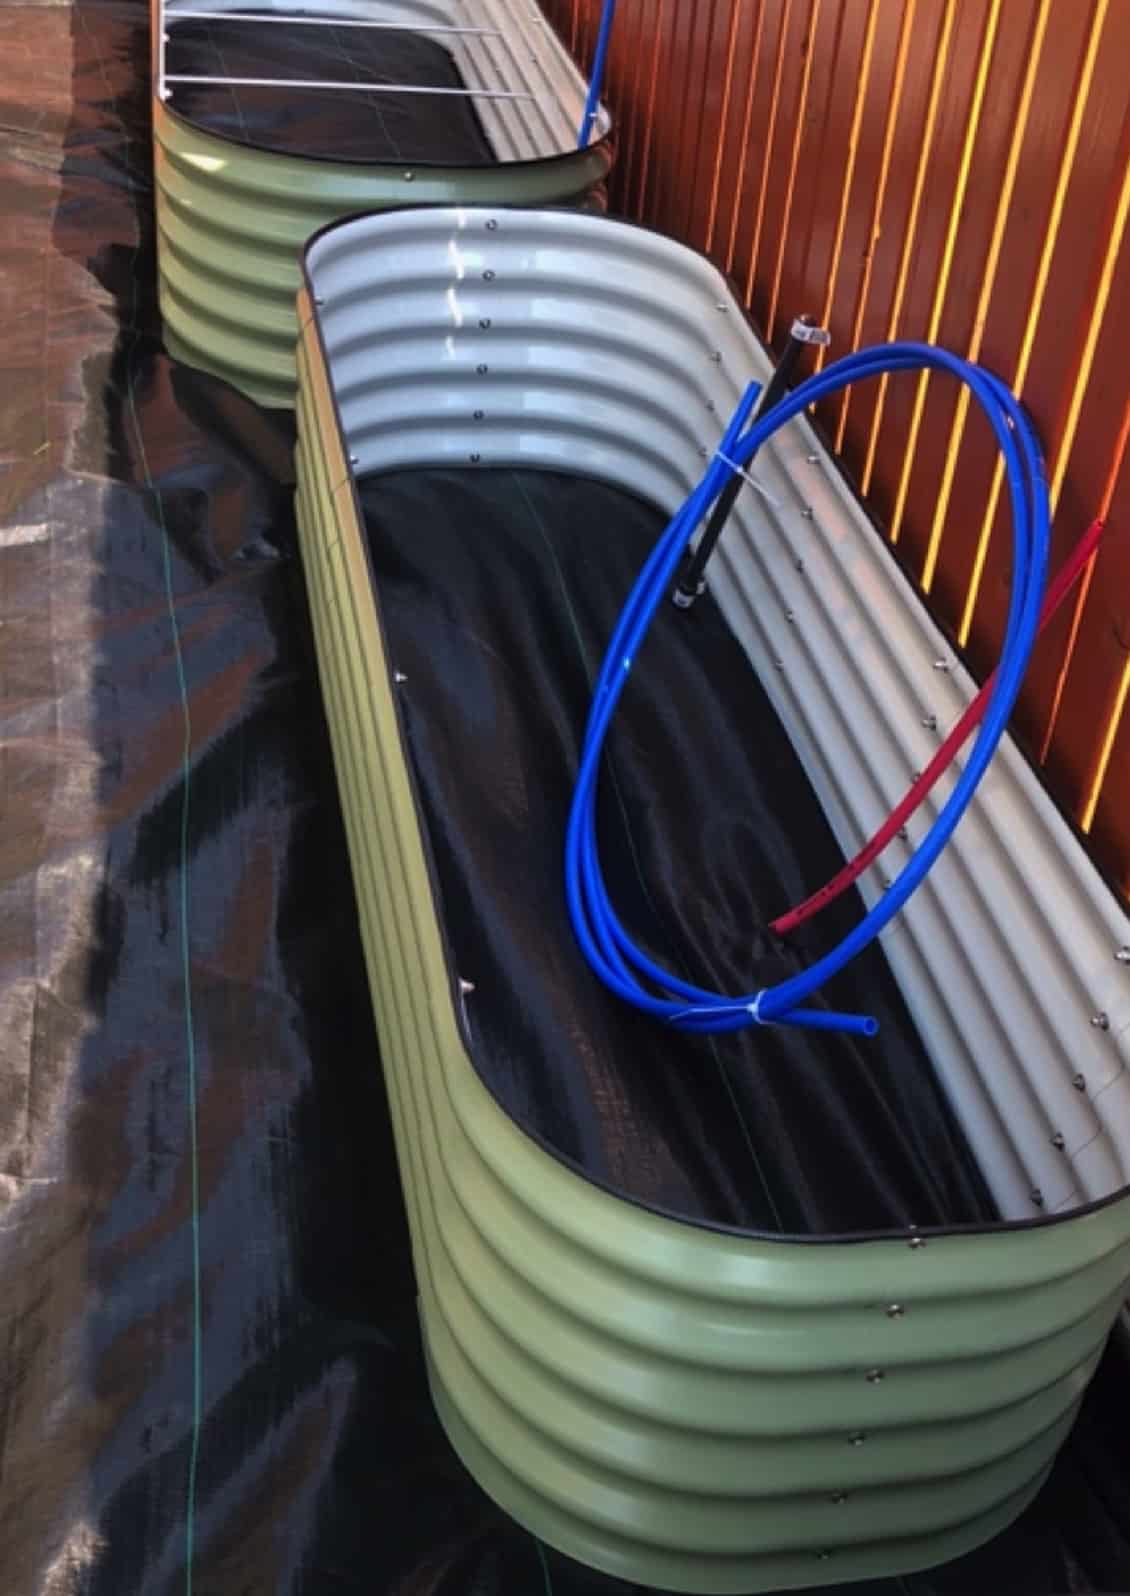
The raised bed components assembled and ready for DIY drip system installation. © Anne Hays/Skagit County WSU Extension Master Gardener
The finished garden beds ready for planting. © Anne Hays/Skagit County WSU Extension Master Gardener
The Next Step – Planning What to Grow
Here again, Cathy’s advice, based on years of experience and research-based learning, was invaluable-she helped us decide what to grow; when to grow; and whether to buy starts versus seeds. Her advice is to grow what you love to eat. Okay, then not so many cukes since my partner is not a fan. Cathy recommends a wonderful book: Grow Cook Eat by Willi Galloway as a starting point for garden planning.
Starting with Seeds Versus Buying Plant Starts
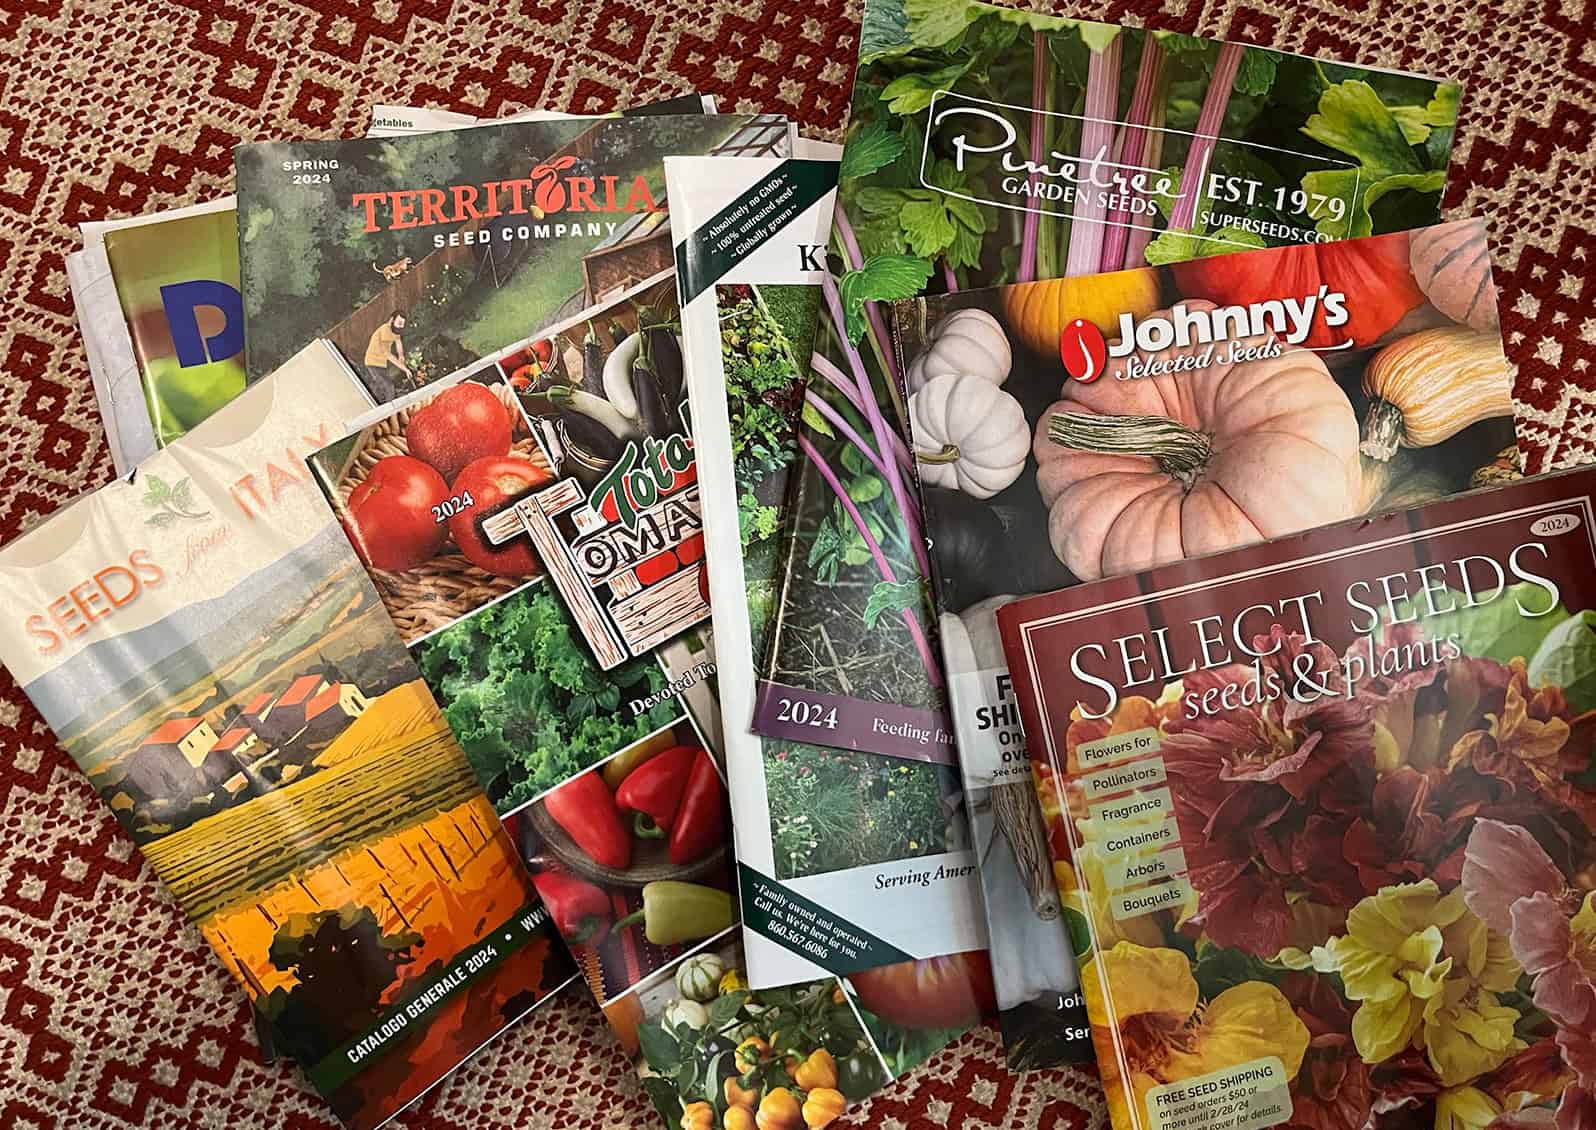
Locally grown plant starts are a reliable way to get up and running. But spending time with seed catalogs is enthusiastically encouraged! Some favorites are provided in the references below.

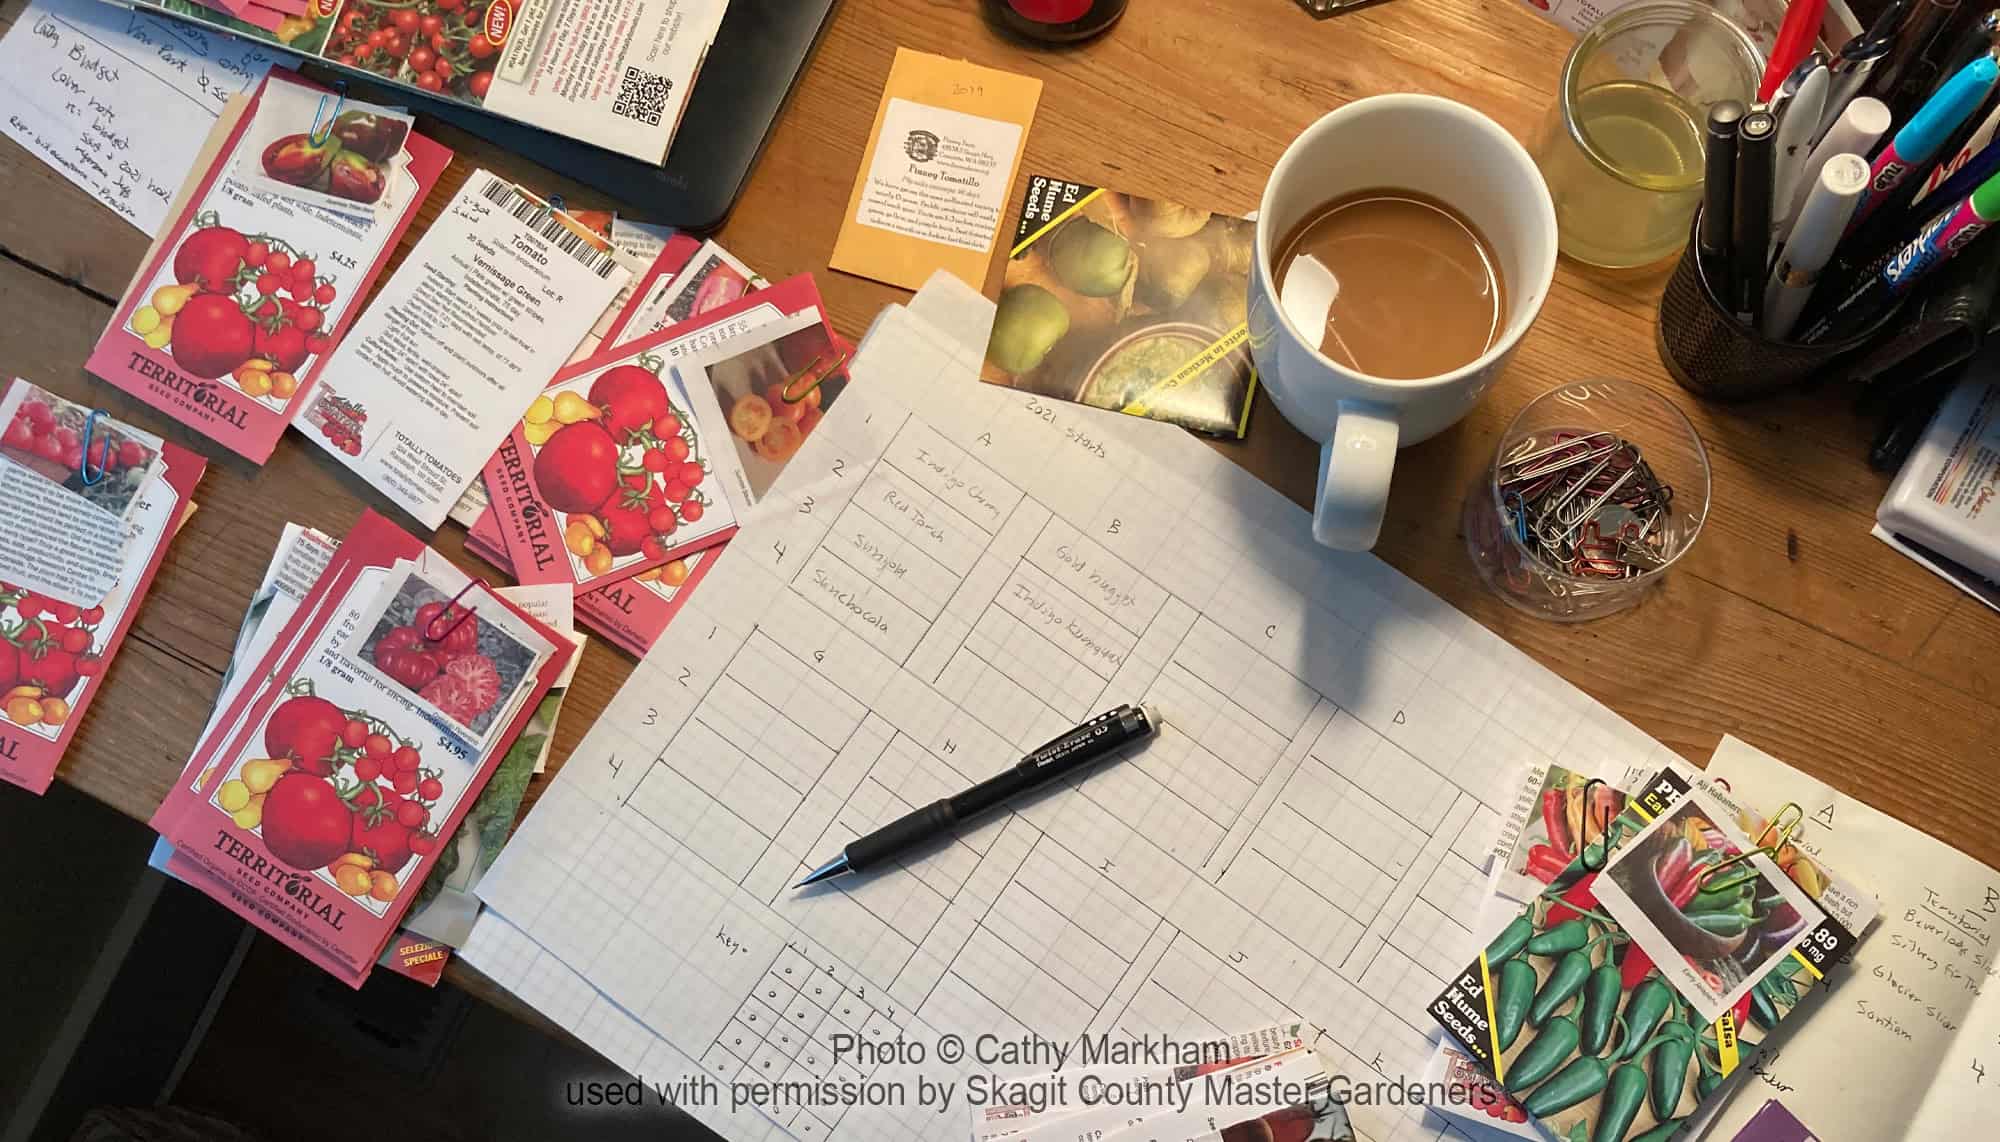
The next steps will include getting together during the cold and dark winter months for tea or warm cider to go through seed catalogs and map out the garden planting. Raised bed experts recommend growing tomatoes on a trellis, and weaving in other climbers, such as beans, on the same trellis to efficiently utilize the space. It is key to plant at the right time – don’t start too early!

Here are some of the guiding principles Cathy encourages new gardeners to lean on:

Grow what you love to eat.

  • You have a lot of choices for what to plant in your vegetable gardens but the best choices are the ones you or your family are actually willing to add to your diet and eat. You are more likely to put the work into the garden and harvest for foods you love to eat.

Start small and be successful with easy-to-grow plants.

  • A very small garden can be very productive and rewarding. It gives you a chance to experiment with plants, maybe one tomato plant or eggplant. Greens, bush beans, cherry tomatoes, carrots, and herbs are an easy way to start. Choose bush and dwarf varieties for small spaces so you won’t have to worry about staking. If you have vertical space, climbing vegetables are great; these include peas, beans, cucumbers, indeterminant tomatoes, and now several new varieties of squash have been developed which grow vertically in small spaces.

Grow nutrition-rich and versatile choices.

  • Adding nutrient-dense vegetables to our diet is always a plus! Dark leaved greens like kale, spinach, and chard; rich dark root vegetables like beets and carrots; peas and beans, garlic, onions, leeks, and shallots; broccoli or broccolini; and tomatoes!

Grow what is expensive to buy or is not as flavorful when you buy it.

  • This is especially true of herbs which are easy to grow for the most part and make a huge difference in food preparation. Tomatoes and English peas (shelling peas) are examples of vegetables that are so much better fresh from the garden. Potatoes and corn are plentiful and readily available, so you may choose to skip giving up the space it takes to grow them.

Decide what “mountains to die on.”

  • Based on your time and patience, decide what you are willing to deal with in your garden. For example, you may choose not to grow many vegetables from the cabbage family because you are not willing to deal with the bugs and worms that they attract. You may choose instead to grow broccolini, a short, early-season vegetable, or maybe Kalettes (a cross between kale and Brussels sprouts) because they are fun. You can buy what you choose not to grow at a farmer’s market.
  • We live in an area where an excellent choice of vegetable starts is available. If you have a new garden, this is a big boost to success because you don’t have to deal with the germination of seeds. Beans are the exception here, they do best when grown from seed. The plus for growing from seed is the huge variety of available seed sources. This may not be a priority for new gardeners.

Grow organic as much as possible.

  • The better you take care of your garden the less you will need to use any chemicals on it. Keep the garden clean of weeds, and mulch to keep the weeds down and the soil moist. Keep the pathways clean also; weeds and grass are very difficult to manage when they grow big. It is easier to pick them small, not letting the weeds compete for nutrition. Thinning your growing plants appropriately will cause them to grow strong and able to survive the normal garden bugs. Use a foliar spray made of a mix of kelp concentrate and fish emulsion for fertilizing. Water the plants consistently so they do not become compromised and weak, which leads to disease.

Begin at the right time – don’t start too early.

  • It is so tempting to get the seeds or plants in the garden early. The first sunny day seems warm enough surely we are done with the cold weather! Garden success comes from resisting this temptation. It isn’t a competition with anyone else, or a race to see who can get the earliest peas. Take the time to prepare the gardens, clean out the flower beds, and pace yourself. This may not suit some, but except for garlic, which gets planted in late October, and leeks and shallots in March, planting can wait until April for the cool spring crops, and everything else until mid to late May. Wait patiently until late May and or even early June to plant tomatoes, eggplant, peppers, and tender herbs like basil. Until the soil is warm, so many plants just shiver and sit. But if you wait until the soil is warm, seeds will germinate quickly and plants are stronger. A compromised plant may not ever get back the vigor of one that has not been traumatized by the weather!

Commit to what you start, that is – take care of your garden. And have fun!
As winter turns to spring, we will meet, talk, plan, and put these guiding principles into action. We plan to continue with a follow-up blog post in spring to report back about our plans and decision process. We promise, you’re going to want to learn more about our garden pest-repelling strategies.
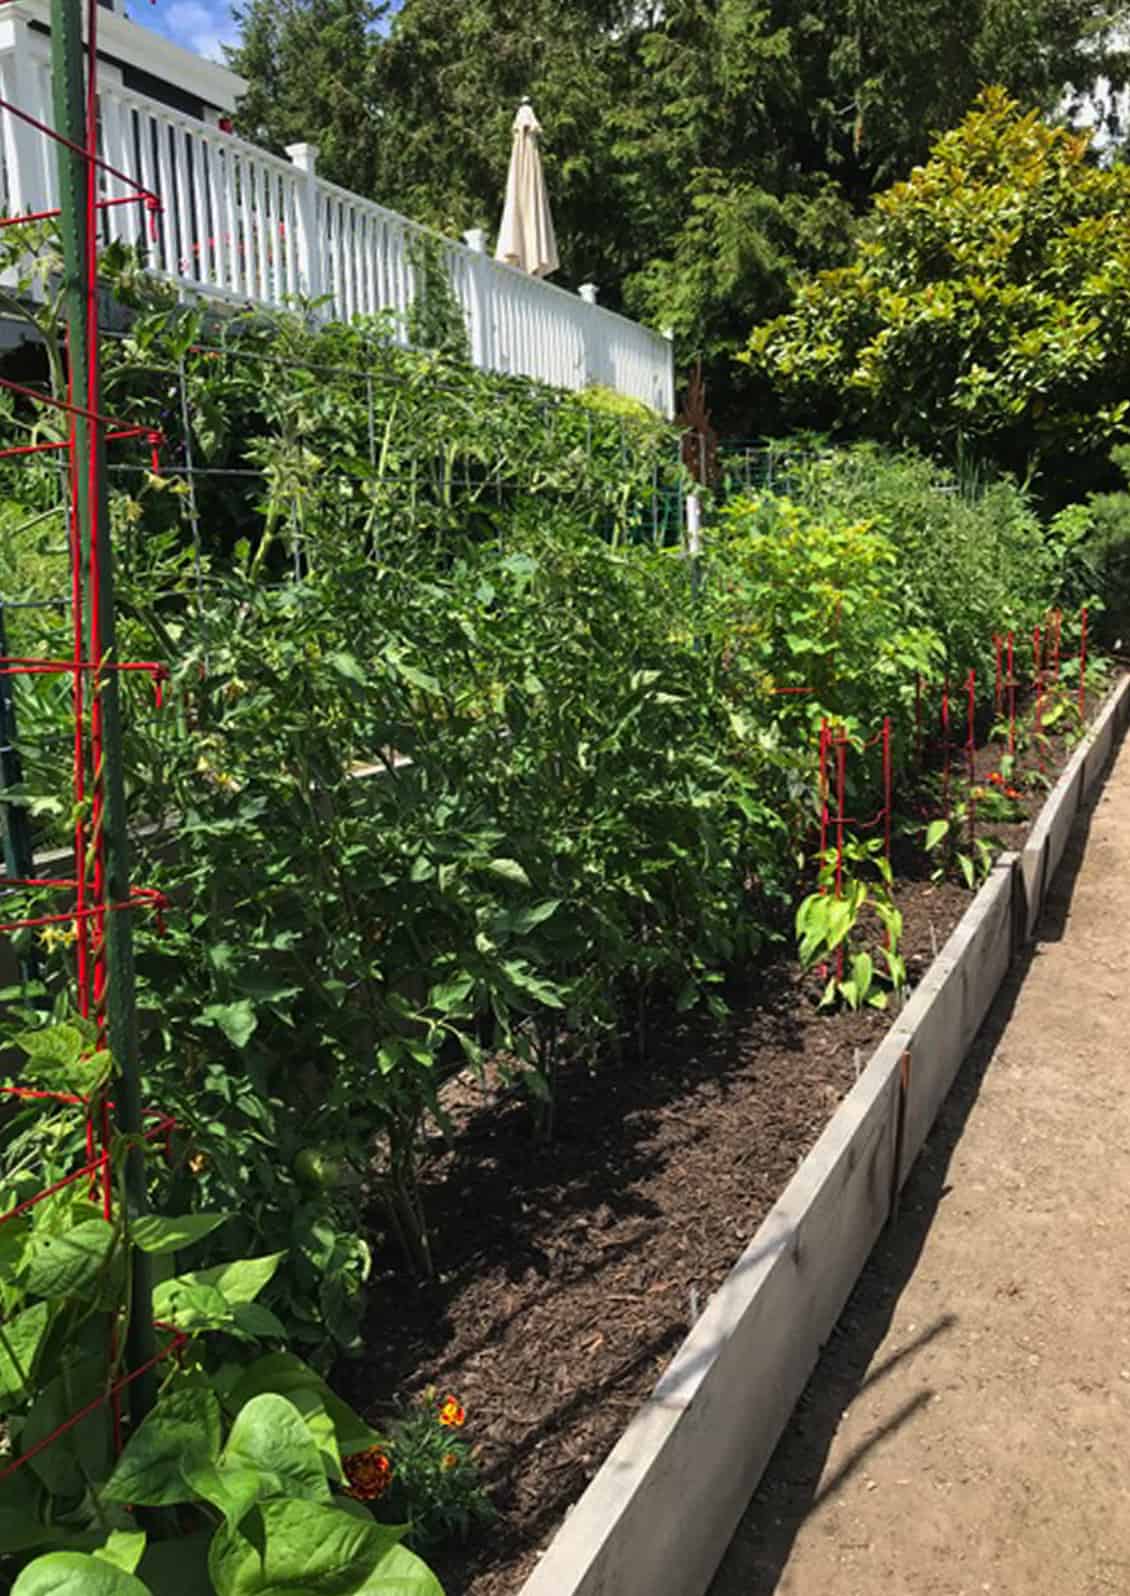
The end goal - Cathy Markham's garden yields an abundance of fresh produce for eating and preserving. © Cathy Markham / Skagit County WSU Extension Master Gardener
The end goal – Cathy Markham’s garden yields an abundance of fresh produce for eating and preserving. © Cathy Markham / Skagit County WSU Extension Master Gardener

REFERENCES:

Galloway, W. (2012). Grow Cook Eat: A Food Lover’s Guide to Vegetable Gardening. Seattle, WA. Sasquatch Books.

Raymond, D. (1983) Joy of Gardening. North Adams, MA. Storey.

Damrosch, B. (2008) The Garden Primer: The Completely Revised Gardener’s Bible. New York, NY. Workman Publishing Company.

LeHoullier, C. (2014). Epic Tomatoes. North Adams, MA. Storey.

Robinson, Jo. (2014). Eating on the Wild Side. New York, NW. Hachette Group.

Miles, C. (2013). WSU Home Vegetable Gardening in Washington. Washington State University Extension Publication #EM057E. https://pubs.extension.wsu.edu/home-vegetable-gardening-in-washington-home-garden-series.

This is a non-inclusive list of seed purveyors to consider:

Renee’s Garden Seeds, www.reneesgarden.com
For some varieties of seeds, Renee’s offers combination packages of two or three types of seeds, dyed so you can differentiate. This is especially nice for variety without planting a huge garden. The tri-color beans and three variety zucchinis are particular favorites.

Italy-Franchi www.growitalian.com

Territorial Seed Company https://territorialseed.com/

Johnny’s Selected Seeds Company https://www.johnnyseeds.com/

bee photo
Learn from the experts at the
Country Living Expo
& Modern Homesteading

Saturday, January 27, 2024

Learn More and Register Here >>

These Gardening Topics and More:

  • Fruit Tree Pruning & Grafting
  • Microclimates in the Garden
  • Low Maintenance Gardening
  • Roses
  • Bee Keeping
  • Soil Sampling
  • Veggie Gardening
  • Growing in High Tunnels, Cold Frames, and Unheated Greenhouses
  • Pest Control
  • Hop Growing
  • Flower Arranging
  • Know Your Native Trees
  • Introduction into Mason Bees
Anne Hays
Cathy Markham

ABOUT THE AUTHORS:

Anne Hays and Cathy Markham are certified Skagit County WSU Extension Master Gardeners, Class of 2022. Cathy has a degree in food and nutrition from the University of Idaho and is a Registered Dietician. Her vegetable garden has been featured in the Seattle Times Sunday Magazine.
Questions about home gardening or becoming a Master Gardener, may be directed to: Skagit County WSU Extension Office, 11768 Westar Lane, Suite A, Burlington, WA 98233; by phone: 360-428-4270; or via the website: https://extension.wsu.edu/skagit/mg/


AMGPost_header5
seedlings, vegetable starts, indoor growing,

Turn the Dark Days of Winter into a Spring Planting Advantage

Start an indoor grow stand and you’ll be enjoying homegrown salad before you know it

              Subscribe to the Blog >

By Kay Torrance, Skagit County WSU Extension Master Gardener

The Pacific Northwest offers unique challenges for gardeners. In the fall the endless summer comes to an abrupt end, with daylight decreasing over three minutes a day from mid-August into early November. As the winter solstice arrives on December 21st there are only 8.5 hours of daylight. We can’t change that, so let’s start a project. 

Want to grow herbs and vegetables in the middle of the winter? Want to get a jump on spring gardening by starting vegetables indoors to plant outside after the last frost? Do it with an indoor growing stand. It can be as simple as hanging a light from the ceiling and placing a few trays on a table. Prefabricated kits are available in all shapes and sizes, or build your own. Many Master Gardeners use their grow stands year-round. In the summer it is great for starting fall vegetables, and flowers, or to protect tender plants such as basil from outdoor insects and slugs.

Find a Suitable Location
Gardeners naturally want to place their grow stand near a window. However, with good artificial lighting, you can use a dark corner, unused room, or heated basement. Unused kitchen counters or shower stalls also work well.

Grow stands look tidy, but you are working with dirt and water. Locate them away from carpets and wood floors. Office chair mats work well to protect delicate floors. Hang a white shower curtain behind the stand to keep the wall clean and reflect light. If you are setting the stand on a table, use a vinyl tablecloth. For wood tables, make sure the trays are not touching the wood as the heat and humidity will damage the finish. Locate the stand near a power source for the lights and heating pads. Plants add moisture to the air, so make sure you have good ventilation to keep you and the plants healthy. 

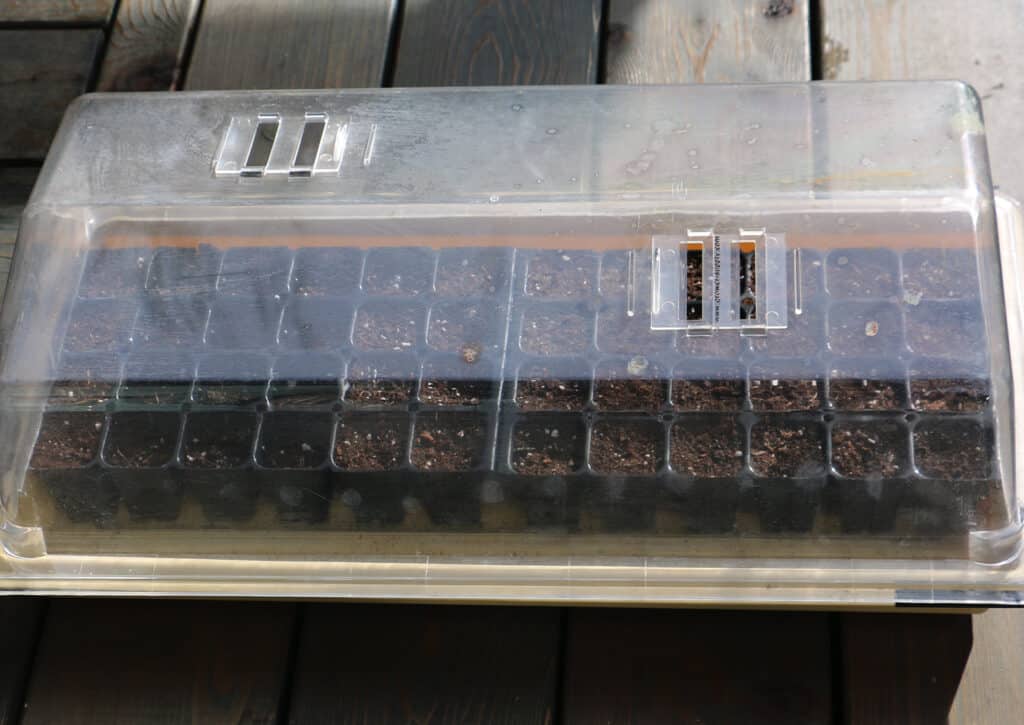
1020 flat, 6-pack, seed starts, dome
1020 flat of 6-pack cells under a dome ready to start germination on a heat pad. Seeds must not dry out during germination. © Photo by Kay Torrance
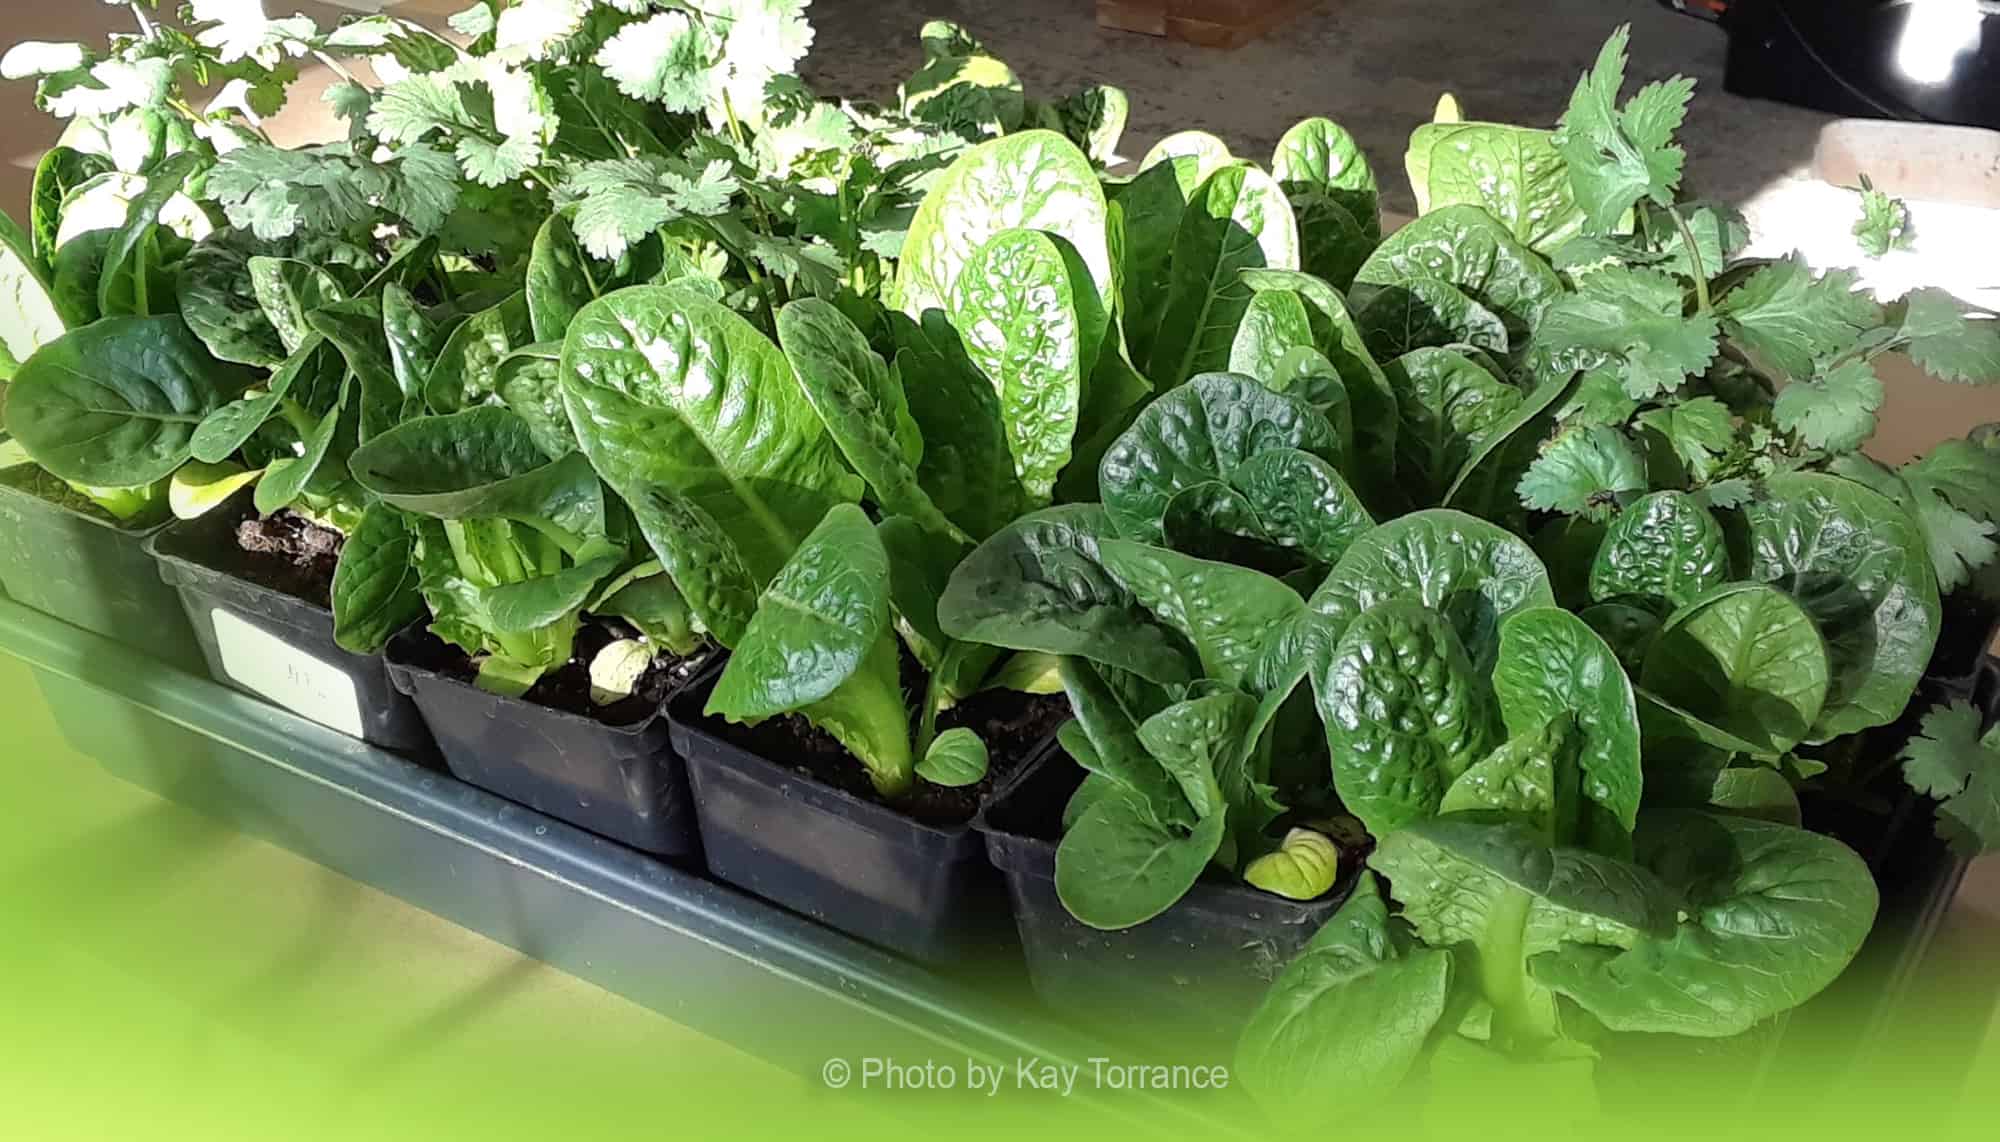
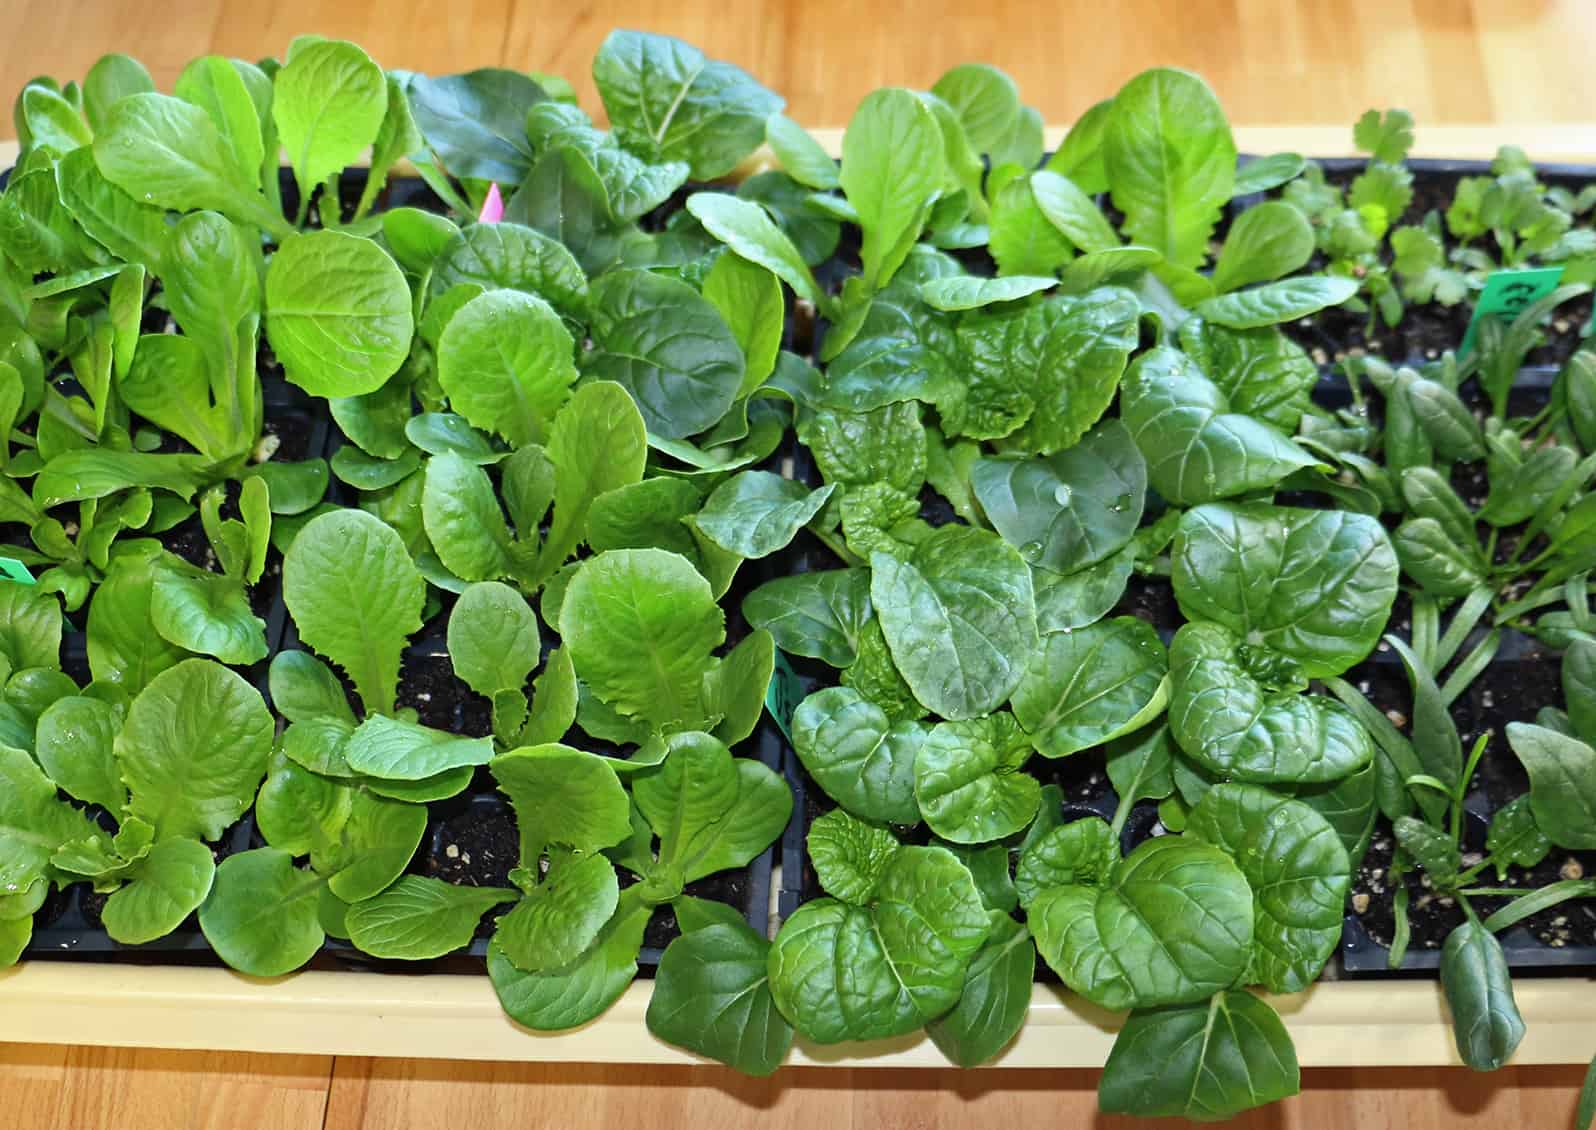
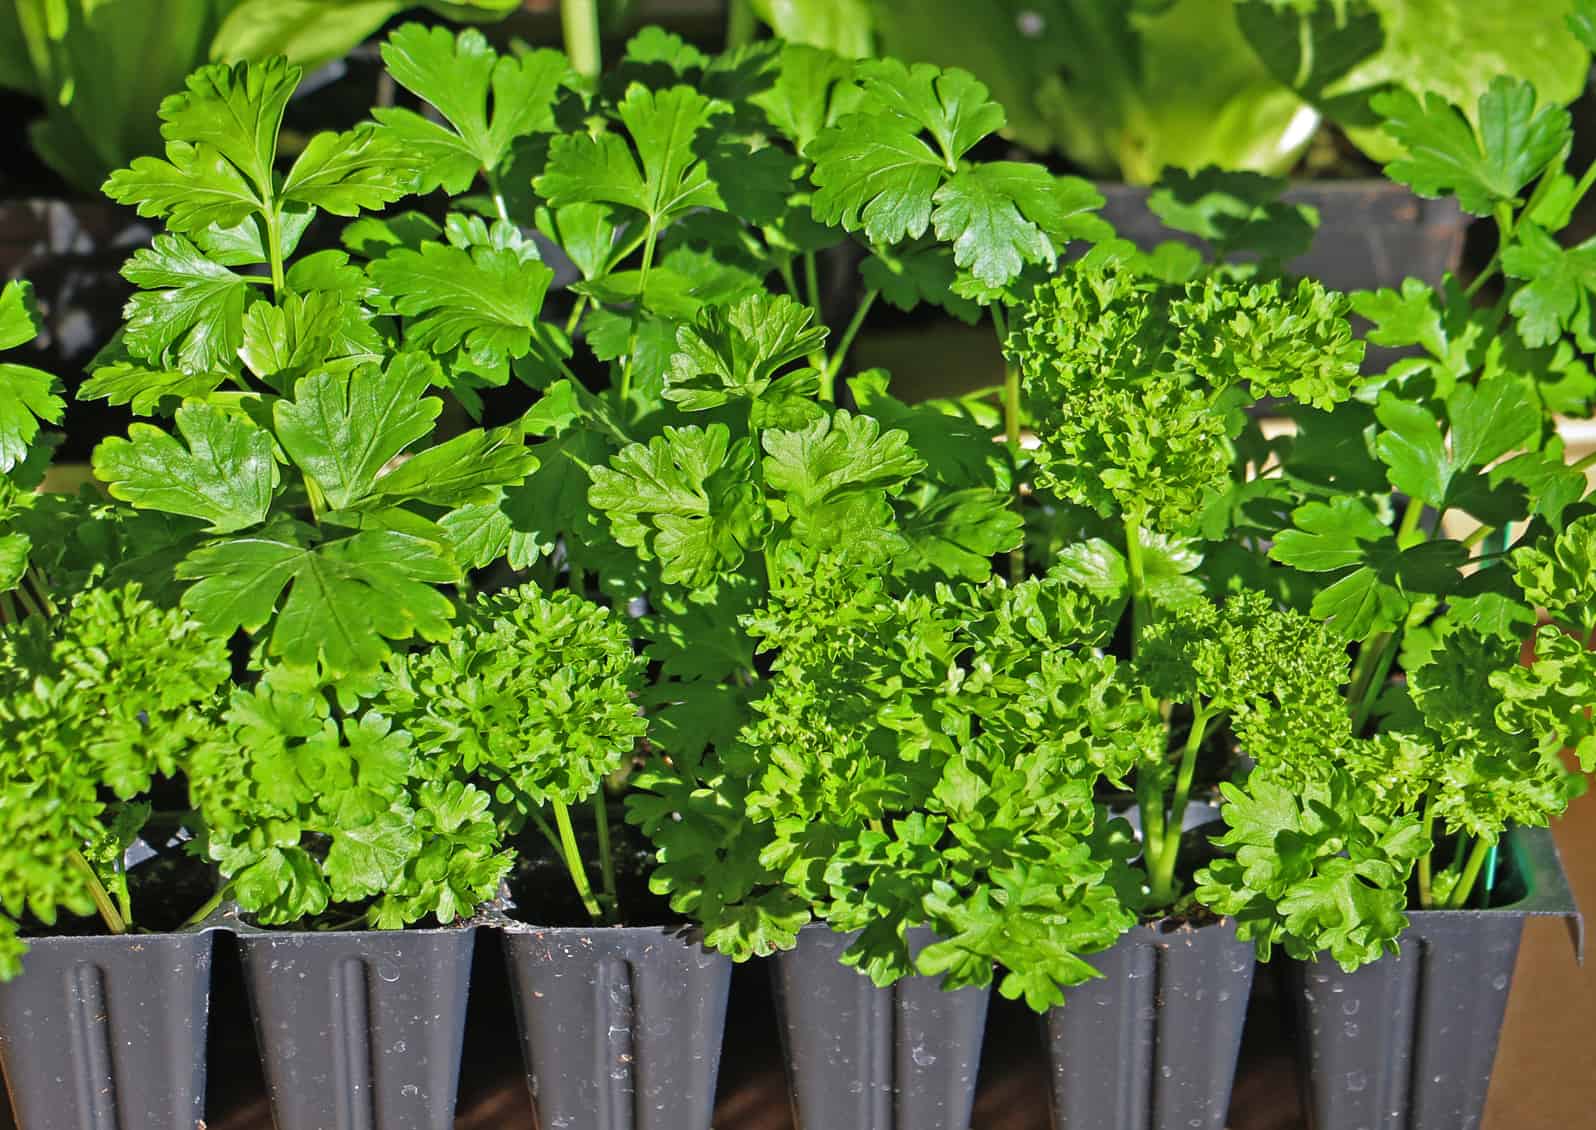
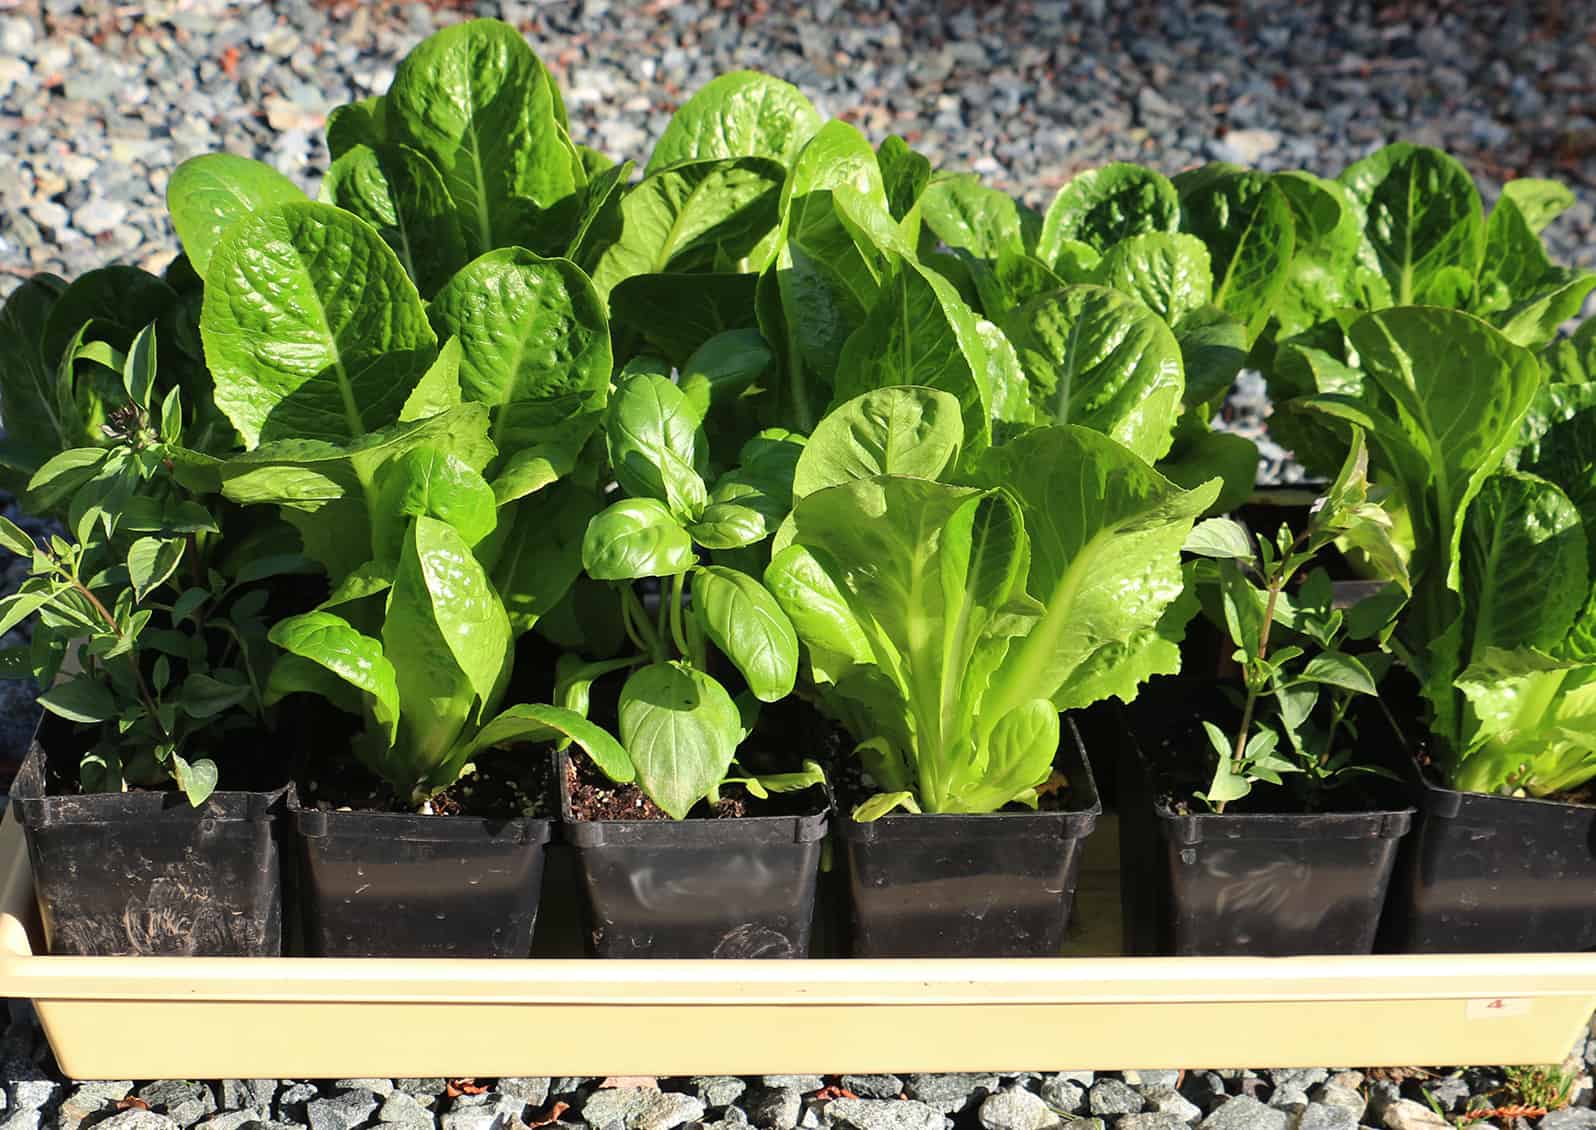
1020 flat, romaine, lettuce, Box choy, spinach, parsley
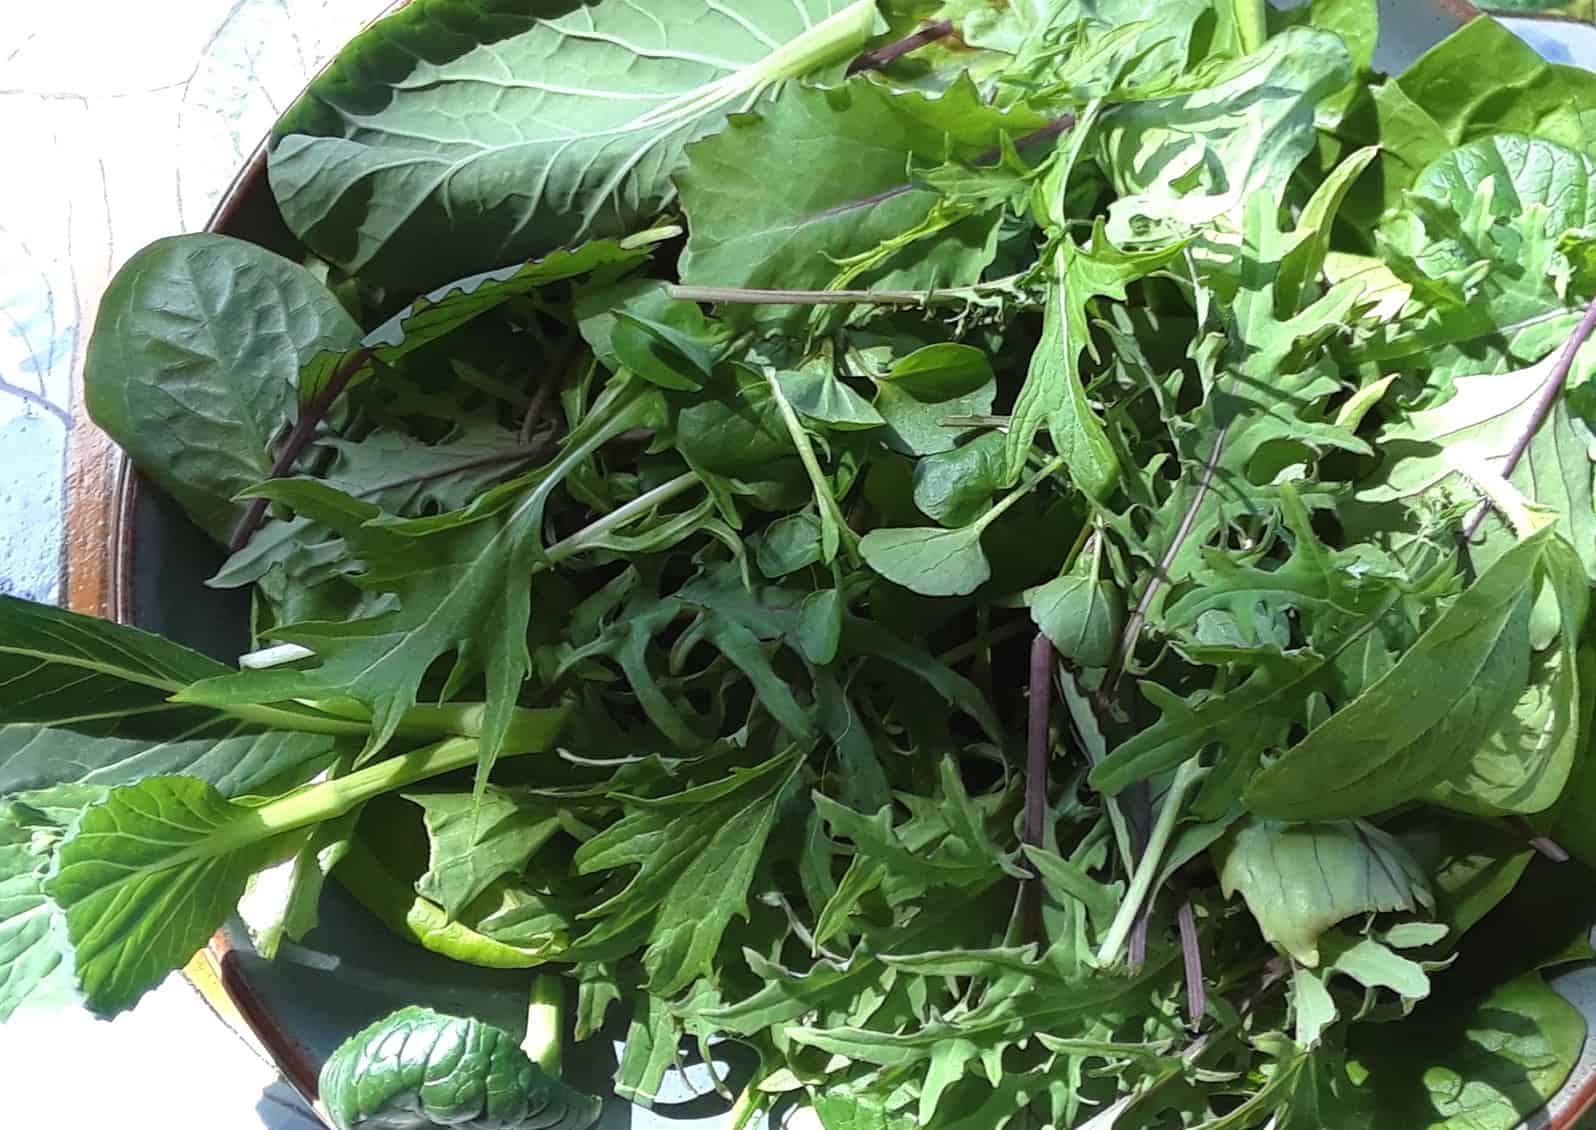
1020 flat of one-month-old romaine lettuce, Bok choy, spinach, and parsley (back right). Ready for transplant into 3 1/2-inch pots except for the parsley. © Photo by Kay Torrance
Sizing Up Your Stand
Think about the size needed to match your growing goals. 3.5-inch square pots often work well as a final size. Once the plant outgrows the 3.5-inch pots, the plant is either harvested or ready to go outside. The most common greenhouse tray size is 10 by 20 inches, commonly called a 1020 tray. One tray holds 18 3.5-inch pots, or 12 6-plug trays (72 plugs total), or eight 5-inch pots. If you only have room for one tray, herbs are a great choice. If you have two trays, lettuce, spinach, fennel, and microgreens are good options. If you have four trays, you have room for a dedicated seed starting tray, while the other three trays are staggered to produce enough salad to feed two people.

Once you have an idea of the size, it is time to decide whether to purchase a kit or build your own. If you decide to purchase a kit, there are many options available; some fit on a small tabletop, others are large tents that are mini-indoor greenhouses. Save money by repurposing shelving and lights or by building your own out of pipe or wood.

3.5" pot, parsley, seed start, vegetables
6-pack cells of flat and curly parsley at eight weeks. Ready for transplant to 3.5″ pot. © Photo by Kay Torrance
test
1020 flat of two-month-old romaine lettuce and three-month-old parsley in 3.5″ pots. Ready to start harvesting. © Photo by Kay Torrance
Building a DIY Grow Stand
The easiest way to get started is to hang a grow light from the ceiling, throw a vinyl tablecloth over a table, and put up a section of shower curtain to protect your wall if needed. Add a heat pad and you are ready to go. Hanging lights from the ceiling gives the most flexibility for lighting with unlimited options for height above the plants. If you don’t want holes in your ceiling, a lighting support can be built using shelving, or a frame from PVC, metal conduit, iron pipe, or wood. Think about things you already have that can be repurposed. Sawhorses or a six-foot ladder can make a good light stand support.

Repurpose common household items for your light support. Pictured here is a spare sawhorse. © Photo by Kay Torrance

PVC is easy to work with and has lots of joint options. If you search online, many design plan options are available. Some guidance recommends against using PVC cement on the joints so the racks can be easily disassembled for storage; however, this can result in a wobbly stand. One alternative to gluing is to drill a small hole in the joint and insert a screw.  This allows for disassembly but does not allow pieces to come loose while you are using the stand. (PVC does not accept most paints so don’t expect to hide the bright white pipe with paint.) Using threaded metal plumbing pipe creates a heavy/sturdy stand with a steampunk look, but the pieces are more expensive than PVC. Threaded metal pipe is available in many lengths so you don’t have to cut it. The threads make for easy assembly. Metal pipe can be painted, and you can disassemble it for storage.

For shelving, plywood is readily available and sold in small pieces, called project panels, at home improvement stores. Often, stores will make cuts for you. Use at least 5/8-inch-thick plywood because thinner pieces will sag over time. Countertop remnants are a sturdy and waterproof alternative. I have found that two-inch foam board insulation panels are easy to use. These panels are inexpensive, lightweight, and can be cut with a utility knife. They are also waterproof, and are available in two-foot by two-foot precut panels, which will hold two 1020 trays. Foam board can also be used on a tabletop to protect the surface from heat and moisture emitted from the heat pad and trays.

Selecting Lighting for Your Grow Stand
Grow stands need a good source of artificial lighting, ideally lights that produce a full spectrum of high-intensity light for rapid plant growth. Leafy greens and herbs need around five hours of direct sunlight each day. Most garden vegetables need up to 14 hours of light each day.

Fluorescent or LED tube lights are an inexpensive alternative to a plant or grow light. Florescent lights give off some heat, which is beneficial to plants, but the glass bulbs can be easily broken. LED grow lights produce the highest intensity light but are the most expensive. They are also more energy efficient and rated for long life. Incandescent lights are not a good choice because they use much more energy and generate a lot of heat which can dry out leaves.

Setting Up the Lighting
Fluorescent lights should be hung one to three inches above the plants. The tubes need to fully cover the plant trays. Choose a fixture with four to eight bulbs or mount multiple fixtures side by side to ensure coverage. Fluorescent bulbs sold for home lighting are not as intense as grow lights and will need to be turned on longer each day. Plan on 8-10 hours of light a day for herbs and leafy greens, and 12 to 14 hours for vegetable starts if you are using fluorescent lights.

LED grow lights are placed 10 to 30 inches above the plants. Follow the manufacturer’s directions. Box-shaped LED grow lights are easy to work with. The added height of the light above the plants increases the overall height of a grow stand; however, it is easier to water and tend plants without moving trays. Plan on six hours of light a day for herbs and leafy greens and eight to ten hours for vegetable starts. When selecting an LED grow light, be mindful of the color of the light. Blues and reds are great for plant growth, but if your stand is in the living room, you might not enjoy being bathed in a purple glow.

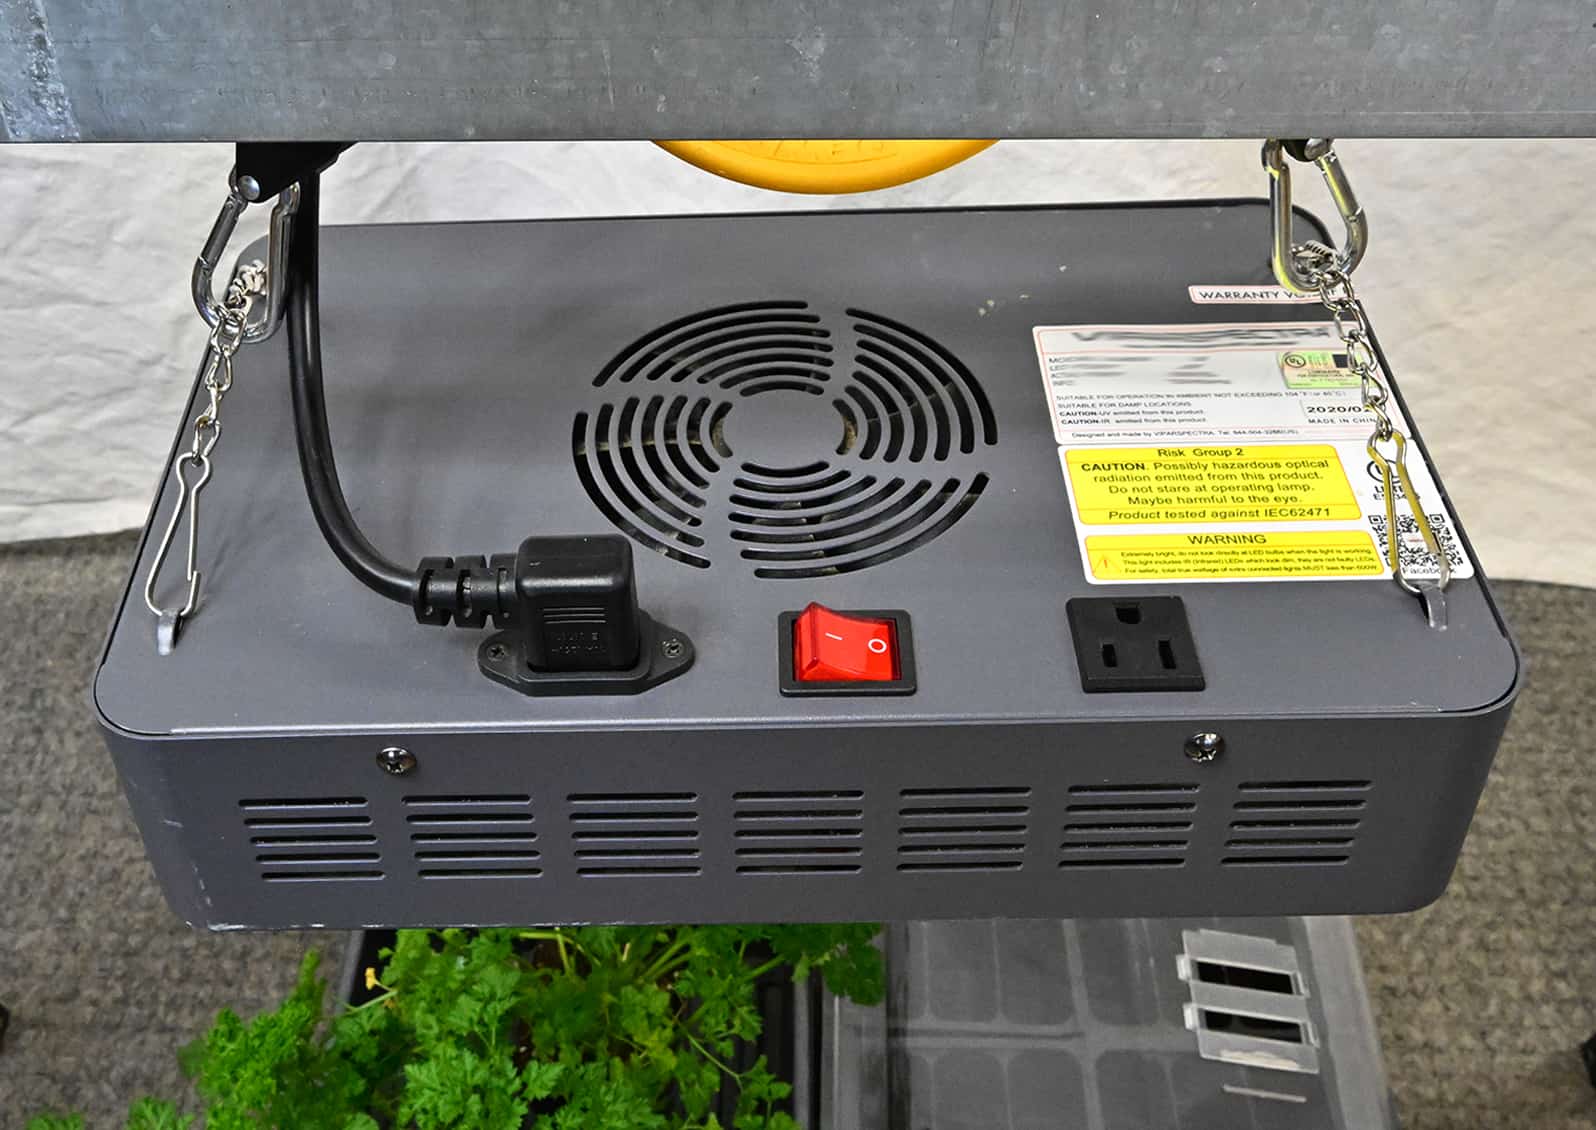
Experiment and adjust the height of the lighting and duration based on your specific setup. All lights generate some heat. Make sure the lights have adequate clearance per manufacturer’s directions and keep an eye on your plant growth so the plants don’t grow into the lights. When purchasing lights, compare all the features. Some fixtures have outlet plugs for connecting multiple lights. Some of the grow lights have built-in fans which keep the lights cool and provide some air circulation for the plants. The fans do generate noise.

Heating Pad Selection and Use
Make sure to size the pad to cover as much of the footprint of the plant tray(s) as possible. Place the plant tray on top of the pad. Do not put the pad inside the tray with the plants directly on top of it as the pads are not designed to be in direct contact with water. Often heat pads are sold rolled up in boxes. At room temperature, the pads are stiff. Before unrolling a pad, plug it in and let it warm up. Forcing them flat can break the heating elements inside.
Trays, Domes, and Pots
Using standard 1020 greenhouse trays makes pot sizing easy because many pots sold are designed to fit in the trays. Select the trays without holes in the bottom. Use a dome (plastic cover) for starting seeds.  If seeds dry out during germination, it will kill them. Use 6-pack cells to start the seeds and 3½-inch pots after the plants outgrow the cells. When starting vegetables with large seeds like squash or cucumbers, begin with 3½-inch pots. You may want several small trays if you are growing microgreens. It is important to sterilize trays and pots if you are reusing them.
Growing Media and Fertilizer
Always use sterilized growing media. This will help prevent dampening off as well as fungus gnats. Use a water-soluble fertilizer designed for vegetables per the manufacturer’s directions.

Important Safety Considerations:

  • Hang lights with appropriate clearance following the manufacturer’s recommendations.
  • Make sure lights are properly supported. If you are attaching eye bolts connected to the ceiling, make sure they are affixed to the ceiling beams and not just into drywall or other materials where the screws could pull out.
  • Make sure to use UL rated lights, heat pads, and surge protectors.
  • Make sure that any electrical components that require grounding (3-prong plug) are properly grounded.
  • Protect wood surfaces from heat and moisture or you can ruin the finish or warp the wood.
  • If using shelving, attach the shelving to the wall so that the stand isn’t accidentally knocked over.

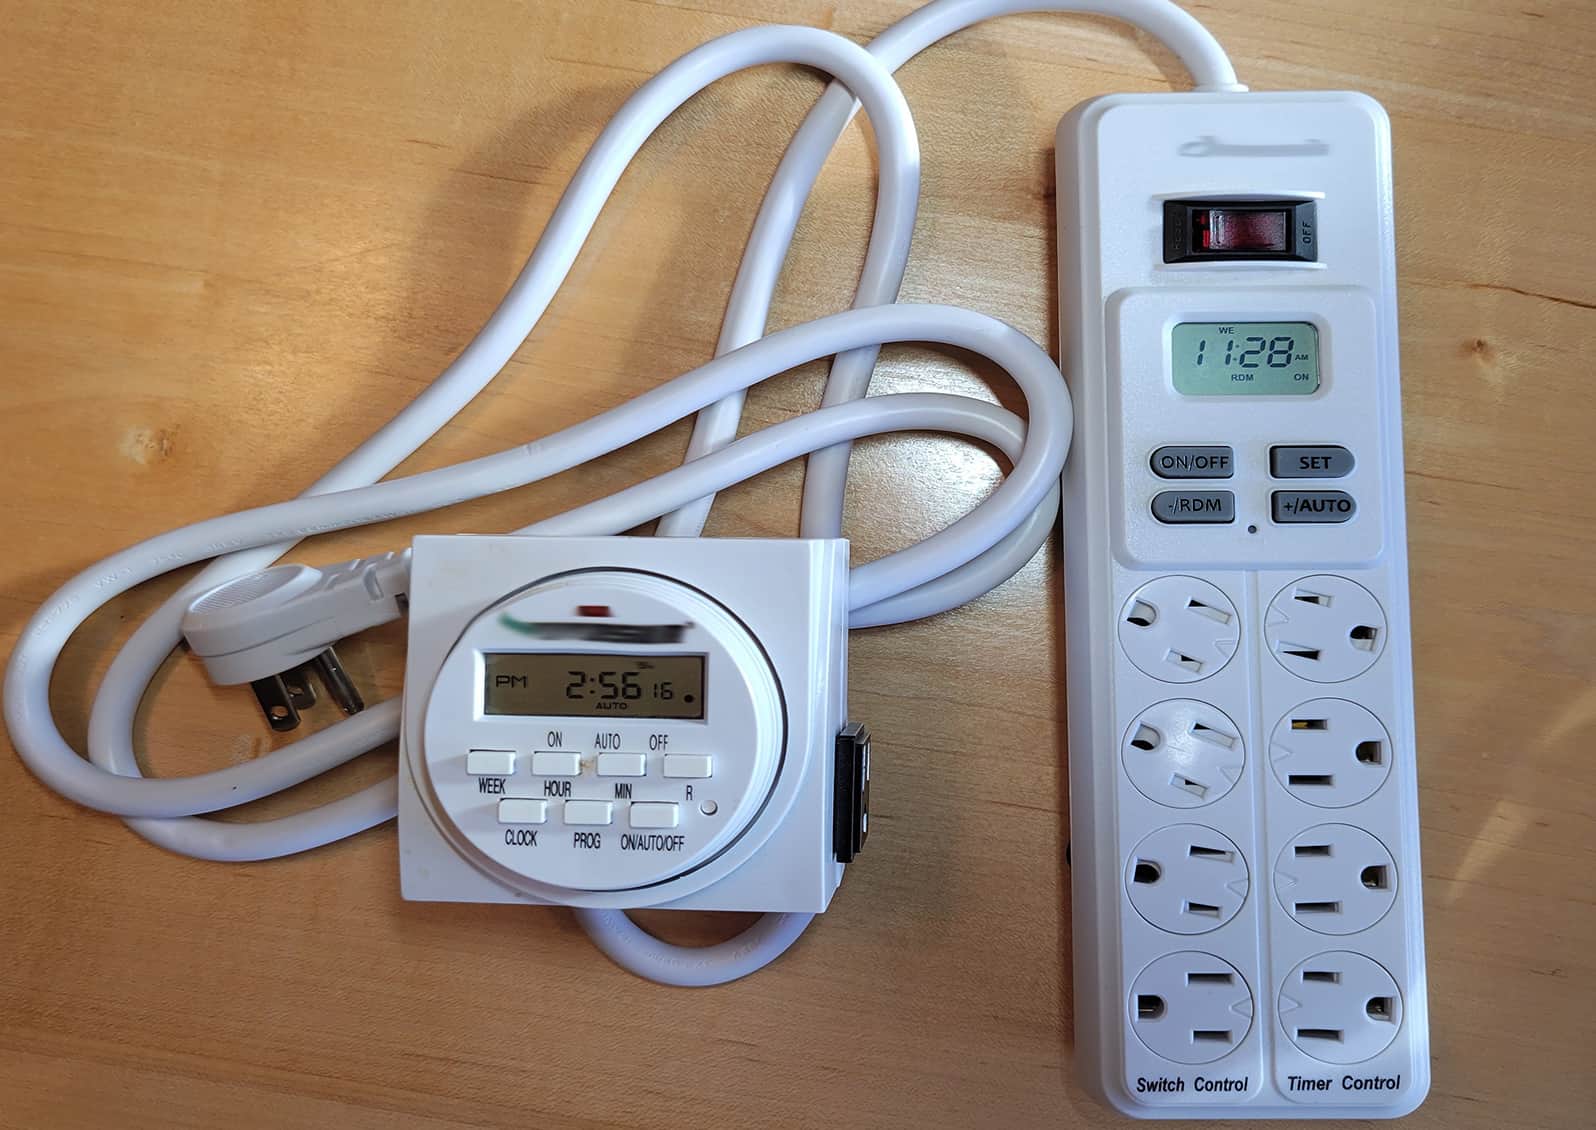
Two types of timer controls.  The light controller on the left has a single outlet.  The model on the right has four switched outlets for lights and four additional untimed ones for heat pads and other uses. © Photo by Kay Torrance
Two types of timer controls. The light controller on the left has a single outlet. The model on the right has four switched outlets for lights and four additional untimed ones for heat pads and other uses. © Photo by Kay Torrance
UL rated LED grow light with fan and plug outlet. © Photo by Kay Torrance
Accessories to Make the Process Easier
Adding a timer to your lighting to ensure consistency is highly recommended. Even the most organized gardener will forget to turn on or off the lights sometimes, especially if the grow stand is located in a basement or out-of-the-way area. Make sure the timer accommodates the three-prong grounded plugs used by plant lights. Some timers are also surge protectors with multiple outlets controlled by the timer. The heating pad needs to be plugged into an outlet, not on a timer. A small oscillating fan provides good ventilation, reduces fungal problems, and the motion helps strengthen the plant stems as they grow. A set of pulleys allows quick and precise adjustments to the height of the lights.
Selecting What to Plant
As a rule of thumb, plant what you like to eat. However, avoid vegetables that take a long time to grow, keep well, and are inexpensive to purchase. Concentrate on herbs and greens that are best eaten fresh. For detailed information and a planting calendar, read the WSU Home Vegetable Gardening in Washington for help selecting vegetables, learning how to harden and transplant starts, and growing them until harvest.

If you are growing plant starts to transplant outdoors, start seeds around eight weeks before the last frost date. Per WSU AgWeatherNet, the last frost for Skagit Valley is generally in May, so March is a good time to plant indoors. Temperatures in many areas vary due to micro-climates, so experiment to see what works for you

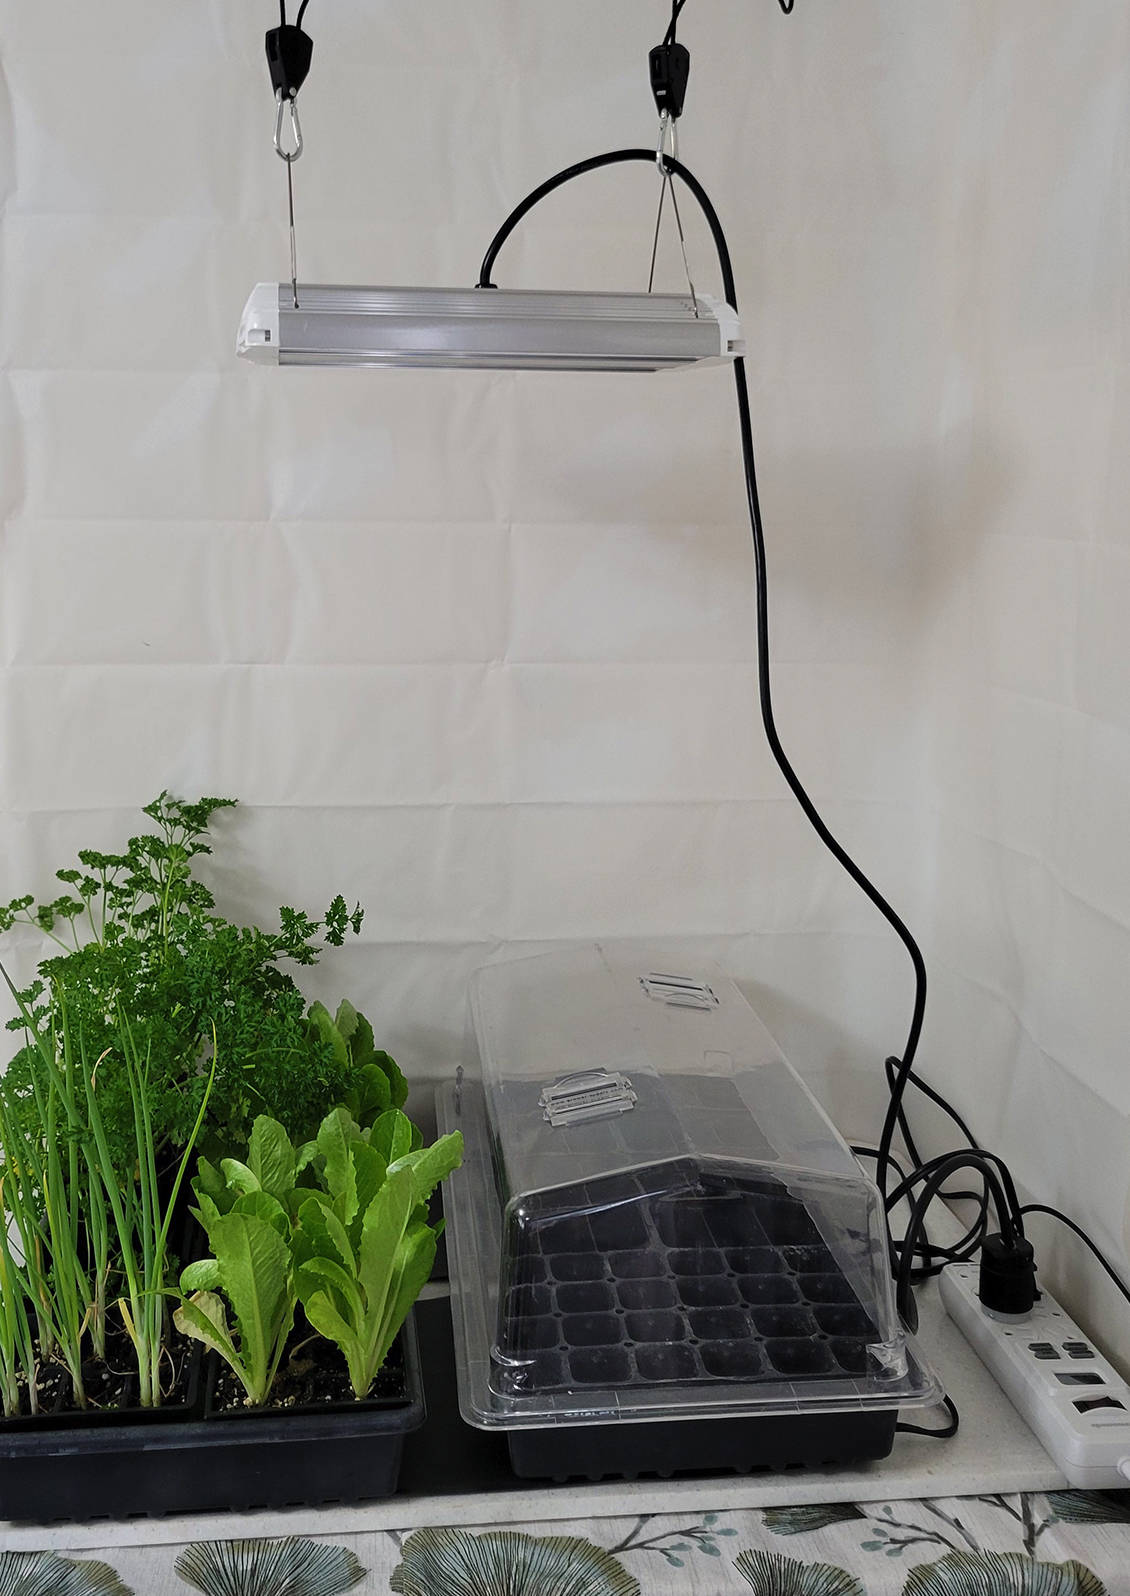
Tabletop grow stand with lights suspended from the ceiling. A shower curtain liner and vinyl tablecloth protect the surroundings from water and dirt. © Photo by Kay Torrance
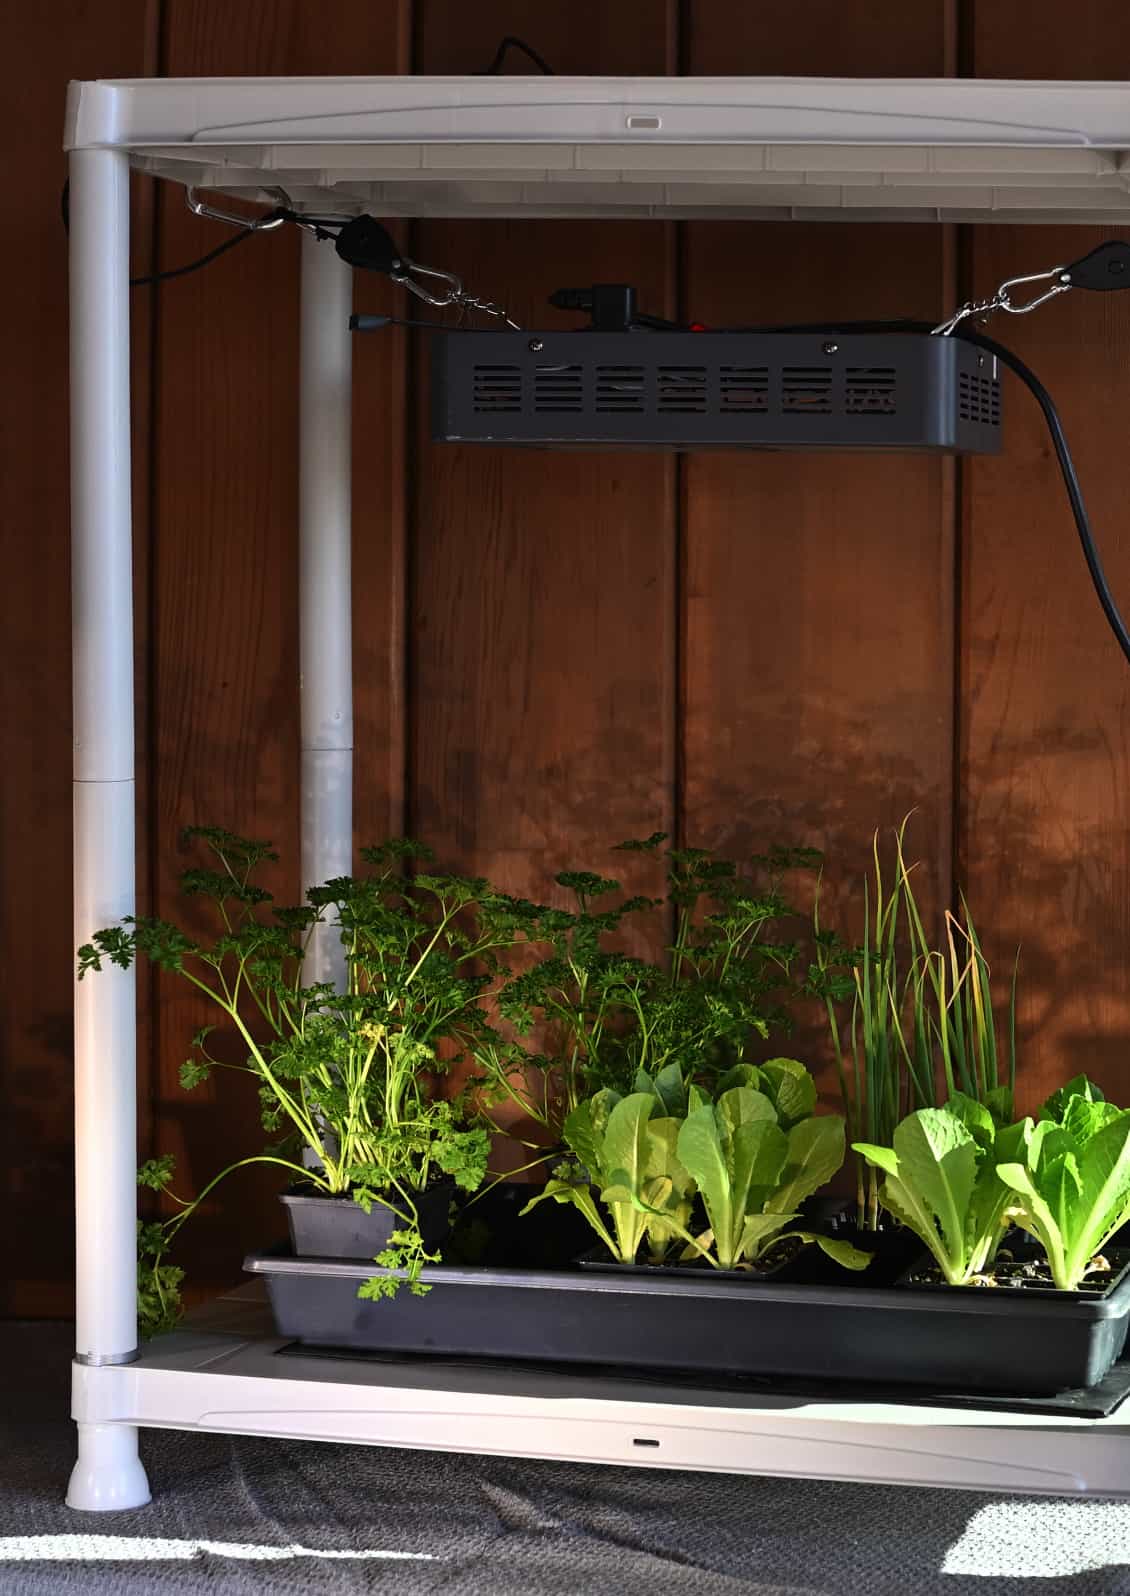
Plastic shelving used for stand.  © Photo by Kay Torrance
Plastic shelving used for stand. © Photo by Kay Torrance

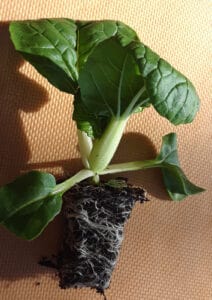
Bok choy pulled from a 6-pack cell to check root growth. Ready for transplant to 3.5-inch pot. © Photo by Kay Torrance

Starting Seeds
Plant each 6-pack with the same or similar seeds. Some plants like parsley will stay in the 6-pack for four to six weeks whereas lettuce will need to be transplanted in two to three weeks. Twelve 6-packs will fit in one 1020 tray – that is 72 plants! It is easy to get carried away and outgrow your grow stand. Think of how many of each plant you want. You may only need two parsley plants but a dozen lettuce plants. Plants grow at different speeds. Check days to harvest on the seed packets. For each tray, I will usually plant three 6-pack (18 cells) that will grow into 18 four-inch pots. I use small trays to plant microgreens to fill the remaining space as they will be harvested before they need to be moved to larger pots.
Transplanting and Harvest
It will take 5-14 days for seed germination. Some seeds will germinate faster if you soak them in water first. Follow directions on the seed packet and research specific germination information from various seed companies. Growth rates will vary based on your temperature, light, and fertilizer. The young plants should be ready to transplant to 3 1/2-inch pots around three to five weeks from germination. If you are unsure if your starts are ready for a larger pot, carefully pull one plant out of the container and look at the roots. Parsley and spinach seem to take forever whereas lettuce, Bok choy, and tomatoes grow really fast. Look for well-formed roots starting to emerge from holes in the plugs or pots.

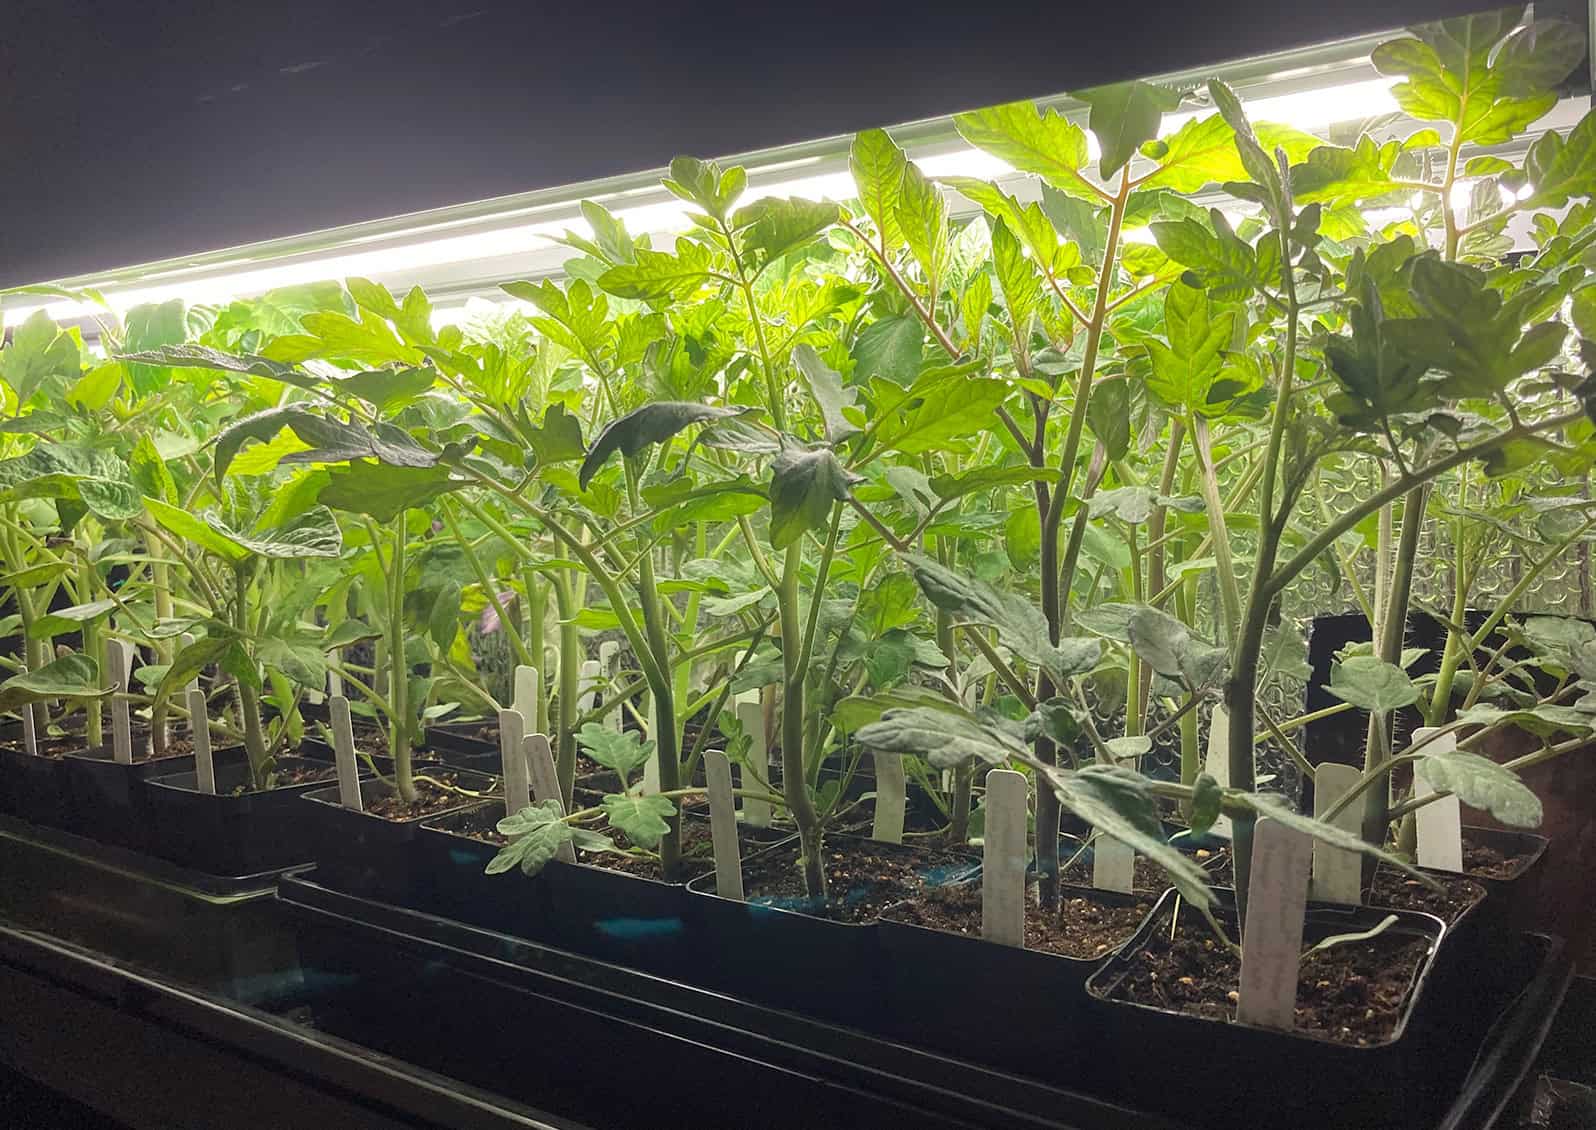
Grow light results © Photo by Kay Torrance

When harvesting, take only what you need for a meal and leave the rest on the plant, using the come-and-come-again method. Harvest the older/outer leaves leaving the young leaves for later. This provides enough foliage to keep the plant healthy and prolong your harvest time. When the plants become too big for the 3.5-inch pots, it is time to transplant them or harvest all the leaves and start over. It is great to stagger crops so you are always in fresh greens.

Questions or Comments
Have fun making the most of the dark days of winter with an indoor grow stand. If you have questions or concerns, add them in the comments section below and members of the Skagit County WSU Extension Master Gardener Plant Clinic team will be happy to answer, or visit a plant clinic in person.

REFERENCES:

VanDerZanden, A. (2008). Environmental factors affecting plant growth. Oregon State University Extension. Retrieved from https://extension.oregonstate.edu/gardening/techniques/environmental-factors-affecting-plant-growth

Wooten, H. (2020) Artificial Lighting for Growing Vegetables at Home. University of Florida/IFAS Extension Orange County. Retrieved from https://blogs.ifas.ufl.edu/orangeco/2020/04/09/artificial-lighting-for-growing-vegetables-at-home/

Miles, C. (2013). WSU Home Vegetable Gardening in Washington. Washington State University Extension Publication #EM057E. Retrieved from https://www.skagitmg.org/wp-content/uploads/Public-Pages/Food%20Gardening/Food%20Gardening%20Library/WSU%20Bulletin%20EM057E%20Home%20Vegetable%20Gardening.pdf

Planting Calendar from WSU Home Vegetable Gardening in Washington https://www.skagitmg.org/wp-content/uploads/2023/03/Planting-Guide-Calendar-Final-2023-03-15.pdf

Grabowski, M. (Reviewed 2018), How to prevent seedling damping off. University of Minnesota Extension. Retrieved from https://extension.umn.edu/solve-problem/how-prevent-seedling-damping

Pennisi, B. (Reviewed 2022). Growing Indoor Plants with Success. University of Georgia Extension Retrieved from https://extension.uga.edu/publications/detail.html?number=B1318&title=growing-indoor-plants-with-success

Peronto, M., Wertheim, F., Fournier, E.(Rev. 2021) Starting Seeds at Home. Bulletin #2751, University of Maine Extension. Retrieved from https://extension.umaine.edu/publications/2751e/

Skagit County WSU Extension Master Gardener Grow Your Own Food Website
https://www.skagitmg.org/home/food/
Skagit County WSU Extension Master Gardener Publication Library
https://www.skagitmg.org/home/library/
bee photo
Learn from the experts at the
Country Living Expo
& Modern Homesteading

Saturday, January 27, 2024

Learn More and Register Here >>

These Gardening Topics and More:

  • Fruit Tree Pruning & Grafting
  • Microclimates in the Garden
  • Low Maintenance Gardening
  • Roses
  • Bee Keeping
  • Soil Sampling
  • Veggie Gardening
  • Growing in High Tunnels, Cold Frames, and Unheated Greenhouses
  • Pest Control
  • Hop Growing
  • Flower Arranging
  • Know Your Native Trees
  • Introduction into Mason Bees


ABOUT THE AUTHOR:

Kay Torrance has been a Skagit County WSU Extension Master Gardener since 2019. She is garden coordinator of the Naturescape garden and pond in the Discovery Garden on SR 536 west of Mount Vernon. https://www.skagitmg.org/home/discovery-garden/

Questions about home gardening or becoming a Master Gardener, may be directed to: Skagit County WSU Extension Office, 11768 Westar Lane, Suite A, Burlington, WA 98233; by phone: 360-428-4270; or via the website: https://extension.wsu.edu/skagit/mg/


AMGPost_header5
Web_headerLisianthus

How to Grow Lisianthus

A rose by any other name…

[sibwp_form id=]

By My Thanh Kim, Skagit County WSU Extension Master Gardener

Call it love at first sight. Four years ago, I fell hard for some mysterious flowers in a lobby of a hotel. They looked like roses except more striking with an abundance of green buds surrounding luxurious blooms. This was the beginning of an obsession.  I checked nurseries for plants but had no luck.  Over the next several years I saw them again, and then, while watching the 2020 (2021) Tokyo Summer Olympics, I saw my beauties, lisianthus flowers prominently displayed and my love affair with them started all over again.

While hard to find in flower nurseries it is possible to start lisianthus from seeds. Mastering the seed-starting techniques was a months-long process, but well worth it. In the end, I had nearly 2,000 plants and gave away buckets of beautiful blooms all summer long. These are the best flowers ever, and I want everyone to enjoy them.

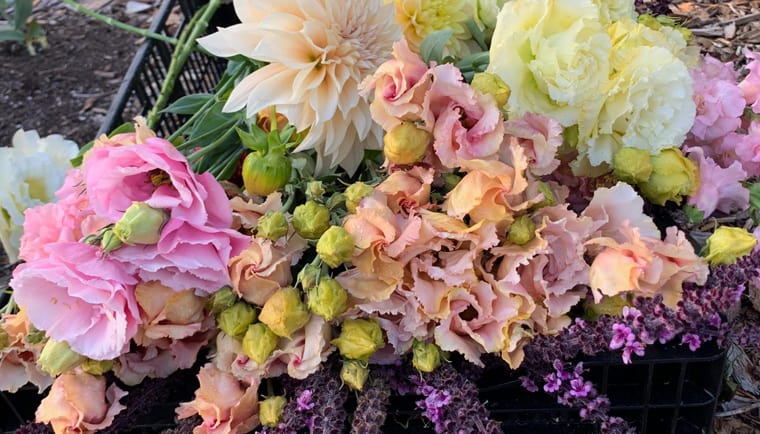
Lisianthus, Eustoma grandiflorum, (commonly called prairie gentian, bluebell gentian) are valued for many reasons including their resemblance to roses, their long vase life as cut flowers, and their unique beauty. They come in many vibrant colors, romantic soft tones, and mysterious bicolor flowers.  In addition to their colors and shape, they are sought after by florists for their strong stems, lush succulent leaves, and graceful buds that continue to open in a vase for several weeks.  They are hardy in USDA hardiness zones 8-10. Lisianthus is not hard to grow, and starting them from seeds may be your best option if you want to have these gorgeous flowers blooming in your garden this summer.

Rosanne Green Lisianthus
Photo by My Thanh Kim
Rosanne Green Lisianthus
Photo by My Thanh Kim
Lisianthus stems can be 18-36" tall
Photo by My Thanh Kim
Lisianthus stems can be 18-36″ tall
Photo by My Thanh Kim
Lisianthus blooming in the author's garden. Photo by My Thanh Kim
Lisianthus blooming in the author’s garden. Photo by My Thanh Kim

January is the perfect time to start lisianthus seeds

It’s January. It’s dark and cold. Though it is too early to start many seeds indoors but it is not too early to start lisianthus. Since they need at least 6 months from planting to bloom, starting them early is a must. Growing lisianthus from seeds is not for the faint of heart. They need constant attention for several weeks if not months. You may need to try multiple times before you can master the skill.  Follow these tips and with some practice and patience, you’ll be able to get many beautiful plants for your garden.

My Thanh Kim, Skagit County Master Gardener

Get started with seeds, a container, seed starting mix

Make sure you get seeds from a reputable source. Lisianthus seeds can be challenging to germinate so make sure the seeds are fresh. The germination rate goes down with older seeds. You want to start with the best seeds possible. Seeds from reputable companies should come in pelleted form for easy handling. Seeds can also be collected from mature flowers. They must be handled with care because they are tiny like specs of dust.

Choose a container or tray that is at least 1.5″ deep to allow room for root growth unless you are starting them in soil blocks. Soil blocking is a method of starting seeds that allows for healthy root growth. Sterilize the container before planting the seeds to prevent diseases.

Don’t start in garden soil. Instead, choose a sterile seed starting mix that has either coco coir or peat moss. Since lisianthus seeds are so tiny, you’ll need a medium that is as fine as possible to allow for better contact with the seeds, sifting out all the large pieces before using it.

small seeds
Lisianthus seed pods contain tiny seeds.
Photo by My Thanh Kim
Lisianthus seedlings. Photo by My Thanh Kim
ABC purple, Voyage 2 green, ABC green, and Rosanne green lisianthus. Photo by My Thanh Kim

Light, temperature, and moisture are critical to seed germination

Lisianthus seeds are considered some of the most difficult to germinate but provided with the right conditions, you’ll have a better chance of success. One of the most important things to remember is that lisianthus seeds need light to germinate. Sow the seeds on the surface of the seed starting mix and do not cover them. Keep the seeds from drying out by misting them with a spray bottle several times a day. Cover the tray with a clear plastic cover until they germinate in 10-14 days. The seeds germinate best at a temperature of 70 degrees Fahrenheit.

Congratulate yourself when the seeds germinate

If the seeds have germinated, pat yourself on the back. You’ve done the hard part. When about 50% of the seeds have germinated, remove the plastic cover. Place the seedlings under grow lights and fertilize lightly every week. Seedlings can be planted in the garden when they have 4 sets of true leaves. Lisianthus can tolerate some frost so they can be planted outside 6 weeks before the date of your last frost. Plant them in a sunny location in well-drained soil and water when the soil is dry. If everything goes well you will have beautiful blooms in July or August.

Quick Summary Tips

Getting lisianthus seeds to germinate is not hard but requires commitment and patience. Here is a summary of the tips to help get the seeds to germinate.

  1. Fill a tray or container with some fine and sterile seed starting mix.
  2. Sow the seeds on the surface of the mix. They need light to germinate so do not cover them with the mix.
  3. Spray a few times a day to prevent the mix from drying out but do not over-water.
  4. Cover the tray with a clear plastic cover to retain moisture.
  5. Place under light to germinate. A desk lamp, LED light, or fluorescent shop light will work.
  6. Keep the tray at room temperature around 70 degrees Fahrenheit.
  7. Remove the plastic cover once about 50% of the seeds germinated (10-14 days).
  8. Feed lightly every week. Place under grow lights.
  9. Plant out in the garden or container once they have 4 sets of true leaves.
  10. It may take multiple attempts to be successful but keep practicing. They are worth it.

About the Author:

My Thanh Kim is a graduate of the Skagit County WSU Extension Master Gardener Class of 2022. She currently serves as the greenhouse co-manager for the SCMG. She has a BS in biochemistry from Tulane University and a teaching credential for San Diego State University.

Resources

https://sakataornamentals.com/wp-content/uploads/sites/13/2022/02/Lisianthus-Cut-Flower-0921-SAKATA.pdf

Zigler, Lisa Mason (2014) Cool flowers: How to grow and enjoy long-blooming hardy annual flowers using cool weather techniques. St. Lynn’s Press, Pittsburg, PA.

Questions about home gardening or becoming a master gardener, may be directed to:  WSU Skagit County Extension Office, 11768 Westar Lane, Suite A, Burlington, WA 98233; by phone: 360-428-4270; or via the website: www.skagit.wsu.edu/mg

Washington State University Extension helps people develop leadership skills and use research-based knowledge to improve economic status and quality of life. Cooperating agencies: Washington State University, U.S. Department of Agriculture, and Skagit County. Extension programs and policies are available to all without discrimination.  To request disability accommodations contact us at least ten days in advance.