AMGPost_header5
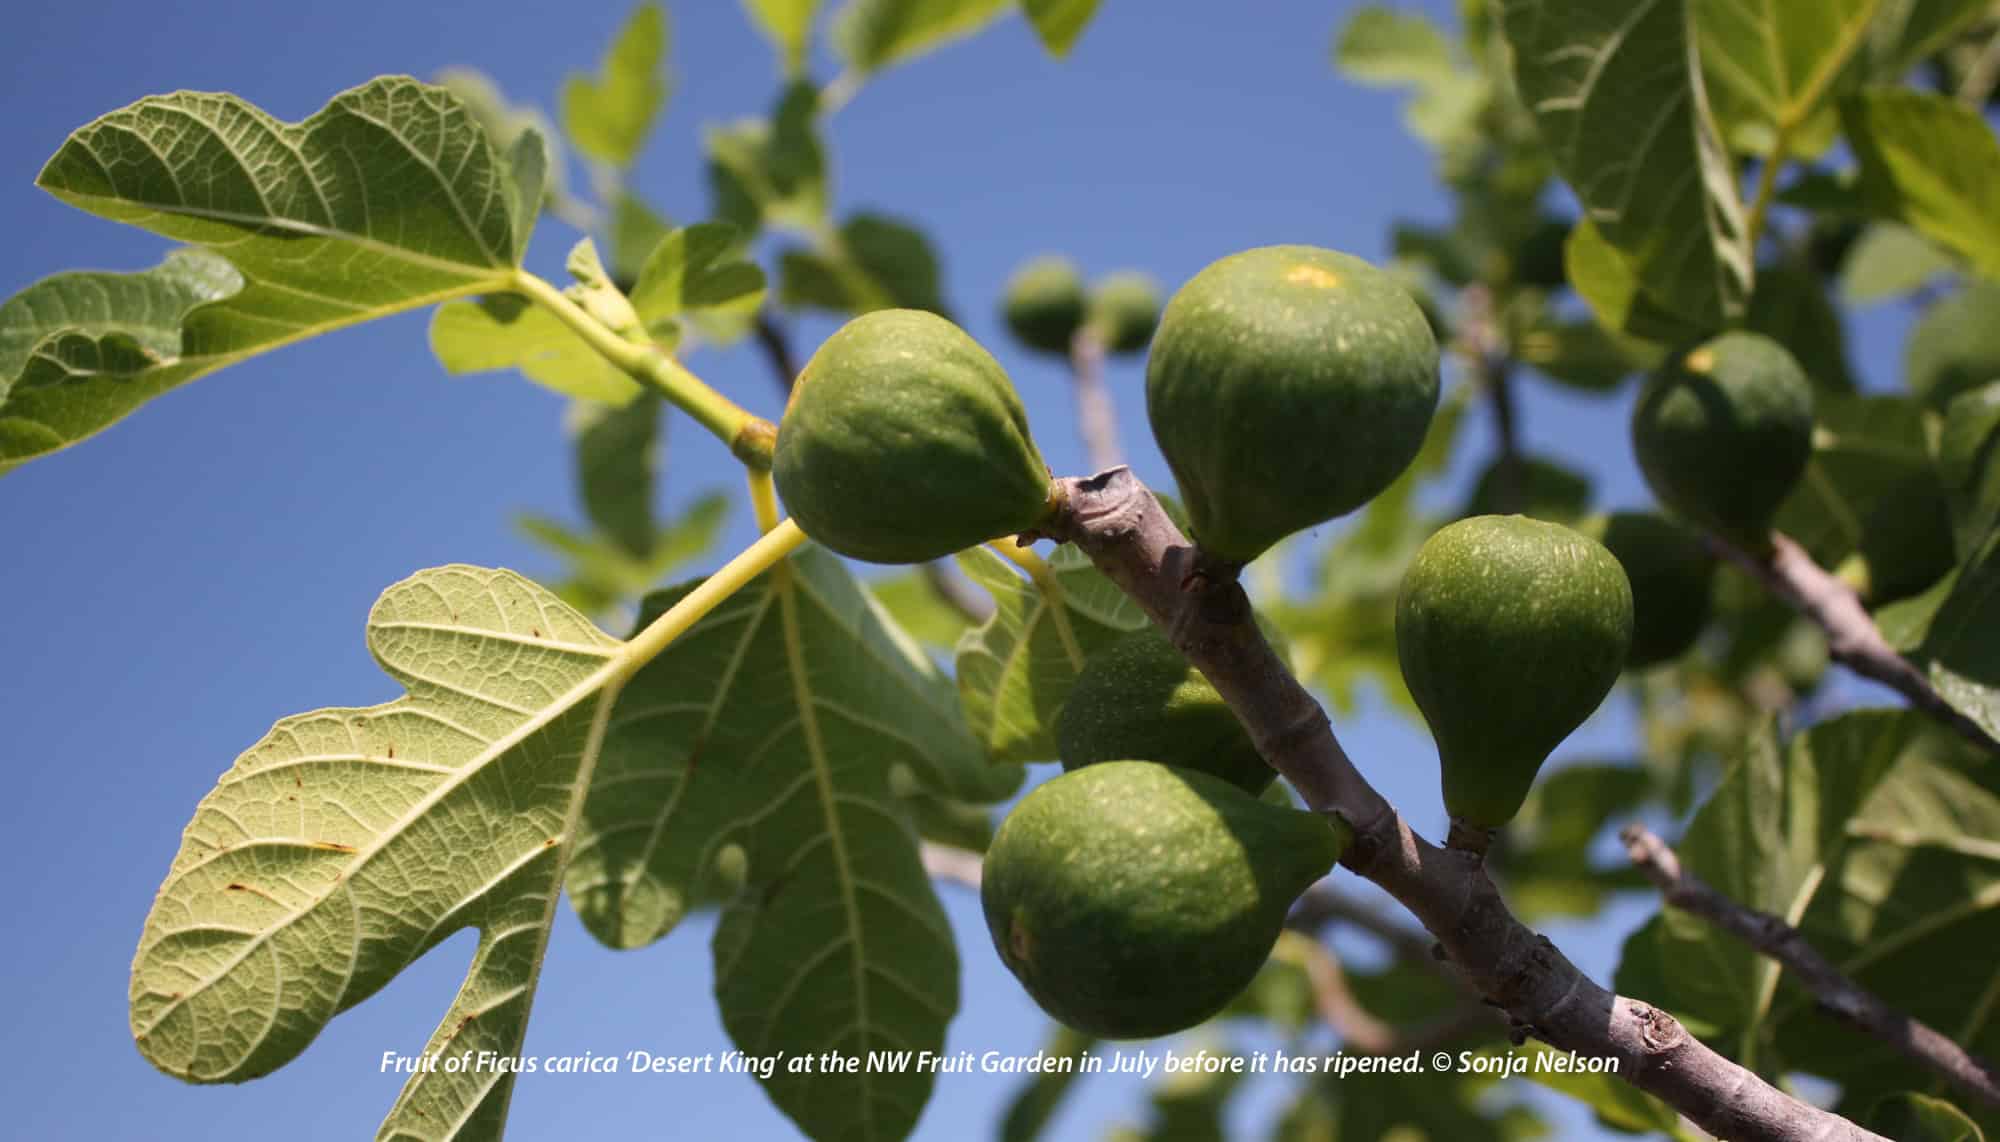
Fruit of Ficus carica 'Desert King' at the NW Fruit Garden in July has not yet ripened. © Sonja Nelson

The Fig Tree-A Horticultural Challenge

Though best suited for a Mediterranean climate, figs can be successfully grown in the Pacific Northwest.

              Subscribe to the Blog >

By: Sonja Nelson, Skagit County WSU Extension Master Gardener

Gardeners are adventurous folks, always on the lookout for a new and captivating plant to add interest to their gardens. One such beckoning horticultural challenge is the edible fig tree (Ficus carica). An example of a mature, edible fig can be found at the edge of the NW Fruit Garden on State Route 536 west of Mount Vernon. Located next to the Skagit County WSU Extension Master Gardener Discovery Garden, the NW Fruit Garden features over 200 fruit cultivars, including fig trees.

Although edible figs are widely grown in Europe’s warm Mediterranean basin, the climate of the Pacific Northwest is too cool for many varieties. However, the mature edible fig is part of NW Fruit’s experimental planting program to find the best fruits for growing in our area.

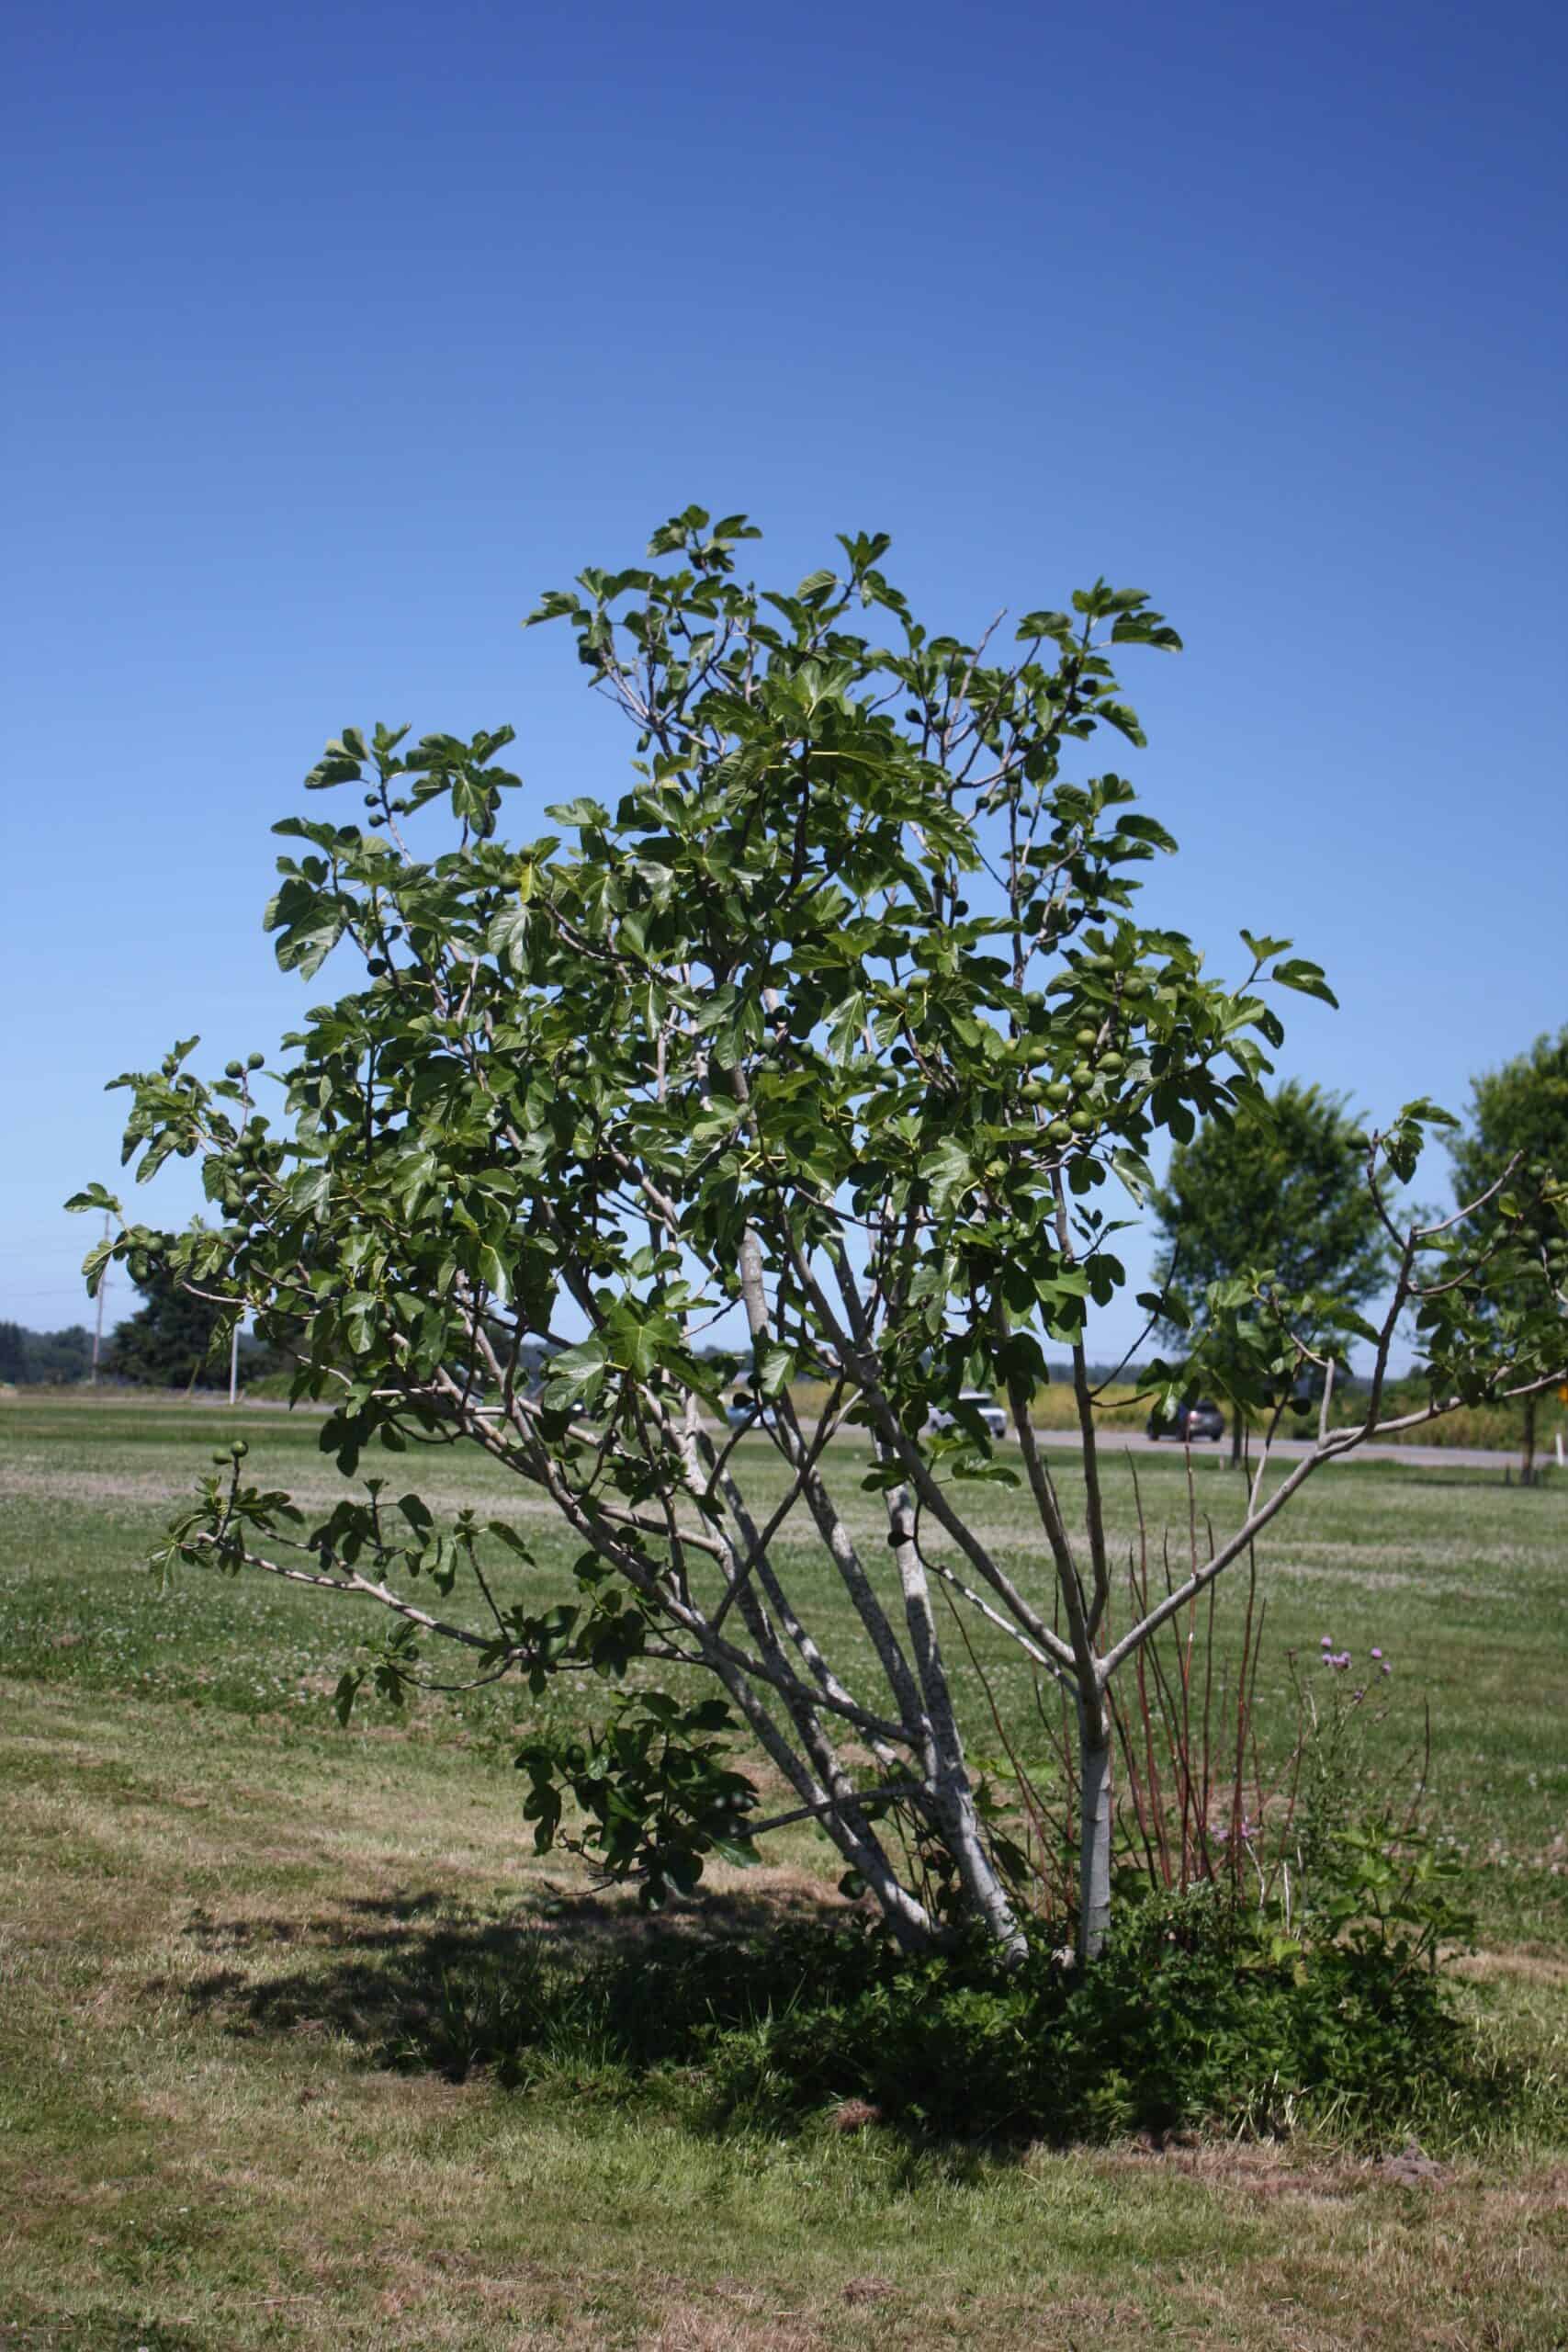
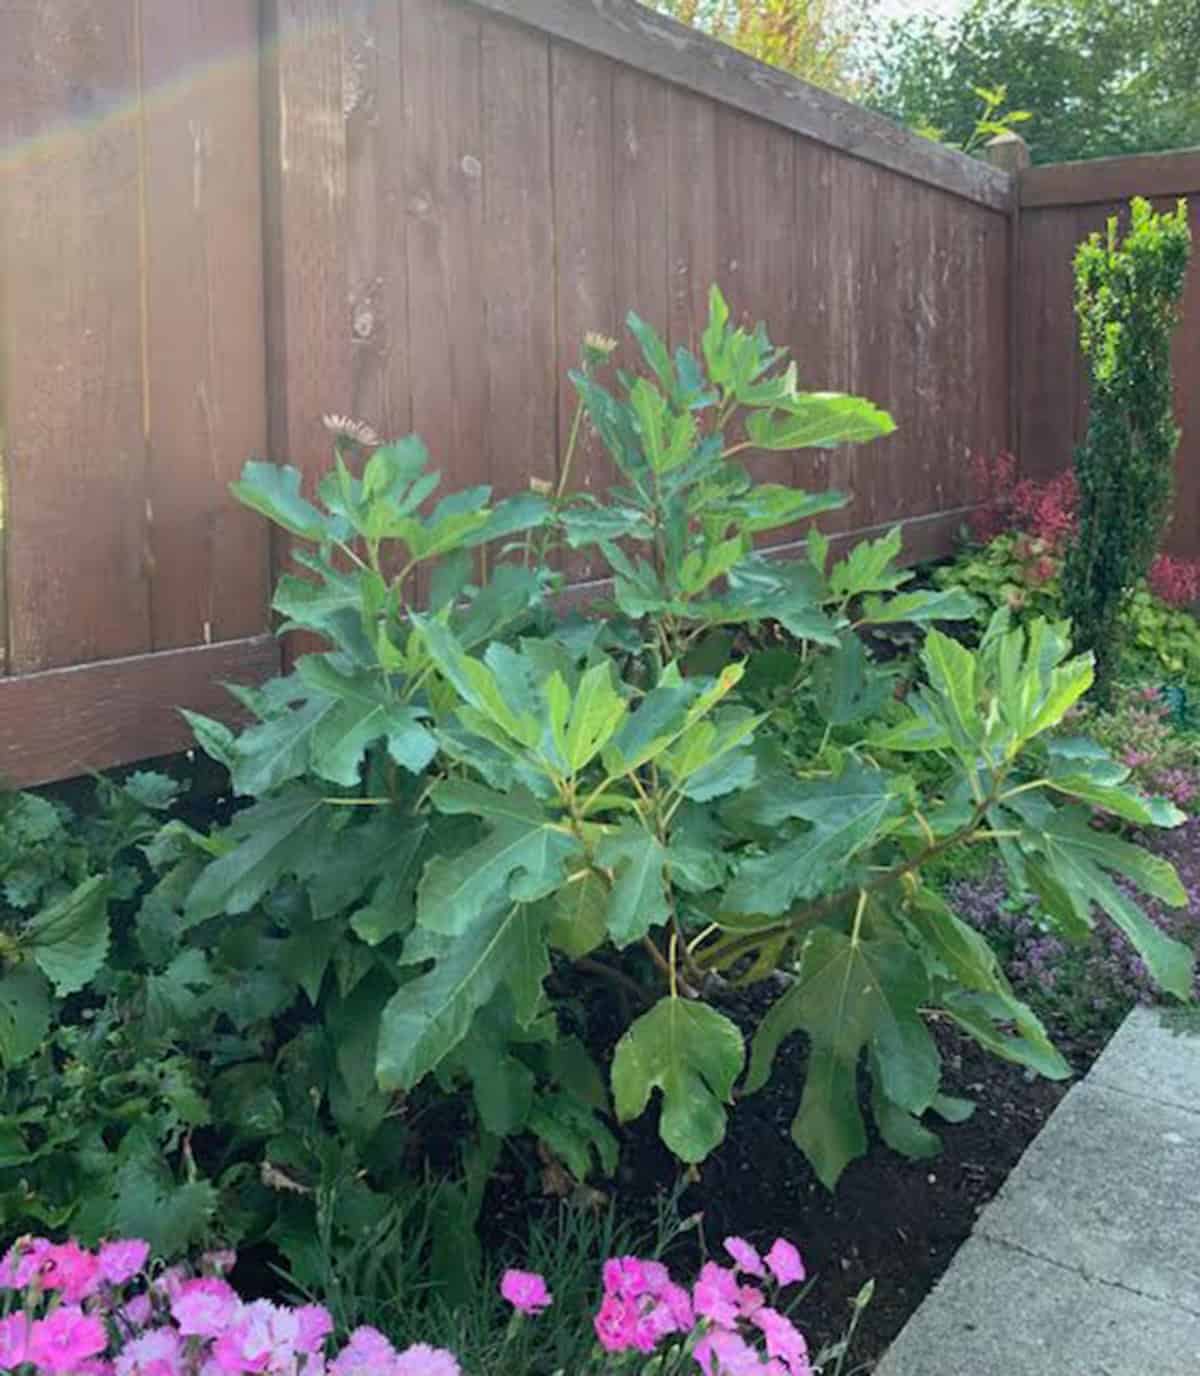
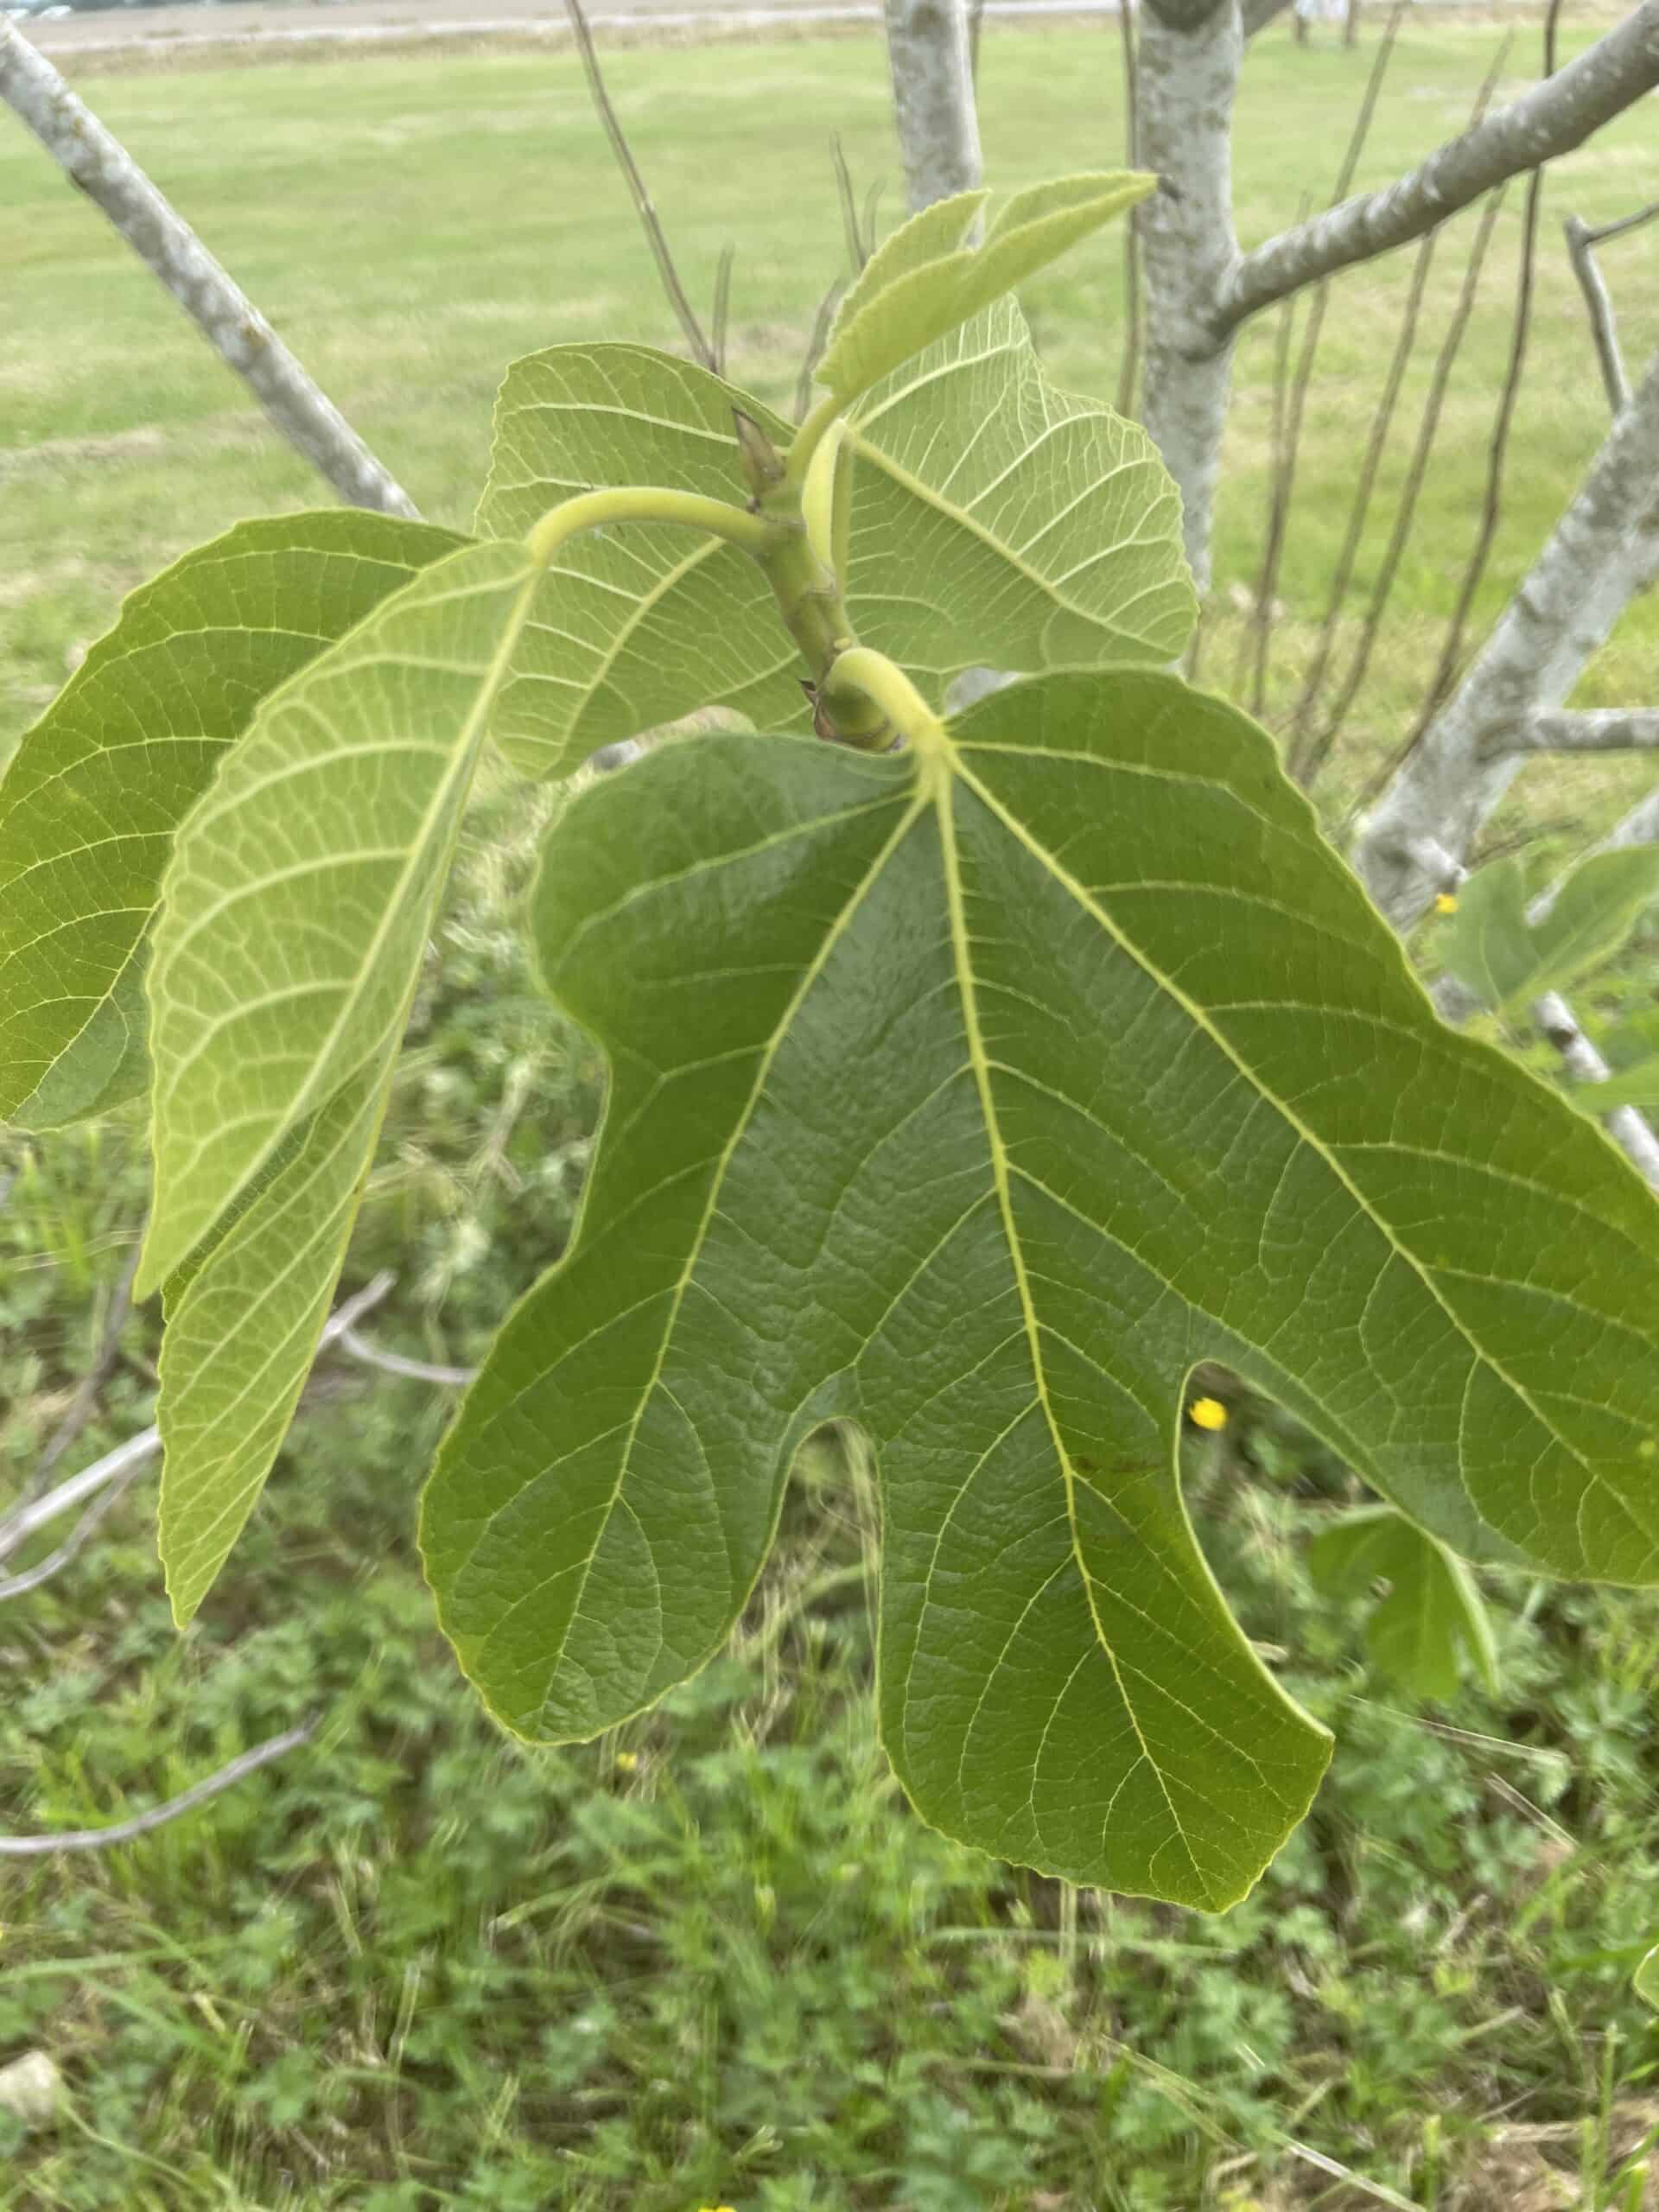
The fig specimen is the cultivar ‘Desert King,’ about 10 feet tall. The white bark on this multi-trunked, deciduous shrub is a pleasing contrast to its large, three-lobed, dark green leaves veined a lighter green. In July, the pear-shaped fruit is dark green (see photo), but the skin changes to greenish white when ripe.

One of the First Plants Cultivated
Each plant in our gardens has a story to tell. However, the fig tree story may be one of the most captivating. Judging from fossils found dating from 9400-9200 BC in the Jordan Valley, which today forms the border between Jordan and Israel, the fig is believed to be one of the first plants cultivated by humans, preceding the domestication of wheat, barley, and legumes by a thousand years. Figs were widespread in ancient Greece and described by Aristotle. They were also a common food source for the Romans. Rome’s first emperor, Augustus, was poisoned with figs from his garden that his wife smeared with poison. The well-known Biblical source in the Book of Genesis refers to Adam and Eve using fig leaves to cover their private parts in shame for eating the forbidden fruit. From the 15th century, the edible fig was grown in Northern Europe and the New World. In 1769, missionaries brought the first figs to California.
The Interesting Botany of the Fig
The edible fig fruit humans consume for its delectable sweetness is produced by Ficus carica, one of over 800 fig species in the genus Ficus. The three types of edible figs are distinguished from one another by their pollination process. The type most amenable to growing in our area is the “common fig.” The fruit skin, referred to by botanists as its “syconium,” is 1-2 inches long and green in color that ripens to purple or brown. Its interior is lined with unisexual flowers that produce seeds through a process called “parthenogenesis,” a natural form of asexual reproduction. The single-seeded fruits line the inside of the syconium, producing soft, reddish flesh containing crunchy seeds.

Most varieties of figs can produce two crops a year. The first crop is called “Breba,” which bears fruit on last year’s wood, and the second is called “Main,” which bears fruit on the current year’s wood. The Puget Sound region is usually too cool to ripen the Main crop.

Fig Research and Much, Much More
Figs are among the many varieties of fruit tested for research in the NW Fruit Garden. Recently, a new row of fig trees was planted with eight fig trees, and another row will be planted soon. The group is also planning to install a protective structure to demonstrate how to cover and protect figs in winter.

NW Fruit’s search for fig tree varieties that grow well in the Northwest extends worldwide. For instance, NW Fruit volunteer and co-chair Sam Benowitz traveled to the Brittany region in northwest France to observe and get a cutting of the fig variety ‘Madeleine de deux Saisons’ to grow and test at NW Fruit. Other new varieties include: ‘Little Ruby,’ ‘Olympian,’ ‘Brown Turkey,’ ‘Nordland,’ ‘Grantham’s Royal,’ and ‘Lattarula.’ Benowitz is a longtime volunteer at NW Fruit. Sam established and owned Raintree Nursery near Morton, Washington in 1972, building it into one of the country’s leading edible fruits nurseries, prior to selling it in 2018. His enthusiasm for his work is characteristic of the garden volunteers caring for and testing the many fruit varieties.

The Western Washington Fruit Research Foundation, now called NW Fruit, was created in 1991 to help support the tree fruit research at the Washington State University (WSU) Northwestern Washington Research & Extension Center (NWREC) Fruit Horticulture Program in Mount Vernon. It is dedicated to supporting research and educating the public about the special fruit-growing conditions of the Pacific Northwest region.

The six-acre NW Fruit Garden currently has over 200 fruit cultivars growing for research and demonstration to the public.

Growing Figs in the Ground
The climate of the Pacific Northwest differs from that of the Mediterranean region, where the species Ficus Caria is native. Although our climate is sometimes compared to a Mediterranean one because of its warm, dry summers, it falls short of being ideal for many varieties of figs. Hence, Sam Benowitz traveled to France’s Brittany area to find edible fig varieties from a climate more like ours and test them at NW Fruit.
Ficus carica 'Desert King' at the NW Fruit Garden.
Ficus carica ‘Desert King’ at the NW Fruit Garden. Photo: © Sonja Nelson

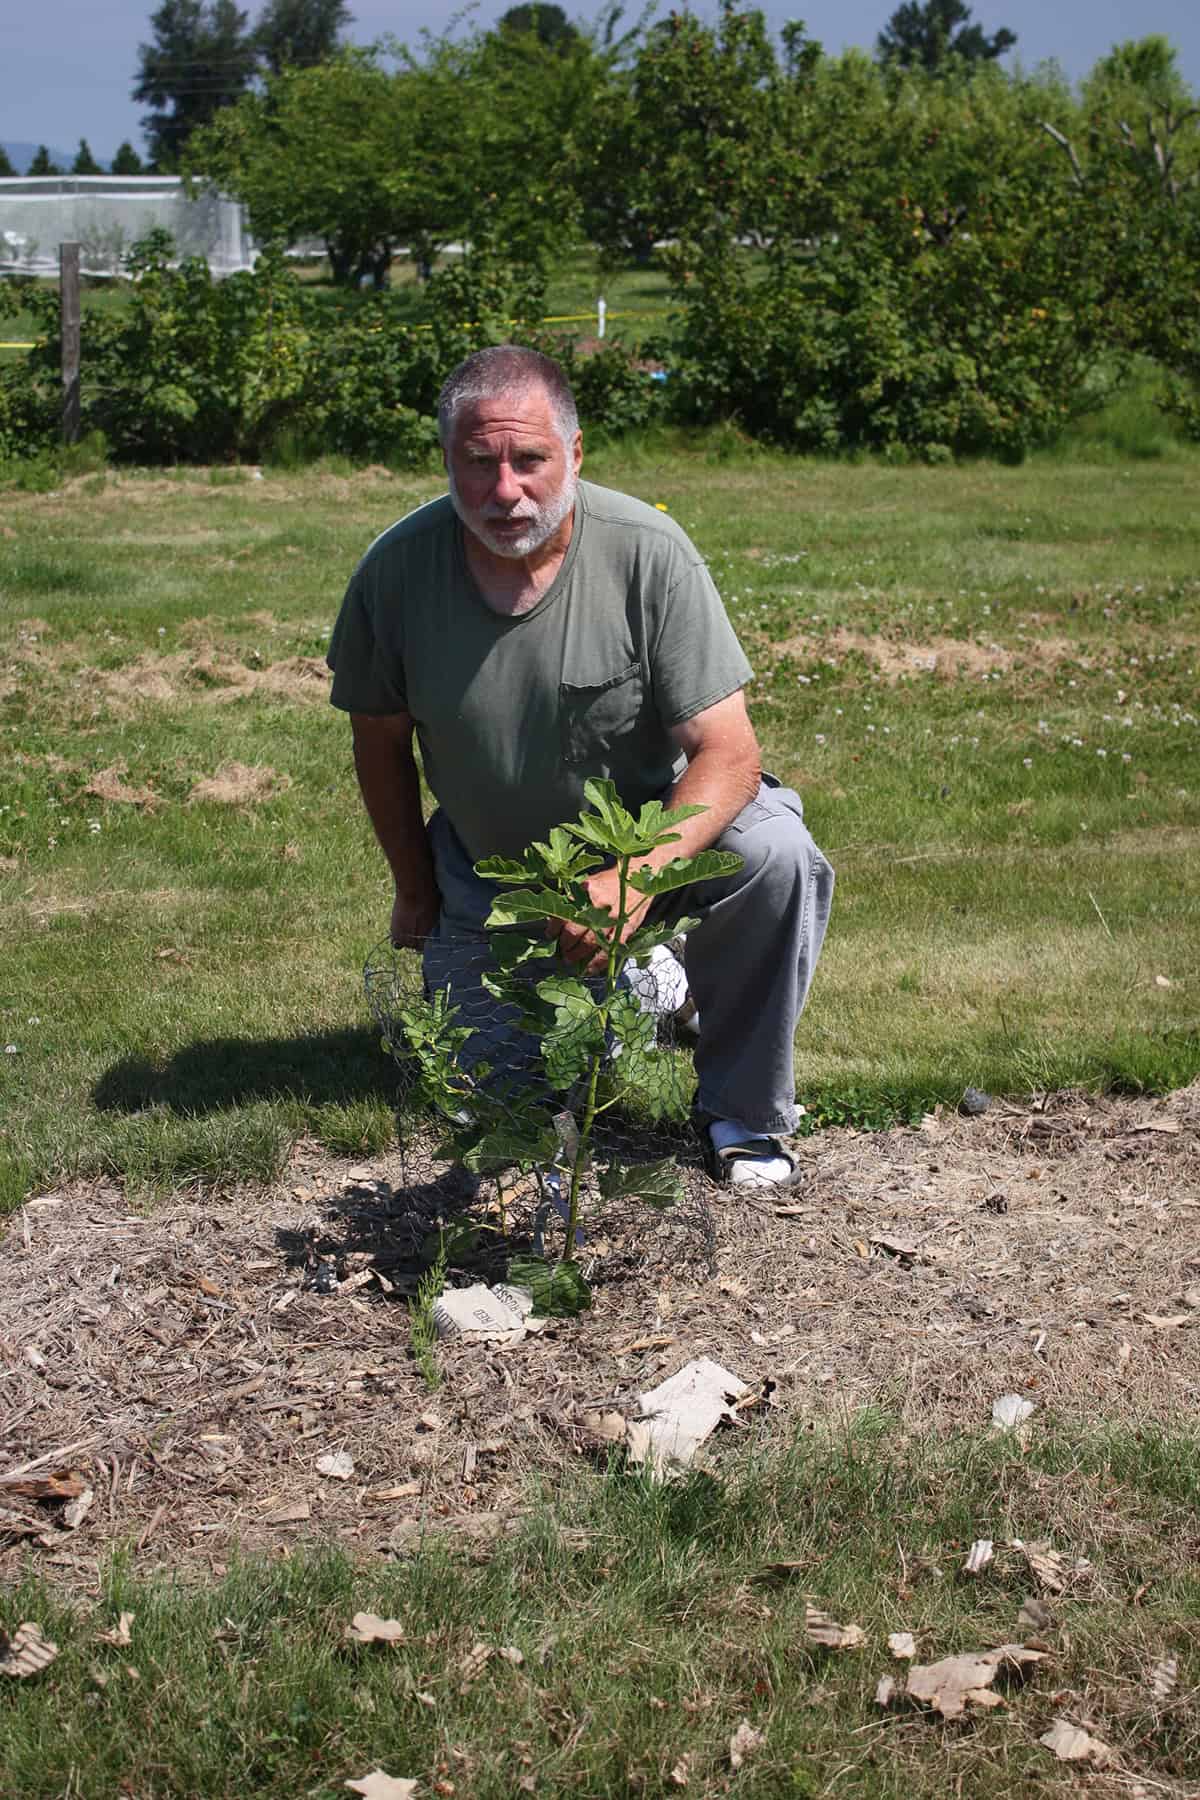
NW Fruit volunteer Sam Benowitz kneels next to a recently planted variety of Ficus carica. This fig is one in a row of eight fig trees planted at NW Fruit to test for adaptability to the Pacific Northwest climate. Photo: © Sonja Nelson

NW Fruit volunteer Sam Benowitz kneels next to a recently planted variety of Ficus carica. This fig is one in a row of eight fig trees planted at NW Fruit to test for adaptability to the Pacific Northwest climate. Photo: © Sonja Nelson

The edible fig, Ficus carica, and its varieties thrive in rich soil and a warm microclimate. The high temperatures sometimes experienced in our area should not be a problem for figs. However, in temperatures below 10 degrees F, plants may need cover. From his experience at NW Fruit, Benowitz believes the most significant shortcoming of our climate for figs is the lack of summer heat during the growing season. The program experiments on-site with techniques, such as walls that capture heat. Regular watering of the fig trees in the garden is necessary, especially as they start. An irrigation system is set to water the figs once a week throughout the summer.

The soil for in-ground figs should be slightly acidic (6.0 – 6.5). Allow spread for fibrous, shallow root systems. Do not fertilize at planting time, but mulch with compost. Training a young fig tree involves spacing the branches and forcing them to one main trunk. Figs can also be trained to an open center or vase shape, allowing good light penetration into the canopy. In training a newly planted tree, cut it to 2 to 3 feet in height, forcing lateral buds to produce new, low branches. In the following winter, select three to four main branches, cut them back to 30-36 inches, and remove the rest. Annual pruning, which should be done in the dormant season, is usually limited to cutting back the previous year’s growth. Thinning may be necessary if the canopy gets too dense. The leaf and root sap of fig trees may cause skin irritation in humans.

Growing Figs in Containers
In the Northwest, fig trees can be planted in containers in any season. Place the pot where you want it to go, preferably in full sun, and add a few inches of well-draining potting mix to the bottom. Place the tree at the same planting depth in which it was growing in the nursery pot. Then, backfill the remainder of the pot with potting mix. The fig’s root ball should be level with the soil line, but leave two inches of space between the soil and the rim of the pot to make watering easier. Add a thin layer of organic mulch around the base of the water line. Water when the top two inches of soil feels dry to the touch. Fertilize in the spring and fall with a balanced, organic fertilizer. Pruning, if necessary, should be done in winter. Ripe figs should be slightly soft and sweet smelling and begin drooping on their stems. Figs with hard necks that remain perpendicular to their stems are not yet ripe and should not be picked.
The dwarf fig 'Little Miss Figgy' was developed for use in a container. Planted in June, this specimen has thrived in a container on the patio of a home in Mount Vernon. Photo: © Sonja Nelson
The dwarf fig ‘Little Miss Figgy’ was developed for use in a container. Planted in June, this specimen has thrived in a container on the patio of a home in Mount Vernon. Photo: © Sonja Nelson

Learn more about Figs and the extensive collection of fruit cultivars at the NW Fruit Open House
On Saturday, October 12 NW Fruit will hold its Sample the Apple and Pear Harvest Day. It is open to members, but anyone can attend by paying a $25 annual membership fee that day. Dr. Cameron Peace of WSU’s School of Horticulture (Pulman) will speak about heritage apple varieties and using DNA to identify varieties. There will be a tour of the many pioneer varieties in the garden and a chance to taste dozens of delicious cultivars thriving in the garden. Bags or boxes of ladder-picked fruit will be available for members to take home in addition to other fruit. Go to the website https://nwfruit.org/apple-pear/ to read more about this event.

NW Fruit is a member-volunteer organization. It includes people who have spent a lifetime growing fruit and people who are just starting on their own journey of learning how to grow fruit successfully. For more information on volunteering, see: https://nwfruit.org

The foliage of  'Desert King' fig in the NW Fruit Garden in July. Photo: © Sonja Nelson
The foliage of ‘Desert King’ fig in the NW Fruit Garden in July. Photo: © Sonja Nelson
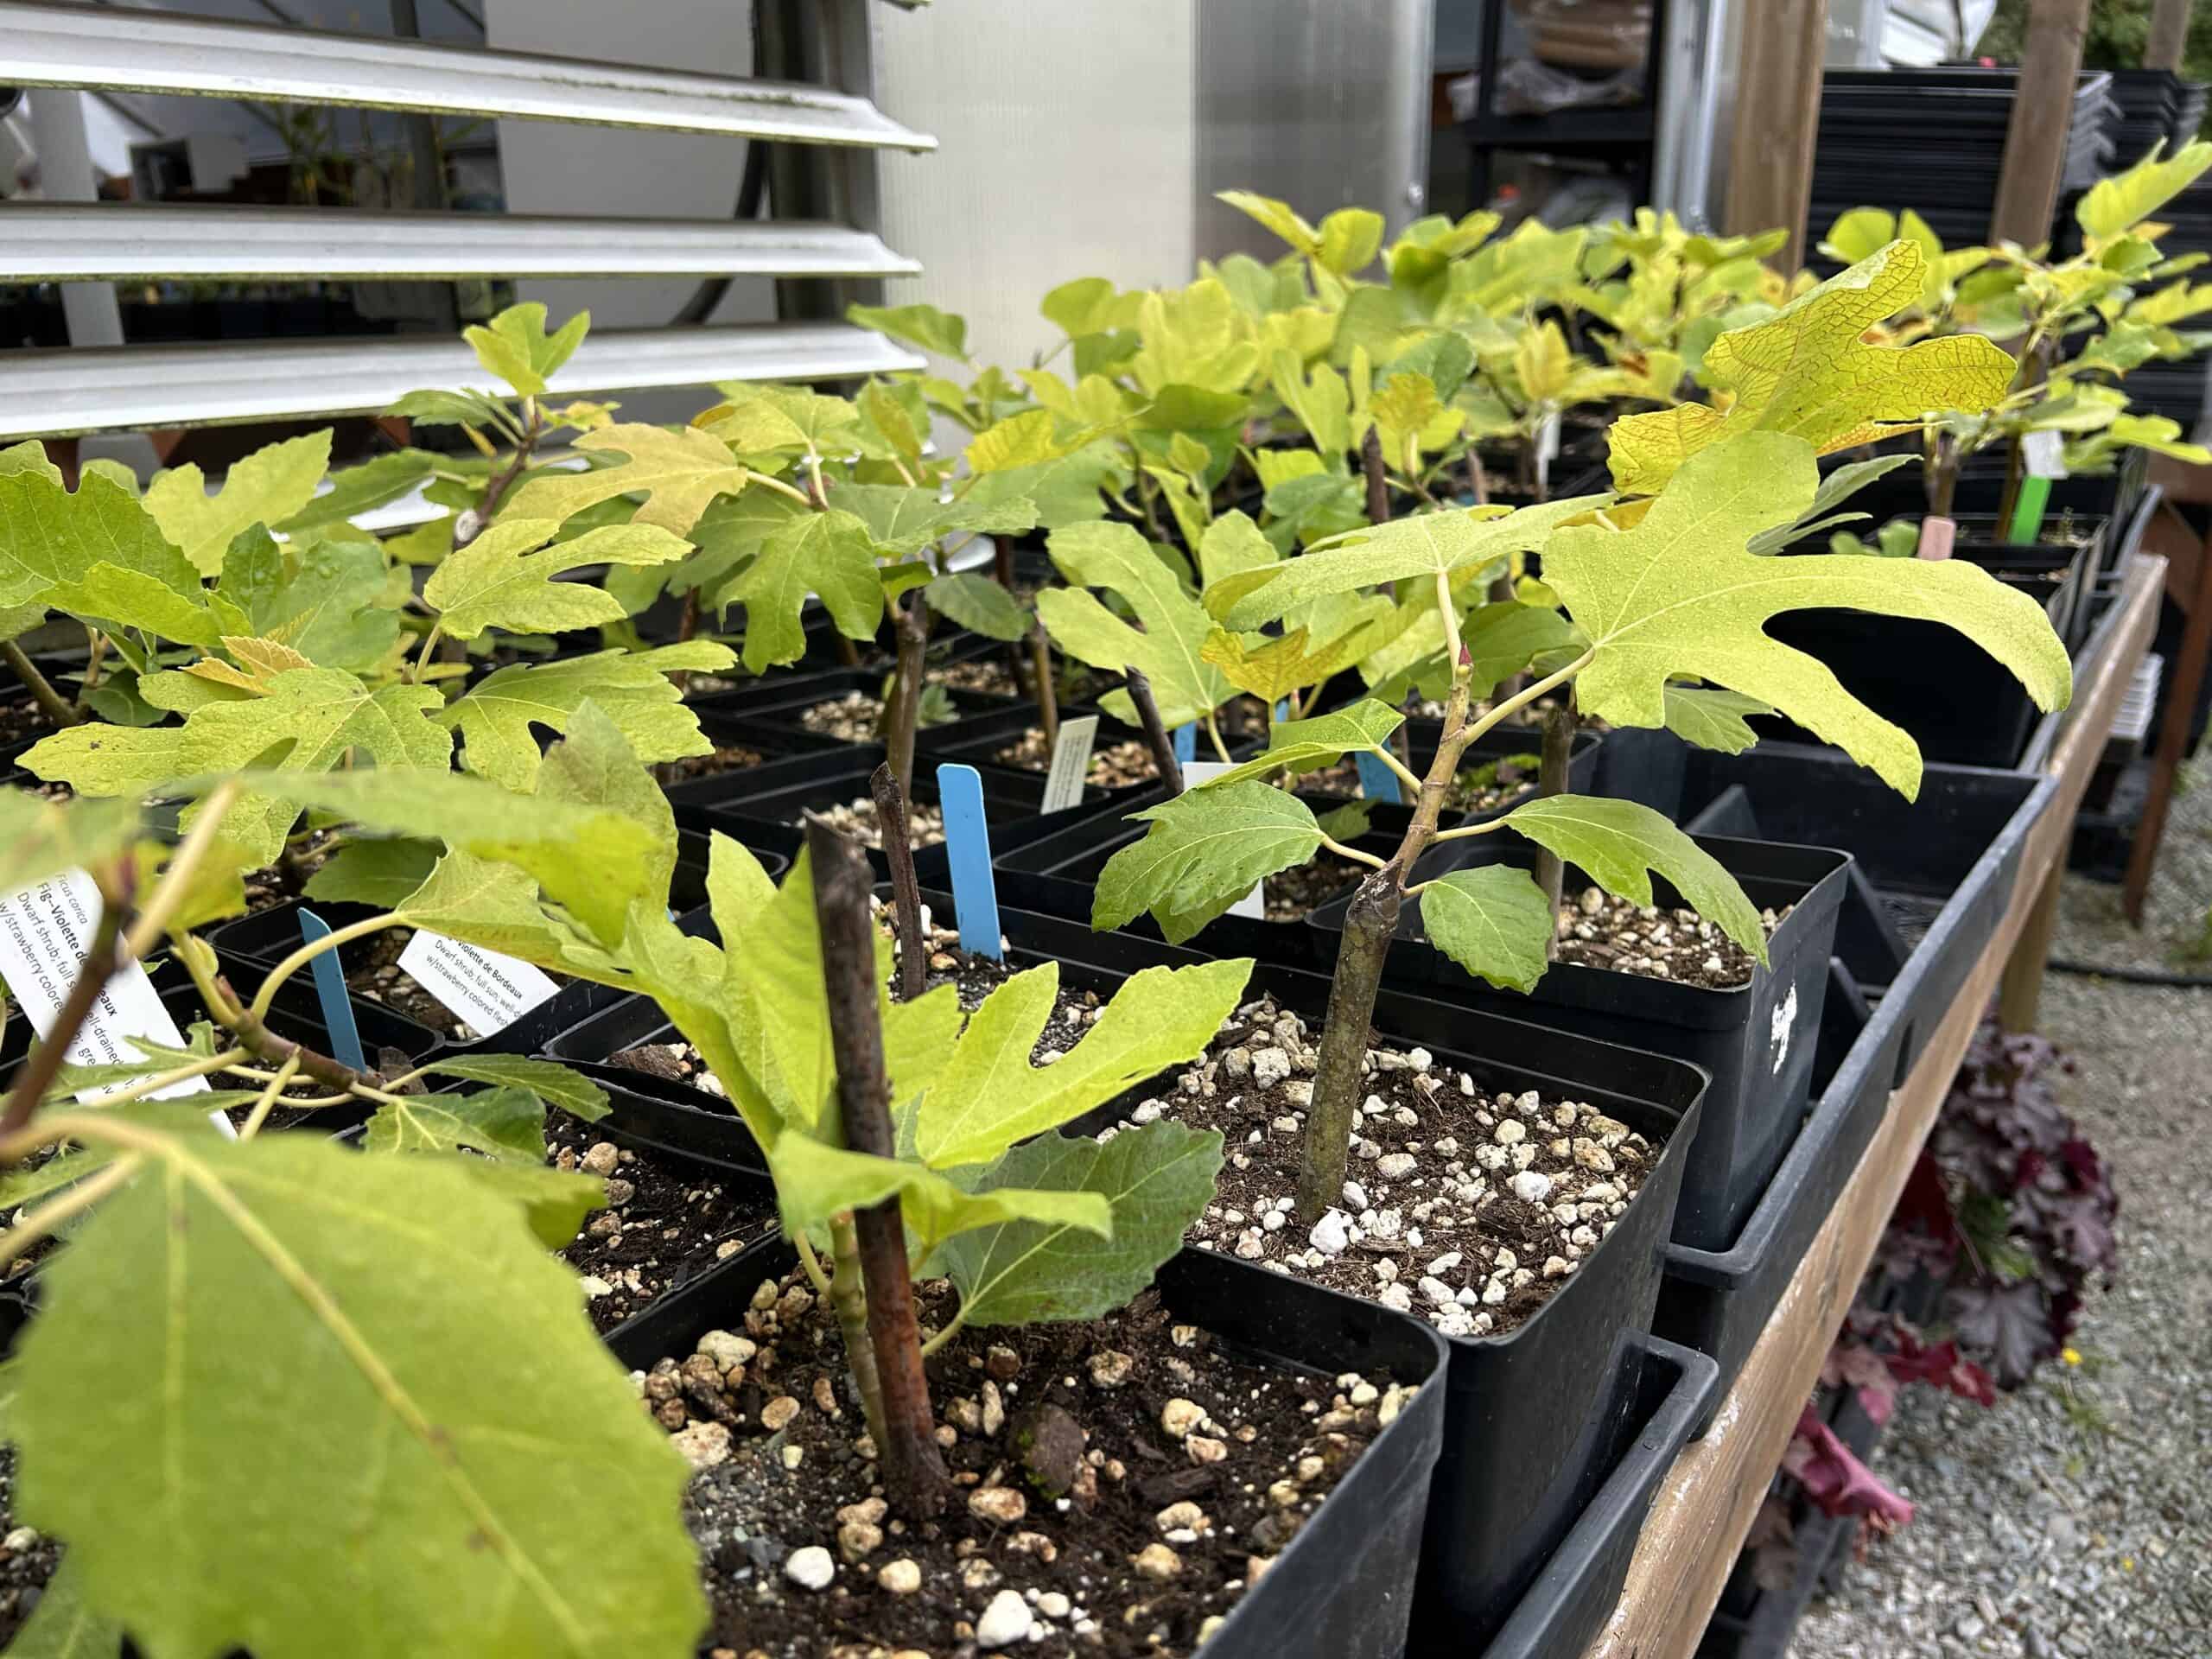
Get started growing figs. Several varieties will be on sale at the annual Master Gardener Plant Fair May 10, 2025 Photo: © Skagit County Master Gardener Foundation
REFERENCES AND RESOURCES:

Benowitz, Sam, NW Fruit Co-Chair. Personal communication, 7/18/ 2024.

Landers, L. How to Grow a Fig Tree in a Pot. Better Homes and Gardens, 5-10-23
Retrieved from: https://www.bhg.com/how-to-grow-a-fig-tree-in-a-pot-7487022

Fruit Garden Tour – Fig

https://nwfruit.org/wp-content/uploads/2016/02/

https://en.wikipedia.org/wiki/Fig

Morgan, P. (2023) Figs in the Home Garden. Pennsylvania State University Extension. Retrieved from: https://extension.psu.edu/figs-in-the-home-garden

Biggs, S. (2021) How to Grow Figs Even in Colder Climates. Fine Gardening. Tauten Press, Newton, CT. Retrieved from: https://www.finegardening.com/project-guides/fruits-and-vegetables/how-to-grow-figs-even-in-colder-climates

Figs and Kiwi Fruit. Snohomish County WSU Extension Community Fact Sheet #46 Retrieved from: s3.wp.wsu.edu>2053/2015/09>46FigsKiwiFruit


Author Sonja Nelson

ABOUT THE AUTHOR:
Sonja Nelson is a Skagit County WSU Extension Master Gardener Class of 2009.

There is still time
to apply to become
a Master Gardener in 2025

Questions about becoming a Master Gardener may be directed to: Skagit County WSU Extension Office, 11768 Westar Lane, Suite A, Burlington, WA 98233; by phone: 360-428-4270; or via the website: https://extension.wsu.edu/skagit/mg/


A Second Act for Your Square 1-Gallon Pots at the Discovery Garden!

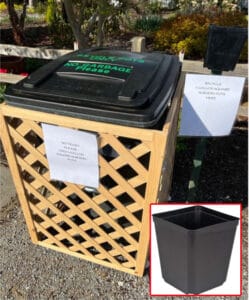
Bring your leftover square 1-gallon pots to the Discovery Garden (16650 State Route 536, Mount Vernon). The bin for recycling the square 1-gal pots is located in the parking lot, just north (to the right) of the main entrance.
We only need square 1-gallon pots like the ones pictured below (bottom right). The recycling bin will be available now through fall. Simply put your pots into the bin, and we take care of the rest!


pot recycling


AMGPost_header5
090224_Header2

Useful Tips for Harvesting and Preserving Herbs in the Pacific Northwest

Preserving herbs can be a bit of trial and error, but the process is worth the fresh flavor and satisfaction.

              Subscribe to the Blog >

By: Laura Kuhn, Skagit County WSU Extension Master Gardener

Because of their useful nature, herbs are a common addition to home gardens. The use of the term herb is often used interchangeably with spice. However, the terms herbs and spices technically refer to two different things. “Herbs” are defined as the leafy parts of plants, such as oregano, rosemary, thyme, sage, basil, and others. “Spices” typically involve the use of other plant parts such as roots, fruits, flowers, seeds, or bark. Spices include cinnamon, ginger, lavender, coriander, cumin, and many others. Both herbs and spices are used for their savory, aromatic, or medicinal qualities. This article will focus primarily on herb preservation, although many methods mentioned here can also apply to spices.

Gardeners who grow vegetables may also grow herbs for pairing in recipes later. However, some of the best pairings cannot be harvested at the same time. For example, basil can look tired by the time the tomatoes are ready to be harvested. And it is difficult to find an easy, cost-effective way to have bunches of fresh cilantro available at the same time tomatoes and peppers ripen for salsa. Preserving herbs can help to bridge these gaps.

In 2002, when faced with a huge abundance of herbs that could not all be used fresh, I bought one of the popular “As Seen On TV” food dehydrators and dried herbs to make gifts for the following holiday season. The color and flavor of home-dried herbs are superior to store-bought herbs. Since then, I have also started to grow herbs and spices to make tea.

An often-asked question is: What is the best way to preserve herbs? The answer depends on how you plan to use them. The goal is to capture the essential oils in the trichomes (fine outgrowth like hairs) on the surface or epidermal layer of the leaves. These oils have the flavor and aroma we want.

What gardeners choose to grow and preserve is most influenced by the amount of time, budget, and available space. The good news is that with a small investment in time, space, and equipment, home gardeners can achieve excellent results that rival the expensive options available.

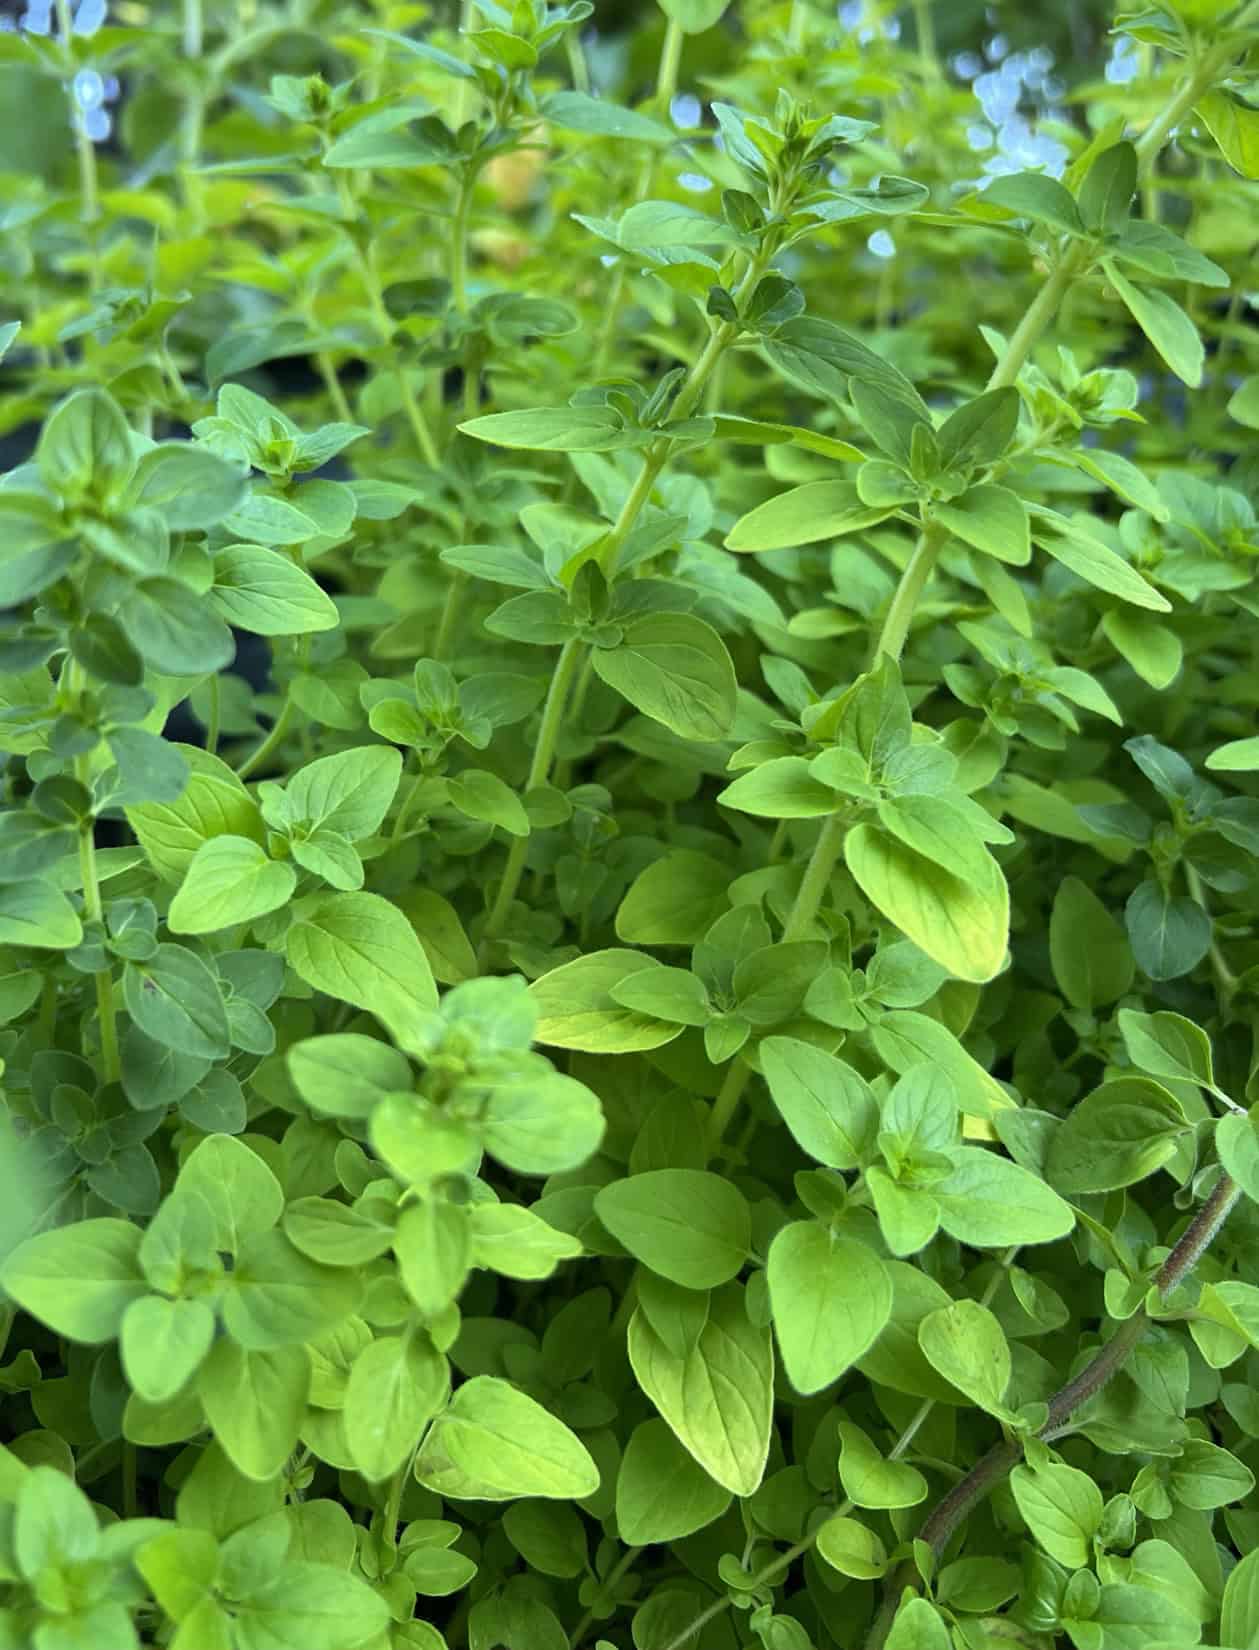
Oregano ripe for harvest.  © Photographer: Laura Kuhn
Oregano ripe for harvest. © Photographer: Laura Kuhn
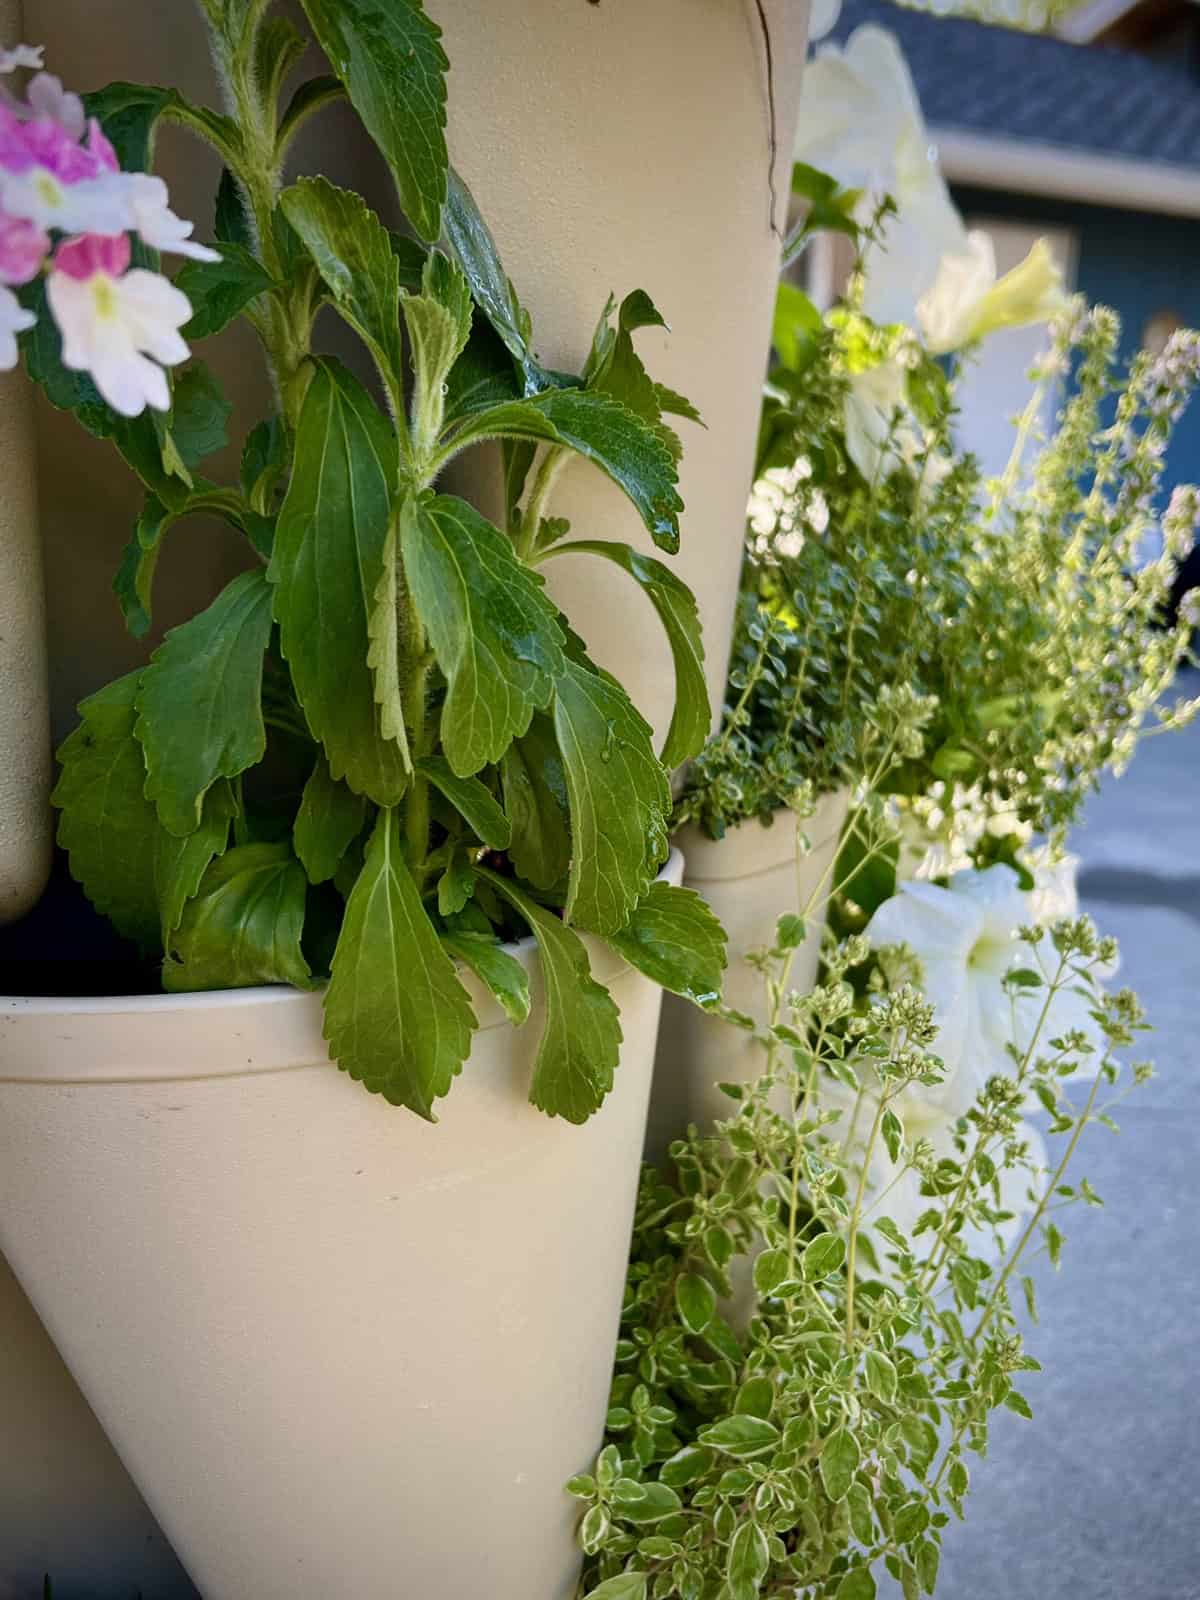
Stevia and ornamental oregano in a vertical container with annuals.  © Photographer: Laura Kuhn
Stevia and ornamental oregano in a vertical container with annuals. © Photographer: Laura Kuhn
Growing Herbs-
Herbs can grow in most garden conditions and be planted directly in the ground, in raised beds, or in containers. Vertical garden systems are a terrific way to get a lot of variety in a small space. Gardeners who are just starting herb growing should start slowly and do their research. Purchasing herb starts at a local garden center is an easy and inexpensive way to begin. However, a far greater selection of herbs are available as seeds. Once gardeners have experience, they can grow their favorites from seed and make space for annual and perennial varieties.
Harvesting Herbs-
The harvesting process is as simple as removing the right part of the plant for the intended use. For most culinary uses, the target is tender fresh leaves (i.e., oregano, thyme, and basil). In some cases, the goal is to preserve flowers for making tea (i.e., chamomile, calendula, or anise hyssop) or to harvest the plant’s mature seeds (i.e., dill or coriander). Yet other plants are used for their roots (i.e., ginger or horseradish). If growing for flowers, it is important to pick the flowers often to encourage the production of more blooms.

For leafy herbs such as basil and oregano, the best flavor comes from young leaves on stems cut before the plant goes into flower production. However, the growing season can be extended by cutting back flowering stem tops to encourage more leaf growth. When doing so, leave four to six leaves on the plant stems for re-growth. If growing for seed, keep the flowers on the plants and wait until the seeds are fully mature. Root harvests take a longer time commitment and can require waiting for several growing seasons to achieve a decent harvest.

Organization is important during the harvesting process. It is best to harvest all of one specific plant at a time, making the cleaning and preservation process easier by avoiding the time-consuming task of separating during the cleaning process. For harvesting, no special tools are needed. Most herbs are tender enough to harvest by hand pinching or using scissors. Small clippers with short-tipped blades are best for harvesting small leaves or stems. Digging roots is a careful process. It is important to provide wide enough margins to avoid shovel damage to the roots.

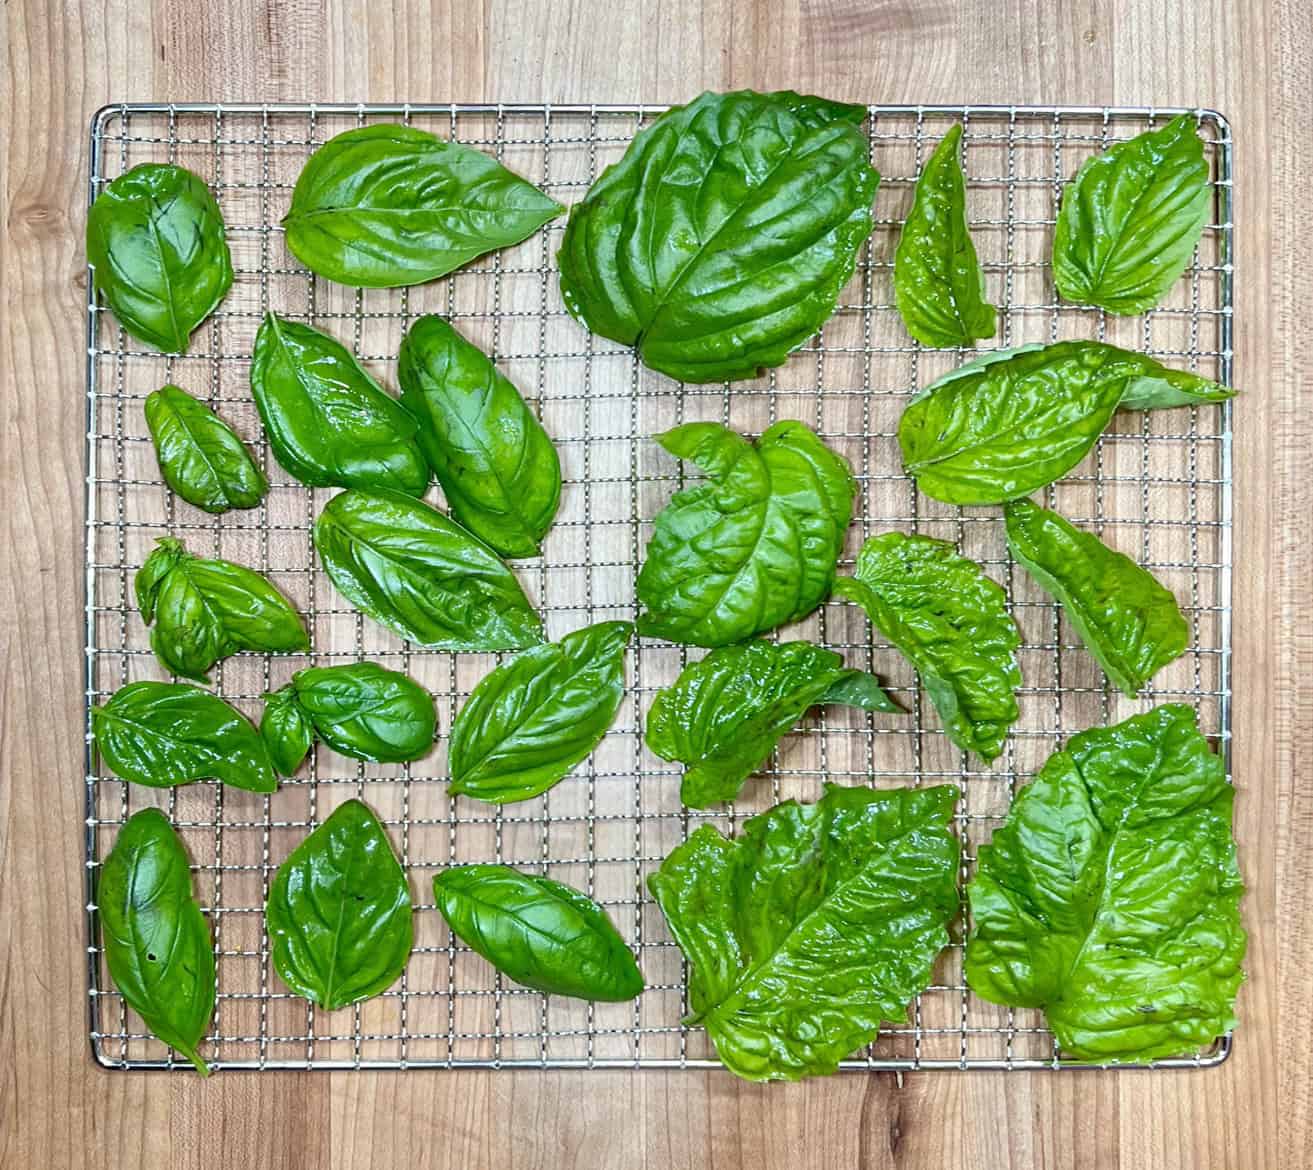
Mammolo and Lettuce Leaf basils ready for drying in the dehydrator. © Photographer: Laura Kuhn
Preserving Herbs –
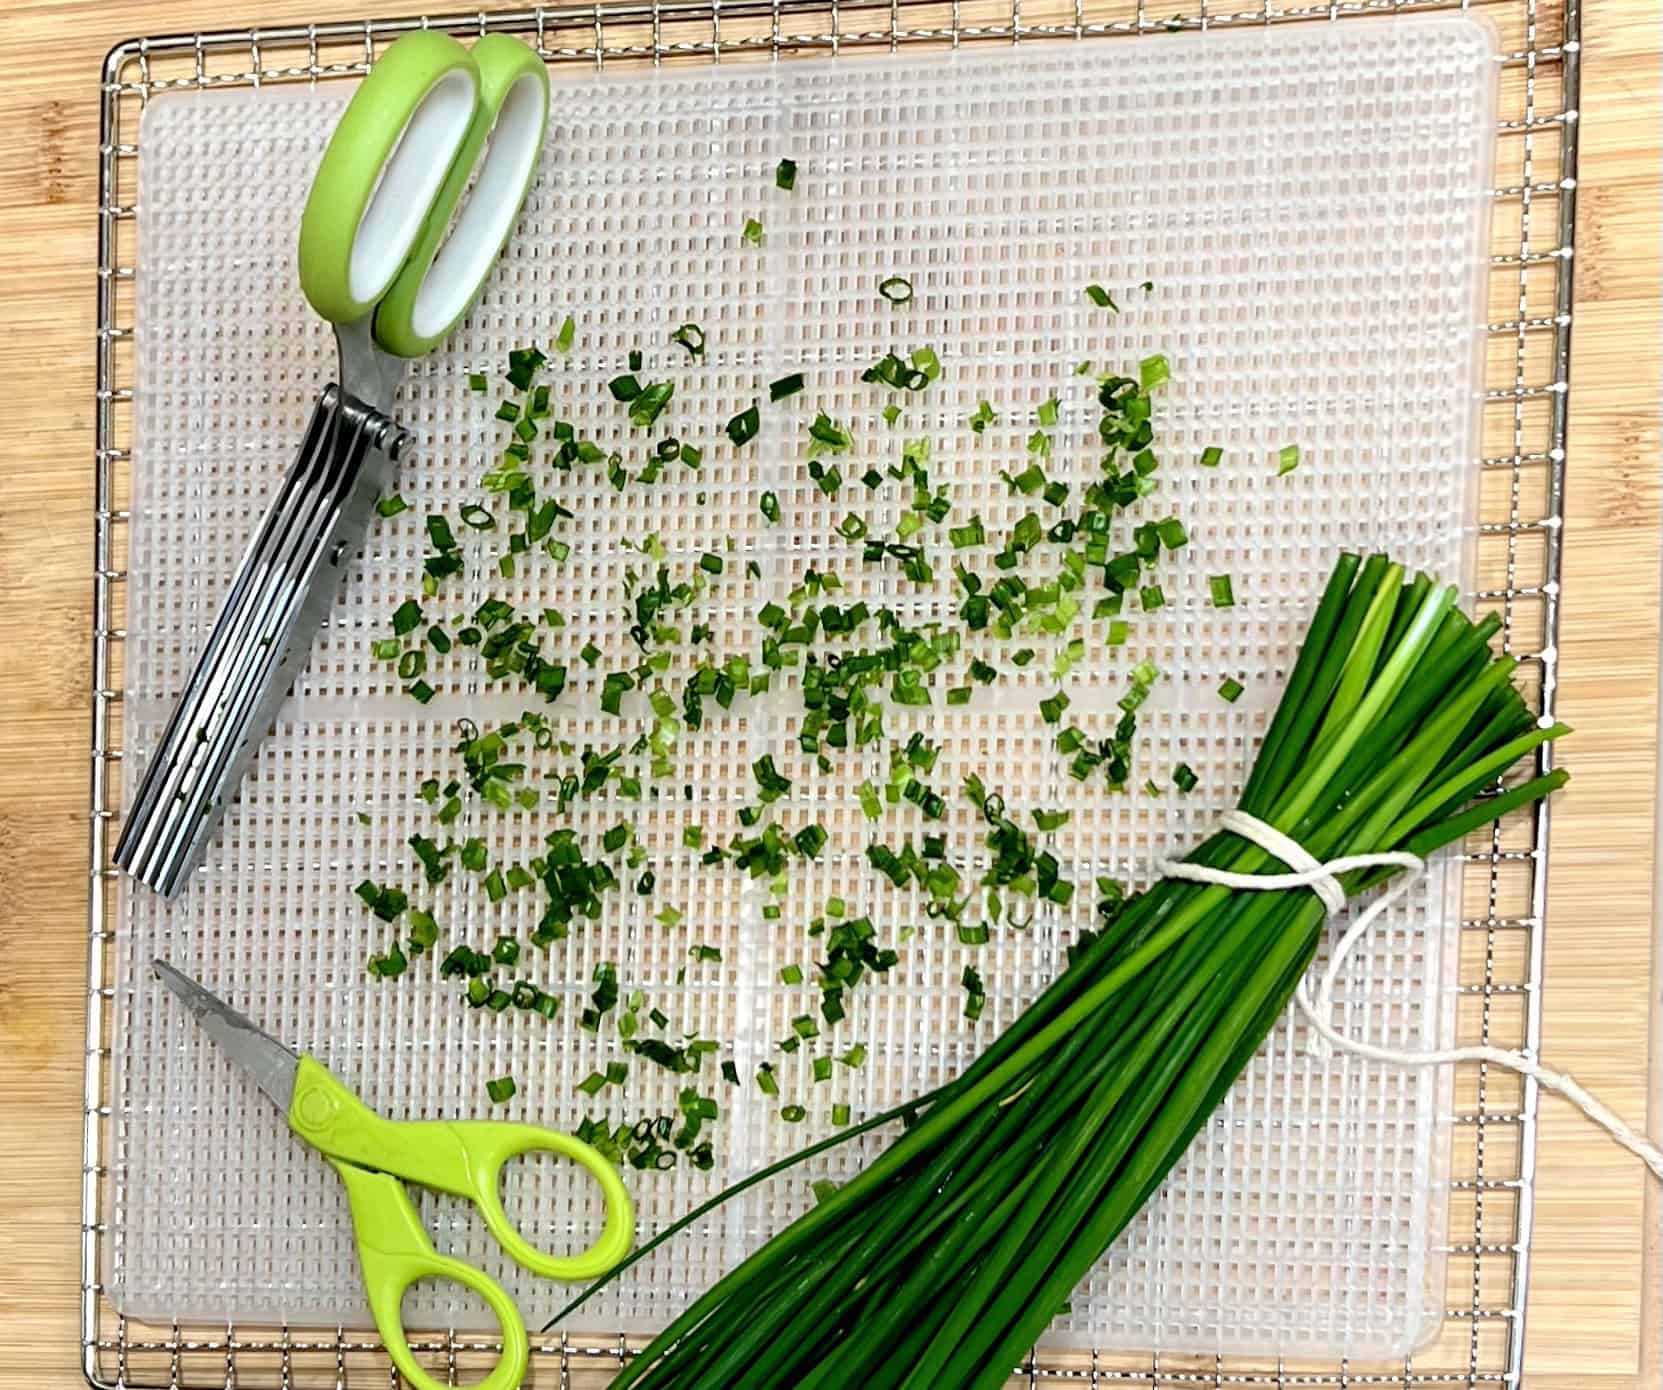
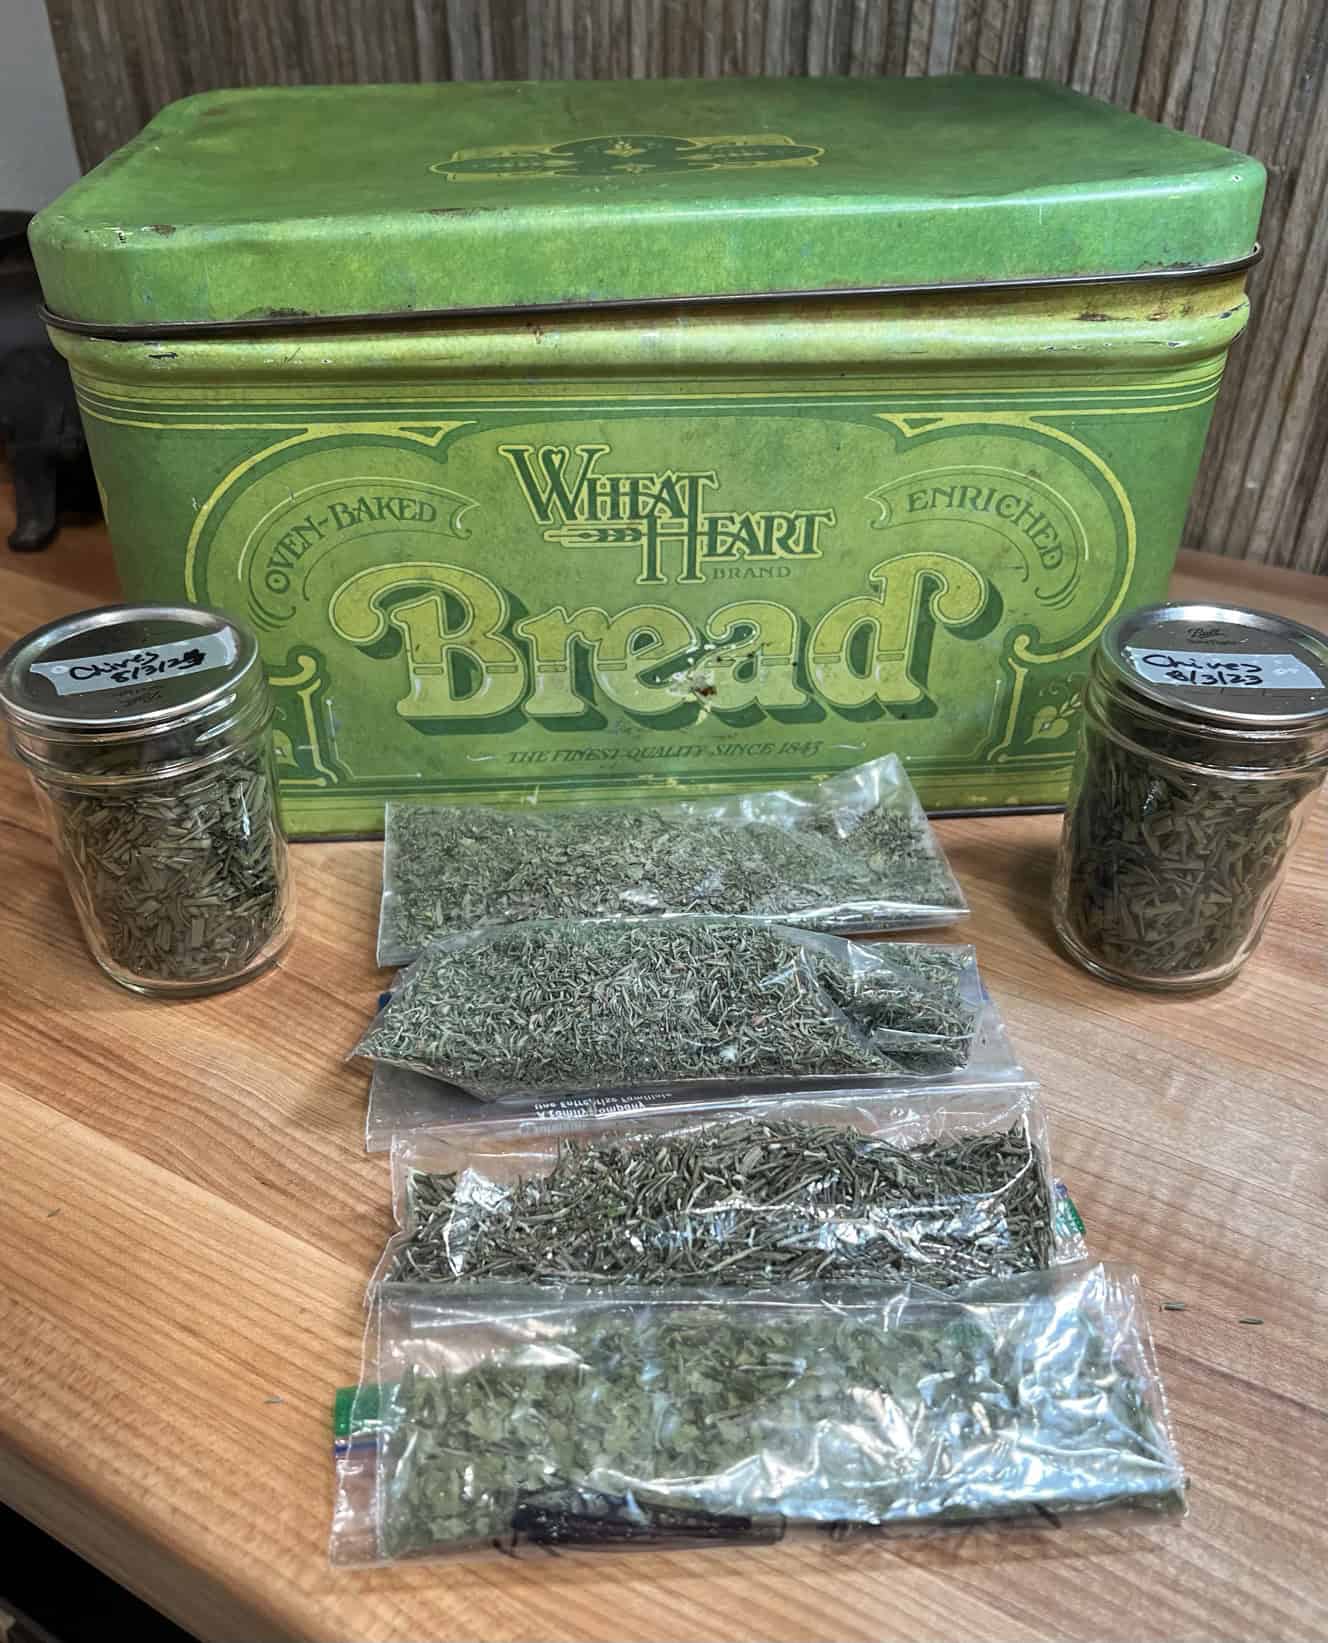
After harvesting, the herbs require cleaning before preserving. Most herbs can be immersed in cool water to clean off the leaves (stem and all). Use paper towels, a drying rack on a work surface, or a salad spinner to get as much moisture off as possible. Avoid crushing the leaves unless the herbs are chopped before preserving them. Chives can be washed and cut into small pieces with scissors by holding a bunch of stems and cutting them as a group before preserving them.

The preservation method should strive to achieve the best quality for the intended use. Scientific research has been conducted on various methods of preservation. The winning method for drying herbs is freeze drying because it preserves essential oils, aroma, and color best. However, the cost of such a system for most home gardeners is not reasonable. Therefore, the most common methods involve dehydration (using heat) or drying (using air), which results in a shelf-stable product that can be used year-round, or by freezing.

Bunching and cutting chives to cut and freeze or dry. © Photographer: Laura Kuhn
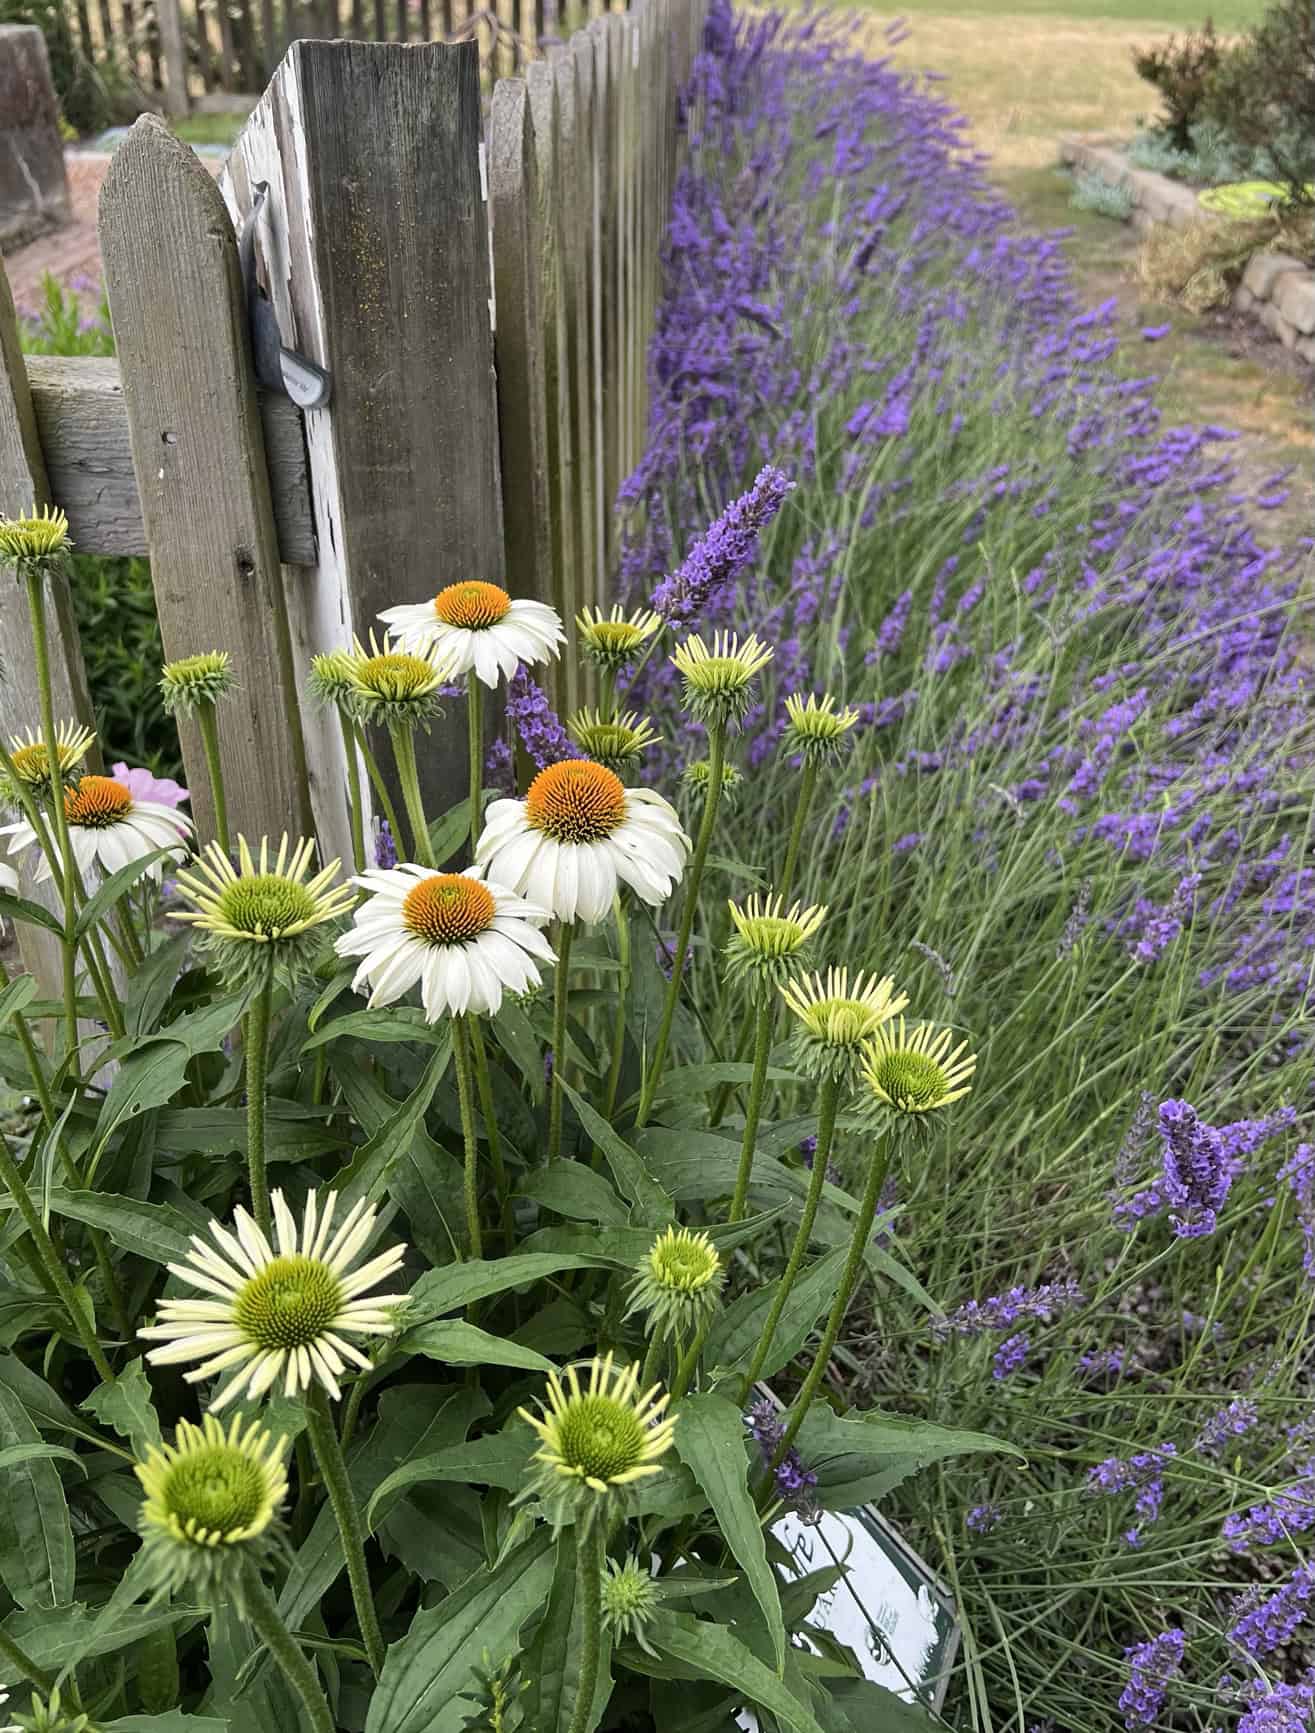
Echinacea (foreground) and lavender at a local nursery. © Photographer: Laura Kuhn
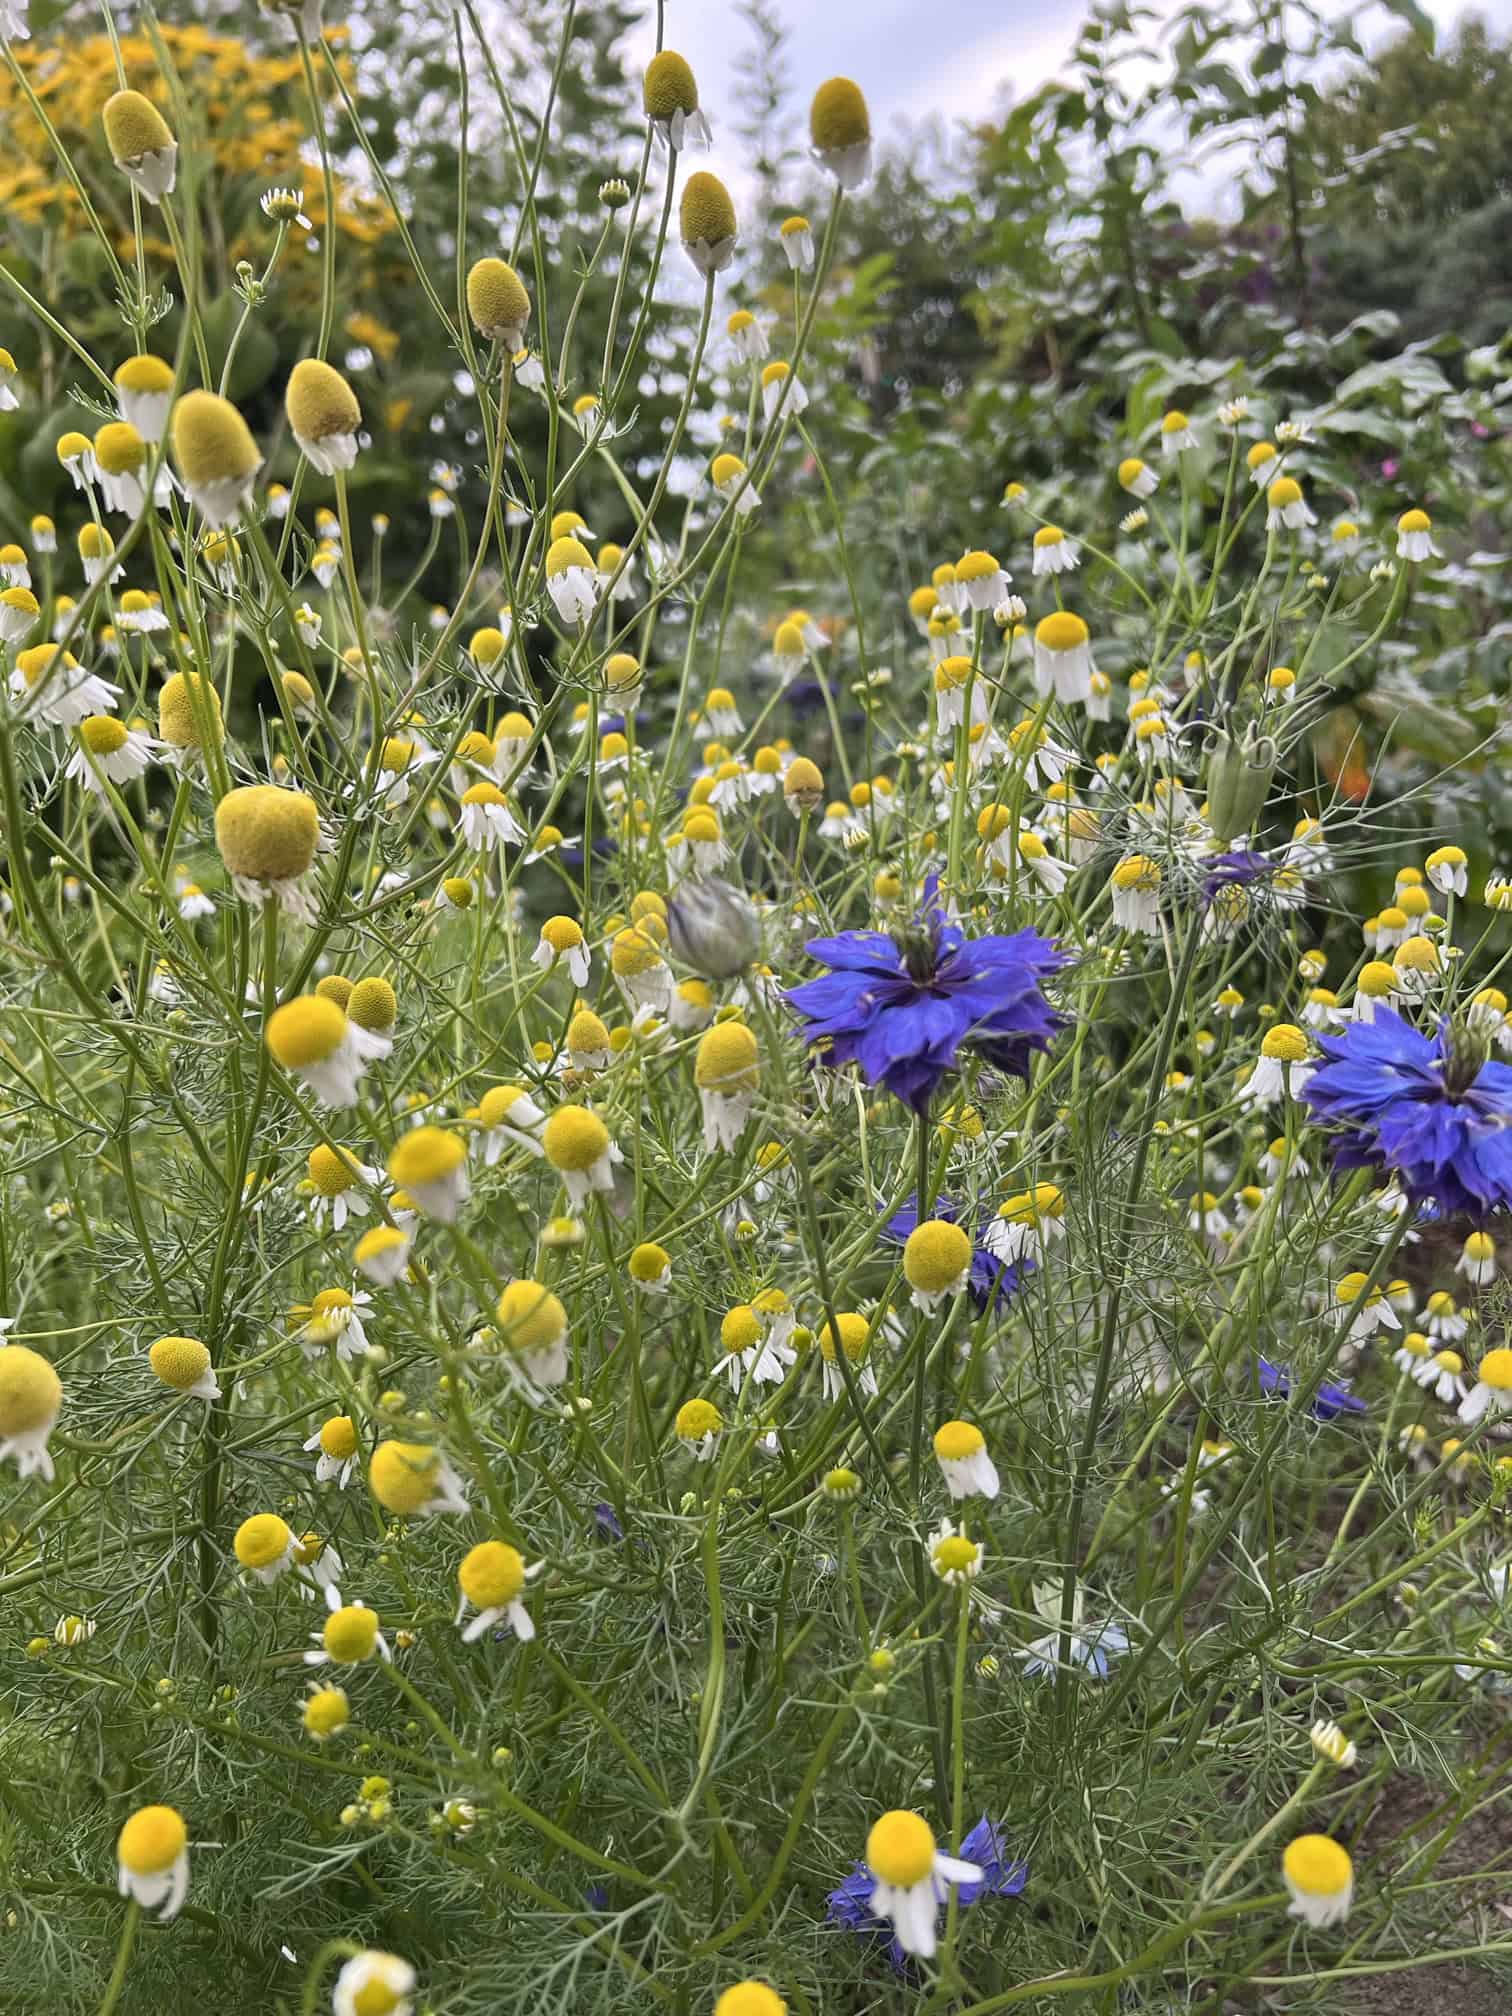
Chamomile ready to harvest in the Herb Garden at the Discovery Garden. © Photographer: Laura Kuhn
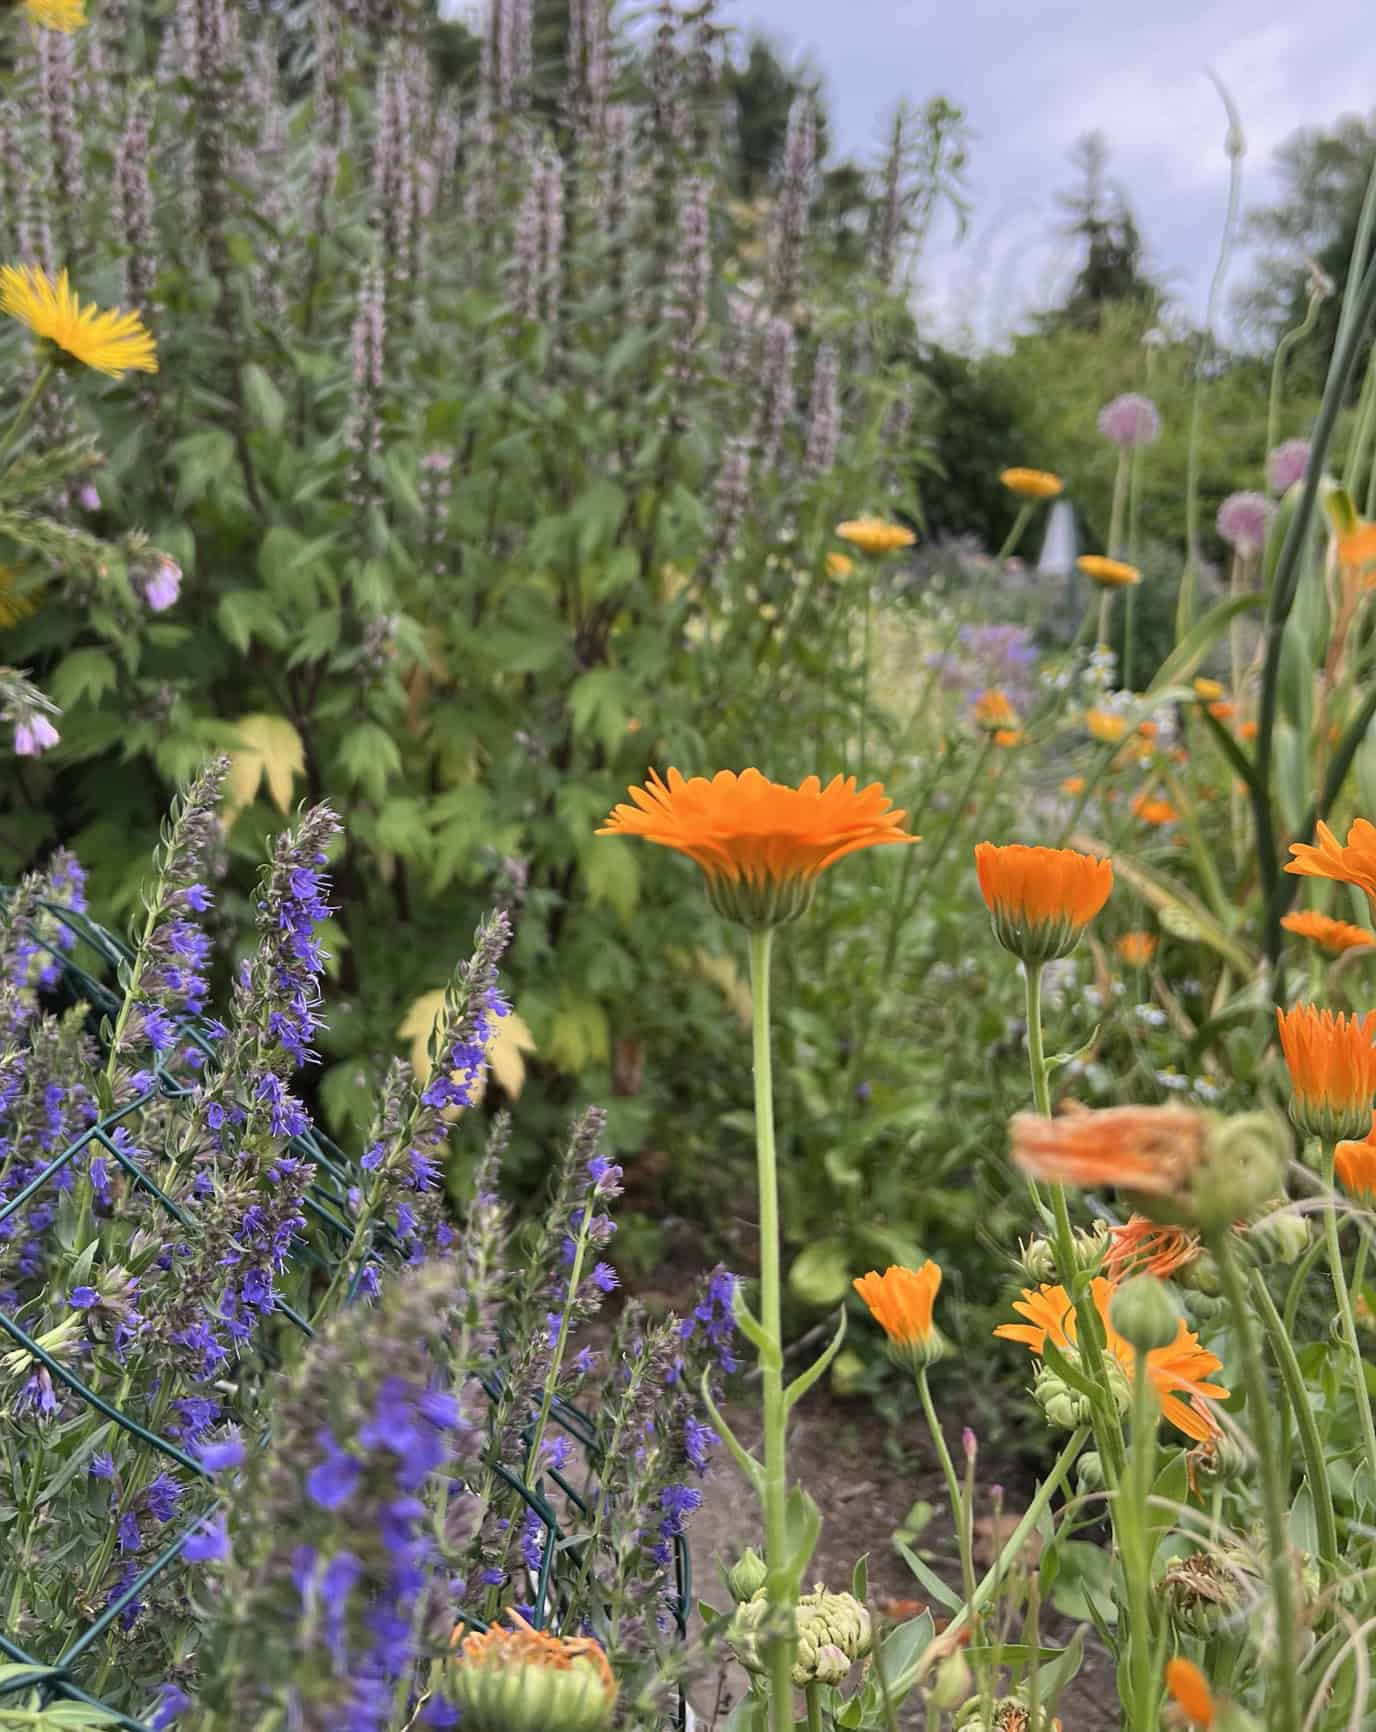
Calendula and various herbs in the Discovery Garden.  © Photographer: Laura Kuhn
Calendula and various herbs in the Discovery Garden. © Photographer: Laura Kuhn

Humidity levels in the Pacific Northwest, particularly western Washington, are a challenge to herb preservation and storage. Humidity levels should be 45-55 percent for proper drying and to avoid mold. Even during our drier summer months, average outdoor humidity levels are more than 60 percent. The water content in the herbs being dried is also a consideration. The more tender herbs, such as basil, tarragon, oregano, lemon balm, and mints, tend to have a higher water content. On the other hand, sage, thyme, parsley, and rosemary tend to be more “woody” and have a lower water content. Taking this into account before picking a preservation method increases the chances of success.

Drying with Air
Drying with air is by far the easiest method of preserving herbs but difficult to master successfully given Pacific Northwest humidity levels. Mold can form on plants, or the dried product will be limp and discolored. Make small bunches of plant stems, wrap with butcher’s twine, and hang the bunches up. The drying area will need to have good ventilation (an oscillating fan works great). Avoid exposure to light during drying as it will affect the color. A barometer or humidity gauge helps decide if drying is possible. Woody plants such as rosemary and sage are best for this process due to humidity levels. The amount of time needed to dry the plants and crush the leaves will vary based on weather and drying conditions. Checking plants often is the best way to gauge if they are ready.
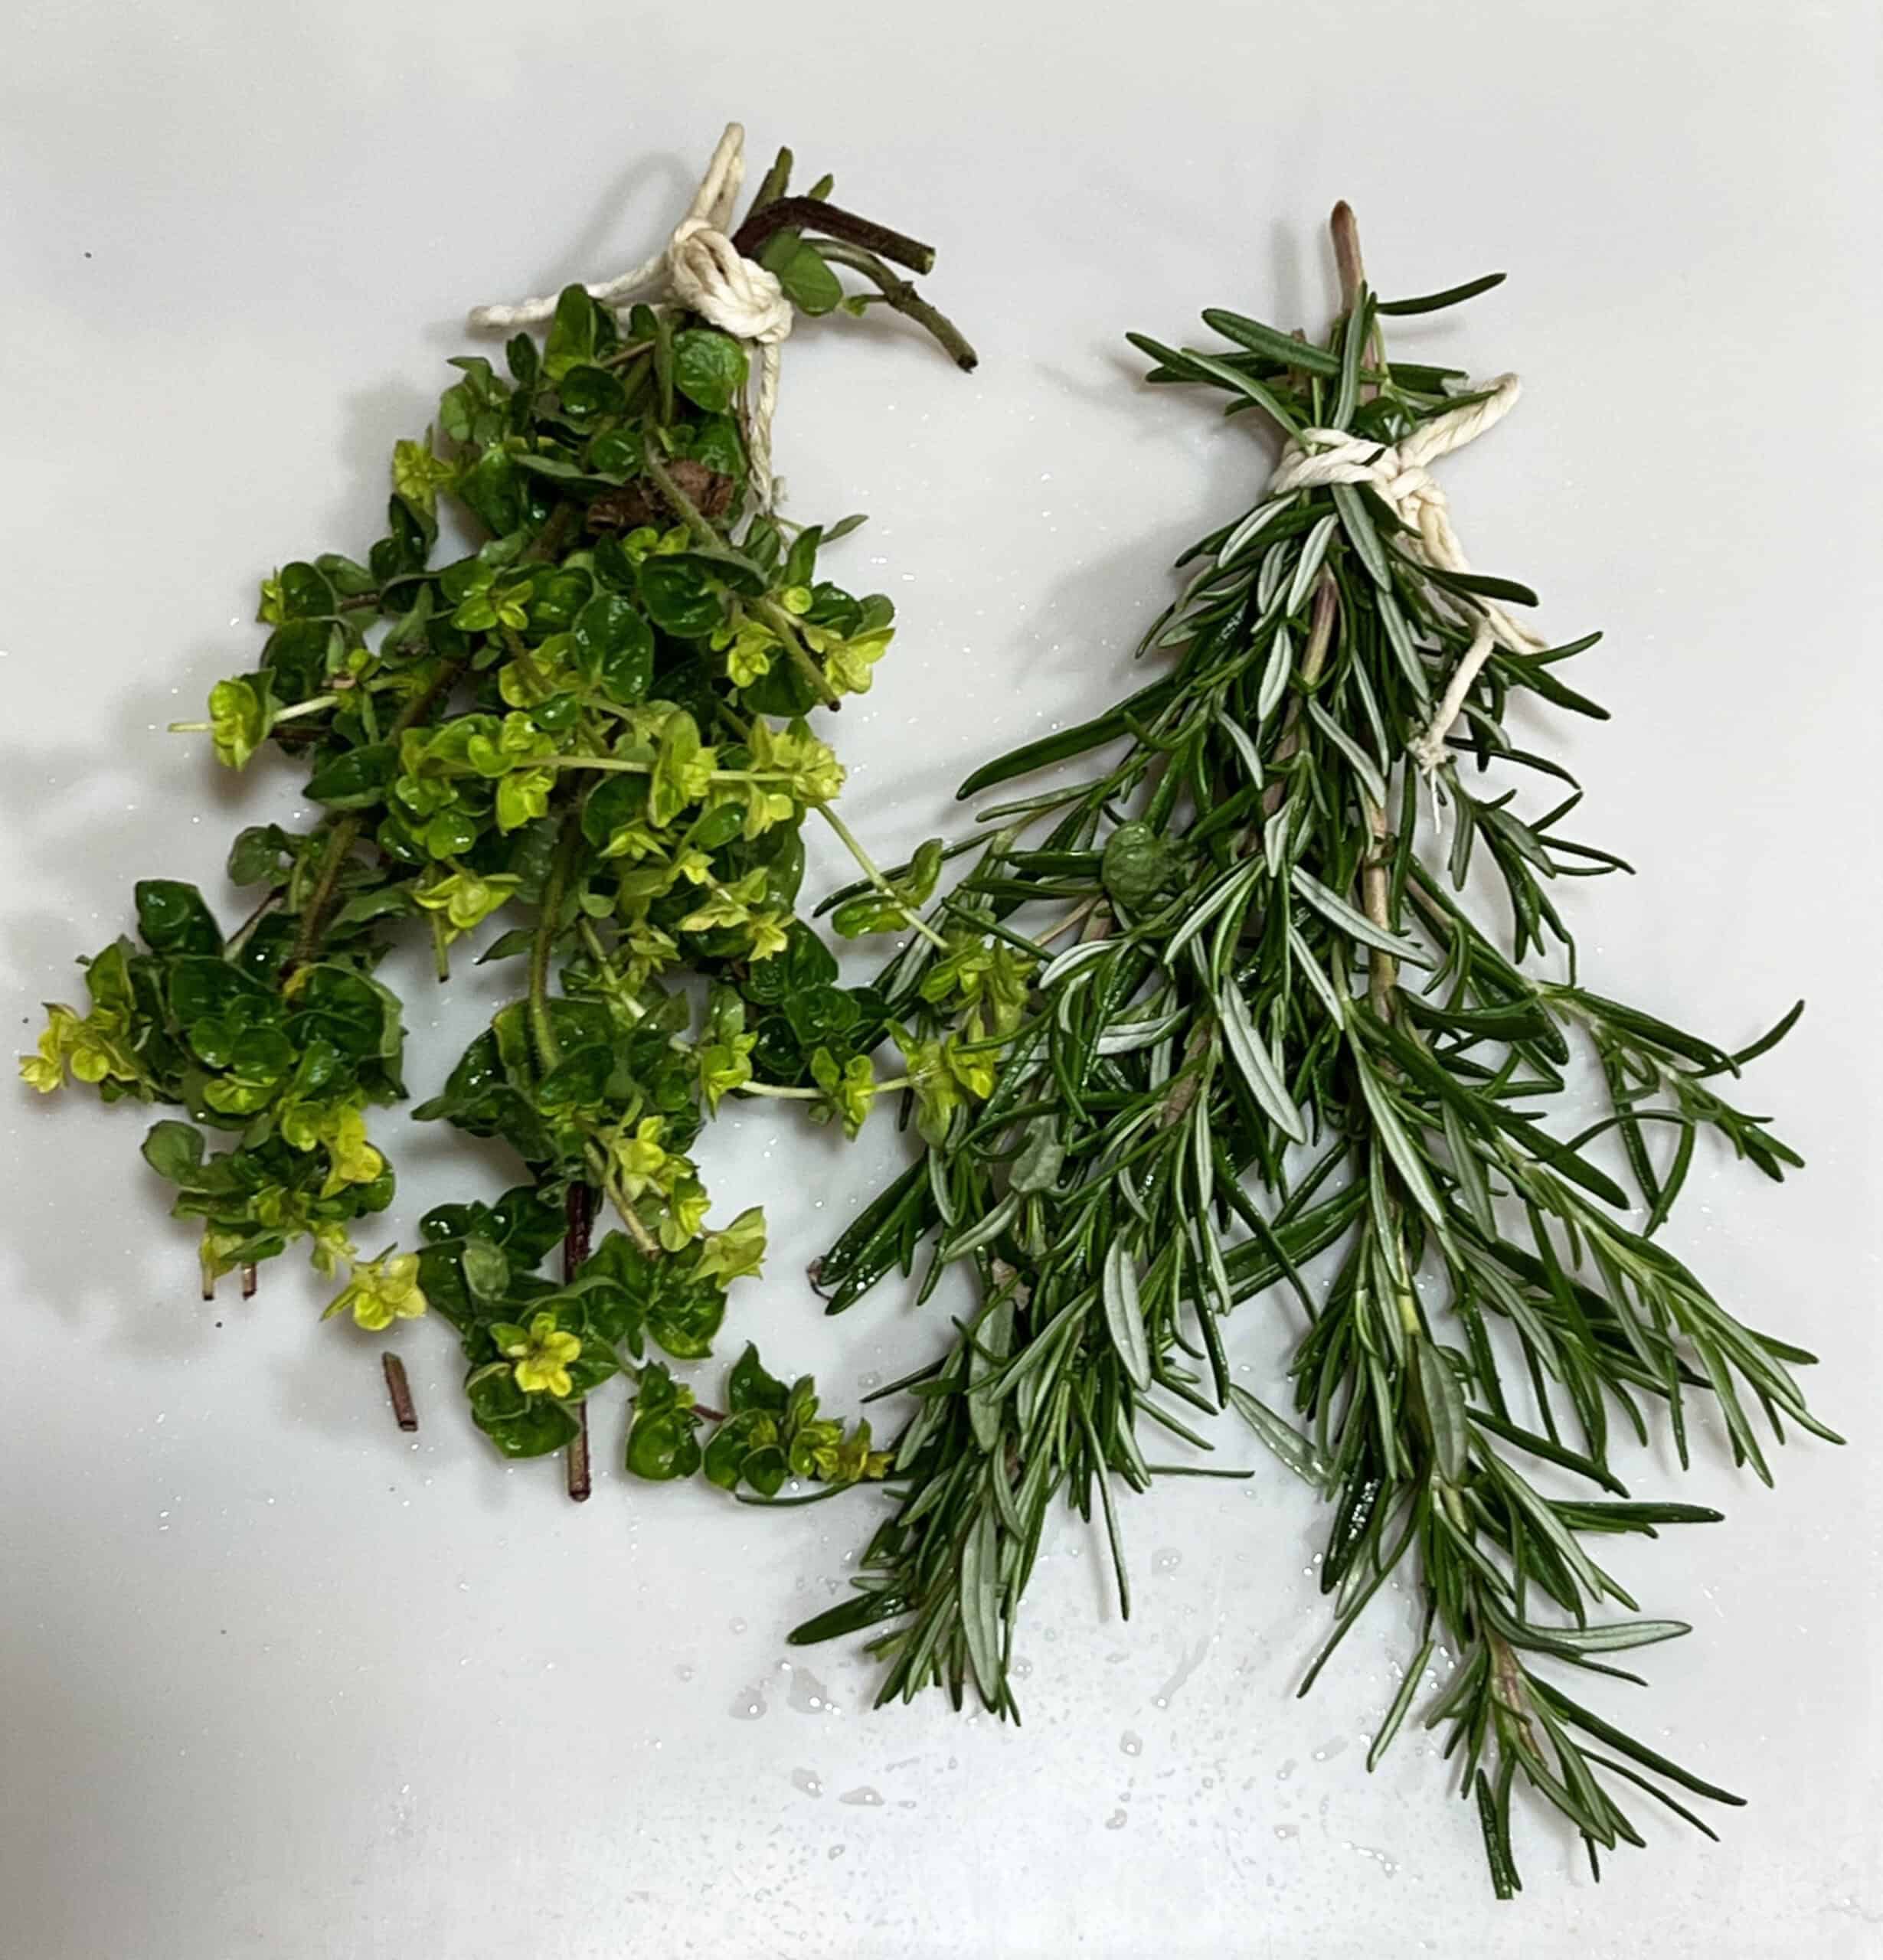
Bunches of herbs ready for hang drying. © Photographer: Laura Kuhn
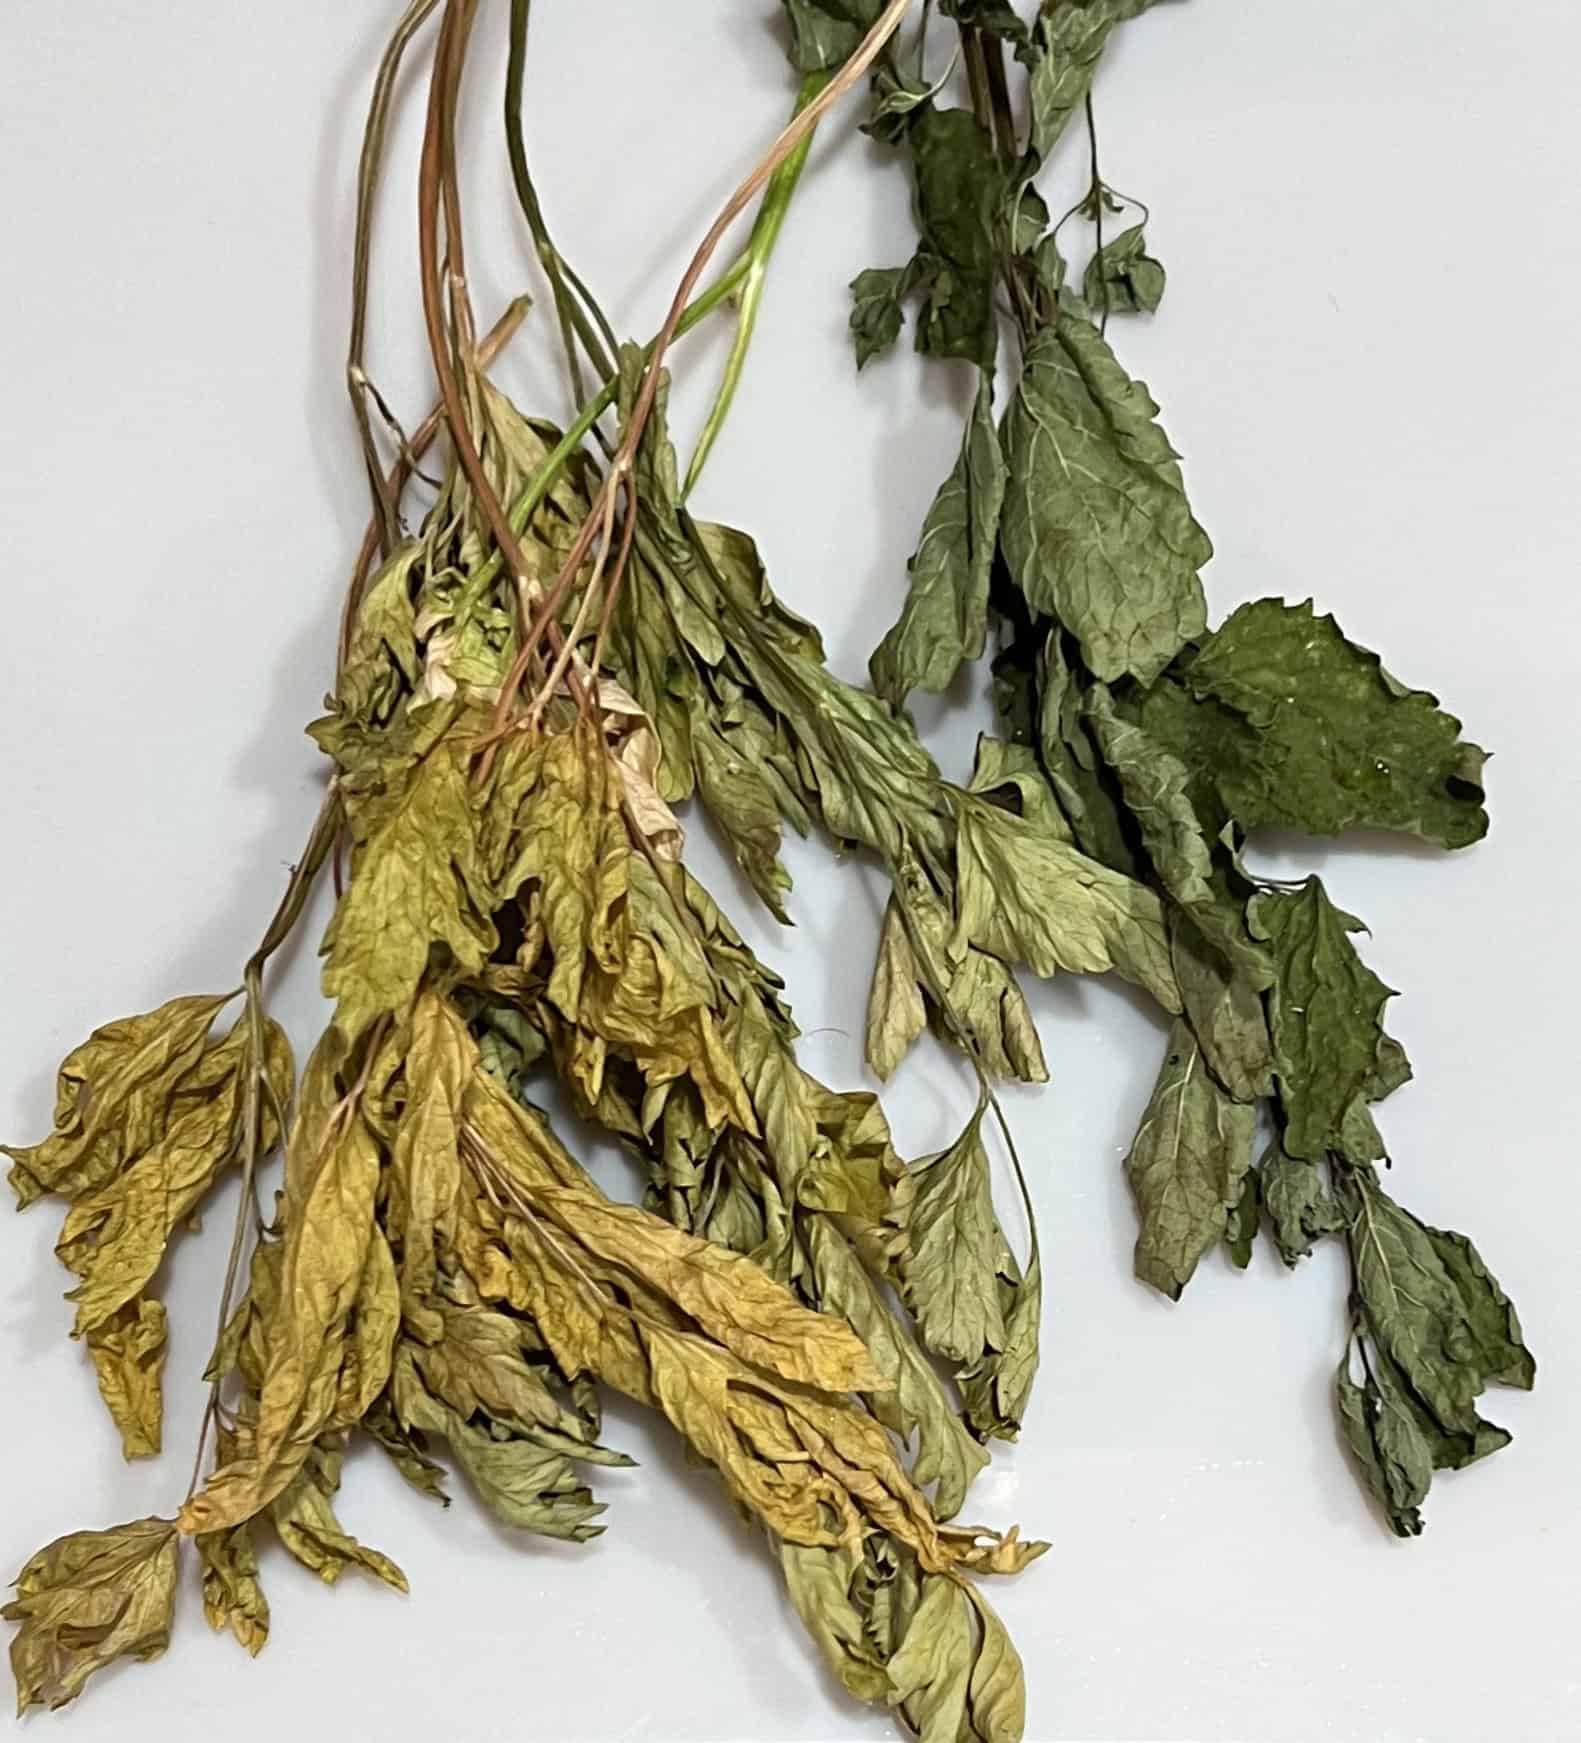
Failed attempt at airdrying parsley and lemon balm. Conditions were too humid for effective drying. Note loss of color in parsley to the left. © Photographer: Laura Kuhn
Dehydrating with Heat
The National Center for Home Food Preservation recommends drying herbs at 95 to 115 degrees Fahrenheit. Lower temperatures are best for tender plants. Since most home ovens cannot achieve the recommended temperatures for herb drying, food dehydrators have become popular. Many dehydrators come with wire racks so air can flow through the leaves. Arrange the leaves/stems across the rack so they are not touching. Overcrowding during the drying process can result in longer dry times. You can use a mesh-style rack for small leaves to provide air circulation. A tip for selecting a decent food dehydrator is to make sure that it can adjust the drying temperature and time. Select a unit that can dry at as low a temperature as possible to provide the most control over the drying process and quality. Increased heat levels might be needed to compensate for humidity levels. Using heated air to dry herbs can result in a higher loss of essential oils than using air-dried herbs. The amount of time needed to achieve a crisp, dry product that can be easily crushed is variable. Humidity, plant water content, and temperature are all factors to consider. For this reason, I recommend checking on the plants often during the drying process.

For either drying method mentioned above, it is important to note that any moisture left in the plants after drying can lead to spoilage. If your drying space seems to be “too moist” meaning you cannot achieve a crisp dry texture, increase the temperature, and air circulation. A process of trial and error may be needed as the time of year and the water content of plants can vary.

To prepare the dried herbs for storage, the leaves are removed from stems and crushed to the desired size. A tip for this step is to place the dried herbs into a bag and push the leaves off the stems. Set aside stems as you push the leaves into the bag. When the biggest stems are removed, crush the leaves inside of the bag to the desired size. Sift through the dried product to remove smaller stems to achieve the best consistency for cooking. Rougher dried herbs can be used for teas. It really is up to personal preference as to how “clean” the final product will be. Some choose sifters or screens to further improve the visual appeal of the end product.

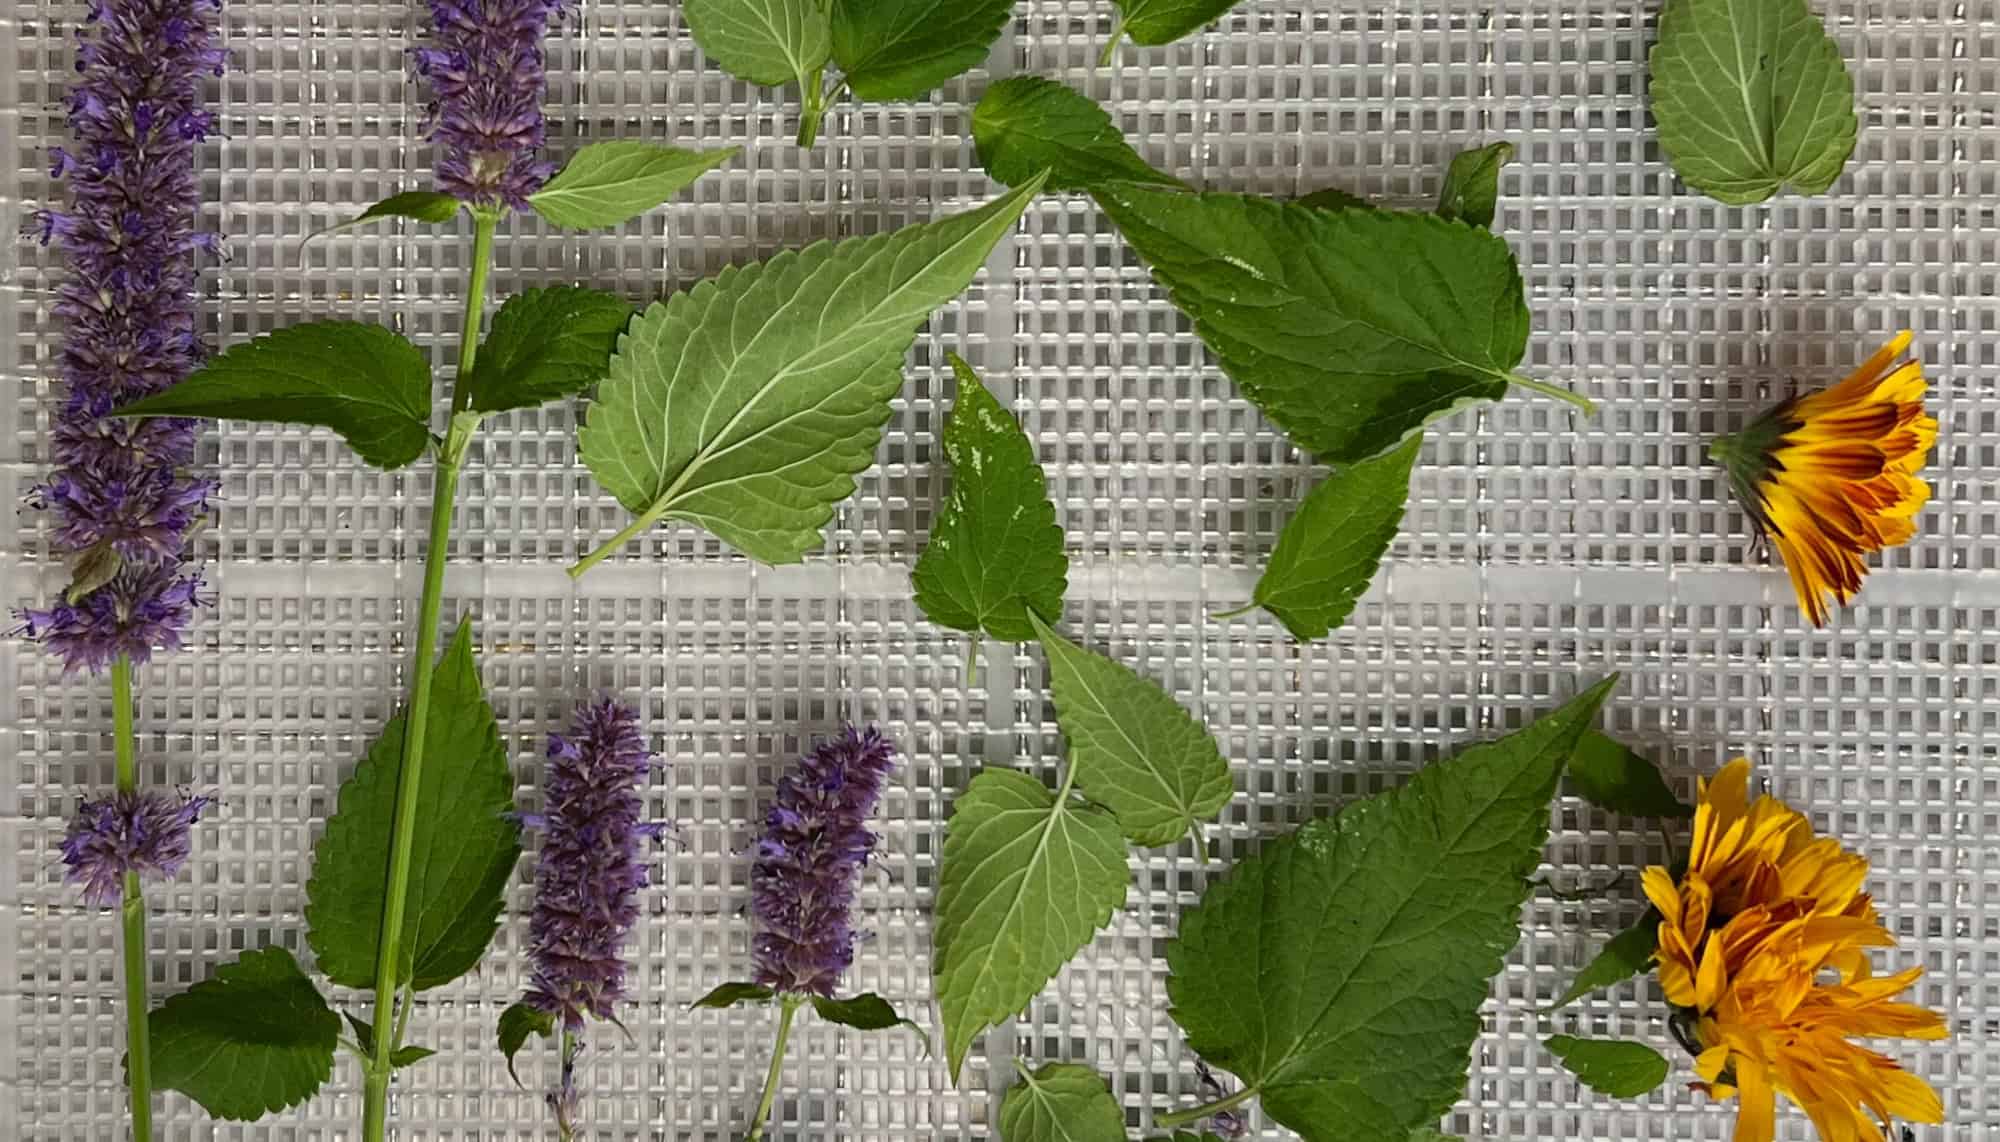
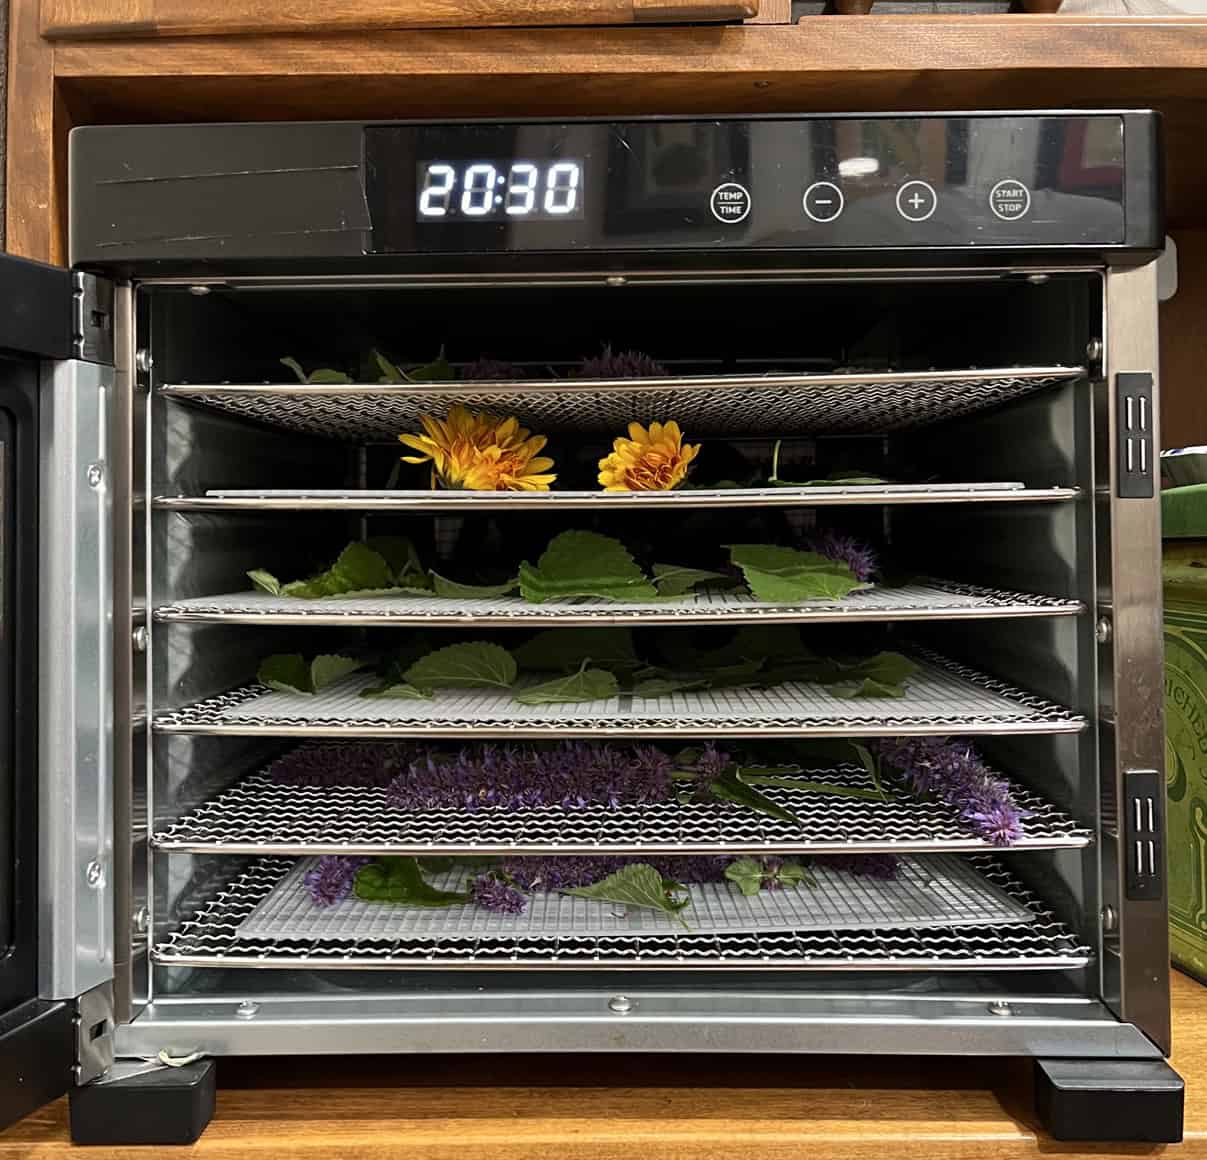
Dehydrator full of racks of calendula and anise hyssop. © Photographer: Laura Kuhn
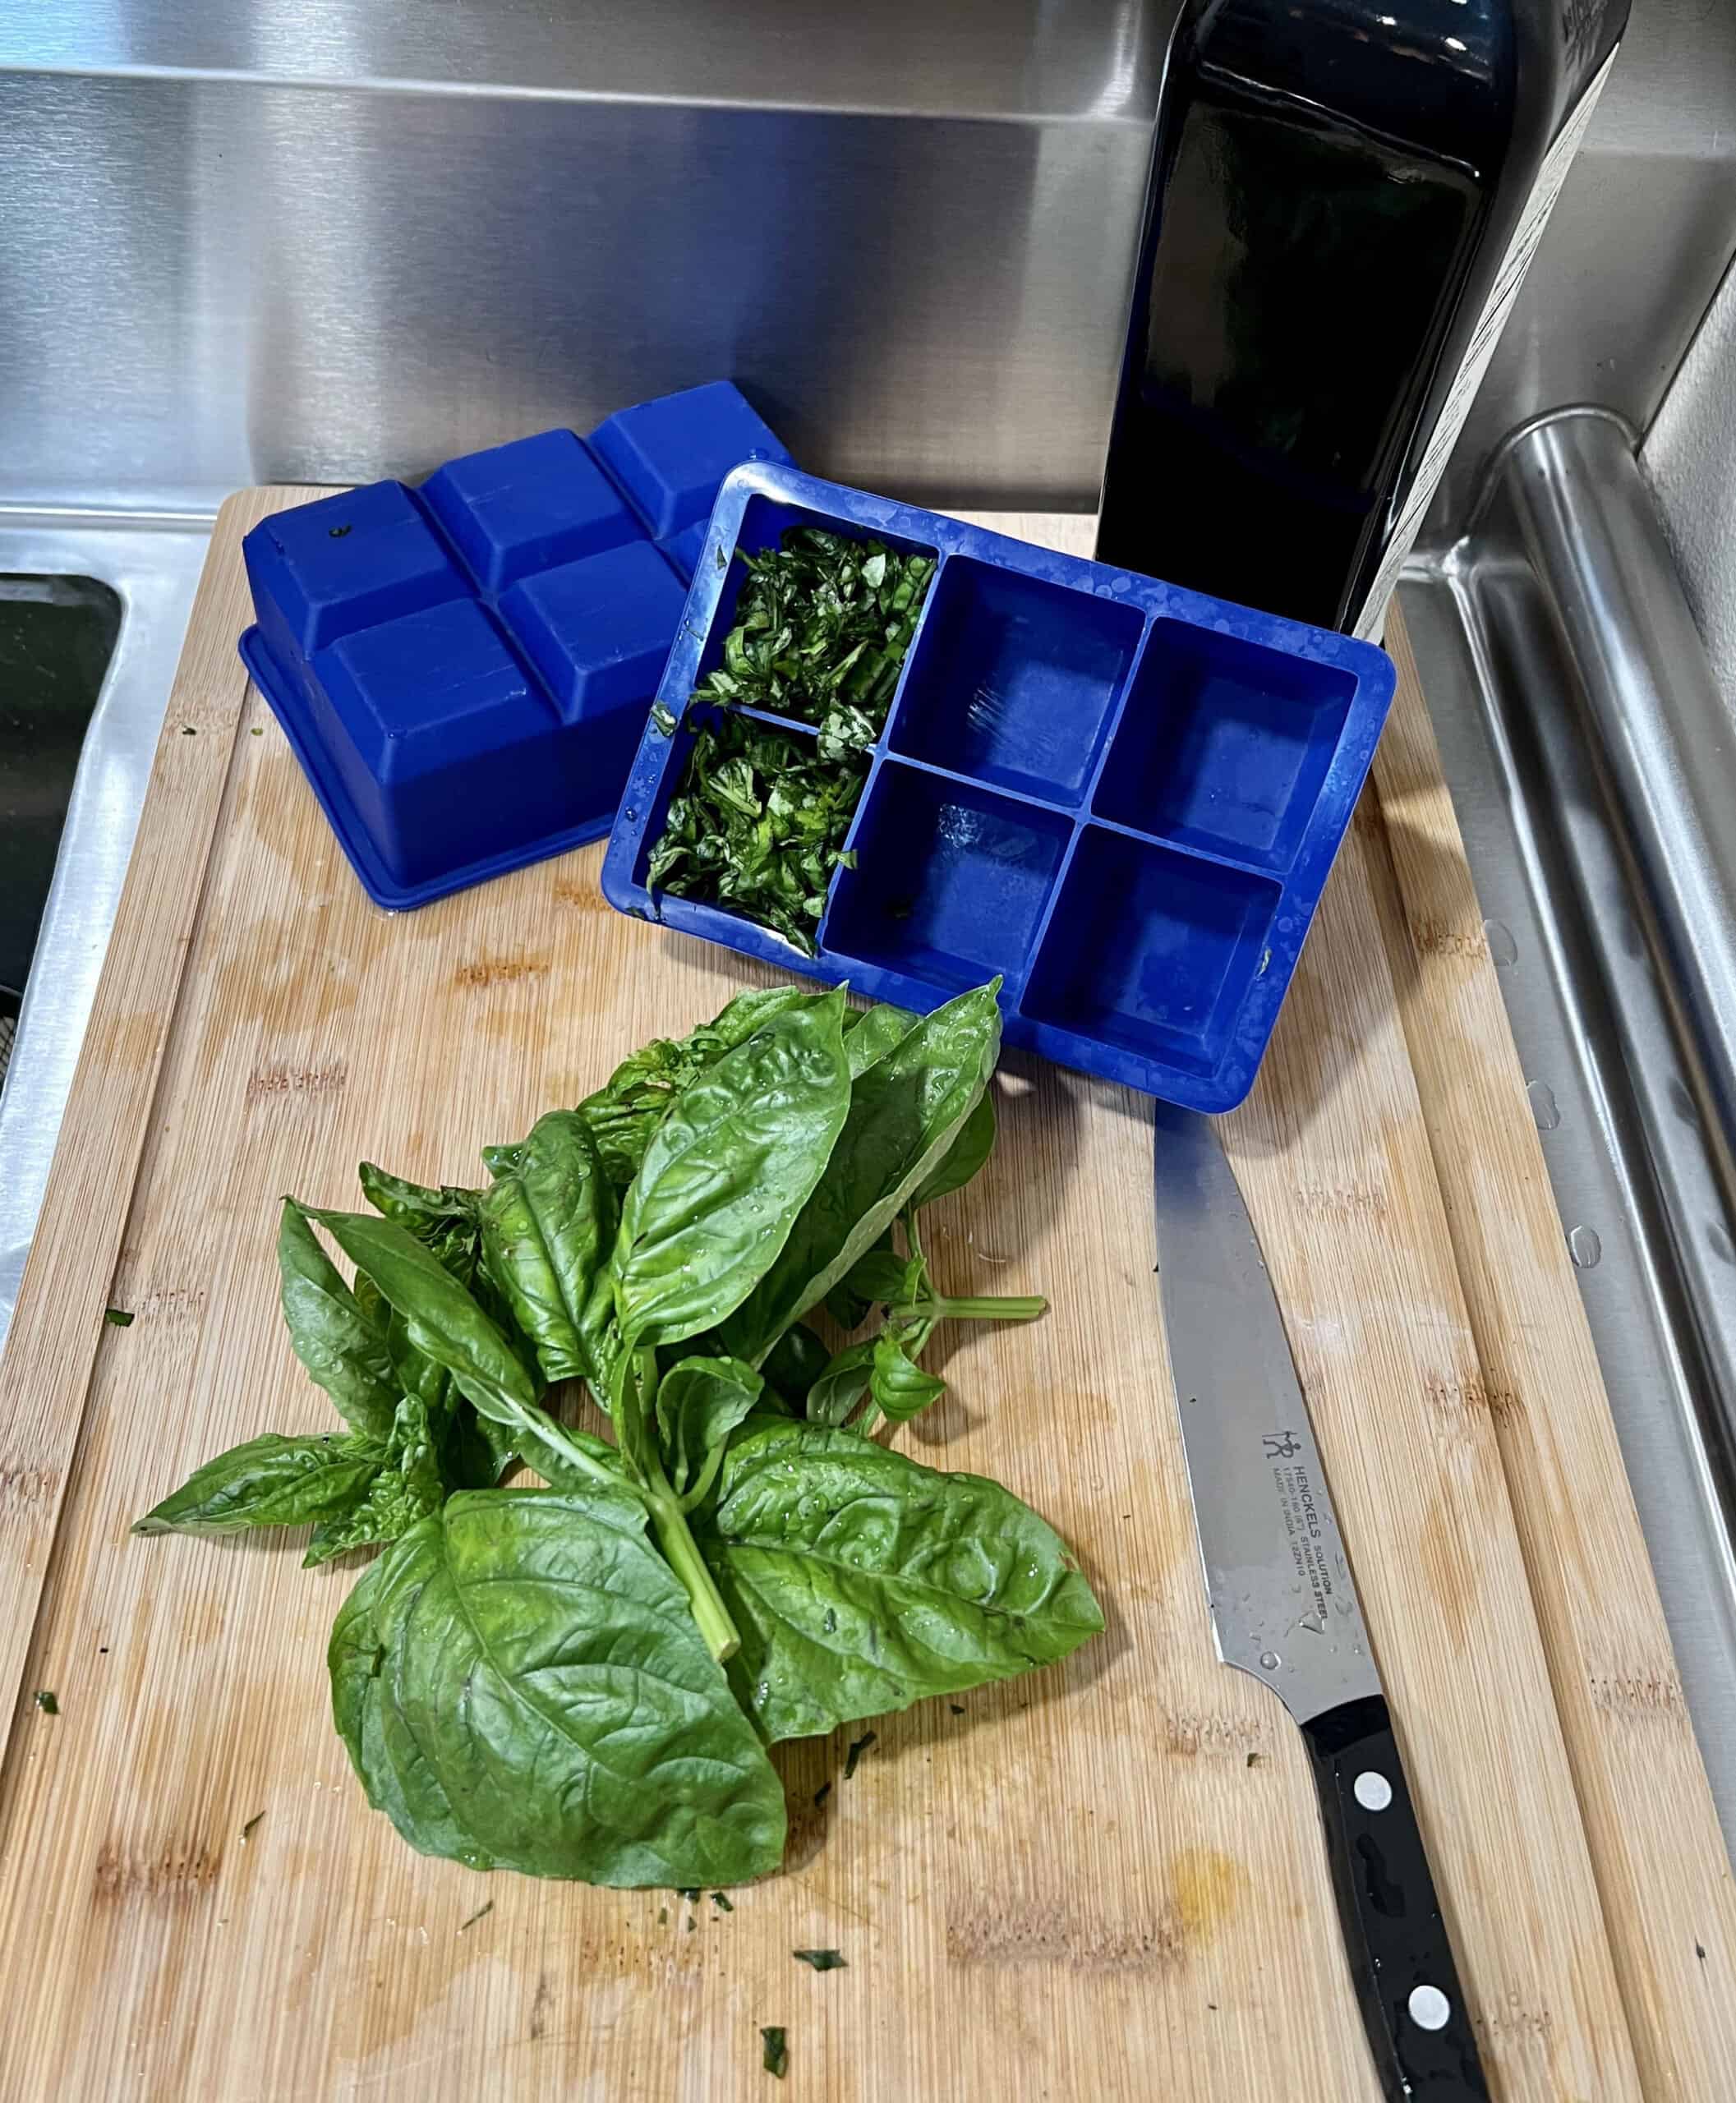
Fresh chopped basil freezes well when packed in ice cube trays then filled with water or oil. Once frozen, the basil cubes can be stored in a large freezer bag and used as needed. © Photographer: Laura Kuhn
Freezing
A quick and straightforward way to preserve herbs for later use in cooking is by freezing. Individual leaves can be placed in single layers on cookie sheets and then flash frozen. Cut chives work well this way. Once frozen, place the herbs into storage containers to reduce exposure to air. Another freezing method is to chop the herbs and load them into ice cube trays, then fill with water. Once frozen, put the cubes into storage containers and add them to recipes when needed. Alliums (onions and garlic) can be easily processed this way, also. The biggest downside to freezing is the required storage space in your freezer and a shorter shelf life.

Other methods include layering whole leaves in salt or oil. Herb essential oils can be transferred to other liquids for use in cooking. For example, herbs can be steeped to create herb-infused vinegars or oils. These methods take more time and care than can be covered here, so more research and preparation should be taken before trying these options. Microwaving takes a bit of trial and error to get the right cooking time for the type of herb used and varies with different types of machines.

Most herbs can be processed successfully in a variety of ways for different uses. A good tip is to experiment and see which techniques work best. Gardeners who experiment, find the methods that work best for their intended use.

Air tight containers and light blocking storage bin for dried herbs. © Photographer: Laura Kuhn
Storing Herbs –
Dried or dehydrated herbs do not like exposure to light and air, especially moist air. A simple and effortless way to store extra dried herbs is to put them into marked zip lock bags or a vacuumed sealed mason jar. Once each herb is in its container, they will need to be placed in a dark area like inside of a canister or storage container. Keep your herbs in a cool dry area because exposure to heat during storage can affect essential oil content. Storage time will vary on the herb, but if stored properly, they can last for months or longer.

The two most important tips of all are to grow what you will use and grow from seed for the best plant selection.

REFERENCES AND RESOURCES:

Rodale’s Encyclopedia of Herbs, May 2000, Rodale Press

Drying: Herbs, National Center for Home Food Preservation, University of Georgia, no date cited. https://nchfp.uga.edu/how/dry/recipes/herbs/

Thamkaew, G., Sjöholm, I., & Galindo, F. G. (2020). A review of drying methods for improving the quality of dried herbs. Critical Reviews in Food Science and Nutrition61(11), 1763-1786. https://doi.org/10.1080/10408398.2020.1765309

Author: Laura Kuhn

ABOUT THE AUTHOR:
Laura is new to the Skagit Valley but has more than 30 years of experience growing in coastal, inland valley, and desert climates. She had fun trying to grow herbs while traveling full-time in an RV. Laura is a 2023 graduate of the Skagit County WSU Extension Master Gardener program.

Questions about home gardening or becoming a Master Gardener, may be directed to: Skagit County WSU Extension Office, 11768 Westar Lane, Suite A, Burlington, WA 98233; by phone: 360-428-4270; or via the website: https://extension.wsu.edu/skagit/mg/


A Second Act for Your Square 1-Gallon Pots at the Discovery Garden!

Bring your leftover square 1-gallon pots to the Discovery Garden (16650 State Route 536, Mount Vernon). The bin for recycling the square 1-gal pots is located in the parking lot, just north (to the right) of the main entrance.
We only need square 1-gallon pots like the ones pictured below (bottom right). The recycling bin will be available now through fall. Simply put your pots into the bin, and we take care of the rest!


pot recycling


AMGPost_header5
small plants growing in rock container

Hypertufa Troughs Serve as Lowland Homes for Native Alpine Plants

Grow these tiny gems seen on an alpine hike

              Subscribe to the Blog >

By: Sonja Nelson, Skagit County WSU Extension Master Gardener

Nestled low to the ground among the peaks of the North Cascade Mountains are tiny alpine plants that delight hikers as they stroll the high country of Skagit and Whatcom Counties. If these hikers are also gardeners, it is tempting to dig a few of these gems to take home and plant in their home garden. Digging and removing plants is, of course, prohibited on public lands, including national parks, forests, and recreational areas. Moreover, the plants most likely would die when snatched out of their high-altitude environment and planted in the soils found in the lowlands of our ecoregion.

However, alpine gardening enthusiasts have found a solution to recreate the beauty they see in the alpine regions of the North Cascades. Using containers created to grow plants away from their native environment and plants purchased from nurseries specializing in alpine plants, gardeners can successfully grow these tiny gems seen on an alpine hike.

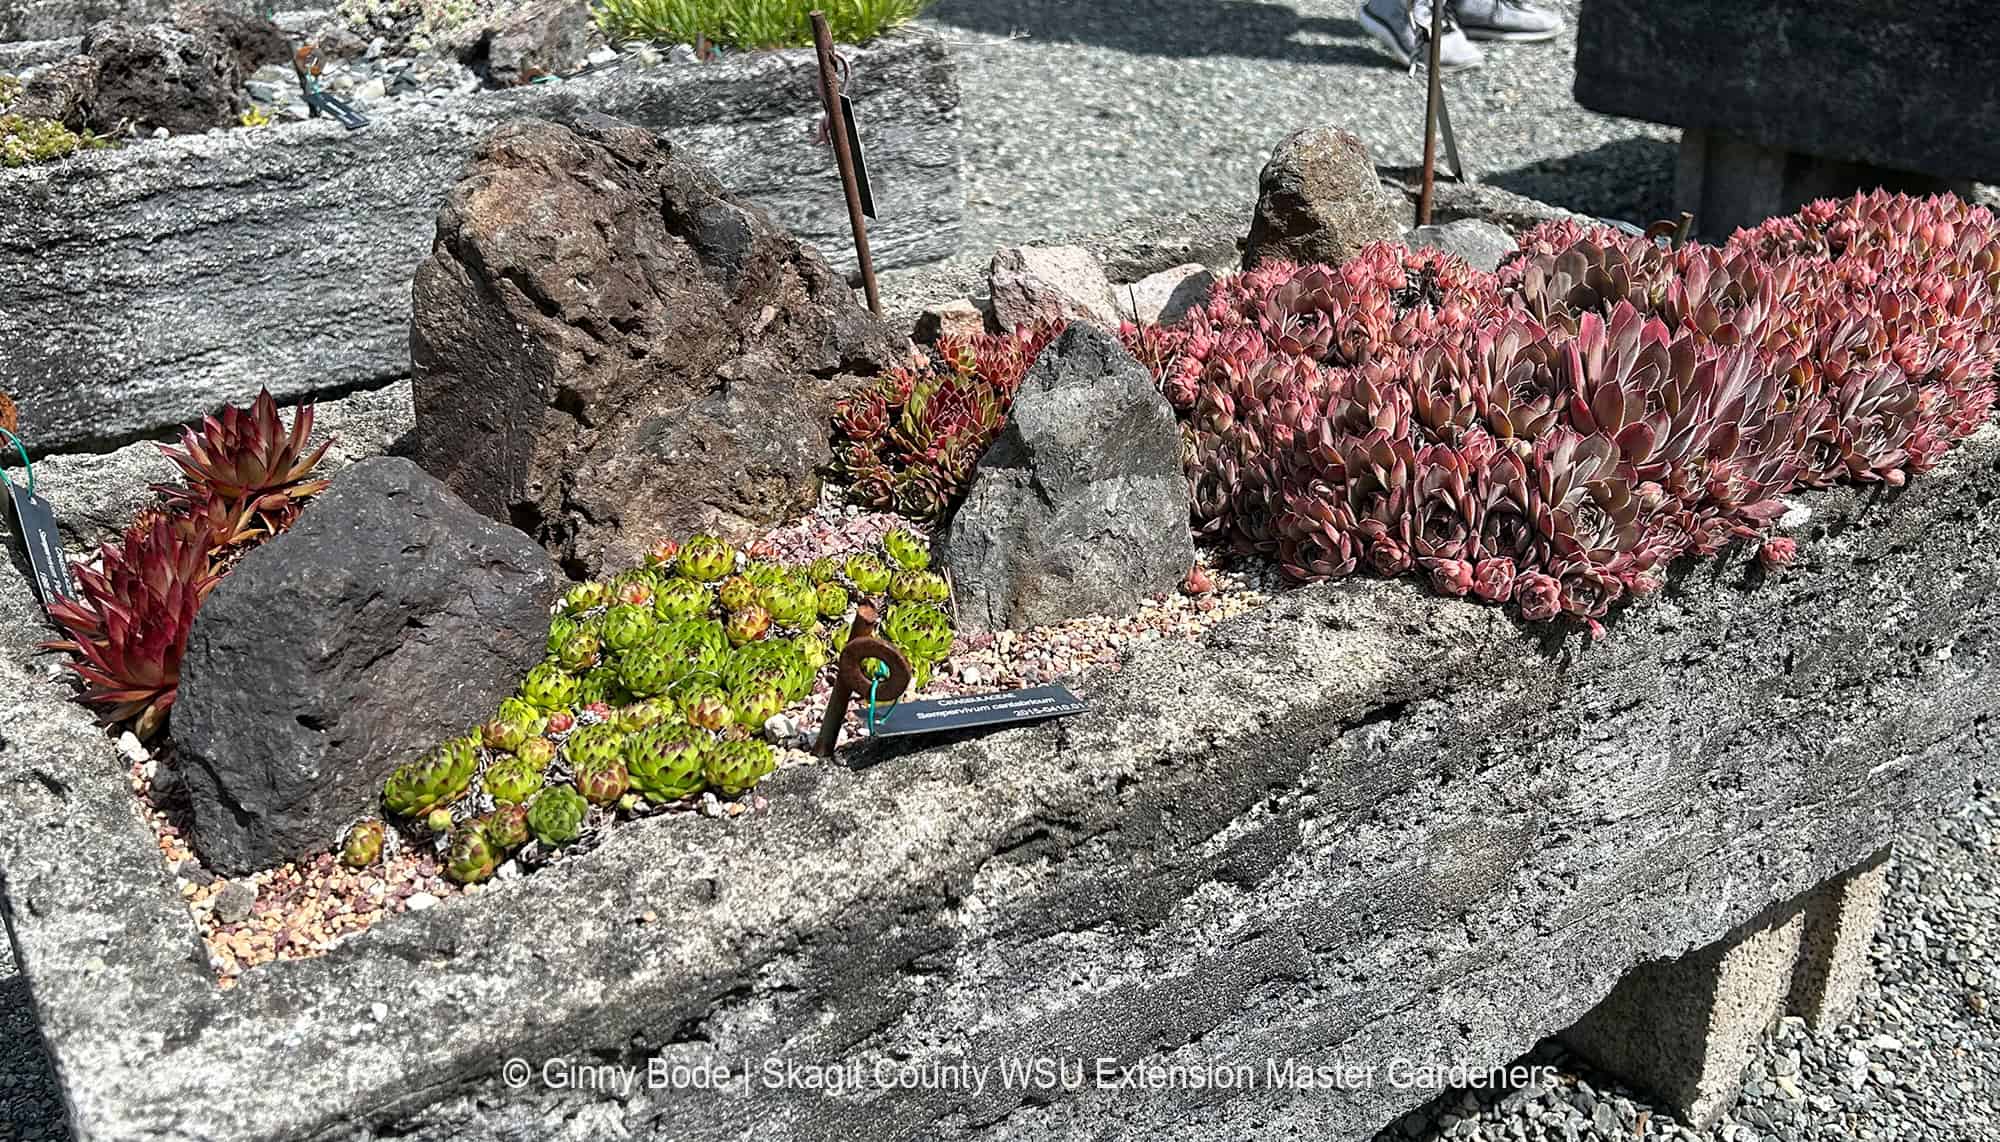
The containers, called “hypertufa troughs,” are constructed to provide the specific requirements alpine plants and succulents need to thrive. They also blend nicely into a garden or can be placed on a deck or patio.

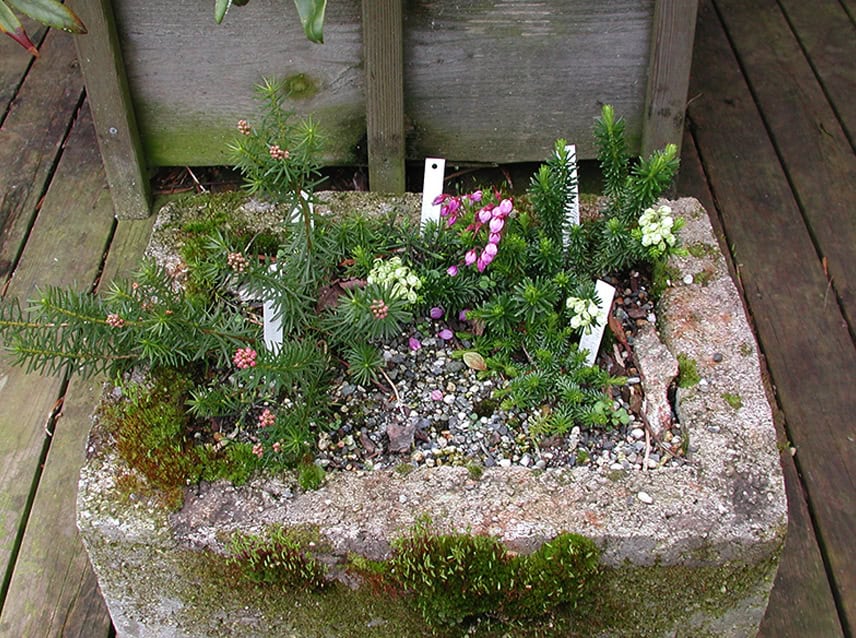
Hypertufa trough planted with mountain heathers native to the North Cascades. The trough is placed on a deck in Bayview in Skagit County. Photo © Sonja Nelson
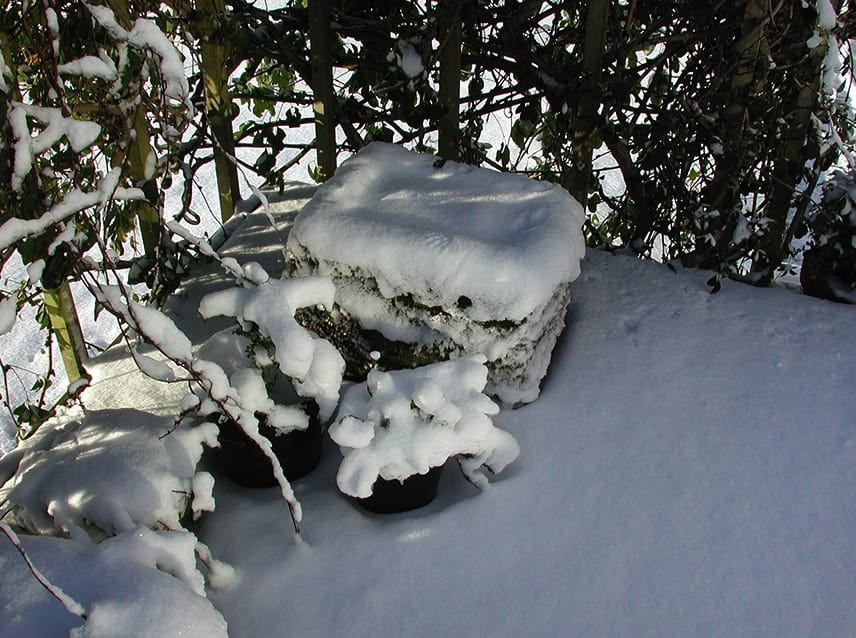
Snow covering the mountain heathers trough, pictured in Photo 1 (to the left), acts as insulation just as it does for these plants in their native home in the North Cascades. Photo © Sonja Nelson

Hypertufa troughs originated from the naturally occurring tufa rock, a type of limestone formed when carbonate minerals precipitate out of water and build up around organic matter, eventually decomposing, leaving a porous rock. English farmers of the 1800s chiseled feeding troughs for their animals out of this rock. Years later, creative gardeners adopted these old containers, covered in moss and worn by decades of exposure to the elements, as decorative planters. A few of these sought-after antique troughs are still found in Europe but are often too heavy and expensive to transport across the Atlantic. (1)

Since tufa rock was not readily found and available in the US, gardeners in the 1930s-1940s began to make tufa-like troughs using a mix of ingredients with Portland cement. They called them “hypertufa.” (2)

Growing small alpine plants in hypertufa troughs has many advantages. The trough materials serve as insulation against extreme hot and cold temperatures that can occur in our ecoregion. The troughs also drain well, so standing water is never a problem, and the roots of alpine plants grow into the porous hypertufa and tend to thrive.

In addition, the Portland cement in the hypertufa mix slowly releases some calcium and magnesium that plants need. And, because the trough is relatively lightweight, they can be moved from place to place in the garden for the best exposure through the seasons. (2)

Ecoregions
Growing alpine plants in hypertufa troughs gives gardeners the pleasure of seeing them close to home in their gardens and protects them from the possible ravages of warm summers in their native locations.

Skagit Valley is located in the Puget Trough ecoregion, with mild, wet winters, and warm, dry summers. Here, precipitation averages 40 inches per year, with a mean January temperature of 39° F and a mean July temperature of 65°F. This climate differs from the climate of the North Cascades ecoregion, where many of our Washington native alpines for our hypertufa troughs grow in the wild. High elevations in the alpine regions are often covered with snow for many months. (3) The North Cascades Highway (State Route 20) traverses this ecoregion’s subalpine and alpine sections.

The Plants
The choice of North Cascade alpine plants for troughs is considerable. To get started, as an example among alpine plants, choose from the mountain heathers, the saxifrages, and the gentians.

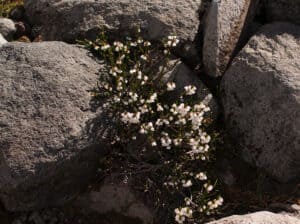
White mountain heather (Cassiope mertensia) near Mt. Shuksan in the North Cascades. © Sonja Nelson

Mountain Heathers
The common name “heather” can refer to many different highland species throughout the world. North Cascade heathers are called “mountain heathers” and include the genera Cassiope and Phyllodoce. Common names include white mountain heather, Alaskan mountain heather, pink mountain heather, and yellow mountain heather. (6)
Saxifrages
Members of the genus Saxifraga are widespread in the North Cascades, many of which grow in the subalpine and alpine regions. Examples seen by the author are Tolmie’s saxifrage (Saxifraga tolmiei) at Chain Lakes, Alaska saxifrage (Saxifraga ferruginea) at Twin Lakes, and western saxifrage (Saxifraga occidentale) on Chowder Ridge (Pojar and Mackinnon1994).
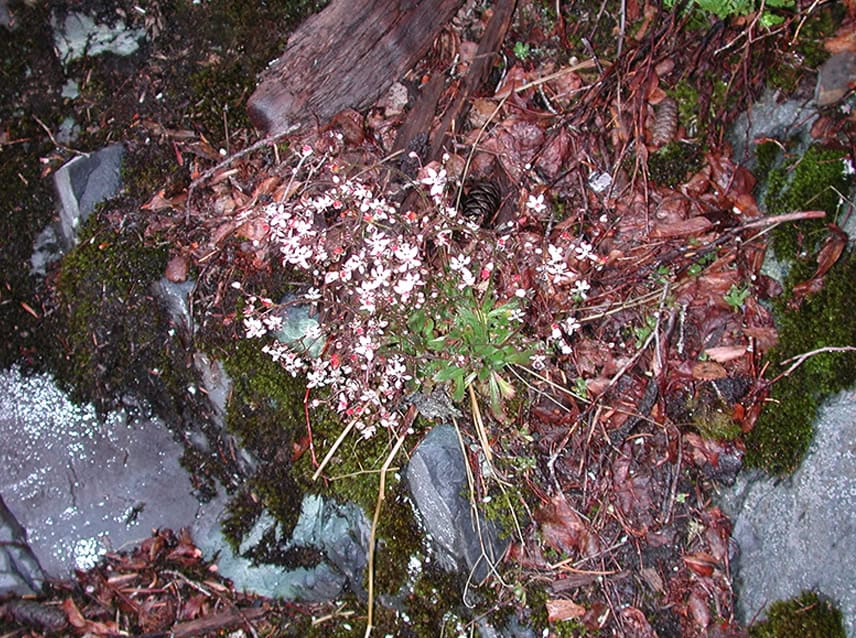
Saxifrage at Bagley Lakes in the North Cascades. © Sonja Nelson

Saxifrage at Bagley Lakes in the North Cascades. © Sonja Nelson

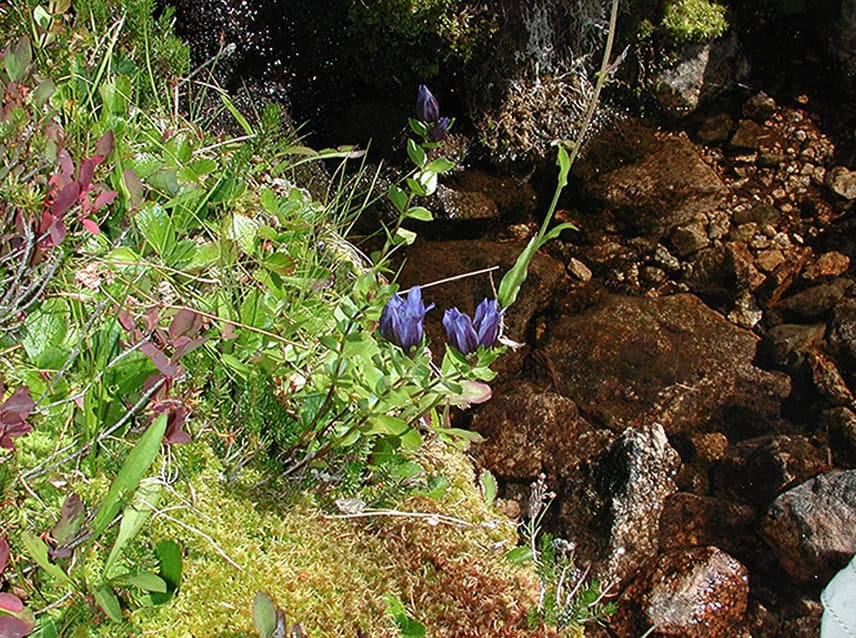
Broad-petalled gentian (Gentiana platypetala) at Cutthroat Pass in the North Cascades. © Sonja Nelson

Broad-petalled gentian (Gentiana platypetala) at Cutthroat Pass in the North Cascades. © Sonja Nelson

Gentians
Members of the genus Gentiana are also widespread in the North Cascades. Four gentian species are native to the North Cascades: king gentian (Gentiana septum), broad-petalled gentian (Gentiana platypetala), swamp gentian (Gentiana douglasiana), and alpine bog swertia (Swertia perennis). (6)

Although hypertufa troughs are highly suitable for growing alpines at low elevations, many small native plants and succulents also find the troughs an amenable environment for growth and a refuge from fluctuating temperatures.

Growing Mix
The soil mix used in the troughs cannot be the same as the soil in your garden. Alpines especially need good drainage, which means water seeps through the medium quickly and does not pool around the plant crowns.

A basic trough medium recipe is 2/3 to 3/4 by volume potting mix with either peat or coconut coir and 1/3 to 1/4 by volume coarse perlite. Add fertilizer if the soil mix does not include it. (2)

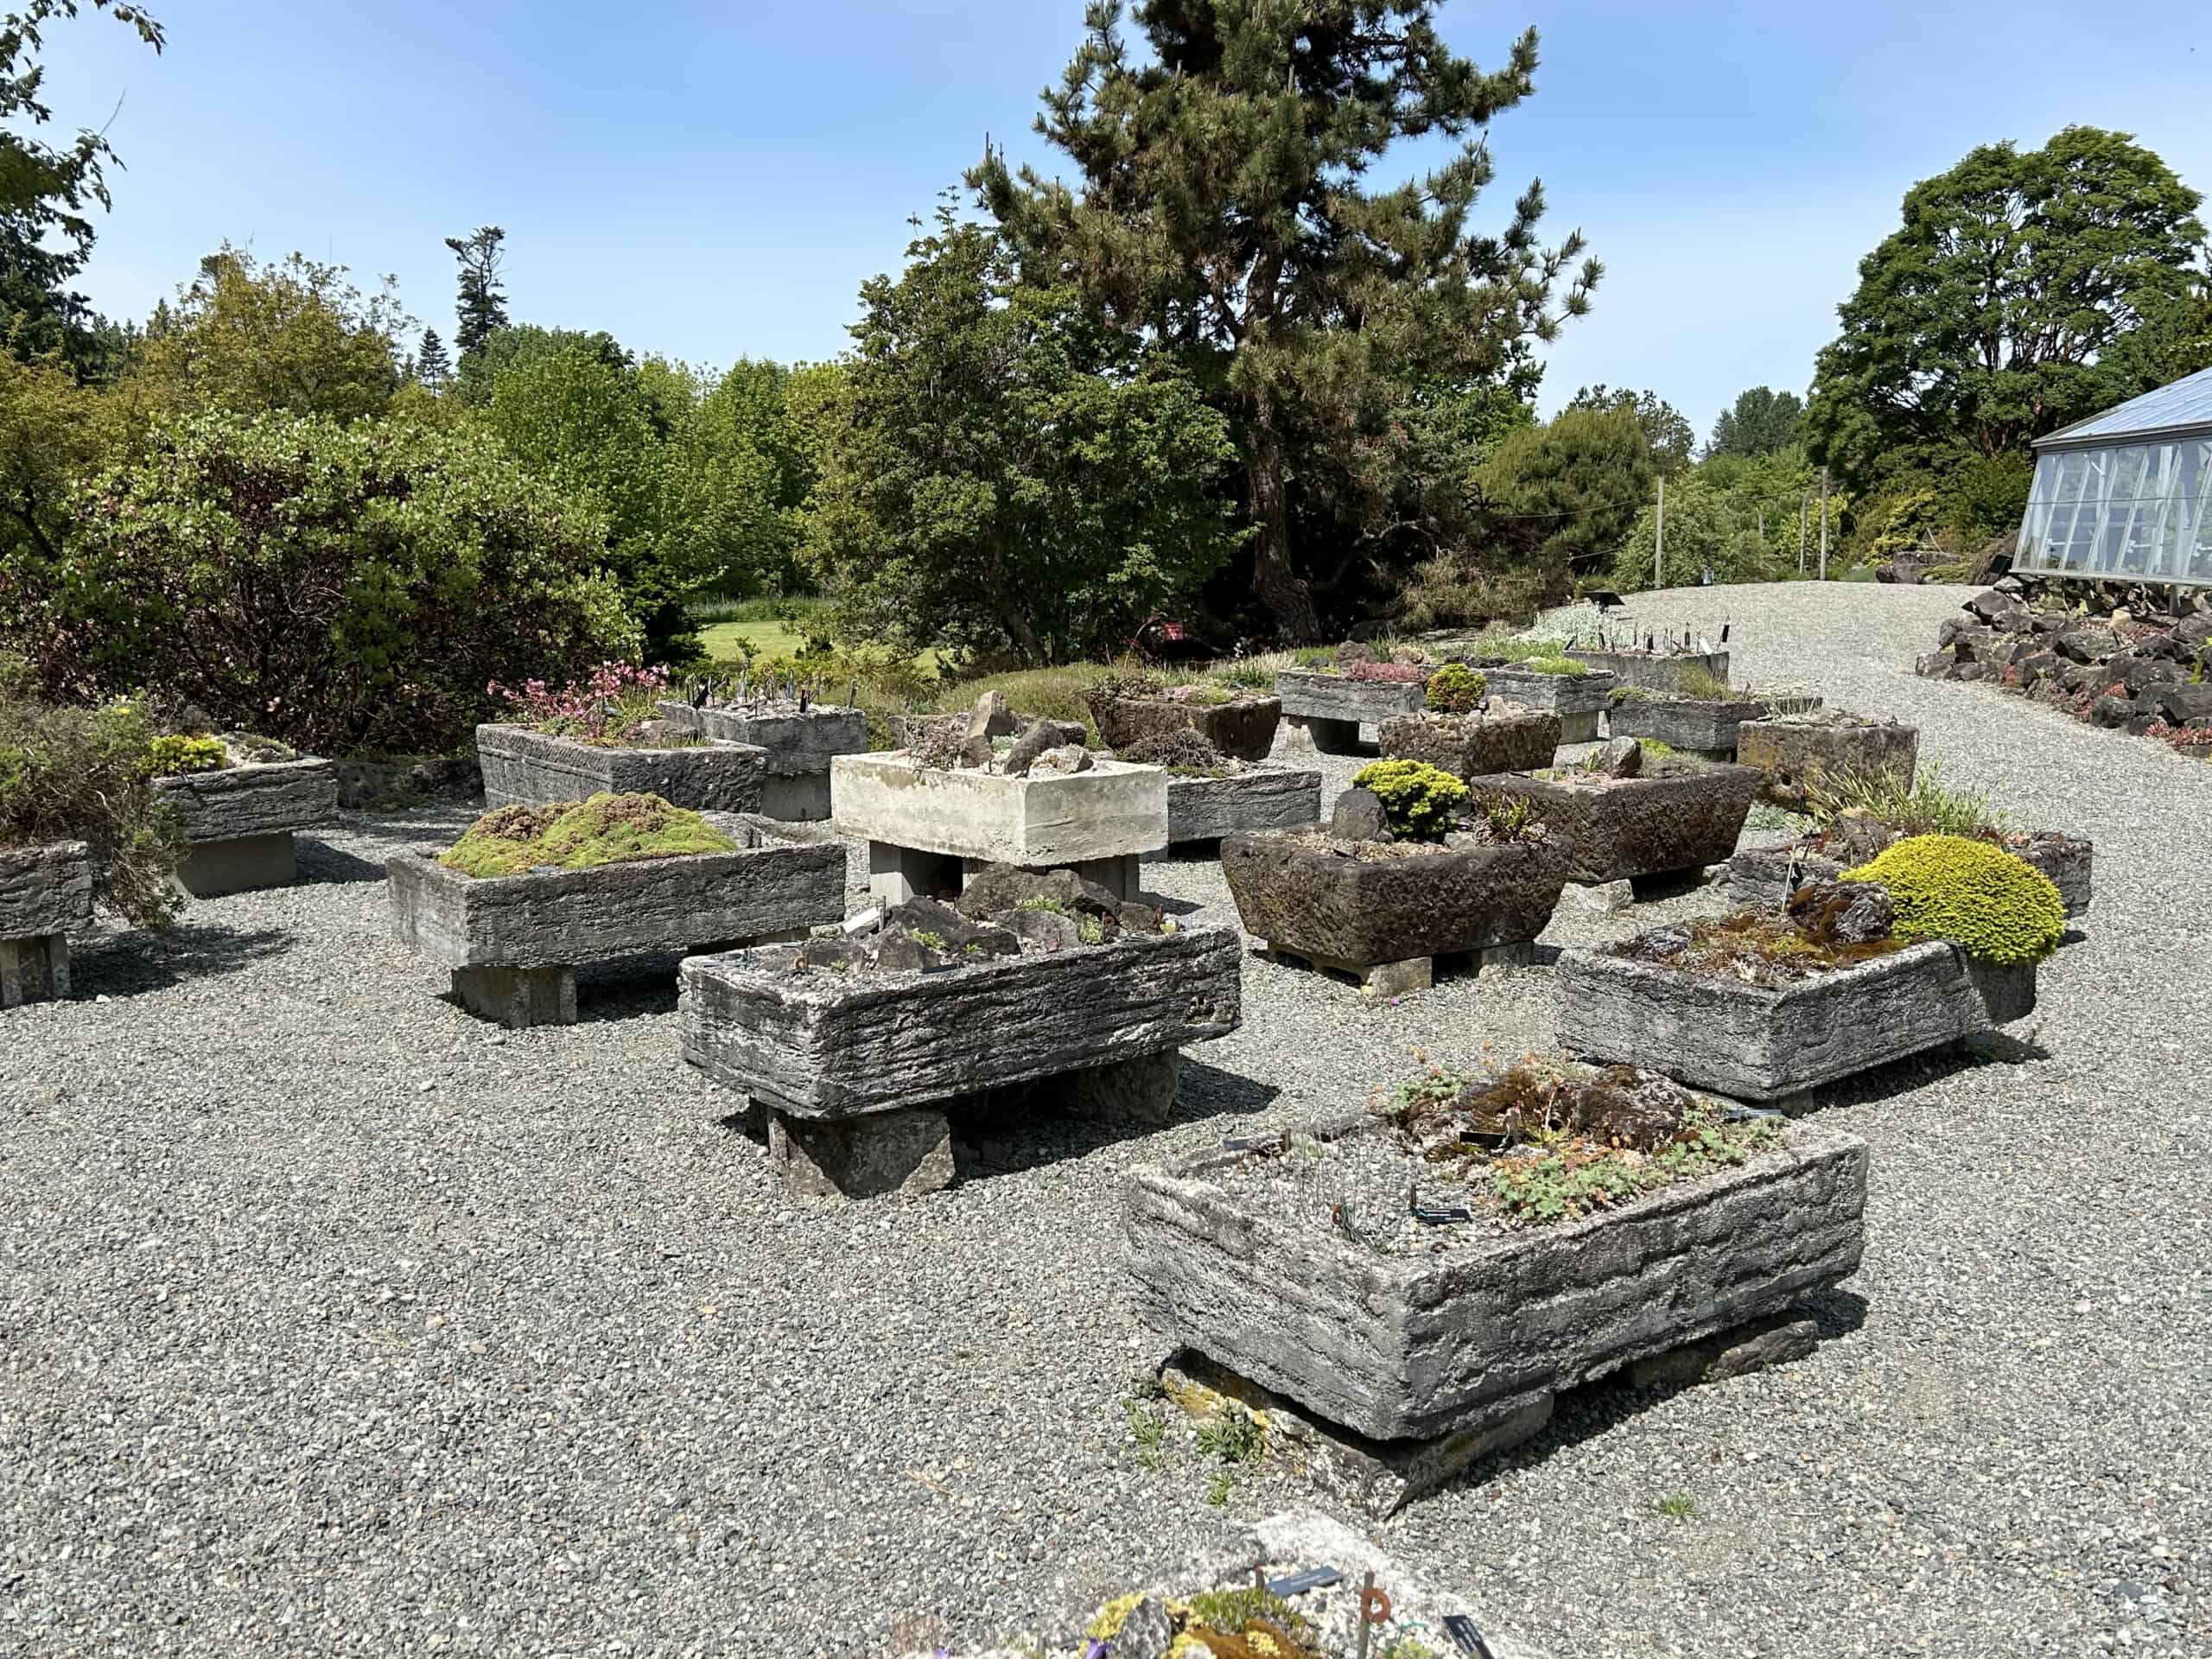
The extensive Trough Courtyard at the  UBC Botanical Garden in Vancouver, BC features an extensive collection of alpine rock plants. © Ginny Bode
The extensive Trough Courtyard at the UBC Botanical Garden in Vancouver, BC features an extensive collection of alpine rock plants. © Ginny Bode
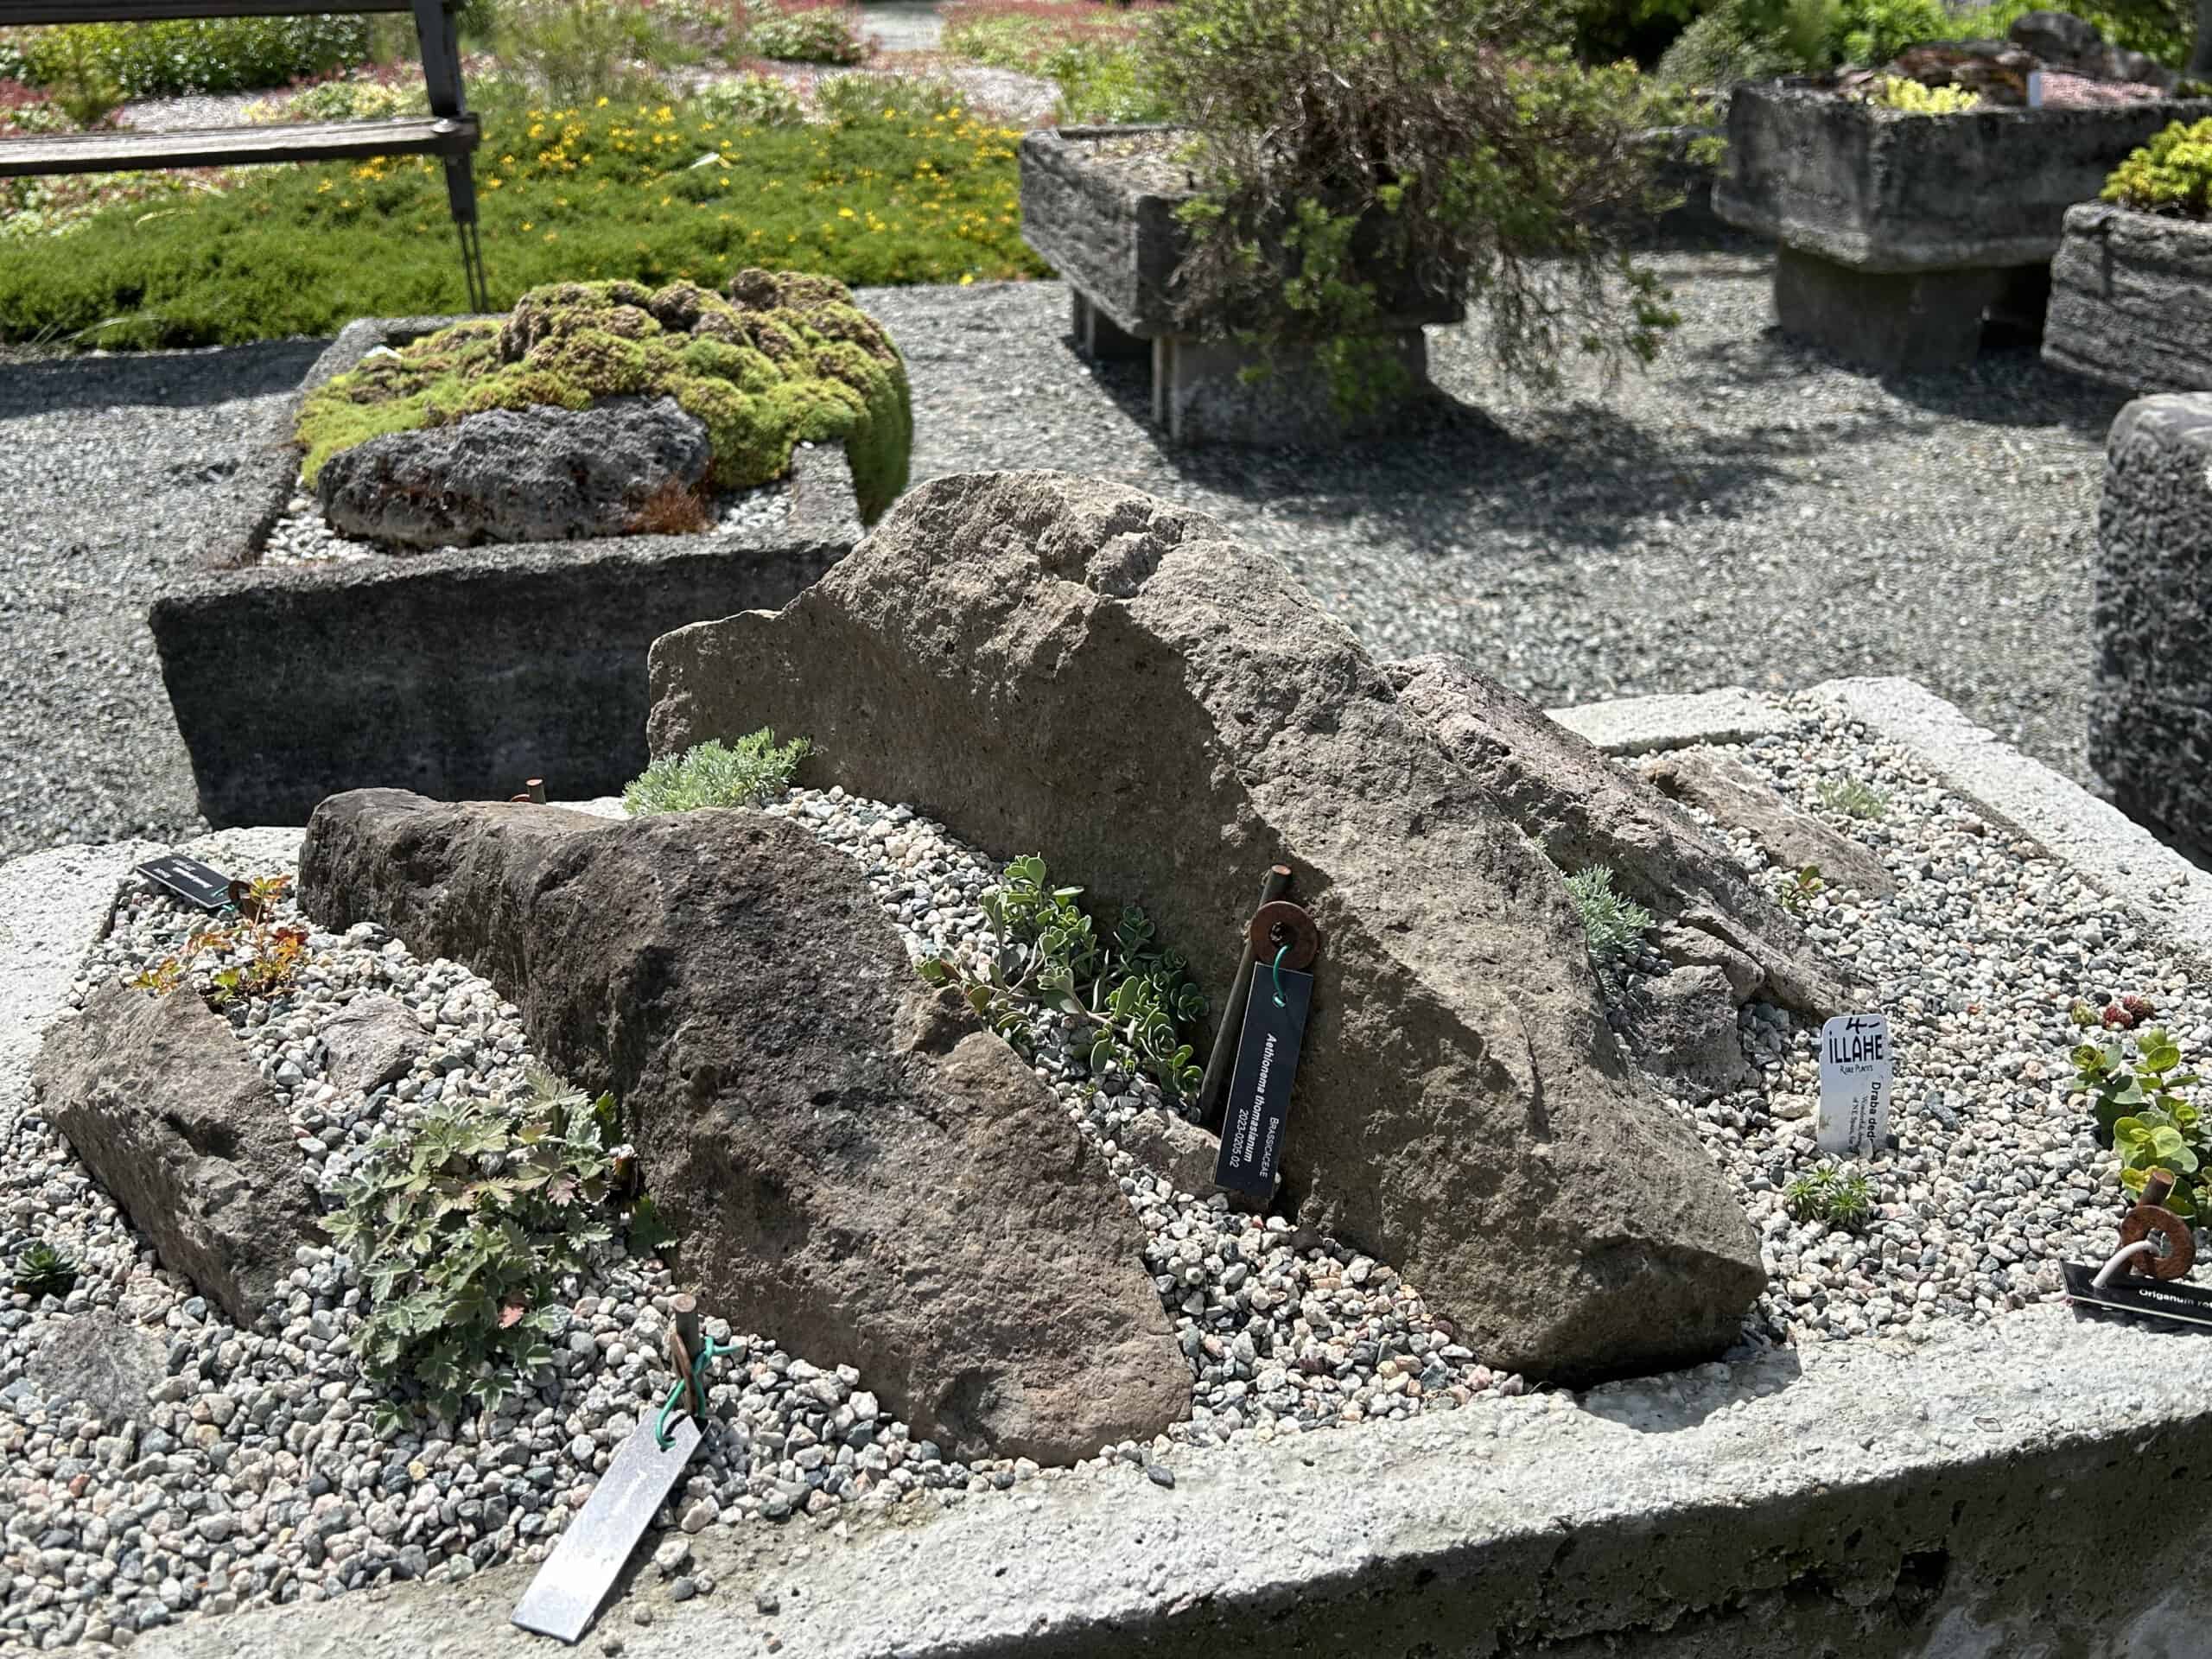
This tiny Brassicaceae is tucked between rocks in a trough garden at the UBC Botanical Garden. © Ginny Bode
Making Hypertufa
Recipe mixes for hypertufa can be found on the Internet. The recipe below is from Rosemary Read, Editor of The Social Gardener for the Whatcom Horticultural Society.
Lightweight Frost-proof Troughs “Tufa”
by Rosemary Read, Editor, The Social Gardener

Materials Needed (parts by bulk):

  • 1 part Portland cement
  • 1 ½ parts fine peat (screened)
  • 1 ½ parts horticultural vermiculite and/or perlite
  • 2 cardboard boxes (which, when fitted one inside the other, leave a gap of approx. 2 in. between the sides.)
  • 2-3 wood dowels (approx. 2 in. long)
  • Chicken wire (or metal strips) for reinforcement

Peat Moss and Sustainability

Increasingly, master gardeners are looking towards sustainable materials and encouraging gardeners to use a peat moss substitute whenever possible. Coconut coir is a sustainable product, and can be used instead of peat moss at a ratio 1.5:1 of the coconut coir and cement to water and perlite. However, it does not decompose as quickly as peat moss, which leaves pits and crevices and resembles true tufa rock. The full recipe and directions for using a peat substitute can be found here > 

Download the full report debunking the myth of the sustainability of peat bogs by Linda Chalker-Scott, PhD., WSU Extension Urban Horticulturist and Associate Professor.
Download here>
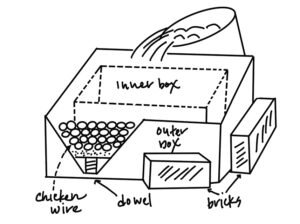
Steps to Making a Hypertufa Pot
Mix the dry ingredients and add water to make a thick, creamy consistency that can be poured. Mix in an old wheelbarrow, bucket, or container that can be moved and washed out when the project is complete.

1) Set up the outer mold cardboard box where you can move around it freely and where it may be left to harden. It is best to cover surfaces with plastic.

2) Pour mixture into the floor of the outer mold (2″ or more).

3) Press the wooden dowels into the mixture. In addition to making drainage holes, the dowels will support the inner box.

4) Place the inner mold on top of the dowel plugs.

5) Place in chicken wire (along sides and corners).

6) Pour in the mixture until it reaches the top.

7) Leave 24 hours. Remove the outer mold (peel off).

8) Rough sides to make it look “old” (chisel).

9) Leave the inner mold longer to harden.

10) Leave trough a week or more to harden before knocking out the plugs.

11) Leave the trough for 2 weeks to “cure” by soaking it in water, which is changed every 2-3 days.

_______ – _______

Safety Warning: Concrete contains chemicals that can cause skin irritation and lung damage. Read the warning labels on the material purchased. When working with concrete, always wear gloves, a facemask, safety glasses, and old clothing. Set up your work area outside, away from breezes, children, and pets.

_______ – _______

Outer box: 16 ½” x 13 ¼” x 8″
Inner box: 13″ x 9 ¼” x 6-8″
Trough Size (inside): 13″ x 9 ¼” x 5 ½”

REFERENCES AND RESOURCES:

1. Carpenter, J. How to Make a Hypertufa Garden Trough. Retrieved from: This Old House.com

2. Chips, L. (2018). Hypertufa Containers. Portland, OR, Timber Press

3. Ecoregions in Washington, Landscape America, (http://www.landscope.org/washington/natural_geography/ecoregions/).Read, R., Personal Communication, (May, 2024). Lightweight Frost-proof Troughs “Tufa” The Social Gardener, Whatcom Horticultural Society, Bellingham, Washington.

4. Reed, W. High and Dry for a NW Icon. (2023, Fall). Washington State Magazine
Retrieved from: https://magazine.wsu.edu/2023/07/31/high-and-dry-for-a-nw-icon/

5. Pojar, J., MacKinnon, A. (1994). Plants of the Pacific Northwest Coast: Washington, Oregon, British Columbia and Alaska. Tukwilla, WA, Lone Pine Publishing.

Sonja Nelson

ABOUT THE AUTHOR:

Sonja Nelson is a Skagit County WSU Extension Master Gardener, Class of 2009.

Questions about home gardening or becoming a master gardener may be directed to:  Skagit County WSU Extension Office, 11768 Westar Lane, Suite A, Burlington, WA 98233; by phone: 360-428-4270; or via the website: www.skagit.wsu.edu/mg

Know & Grow
Gardening for Fragrance
Presented by Diana Wisen
Free
Tuesday, June 18 ~  1 p.m.
NWREC Sakuma Auditorium
16650 State Route 536, Mount Vernon

Visit the annual Open House at the Display Gardens:

Saturday, June 29
10 a.m. to 2 p.m.
Free Admission & Parking

Discovery Garden
16650 State Route 536, Mount Vernon
Learn More >


A Second Act for Your Square 1-Gallon Pots at the Discovery Garden!

Bring your leftover square 1-gallon pots to the Discovery Garden (16650 State Route 536, Mount Vernon). The bin for recycling the square 1-gal pots is located in the parking lot, just north (to the right) of the main entrance.
We only need square 1-gallon pots like the ones pictured below (bottom right). The recycling bin will be available now through fall. Simply put your pots into the bin, and we take care of the rest!


pot recycling


AMGPost_header5
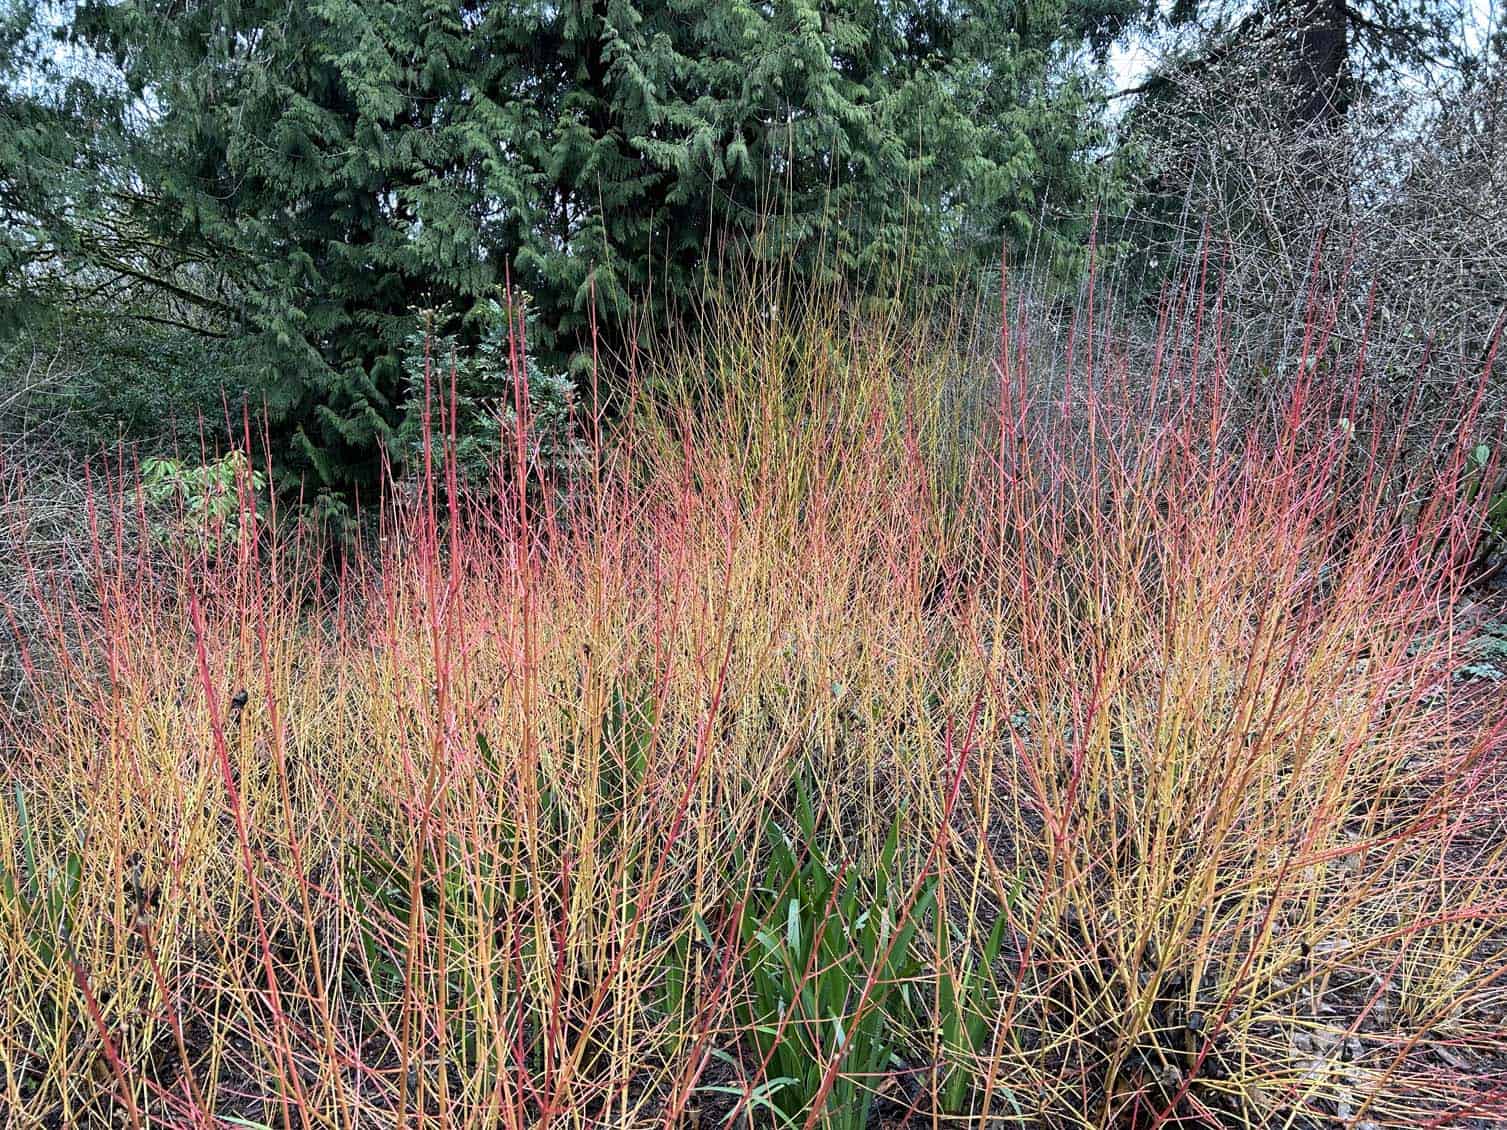
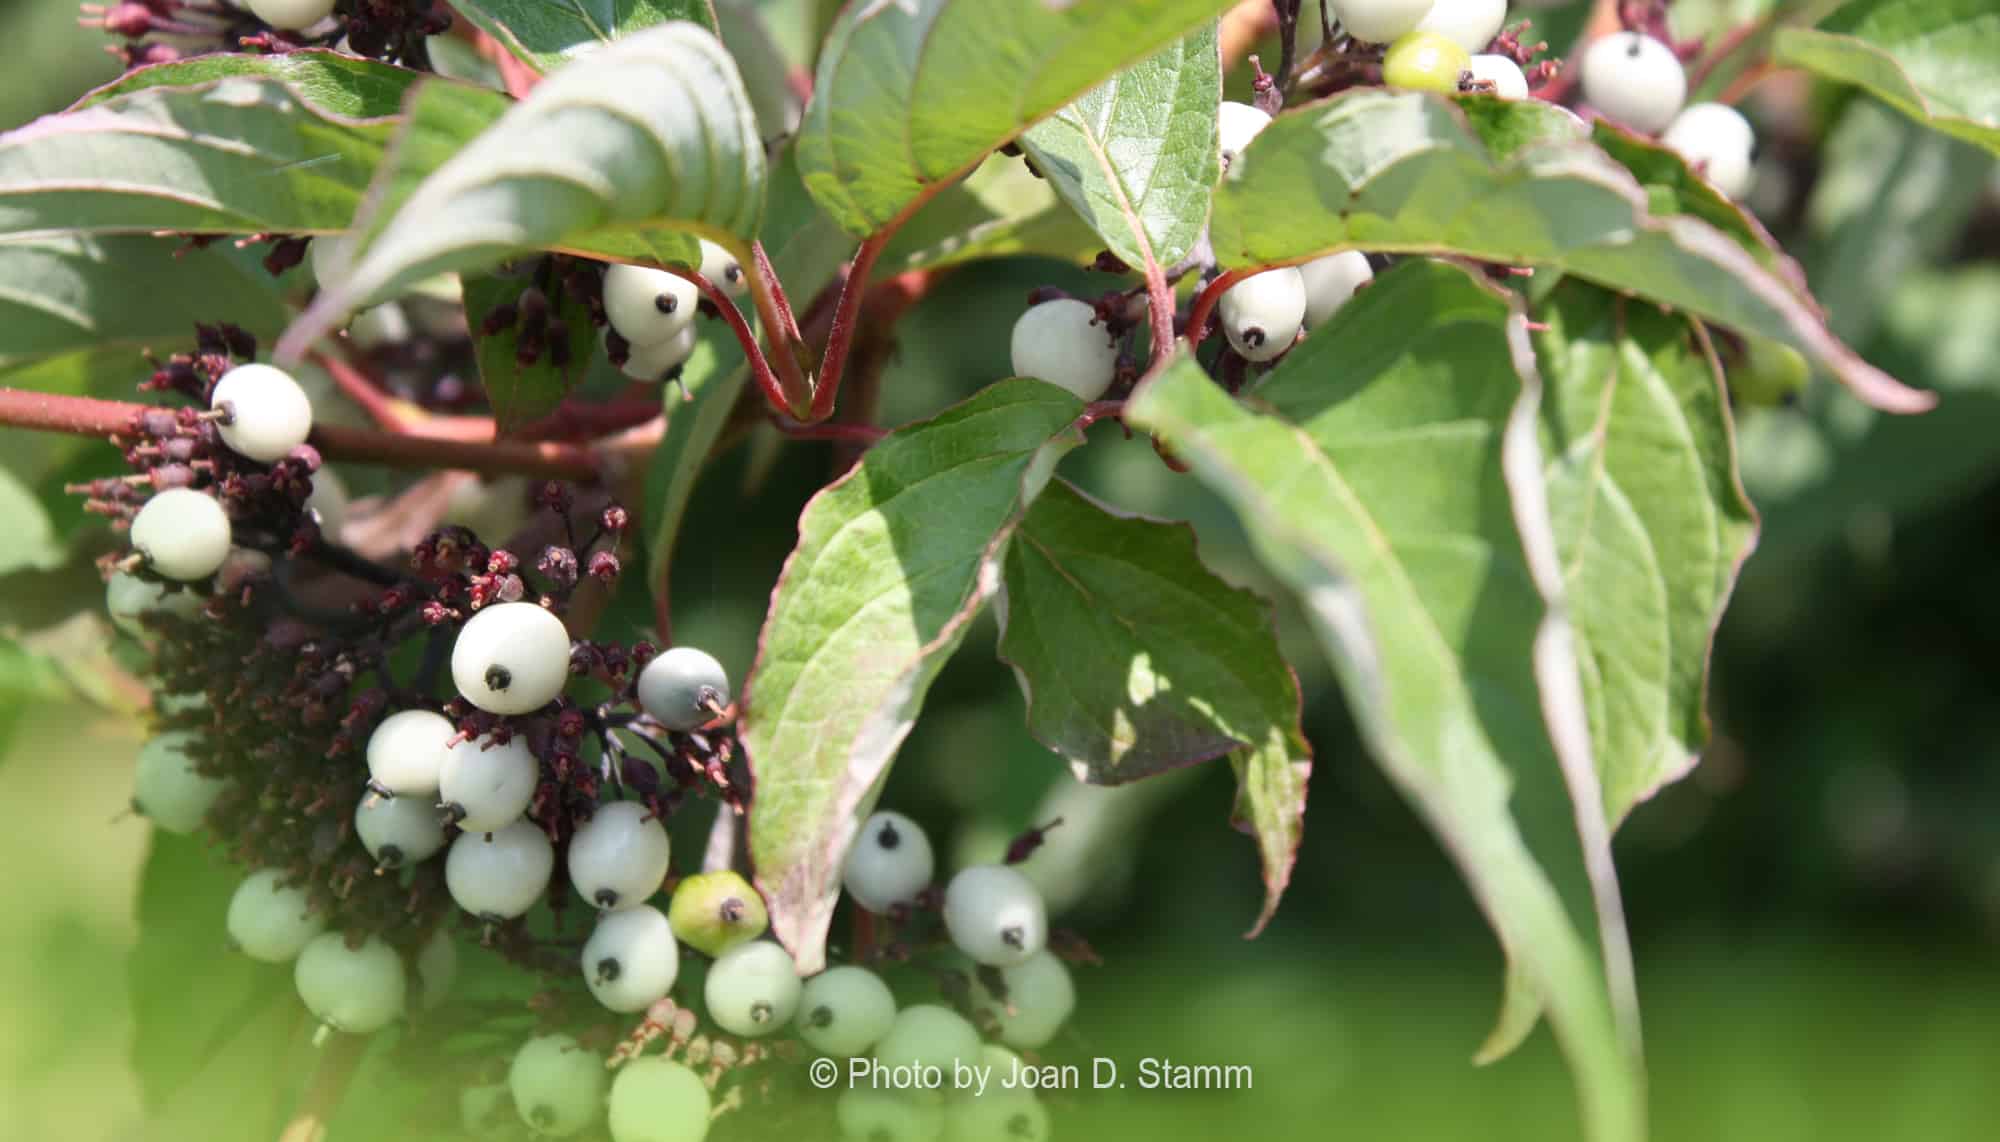
Red-twig dogwood (Cornus sericea) © Joan D. Stamm

Gardening for Wildlife

Thinking of adding new plants to your garden this spring? Choose from these recommendations to build a healthy ecosystem for your favorite wildlife species.

              Subscribe to the Blog >

Updated: August 18, 2024

By: Joan D. Stamm, Skagit County WSU Extension Master Gardener

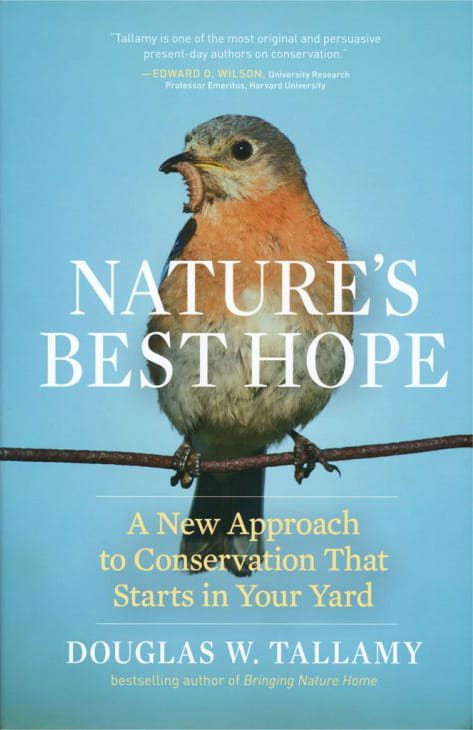
In a blog article last September, I recommended reading Nature’s Best Hope by Douglas Tallamy for the “why” of gardening for wildlife. This article will explore the “what” and the “where”-as in “what” plants and “where” to buy them.

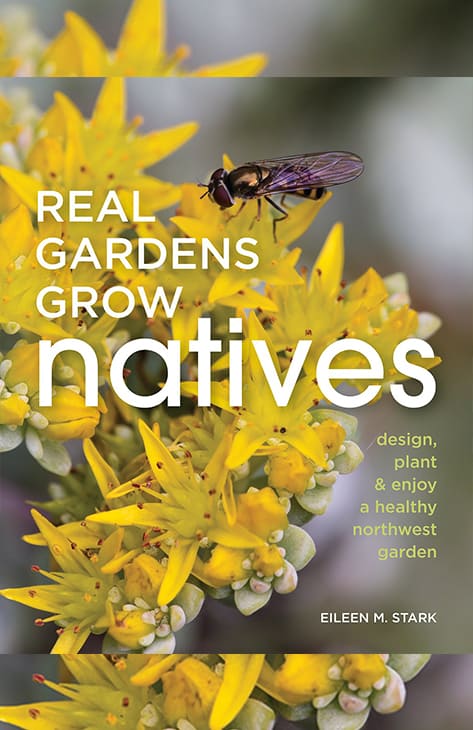
For the “what,” I suggest Real Gardens Grow Natives by Eileen M. Stark as a guide to site prep, plant selection, and the benefits each plant offers the ecosystem. “Benefit” in this article, as in Stark’s book, is the critical word. It points to what the National Wildlife Federation (NWF) has coined as keystone plants.

What exactly is a keystone plant?
According to NWF, keystone plants are “native plants critical to the food web and necessary for many wildlife species to complete their life cycle. Without keystone plants in the landscape, butterflies, native bees, and birds will not thrive. 96% of our terrestrial birds rely on insects supported by keystone plants.”

Stark, a wildlife conservationist and landscape designer from Portland, Oregon, specializes in wildlife habitat gardens that include keystone plants. In the 317 pages of her beautifully photographed book, you will find 100 of her favorite Northwest native plant varieties and their many benefits for wildlife.

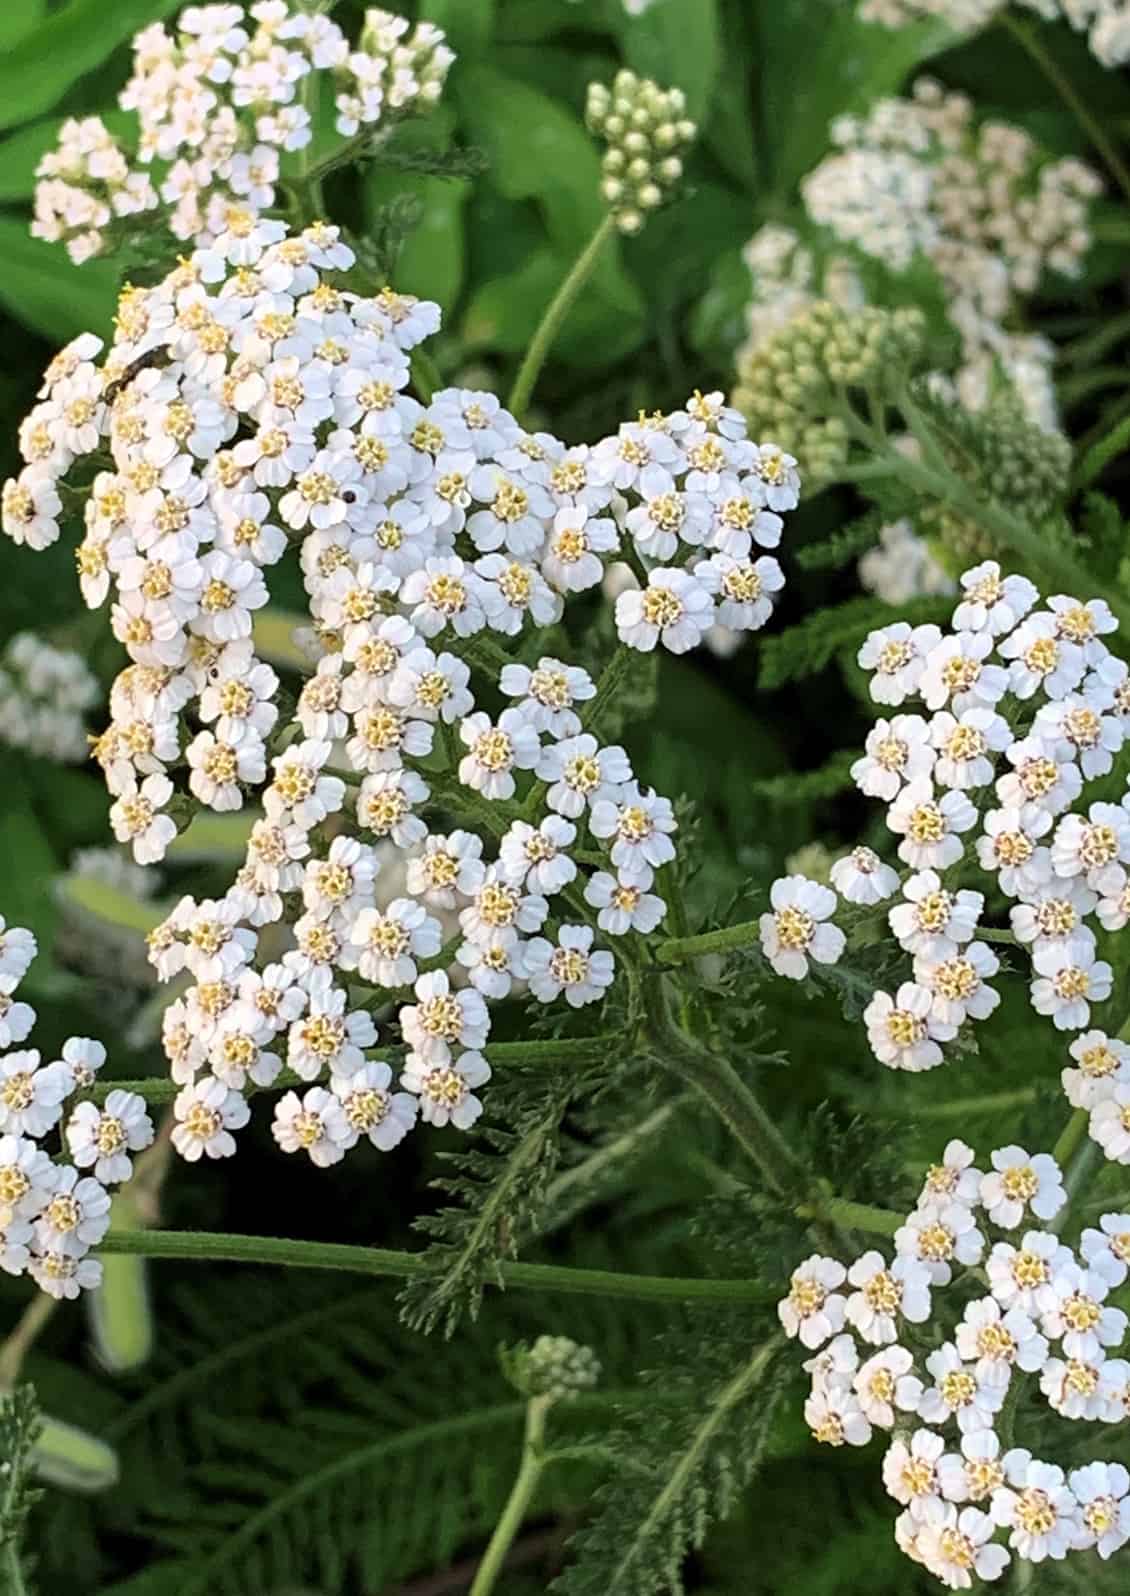
Yarrow (Achillea millefolium) © Joan D. Stamm

Yarrow (Achillea millefolium) © Joan D. Stamm

Twinberry (Lonicera involucrata) © Joan D. Stamm

Twinberry (Lonicera involucrata) © Joan D. Stamm

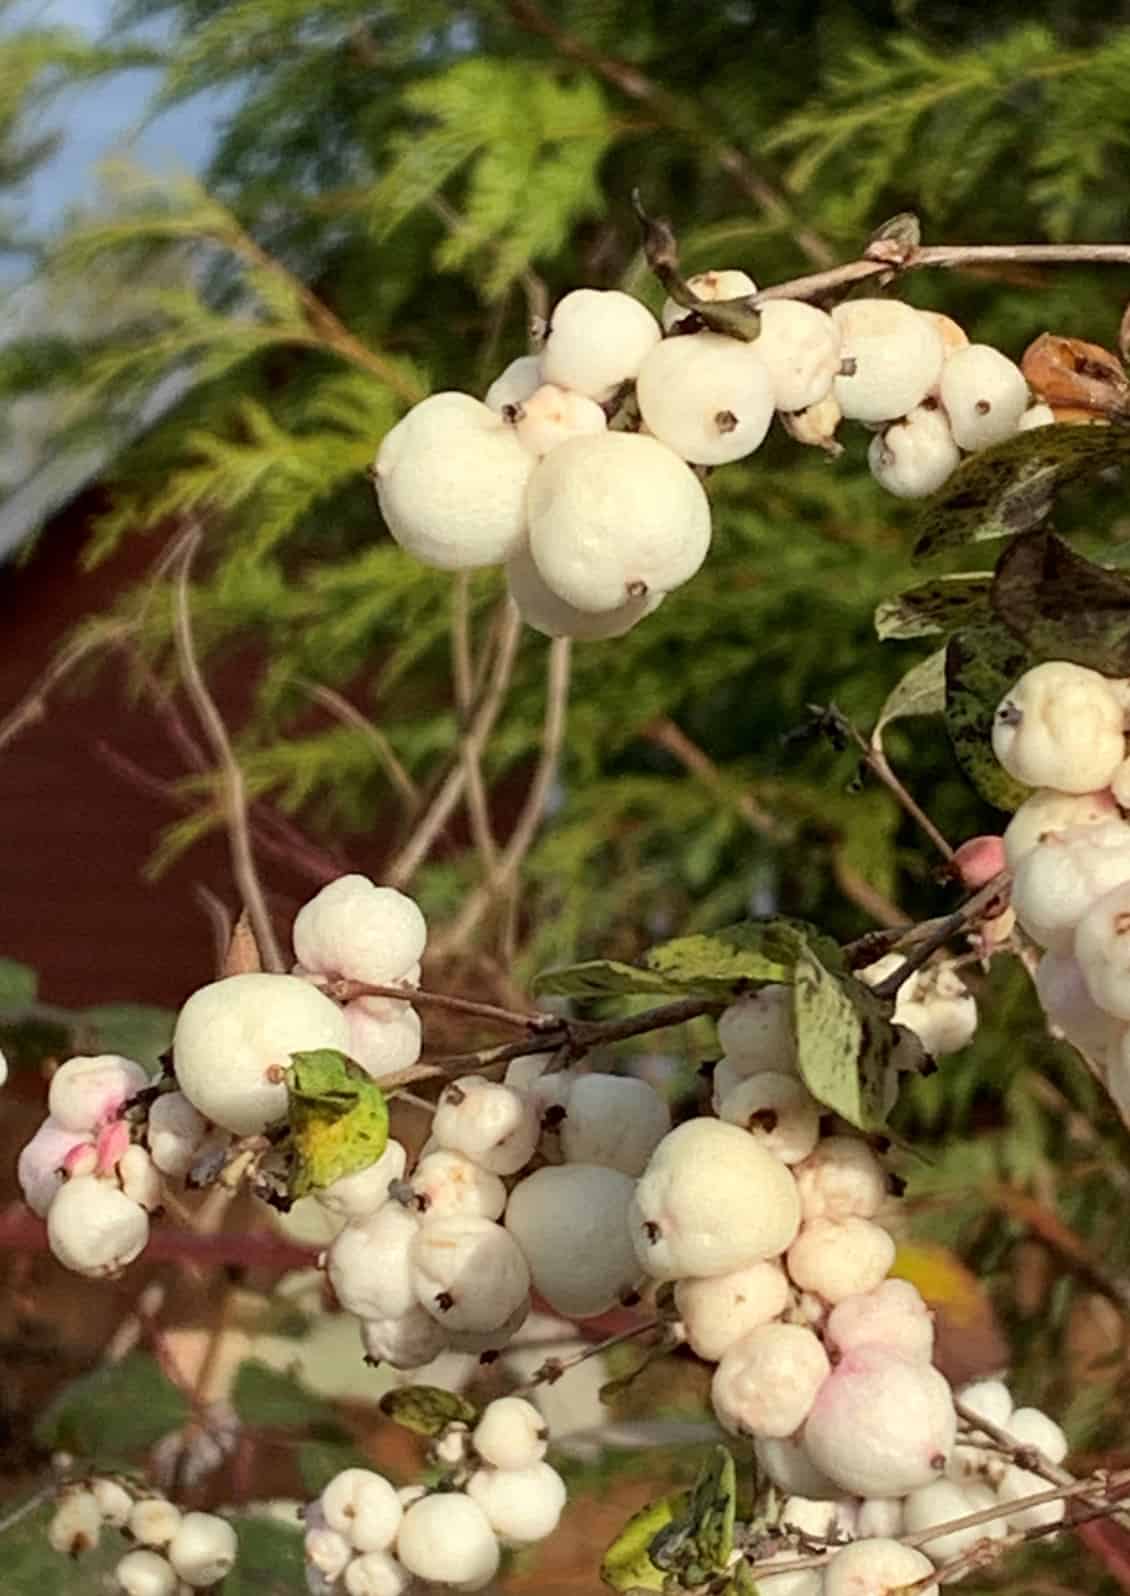
Snowberry (Symphoricarpos albus) © Joan D. Stamm

Snowberry (Symphoricarpos albus) © Joan D. Stamm

For example, the Garry oak or Oregon white oak (Quercus garryana) is one of the top keystone plants Stark promotes in her book. If we want butterflies in our garden, we need to have trees, shrubs, and perennials that host butterfly larvae. The Garry oak is one such tree; it is a host plant for many caterpillars, including the “gray hairstreak, California sister, and Propertius duskywing butterfly larvae.” In addition, the “flowers attract native bees,” and the “acorns sustain populations of mammals and birds such as woodpeckers, nuthatches and vireos.” “Studies show,” writes Start, “that oaks support more insect herbivores than any other plant genus.”

Although incredibly beneficial, not everyone has space for an 80-foot Garry oak. If not, consider another keystone tree: bitter cherry (Prunus emarginata). Birds such as “tanagers, waxwings, bluebirds, towhees, and flickers” will arrive to eat the fruit. A native cherry also hosts “swallowtail and Lorquin’s admiral butterfly larvae.”

If you love butterflies, another great keystone tree is Scouler’s willow (Salix scouleriana); it hosts “western tiger swallowtail, great comma, dreamy duskywing, and mourning cloak butterfly larvae.” In addition, native willow flowers “provide pollen and nectar for bees,” and “small and large mammals feed on buds, leaves, and seeds.”

small green bush with red berries

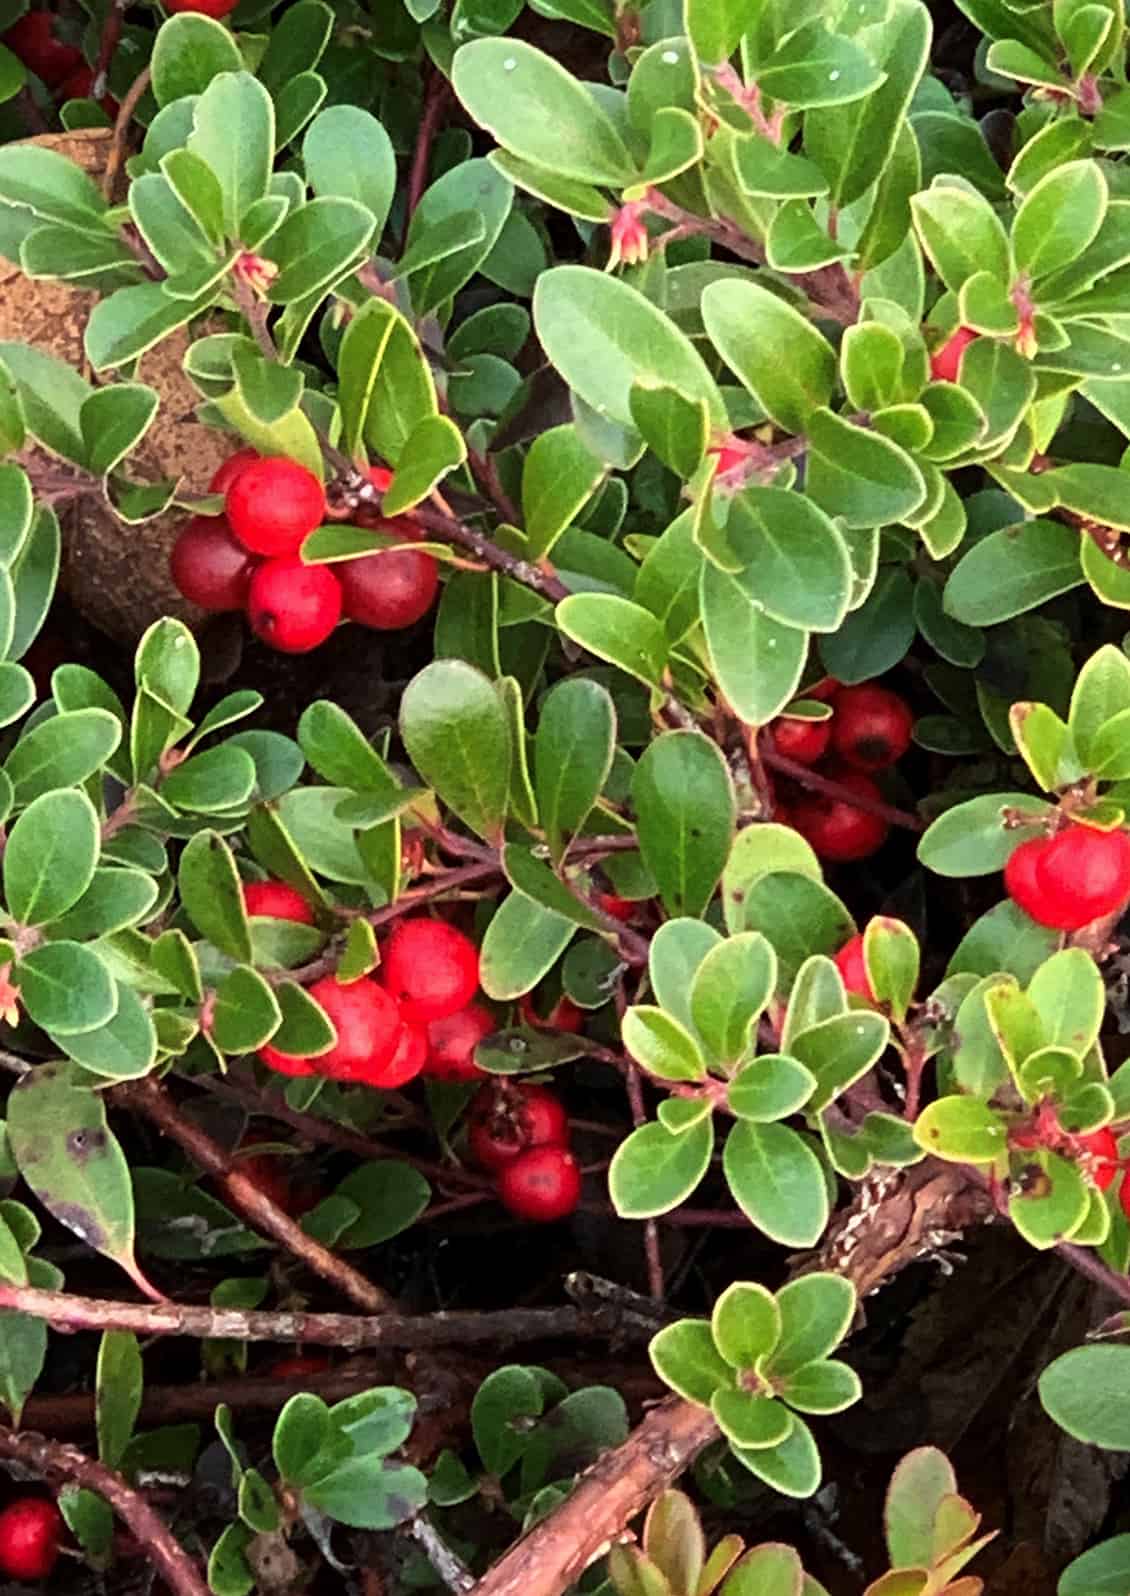
Kinnikinnick (Arctostaphylos uva-ursi) © Joan D. Stamm

frog on orange flower

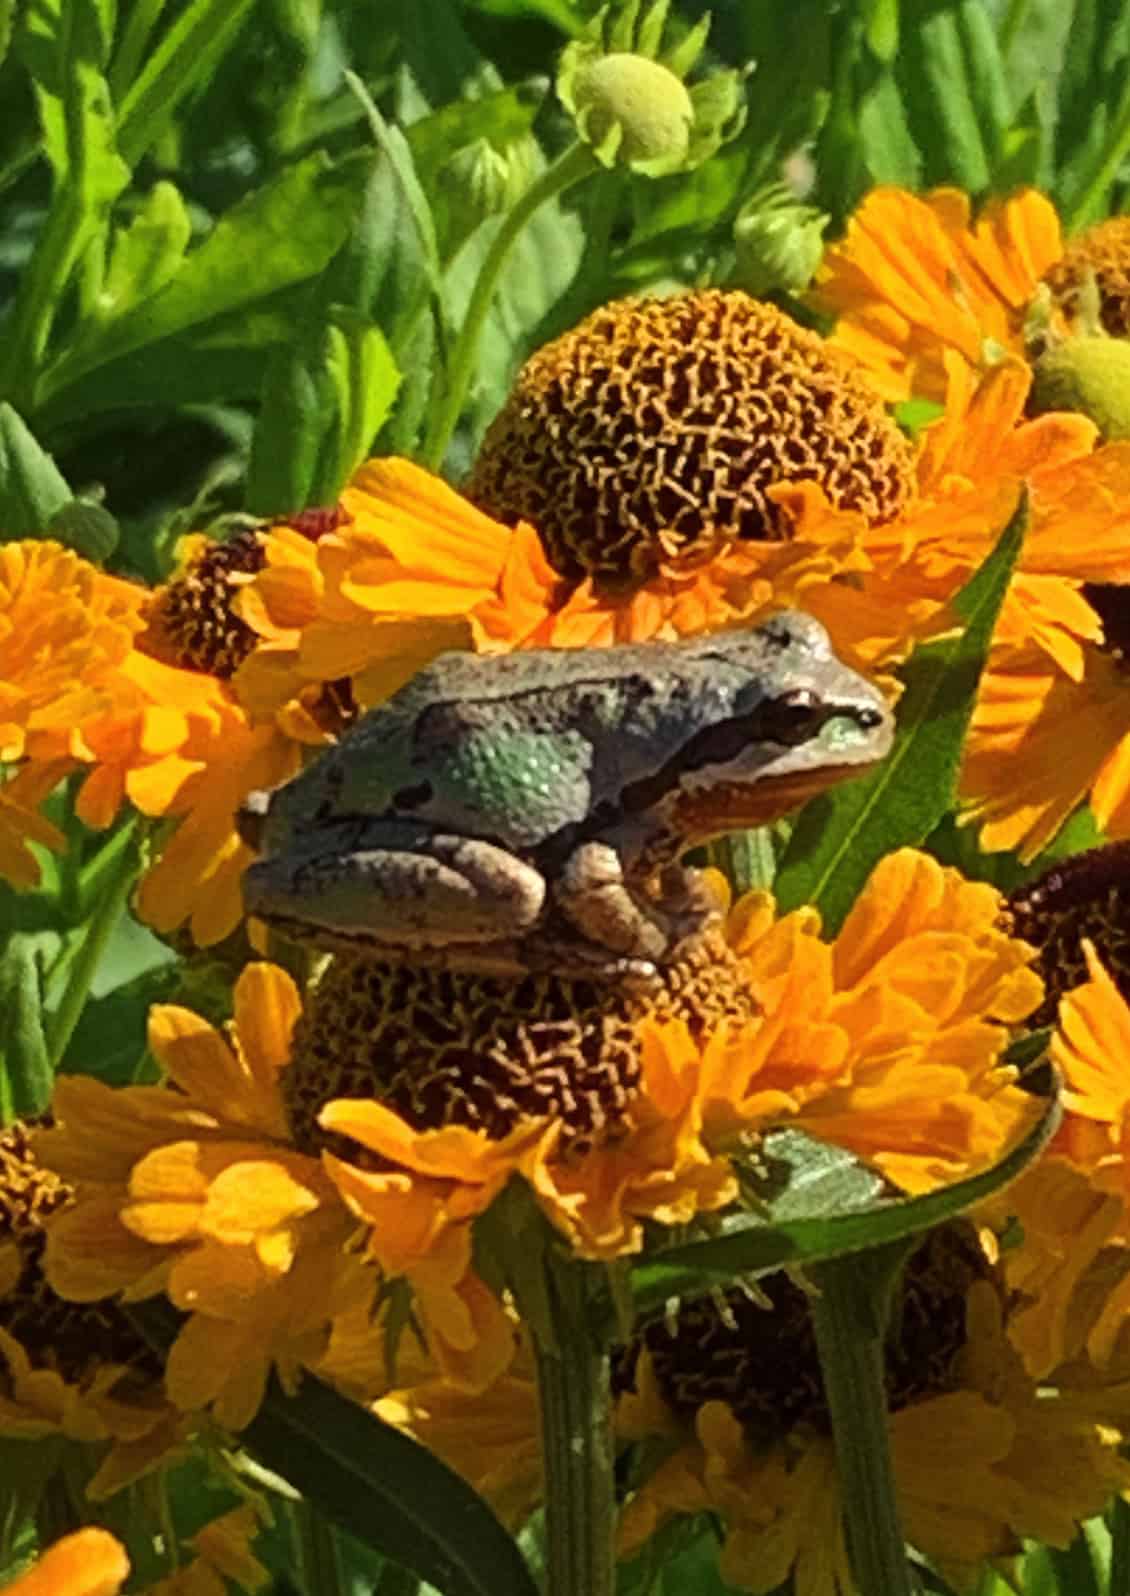
Frog on Sneezeweed © Joan D. Stamm

Bee on orange and yellow flower

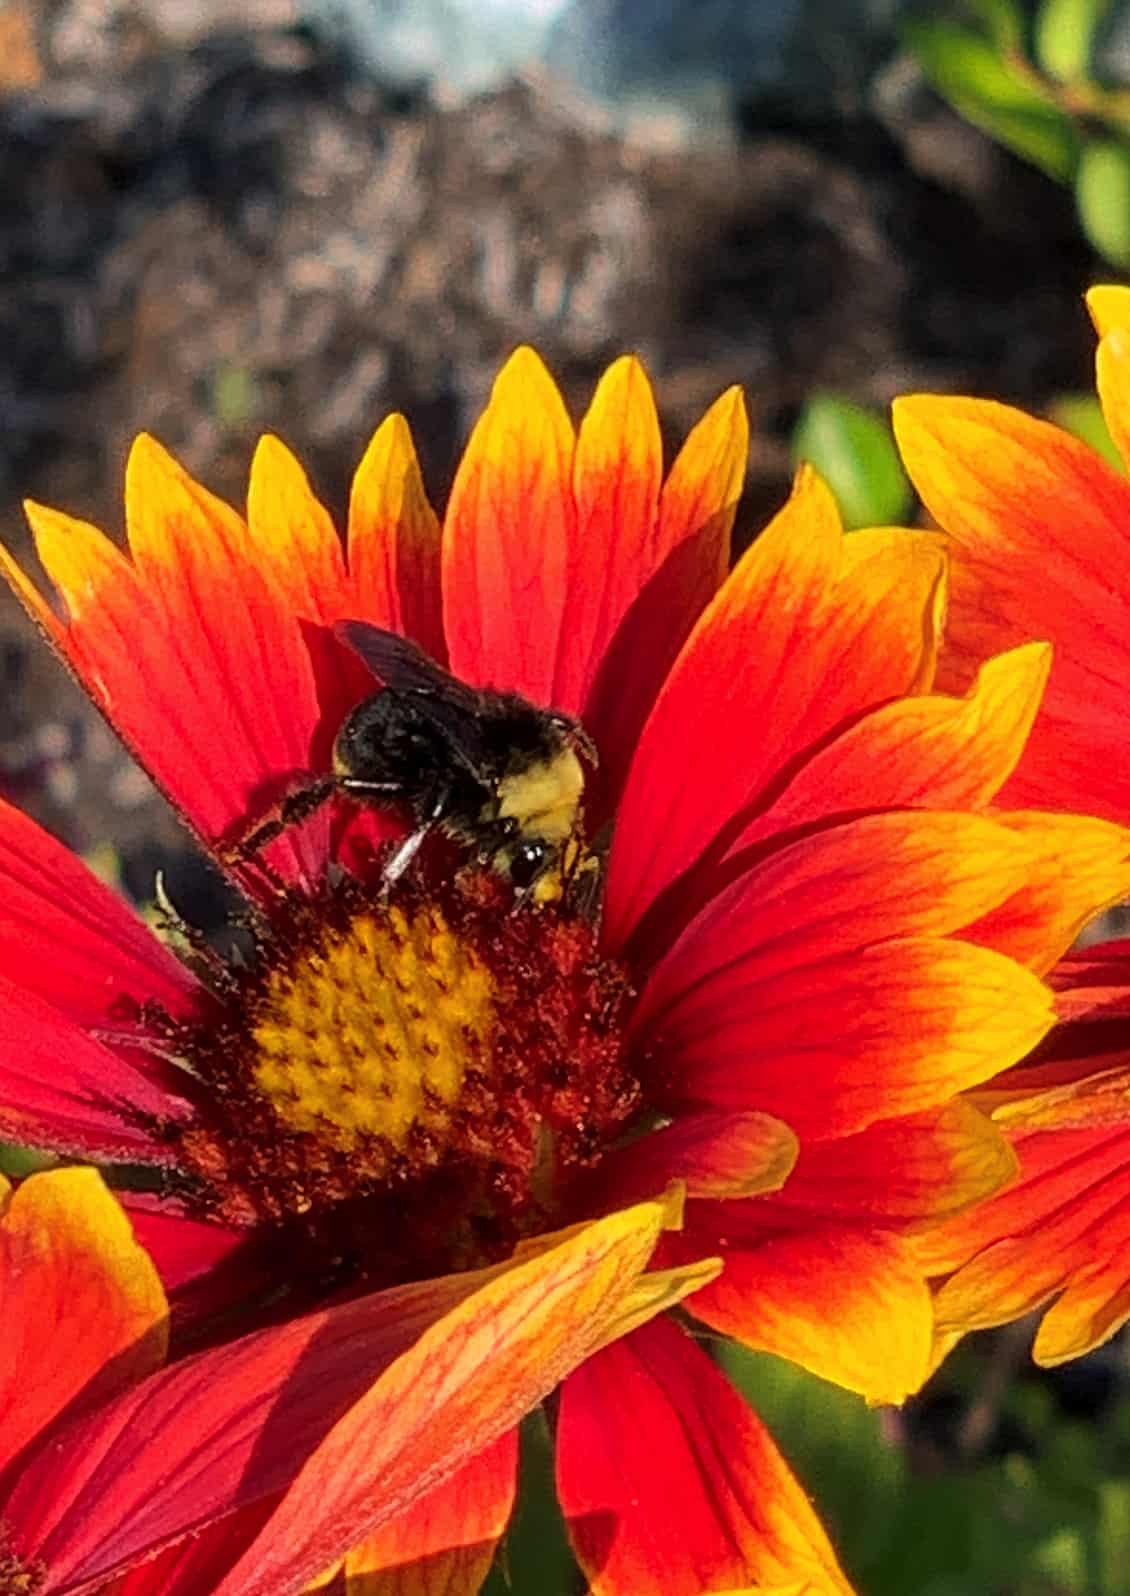
Bumblebee on blanket flower © Joan D. Stamm

Serviceberry (Amelanchier alnifolia) is also a keystone tree, providing “pollen and nectar for large numbers of bees, as well as hummingbird and spring azure butterflies.” Serviceberry fruit, says Stark, “is relished by waxwings, chickadees, woodpeckers, and tanagers,” and it is a host plant for “pale swallowtail, brown elfin, Lorquin’s admiral, and California hairstreak butterfly larvae.”

Along with these important native trees, many keystone perennials can fit into any open sunny space in your garden. A beneficial plant throughout many regions, goldenrod (Solidago canadensis), is a “nectar source for native bees and butterflies, such as the checkered skipper, clouded sulphur, gray hairstreak, monarch [east of the Cascades], and the endangered Oregon silverspot.”

Douglas aster (Symphyotrichum subspicatum) “provides nectar and pollen for bees and nectar for woodland skipper, pine white, painted lady, red admiral, mourning cloak, and the Oregon silverspot.” It is also a “host plant for field crescent and other butterfly larvae.”

plant with purple blue flower
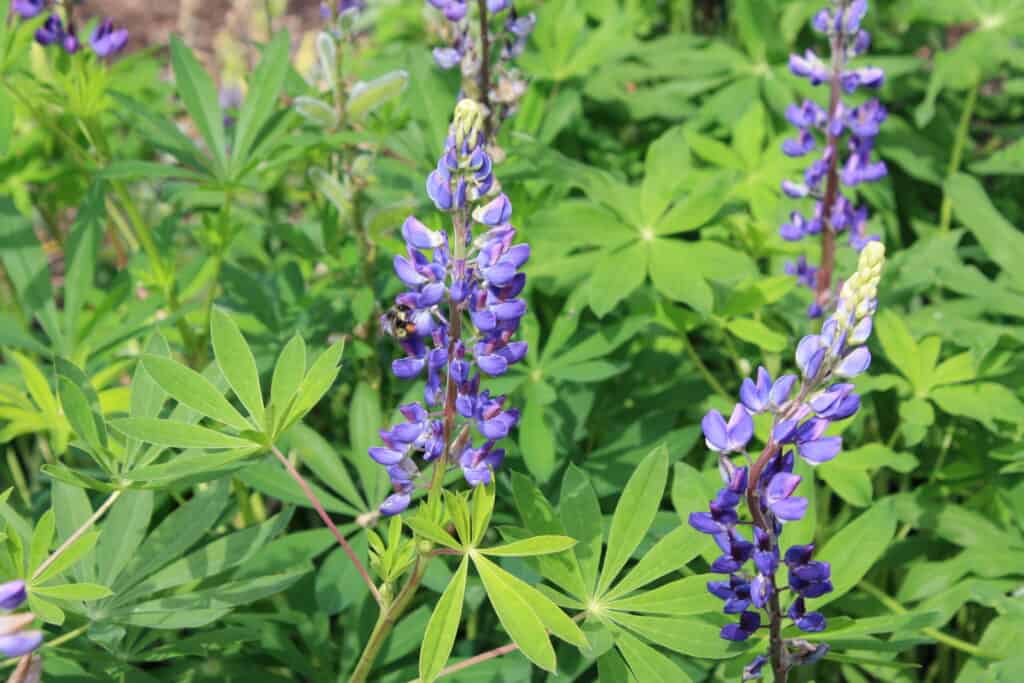
Lupine © Joan D. Stamm

Big-leaf lupine (Lupinus polyphyllus) not only “provide[s] pollen for native bumblebees,” it is a “host plant for silvery blue, painted lady, and orange sulfur butterfly larvae. Aphids attracted to the plant are preyed upon by syrphid fly larvae. Seeds are eaten by birds such as sparrows and finches.”

The Viola adunca, a native violet in our state, is a dynamic host plant for at least seven species of butterfly caterpillars and an enticing nectar plant for the endangered Mardon skipper butterfly.

Stark divides her native plant selections into three categories: plants for sun, partial sun, and mostly shade, guiding us in our creed “right plant, right place.” You’ll also find chapters on soil, pruning, watering, weeding, mulching, and much more. Her book is this gardener’s “go-to” choice whenever looking for the right native plant for a particular area and wanting to know the benefit to nature: what bees, butterflies, birds, or caterpillars the plant will attract.

As beneficial as all native plants are for our native wildlife, some natives on Stark’s list may not be suitable for an urban or suburban garden. For example, western red cedar, grand fir, Douglas fir, western hemlock, and Sitka spruce, are all enormously beneficial, but grow to a height of over 100 feet. The Douglas’ spirea, Stark warns, “may be too assertive for small, moist gardens.” Yet, the Spiraea betulifolia var. lucida, a small shrub with white flowers, might be perfect for a sunny border. Be sure to familiarize yourself with height, width, water requirements, and characteristics such as “vigorous,” “assertive,” or “rapid spreader” to determine if you have the “right plant for the right place.” A Nootka rose’s flowers and hips provide many benefits to wildlife but, over time, will grow into a thicket. However, if you have room for it to spread, it might make the perfect hedgerow, providing not only winter food for juncos and grosbeaks but also a habitat for nesting birds and the western checkerspot butterfly caterpillar.

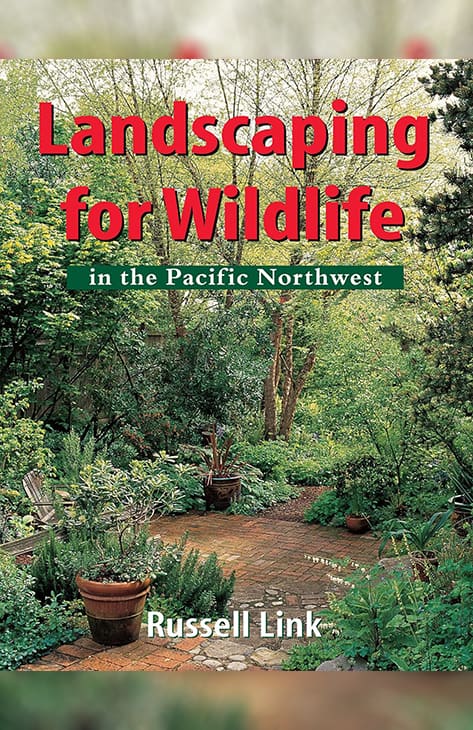
For a more comprehensive book on creating gardens for wildlife, see Russell Link’s Landscaping for Wildlife in the Pacific Northwest. Link’s book not only includes extensive lists of native and non-native plants that benefit wildlife but also illustrates how to build habitats for birds, reptiles, mammals, and all the other creatures that make up a complete ecosystem. For example, he details snag locations and which draw native birds. He describes how to create a cavity in a live tree without killing the tree and thus create a habitat for a woodpecker. The book contains several kinds of fully illustrated brush or rock piles, including how to make them, where to place them, and who will benefit.

For example, Link says that “bushtits, chickadees, dark-eyed juncos, towhees,” and others “will use the inside of a brush pile,” whereas “hummingbirds, robins, and towhees will use the outside of a brush pile. Salamanders, snakes, toads, and turtles,” will use the base of the brush pile. He also covers how to create or construct proper birdbaths, ponds, nest boxes, and bat houses and features detailed drawings to illustrate how to build homes for Mason and bumblebees. Included are eight pages of colored photos depicting NW native mammals, birds, reptiles, amphibians, butterflies, moths, and other insects, describing our native birds and their preferred habitats.

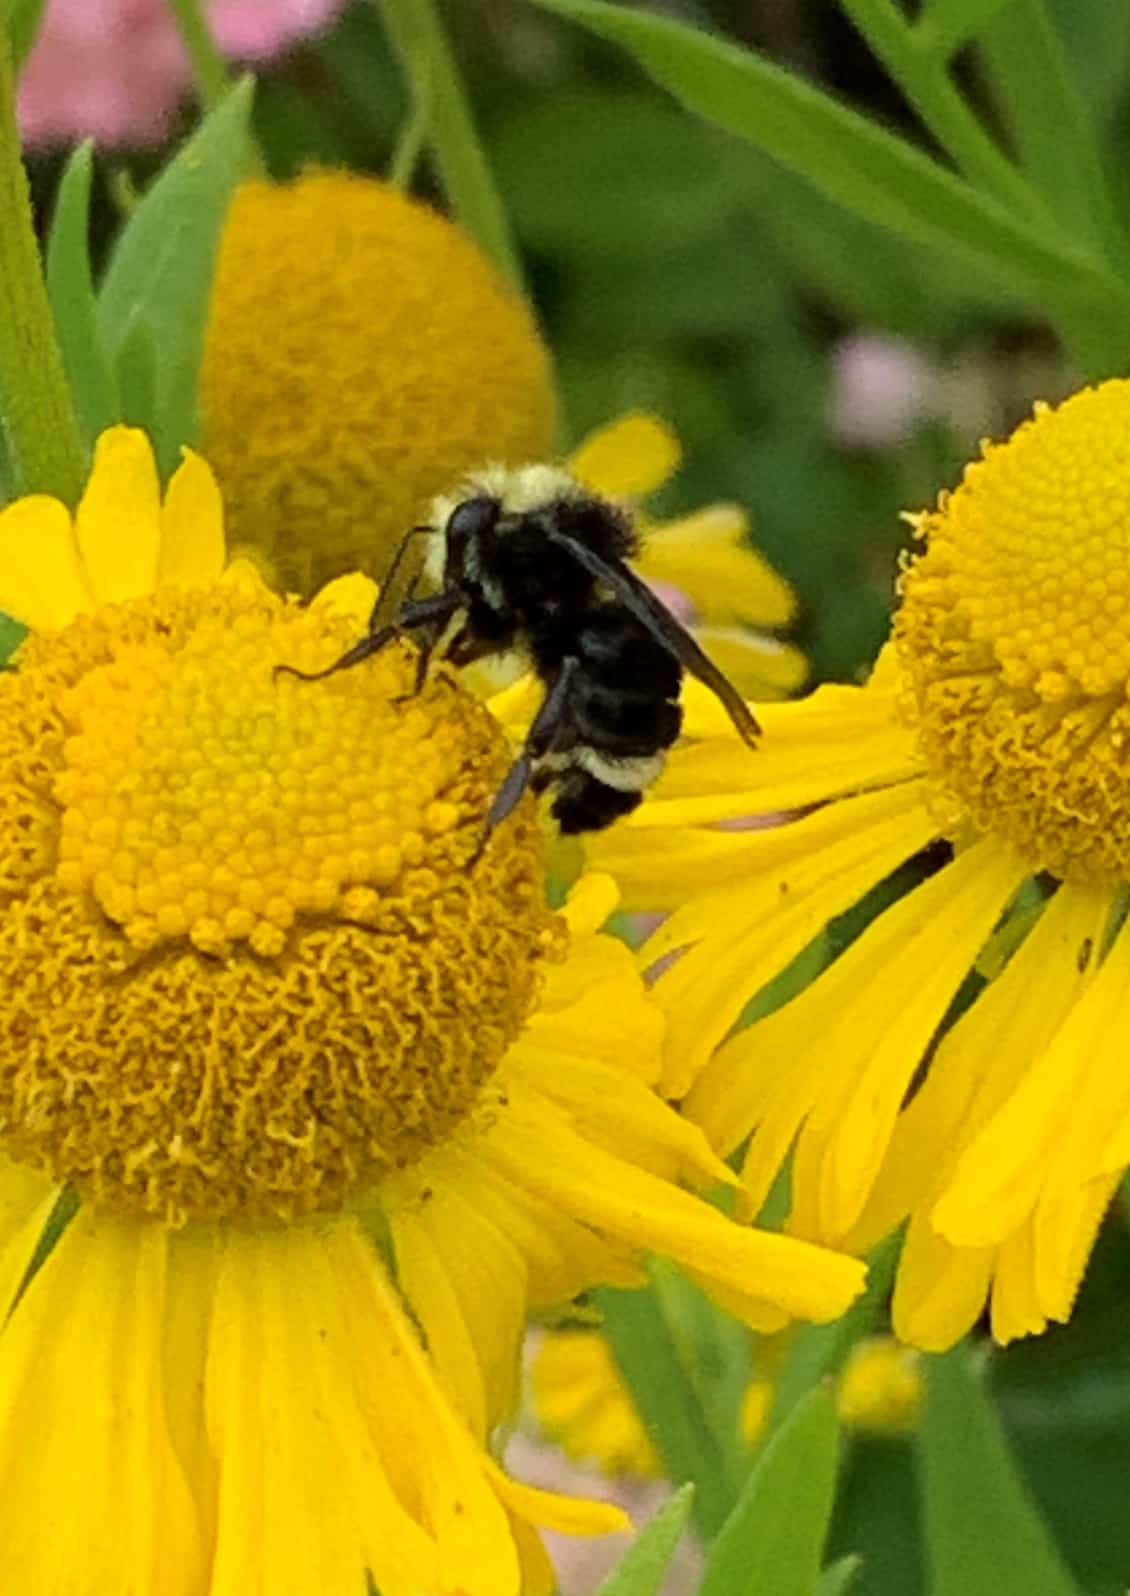
Bee on Sneezeweed © Joan D. Stamm

Bee on Sneezeweed © Joan D. Stamm

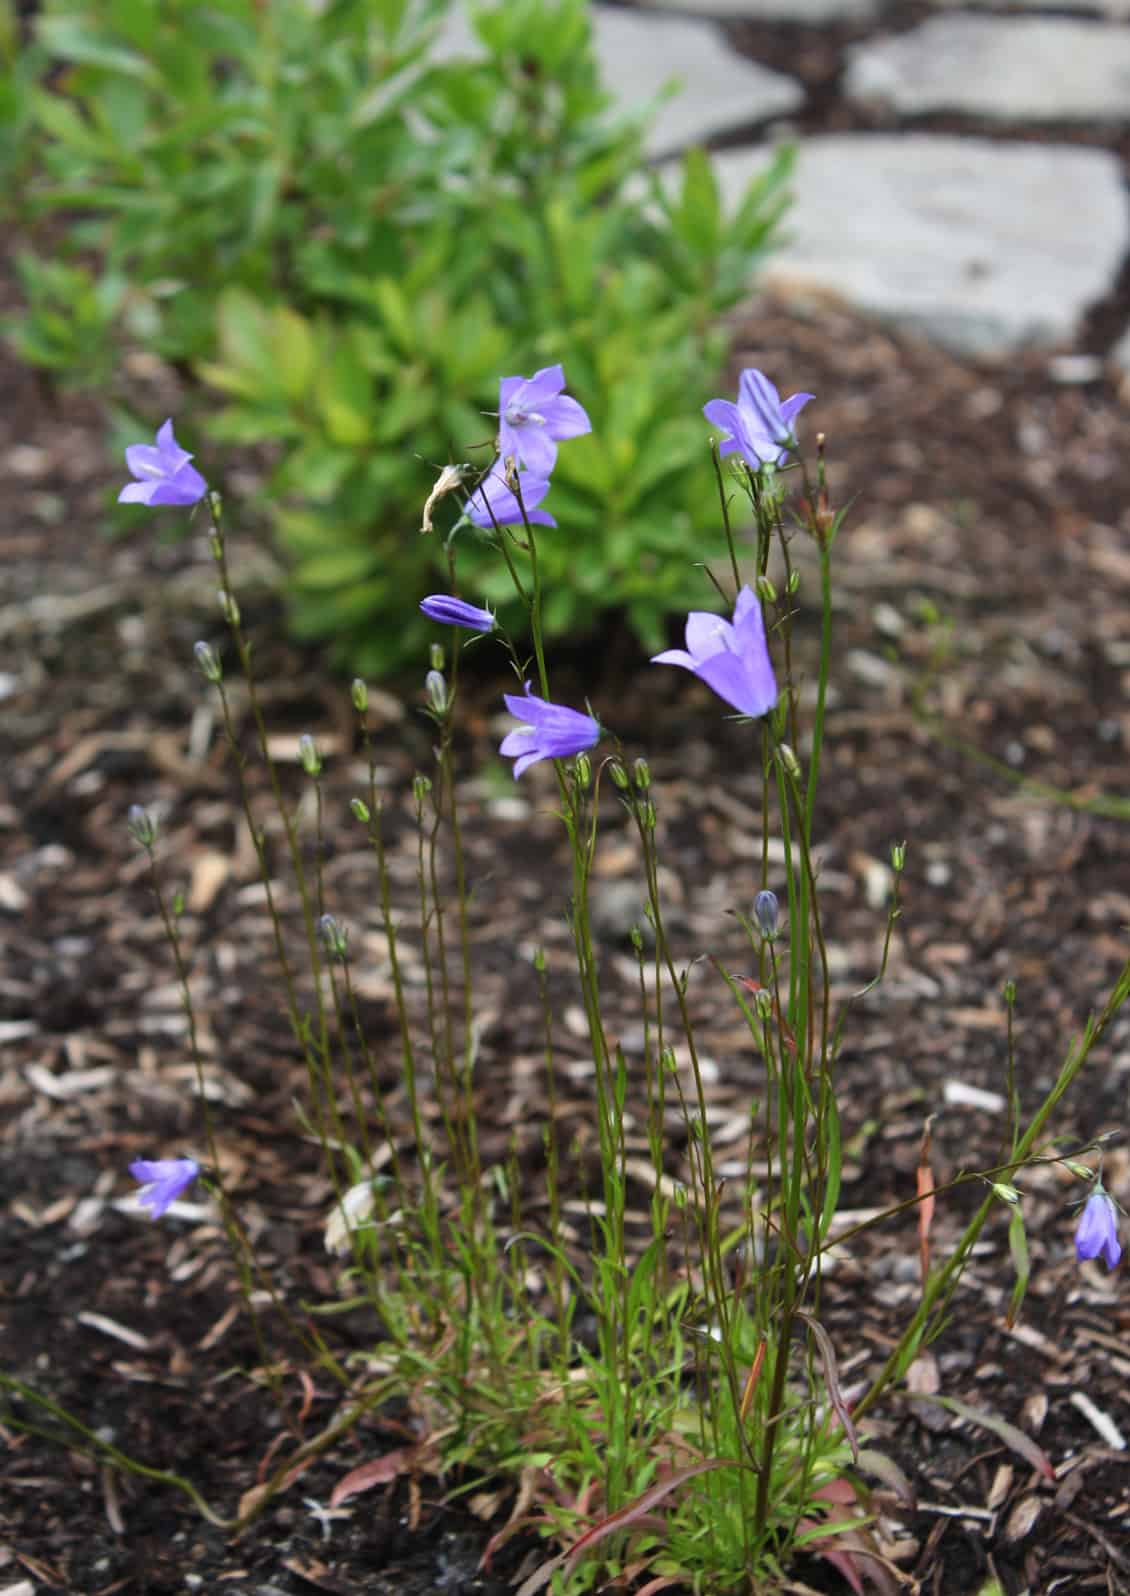
Scotch bluebell (Campanula rotundifolia) © Joan D. Stamm

Scotch bluebell (Campanula rotundifolia) © Joan D. Stamm

With these three books, Nature’s Best Hope, Real Gardens Grow Natives, and Landscaping for Wildlife in the Pacific Northwest, you will be inspired, informed, and guided to provide plants that offer habitat and food (nectar, pollen, insects) for our native wildlife. You will better understand why it’s important to cultivate natives and have a clearer idea of what to plant, thus joining the movement to restore our natural ecosystem.

picture of book cover by Douglas Tallamay
picture of book
Picture of Landscaping for wildlife in the PNW book cover
The only question remaining is “where” to buy all these wonderful beneficial plants?
You can start with our very own Skagit County Master Gardener Foundation’s Annual Plant Fair, which always features a native plant section. The sale occurs the Saturday before Mother’s Day (May 11, 2024) at the Skagit County Fairgrounds in Mount Vernon.

The local Salal chapter of the Washington Native Plant Society (https://www.wnps.org/salal-programs/garden) offers a twice-yearly native plant sale online with pick up at their demonstration garden adjacent to the Discovery Garden. Sign up to get email notifications.

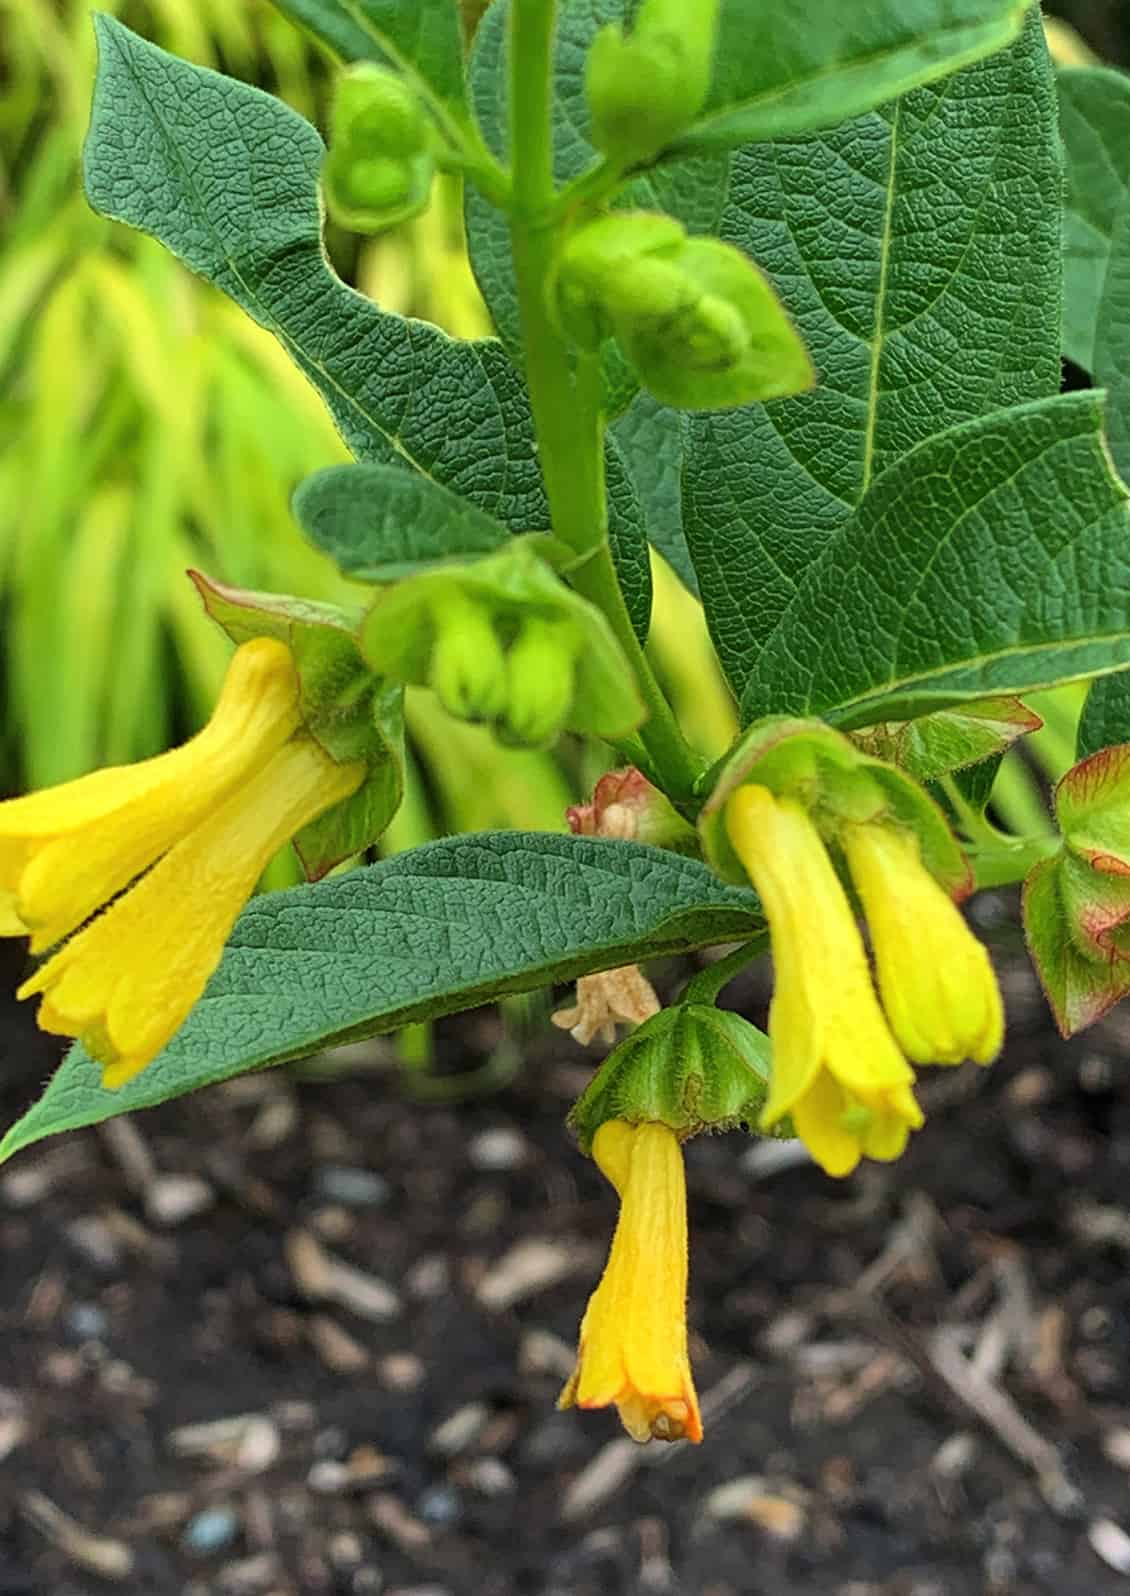
Some of our local nurseries are beginning to carry more native plants. Azusa Gardens in Mount Vernon on Hwy 20 (https://www.azusagardens.com/) keeps expanding its native plant section each season. They feature two- and five-gallon shrubs such as twinberry, ocean spray, snowberry, red-twig dogwood, mountain hemlock, and others. Twinberry (Lonicera involucrata), in particular, is an attractive and beneficial native shrub easily grown with a little shade. It produces yellow tubular flowers attractive to hummingbirds and the berries are eaten by “thrushes, flickers, grosbeaks, and waxwings”; it’s also a host plant for the “snowberry checkerspot butterfly larvae.” Azusa also carries native ferns, and groundcovers such as bunchberry and wild ginger. They also welcome requests for specific plants.

Christianson’s Nursery in Mount Vernon on Best Road  (https://www.christiansonsnursery.com/) has a native plant section and carries one-gallon great camass (Camassia leichtlinii) in spring. They also have vine maple, salal, western red cedar, fir, hemlock, and kinnikinnick. The latter is a perfect groundcover. Kinnikinnick is not only evergreen, but the flowers are popular with bees and hummingbirds; the berries are eaten by “songbirds and many ground-feeding birds,” says Stark. It is also a “host plant for brown elfin and hoary elfin butterfly larvae.”

Plantas Nativa in Bellingham (https://www.plantasnativa.com/) specializes exclusively in native plants. They pack a lot of choices-conifers, shrubs, perennials, ferns, grasses, water plants, groundcovers, and more-into their small corner lot.

A little farther away but worth the drive, a visit to the Pacific Rim Institute (PRI) https://pacificriminstitute.org/ near Coupeville on Whidbey Island will reward you with not only a native plant nursery but a hike through a preserved segment of Washington’s native prairie landscape that contains the endangered golden paintbrush (Castilleja levisecta). PRI’s Nursery specializes in 50 native prairie plants. Many, such as woolly sunflower, red paintbrush, campanula, yarrow, larkspur, and fescue, will thrive in a sunny spot in your garden. Red paintbrush, in particular, is a beautiful, easy-to-grow native when planted with another native-like yarrow, woolly sunflower, penstemon, or blue-eyed grass. Due to its symbiotic nature, paintbrush requires nutrients from a host plant’s roots to survive. It blooms throughout summer, and Anna’s hummingbird loves the red flowers.

PRI also specializes in some unique native bulbs-ookow (Dichelostemma congestum), blue lily (Triteleia grandiflora), and harvest brodiaea (Brodiaea coronaria), that I hope will begin to replace my non-native tulips and daffodils for spring cheer.

With the knowledge and expertise of Tallamy, Stark, and Link, and a little help from our many plant retailers, you will be inspired to garden with native keystone plants that provide food and habitat for our indigenous birds, bees, and butterflies. In our age of endangered plant and animal species, we can be a force for eco-restoration right in our own backyard.

REFERENCES AND RESOURCES:

Link, R. 1999. Landscaping for Wildlife in the Pacific Northwest. Washington Department of Fish and Wildlife.

Stark, E. 2014. Real Gardens Grow Natives. Skipstone, Seattle, WA

Tallamy, D. 2019. Nature’s Best Hope: A New Approach to Conservation That Starts in Your Yard. Timber Press, Portland, OR.

ABOUT THE AUTHOR :

Joan D. Stamm

Joan D. Stamm is a Skagit County WSU Extension Master Gardener and the author of several books, including The Language of Flowers in the Time of COVID: Finding Solace in Zen, Nature and Ikebana.

https://joandstamm.com/

Questions about home gardening or becoming a Master Gardener may be directed to: Skagit County WSU Extension Office, 11768 Westar Lane, Suite A, Burlington, WA 98233; by phone: 360-428-4270; or via the website: www.skagit.wsu.edu/mg


AMGPost_header5
Hummingbird

Gardening for Pollinators

A journey of learning

              Subscribe to the Blog >

By: Patty Puckett Tingler, Skagit County WSU Extension Master Gardener

Pollen is a fine powdery substance, typically yellow, consisting of microscopic grains discharged from the male part of a flower. The term pollinator is not limited to wind, insects, animals, and butterflies. Some unexpected insects such as beetles and moths are also pollinators, performing the critical task of transporting pollen to the female parts of other plants, enabling fertilization and the production of seeds and fruit. Pollinators are vital to global crop production. According to an article published by the U.S. Forest Service, “Of the 1,400 crop plants grown around the world, i.e., those that produce all of our food and plant-based industrial products, almost 80% require pollination by animals.”

It is widely assumed that the honeybee is the predominant pollinator. However, there are many types of bees, solitary and social, and they all play a role in pollination. Typically, in a home garden, you’ll find solitary bees that are not part of a hive; however, all bees play a role in pollen distribution and pollination.

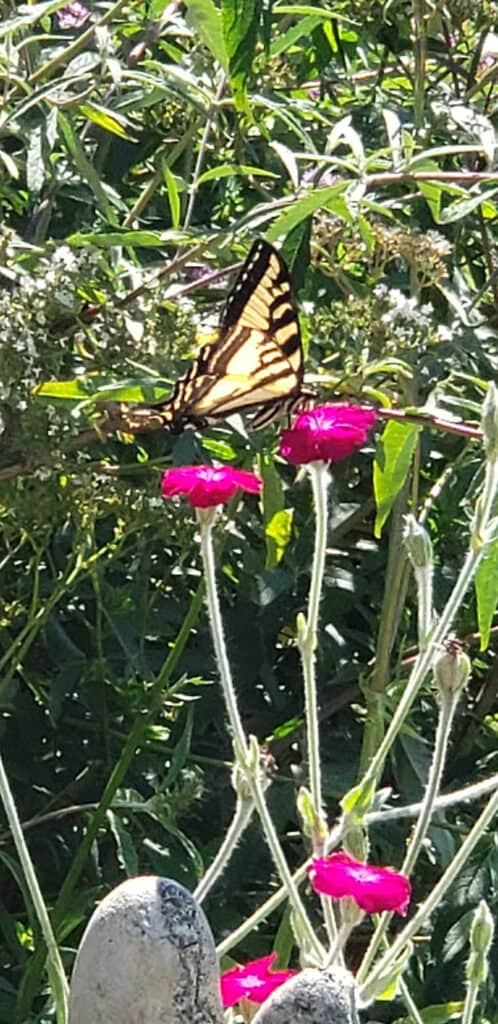
Butterfly on flower
© Patty Puckett Tingler
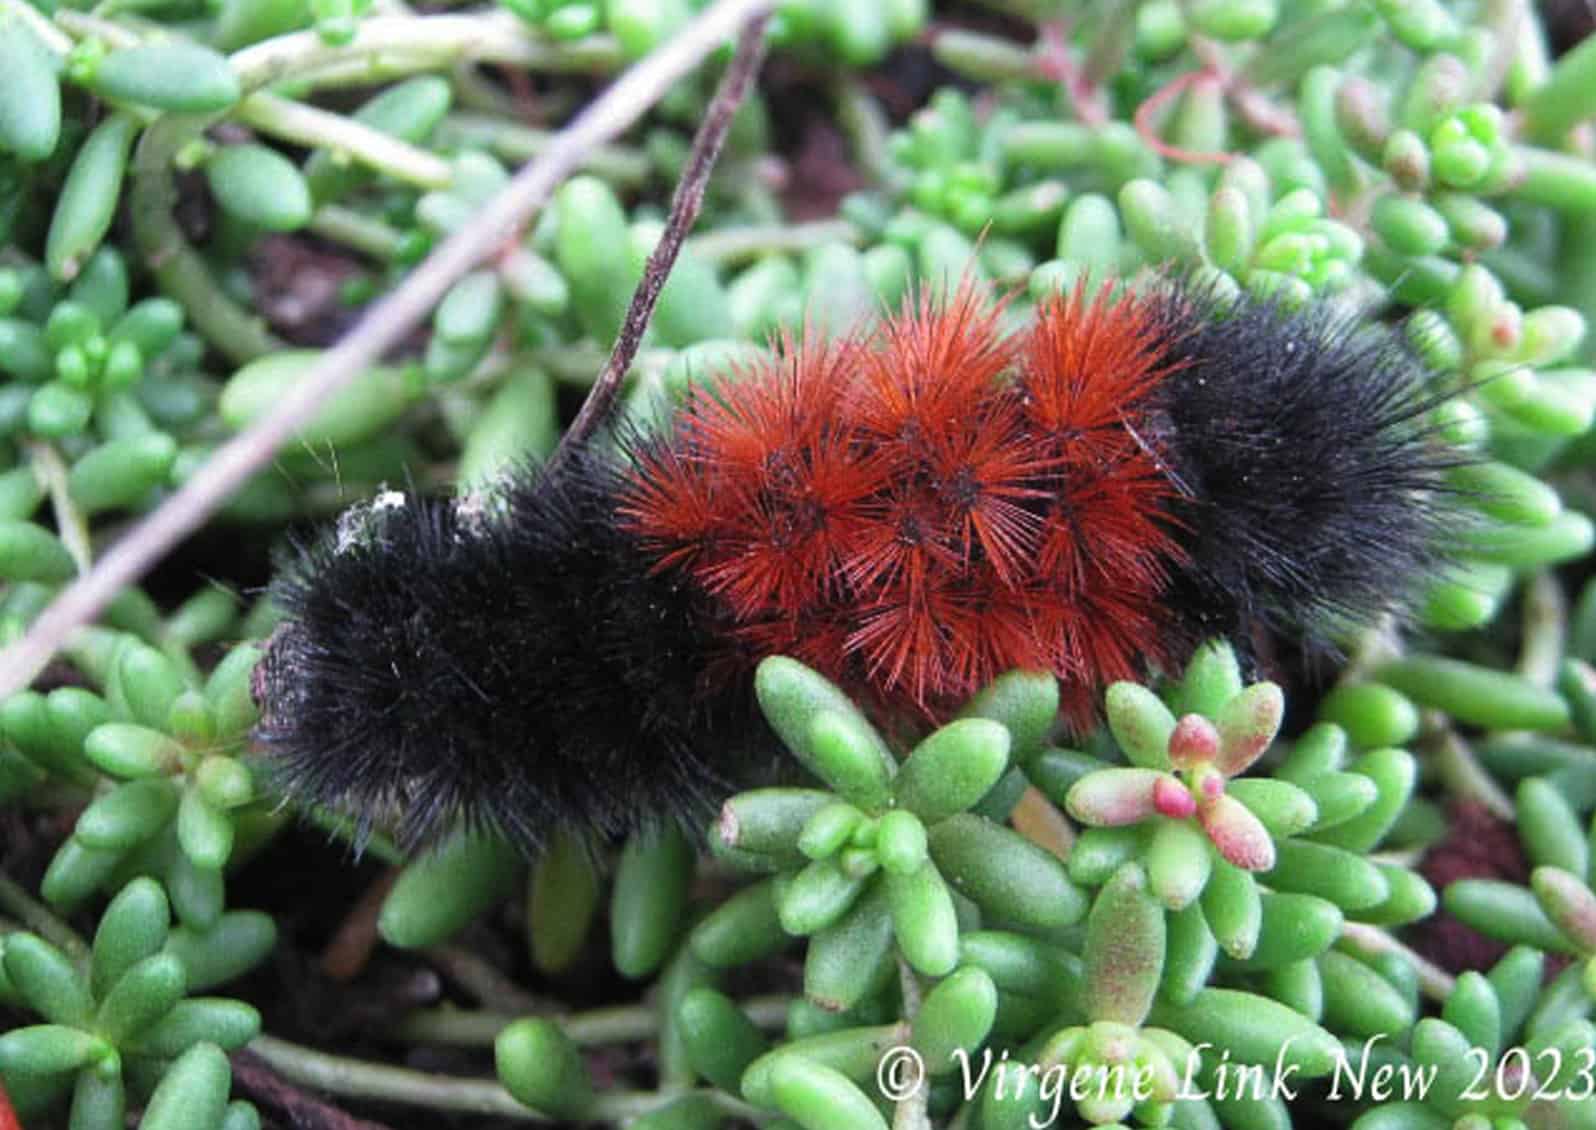
Island tiger moth, banded wooly bear caterpillar
The Banded Wooly Bear is the larval stage of the Island Tiger Moth. © Virgene Link-New
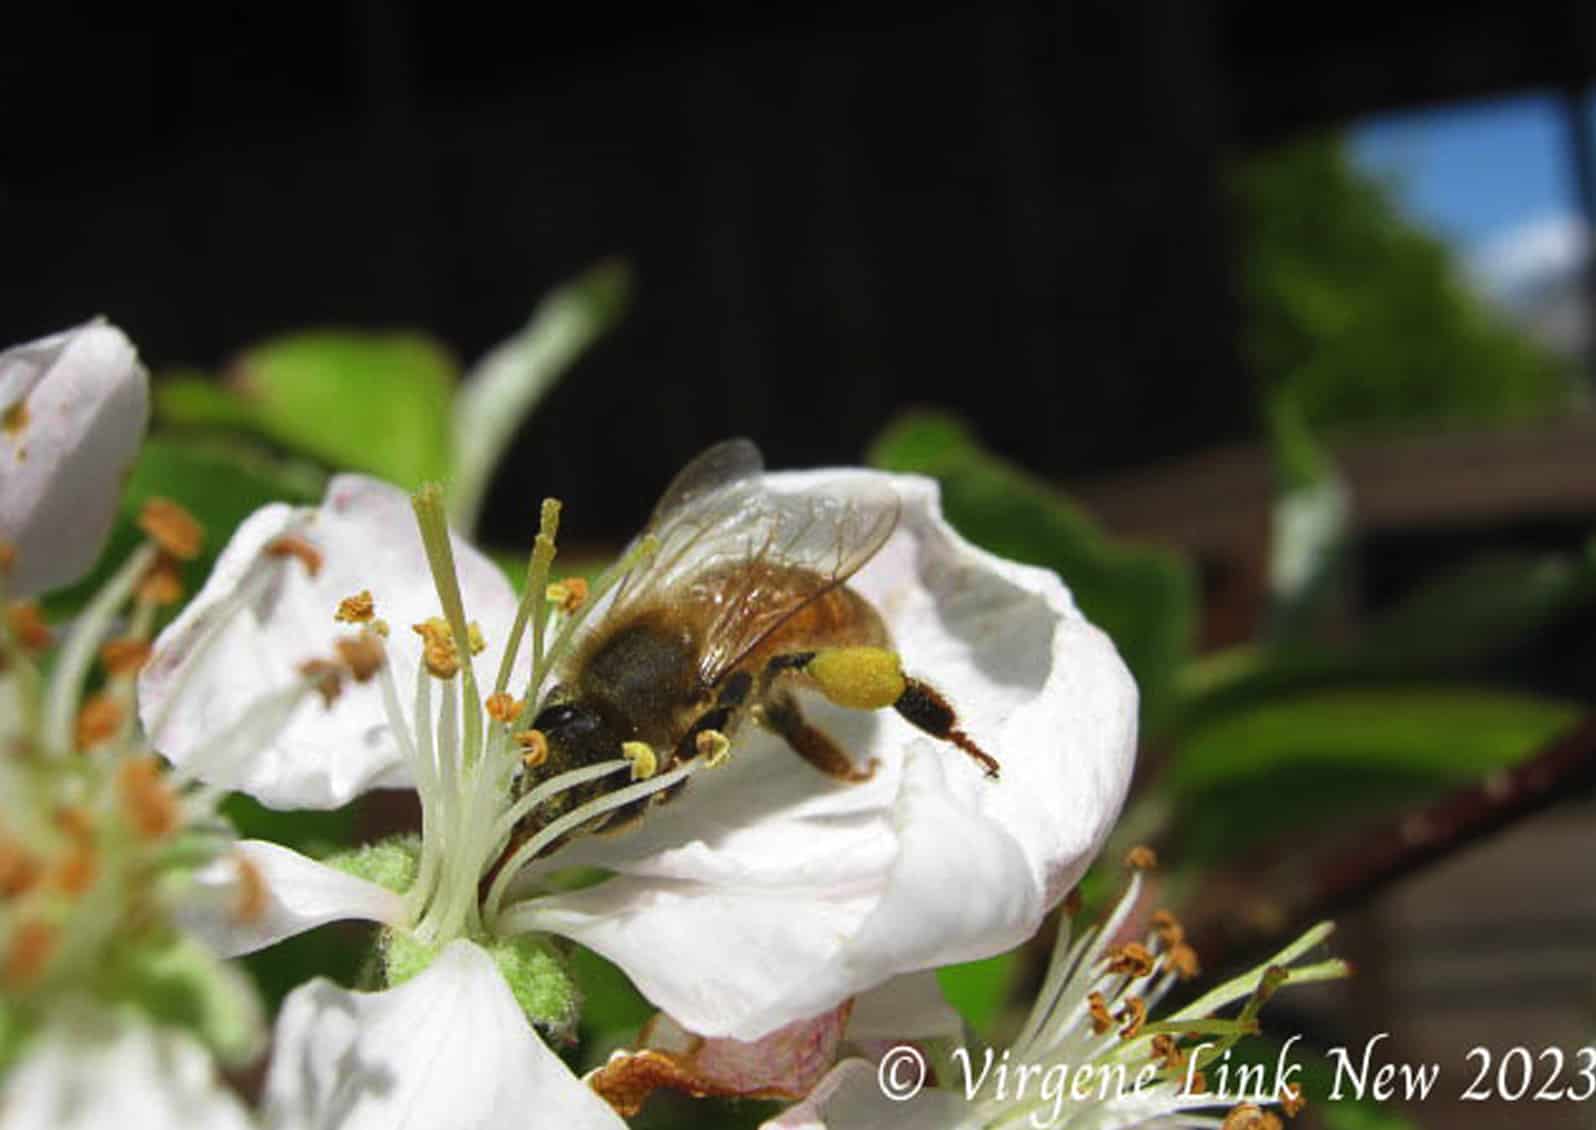
honeybee on blossom
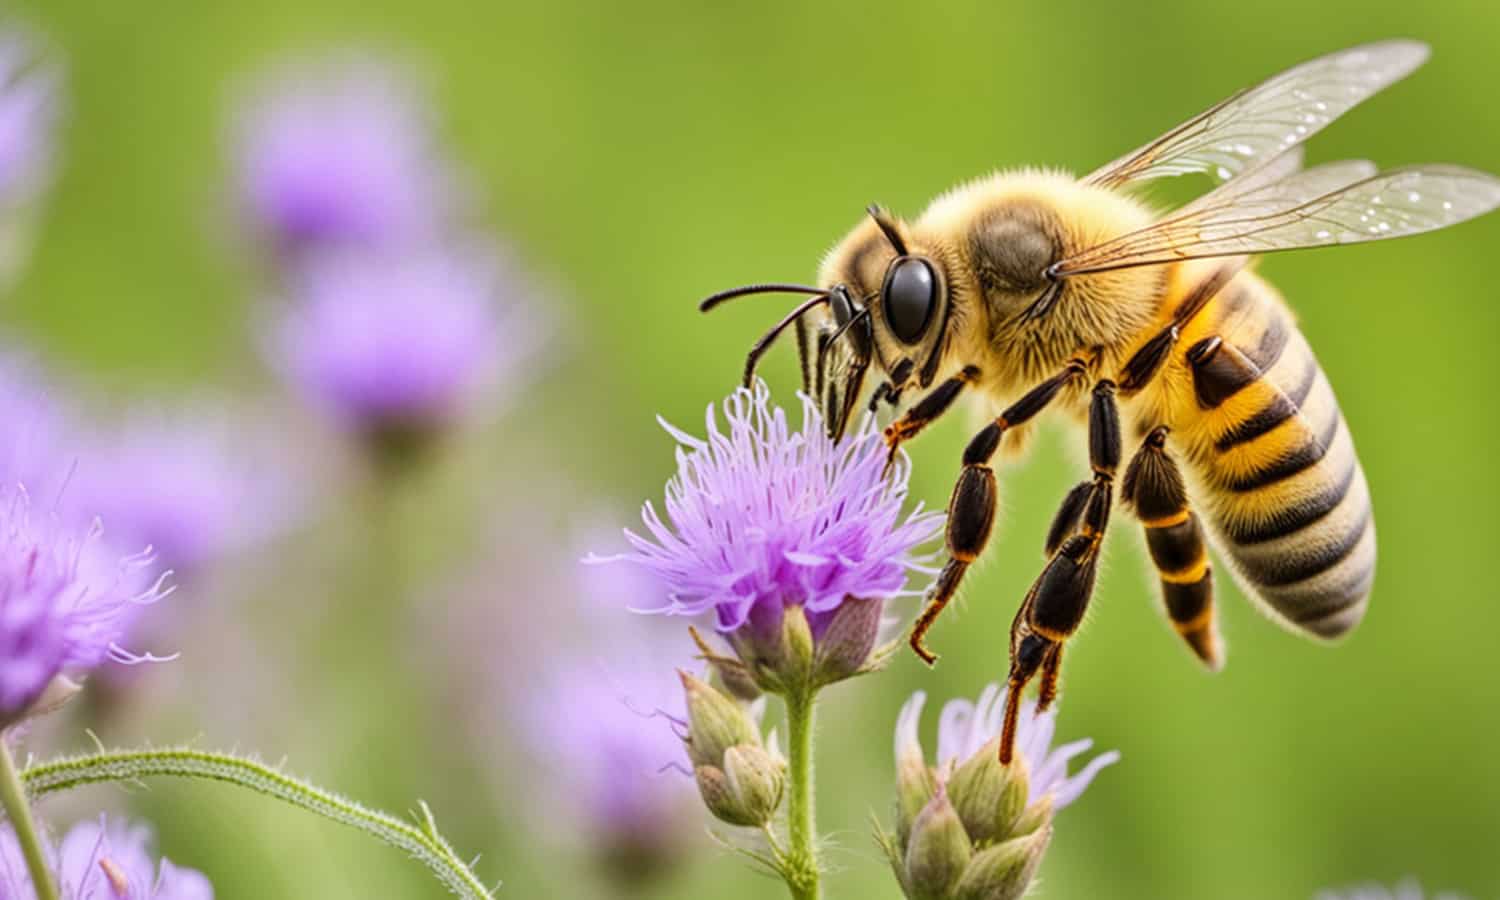
A honeybee on a kale blossom Caption © Virgene Link-New

Flowers, Fruits, and Veggies

Gardeners should consider choosing plants that will provide pollinators with a variety of feeding choices all season long. Choosing early and mid-spring blooming flowers or bulbs to attract pollinators is a wise strategy. Once the pollinators have been attracted to the garden, vegetables will be bountiful all summer long. Fruit trees in blossom are ready to be pollinated. Be sure to share the bounty with birds later in the season as they were likely part of the pollinator team.

Remember to be patient. Attracting pollinators is laying the groundwork for years to come, so efforts made now will affect the garden and pollinators in the future. Watch and study your space for attractiveness to pollinators as you would for sun and shade. Neighboring plants can repel certain pollinators and you may need to move or rethink what to plant in a particular area to attract the pollinators for garden needs. Gardening for pollinators is a journey of learning and understanding.

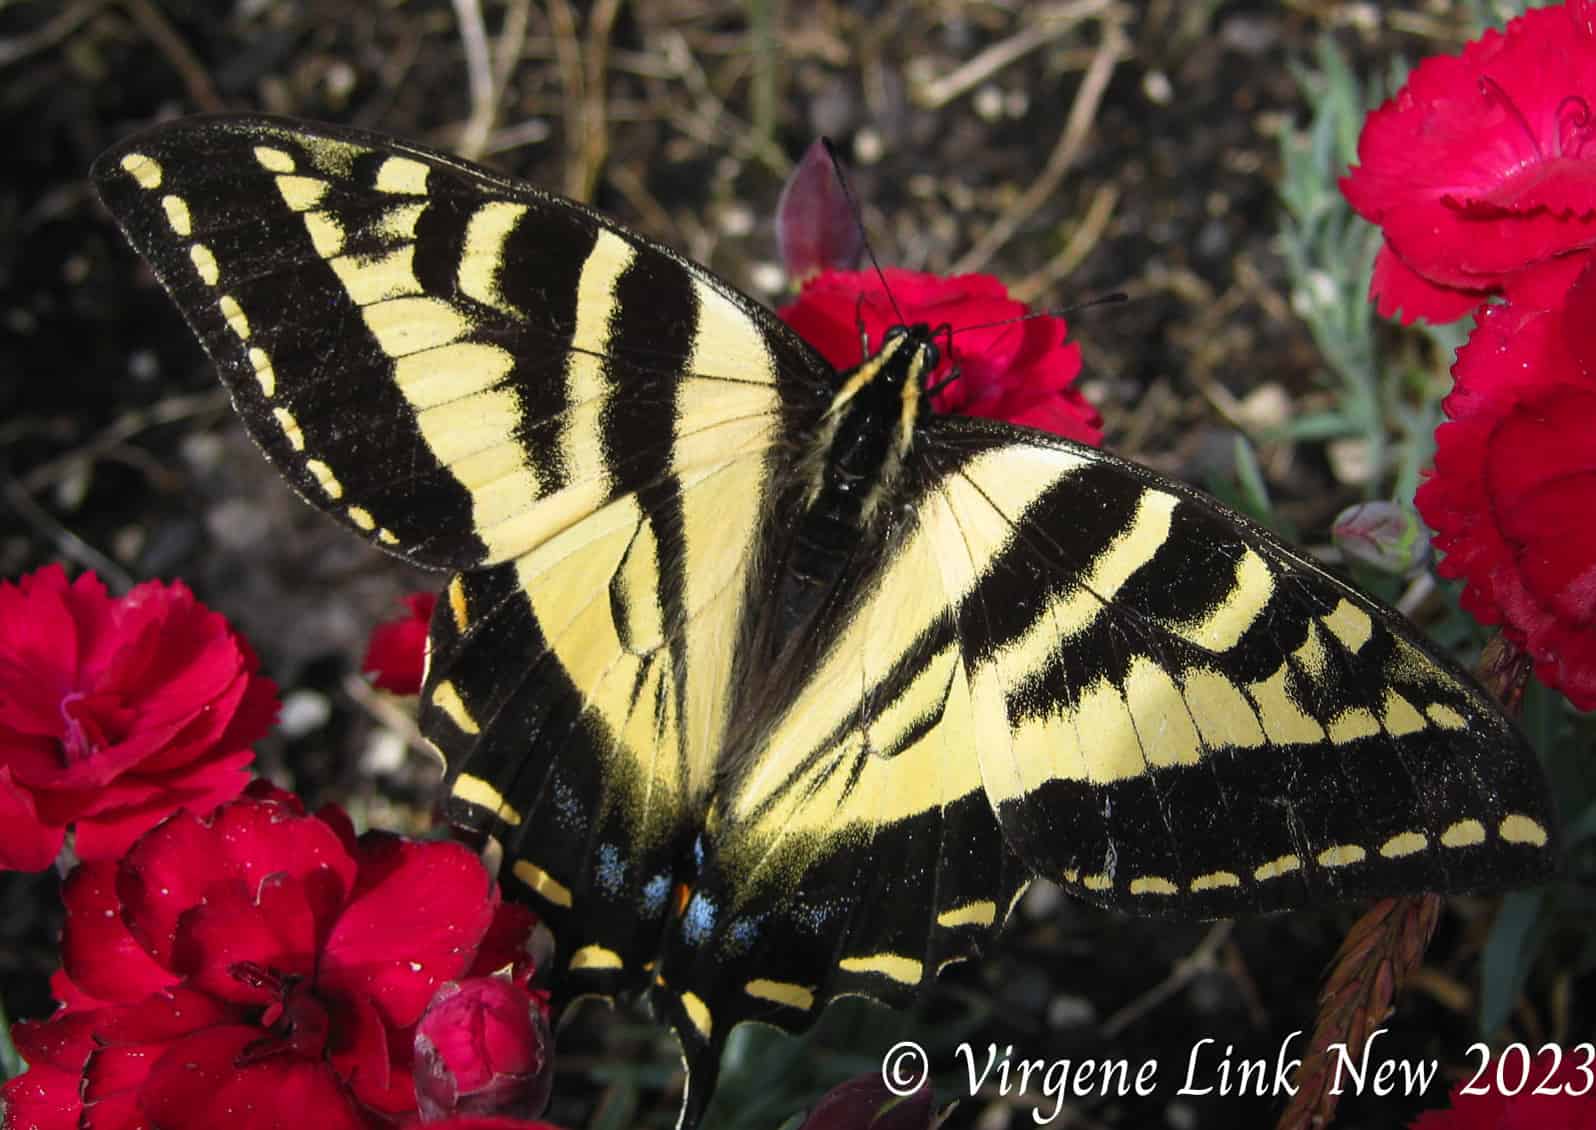
swallowtail, butterfly
The Western Swallowtail has a lifespan of only 6 – 14 days. Caption © Virgene Link-New
hover fly
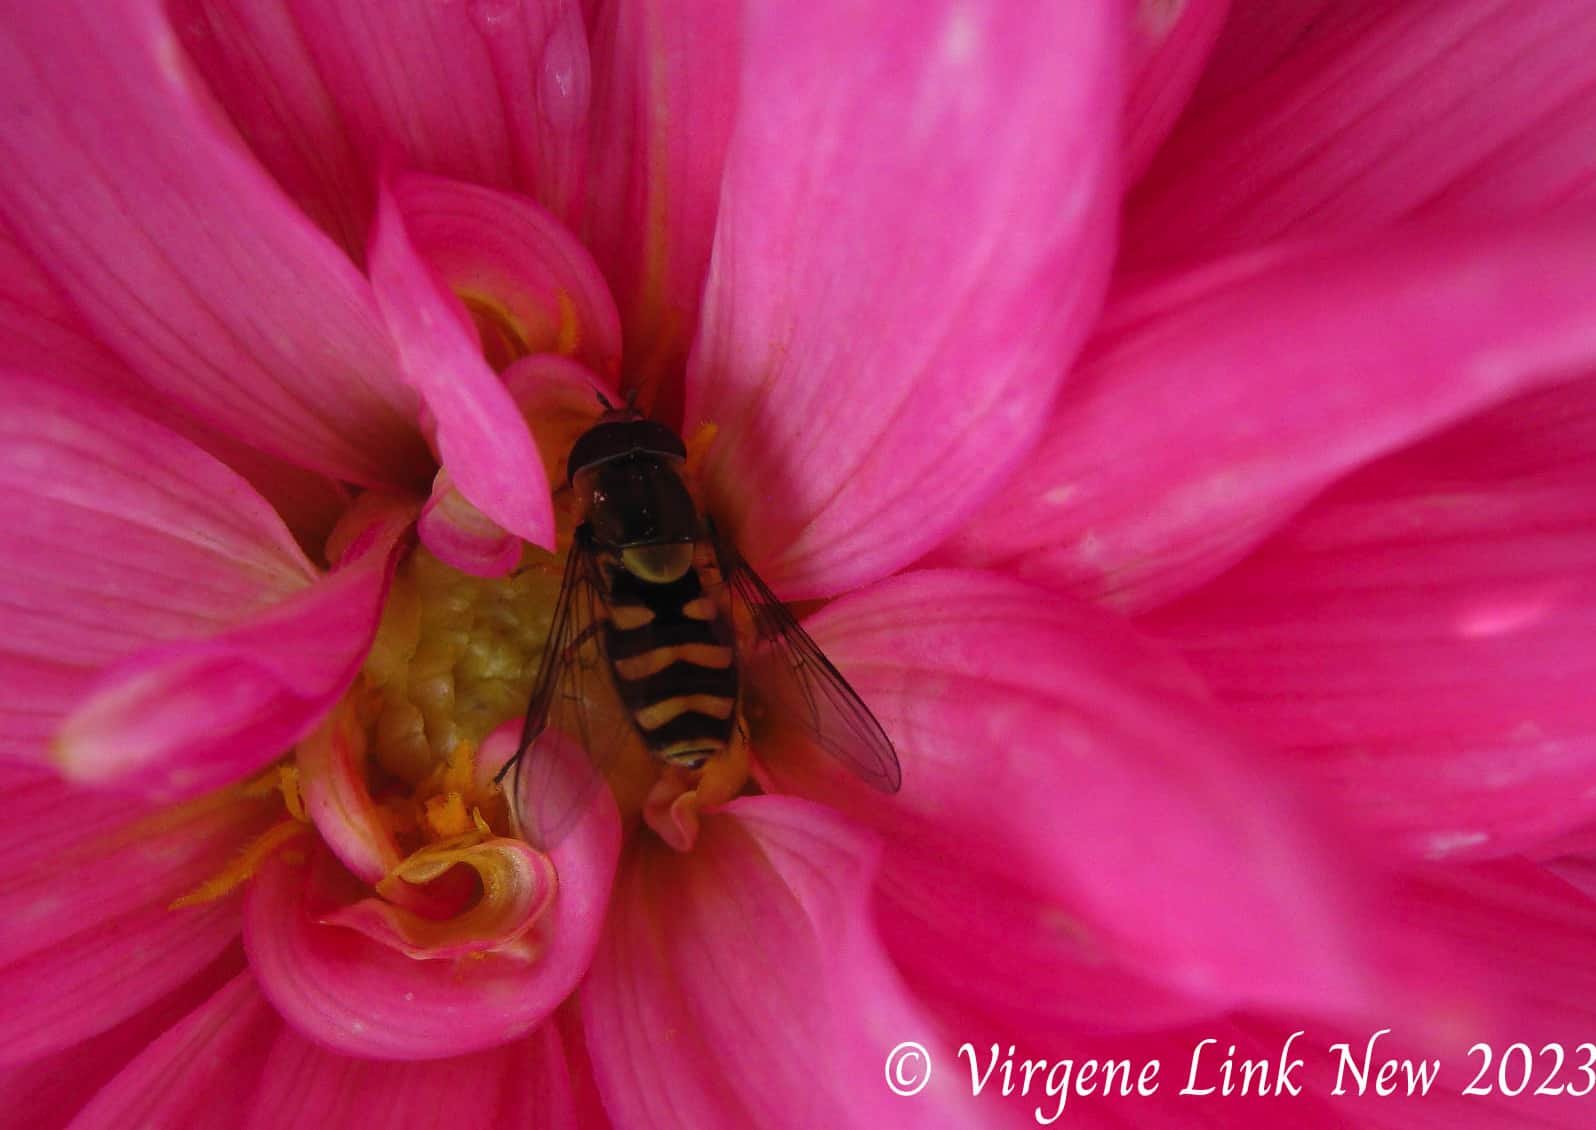
Hover fly on dahlia © Virgene Link-New

Attracting Pollinators

If you personally like scented plants then you already know which plants pollinators enjoy. In addition to scent, think of using the open face of a flower as a landing place for the pollinator to rest while gathering and distributing pollen. Whether it’s a bee, a butterfly, or a bird, rest areas will encourage different pollinators to return. In the Pacific Northwest, especially western Washington, pollinators are lured by crocosmia, coneflowers, lavender, catmint, and sunflowers to name a few. One easy-to-grow pollinator-friendly annual is lacy phacelia, also known as blue tansy. It is a beautiful lavender color, grows easily from seed, and bees will flock to this plant. Distribute the seeds around your yard and enjoy its tall, beautiful splendor.

The number of scented plants in the Pacific Northwest is quite wide, from climbing vines like honeysuckle to lavender and lilac bushes. There are plenty of native species to choose from that are drought tolerant once established such as camas, lupine, salvia, and checker mallow also known as Malva. Daisies, asters, California poppy, catmint, and sage are also pollinator-friendly plants easily grown in the PNW.

What can we do to support pollinators?

How we can best support pollinators depends on the season. In fall, it’s best to put down your rake and leave the leaves on the ground. Mother Nature will do her best to push the leaves together under shrubs or against a structure. Some pollinators burrow under these leaf accumulations to overwinter. Wait until the spring weather is warmer (above 50°F) before cleaning up the garden as the pollinators will need the warmth as they emerge from their winter habitat.

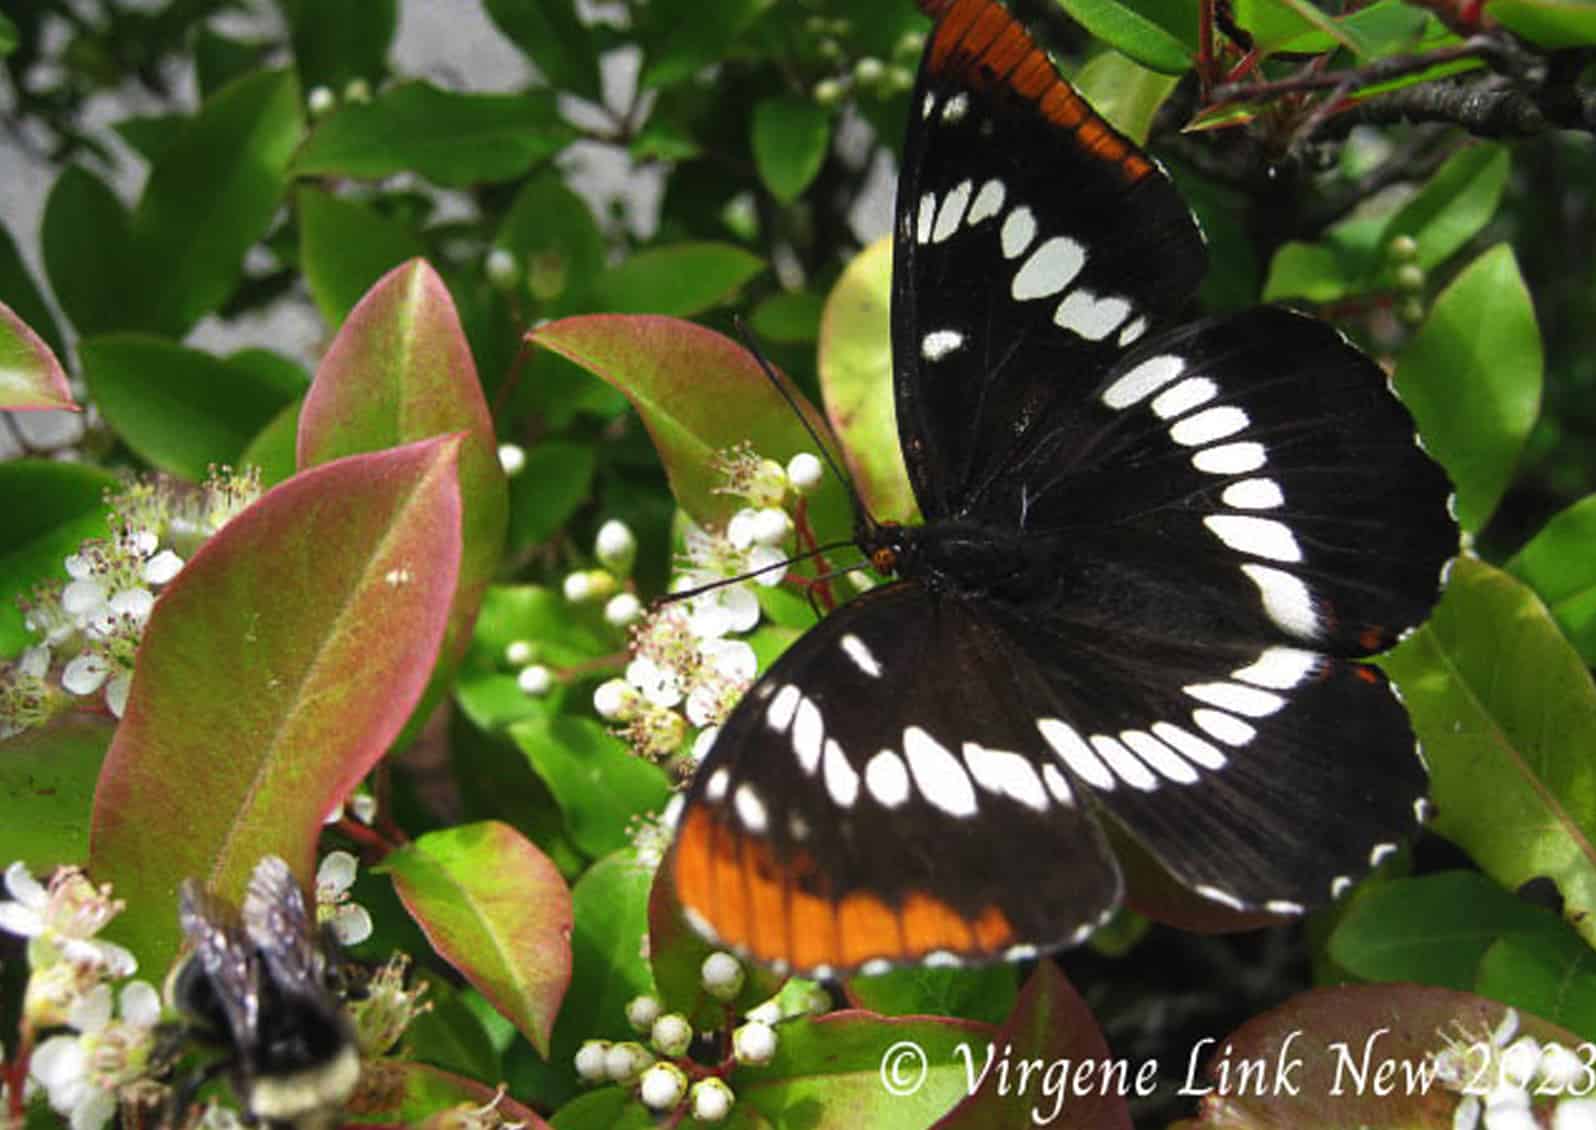
Lorquin’s Admiral butterfly © Virgene Link-New

Reduce the areas of grass on your property by adding shrubs, trees, and perennials that will provide visual interest and habitat for birds and insects. Use fewer toxins and chemicals, when possible. Pollinators need water for many purposes, including drinking, cooling, and reproduction so be sure to provide a source of shallow water near pollinator plants. Recycle pots or repurpose other containers (buckets, watering cans, birdbaths, etc.) on your patio or landscape to encourage more pollinators. Secondhand stores are full of items waiting for a reimagined purpose.

By providing backyard habitats or even a patio garden of scented, open flowers, bees and other pollinators will find your offerings. Support them by providing plants that help them do their job. Look online for native Pacific Northwest plants, shrubs, or seeds. Visit a local nursery to get plant recommendations or attend classes. Use your local library to learn more about creating or filling your garden with pollinator-friendly plants.

The more you learn about the world around you, the easier it is to live simply with our environment. Becoming aware of your environment and learning more about pollinators will open your eyes to the beauty and intricate connectivity of nature. We co-habit with and need insects, birds, butterflies, and other creatures to act as pollinators to plants to provide us with both beauty and nutrition. Our health, both physical and mental, would not exist without the efforts of the earth’s pollinators.

REFERENCES AND RESOURCES:

Why is Pollination Important ? U.S. Forest Service
Retrieved from https://www.fs.usda.gov/managing-land/wildflowers/pollinators/importance

James, D. Pollinators retrieved from https://hortsense.cahnrs.wsu.edu/pollinators/

Krischik, V. Pollinator Conservation Biocontrol: Beneficial Insects | IPM and Pollinator Conservation University of Minnesota retrieved from: https://ncipmhort.cfans.umn.edu/beneficial-insects

Zagory, E., Hetrick, K. (2016) Introducing 10 Bees and 10 Plants They Love. University of California, Davis
https://arboretum.ucdavis.edu/sites/g/files/dgvnsk1546/files/inline-files/10-bees-10-plants_0.pdf

ABOUT THE AUTHOR :

Patty Puckett Tingler

Patty Puckett Tingler is a certified Skagit County WSU Extension Master Gardener, Class of 2022.

Questions about home gardening or becoming a Master Gardener may be directed to: Skagit County WSU Extension Office, 11768 Westar Lane, Suite A, Burlington, WA 98233; by phone: 360-428-4270; or via the website: www.skagit.wsu.edu/mg

bee photo
Learn from the experts at the
Country Living Expo
& Modern Homesteading

Saturday, January 27, 2024

Learn More and Register Here >>

These Gardening Topics and More:

  • Fruit Tree Pruning & Grafting
  • Microclimates in the Garden
  • Low Maintenance Gardening
  • Roses
  • Bee Keeping
  • Soil Sampling
  • Veggie Gardening
  • Growing in High Tunnels, Cold Frames, and Unheated Greenhouses
  • Pest Control
  • Hop Growing
  • Flower Arranging
  • Know Your Native Trees
  • Introduction into Mason Bees


AMGPost_header5
102023_Header

Plant Bulbs Now For Spring Color

Take the time in the fall to plant bulbs and enjoy the first signs of spring in late January.


              Subscribe to the Blog >

By Jessamyn Tuttle, Skagit County WSU Extension Master Gardener

Bulbs are an important part of the spring garden. They provide color and interest when it’s most appreciated, as well as food for early pollinators. After putting on a spectacular show throughout spring, bulbs then fade into dormancy and let the summer garden do its thing.

To make that happen, however, the work of planting bulbs needs to happen in the fall. It’s strangely satisfying to put dry, dormant bulbs into the garden on a blustery October day, knowing that in just a few short months they will be shooting up new growth and flowers.

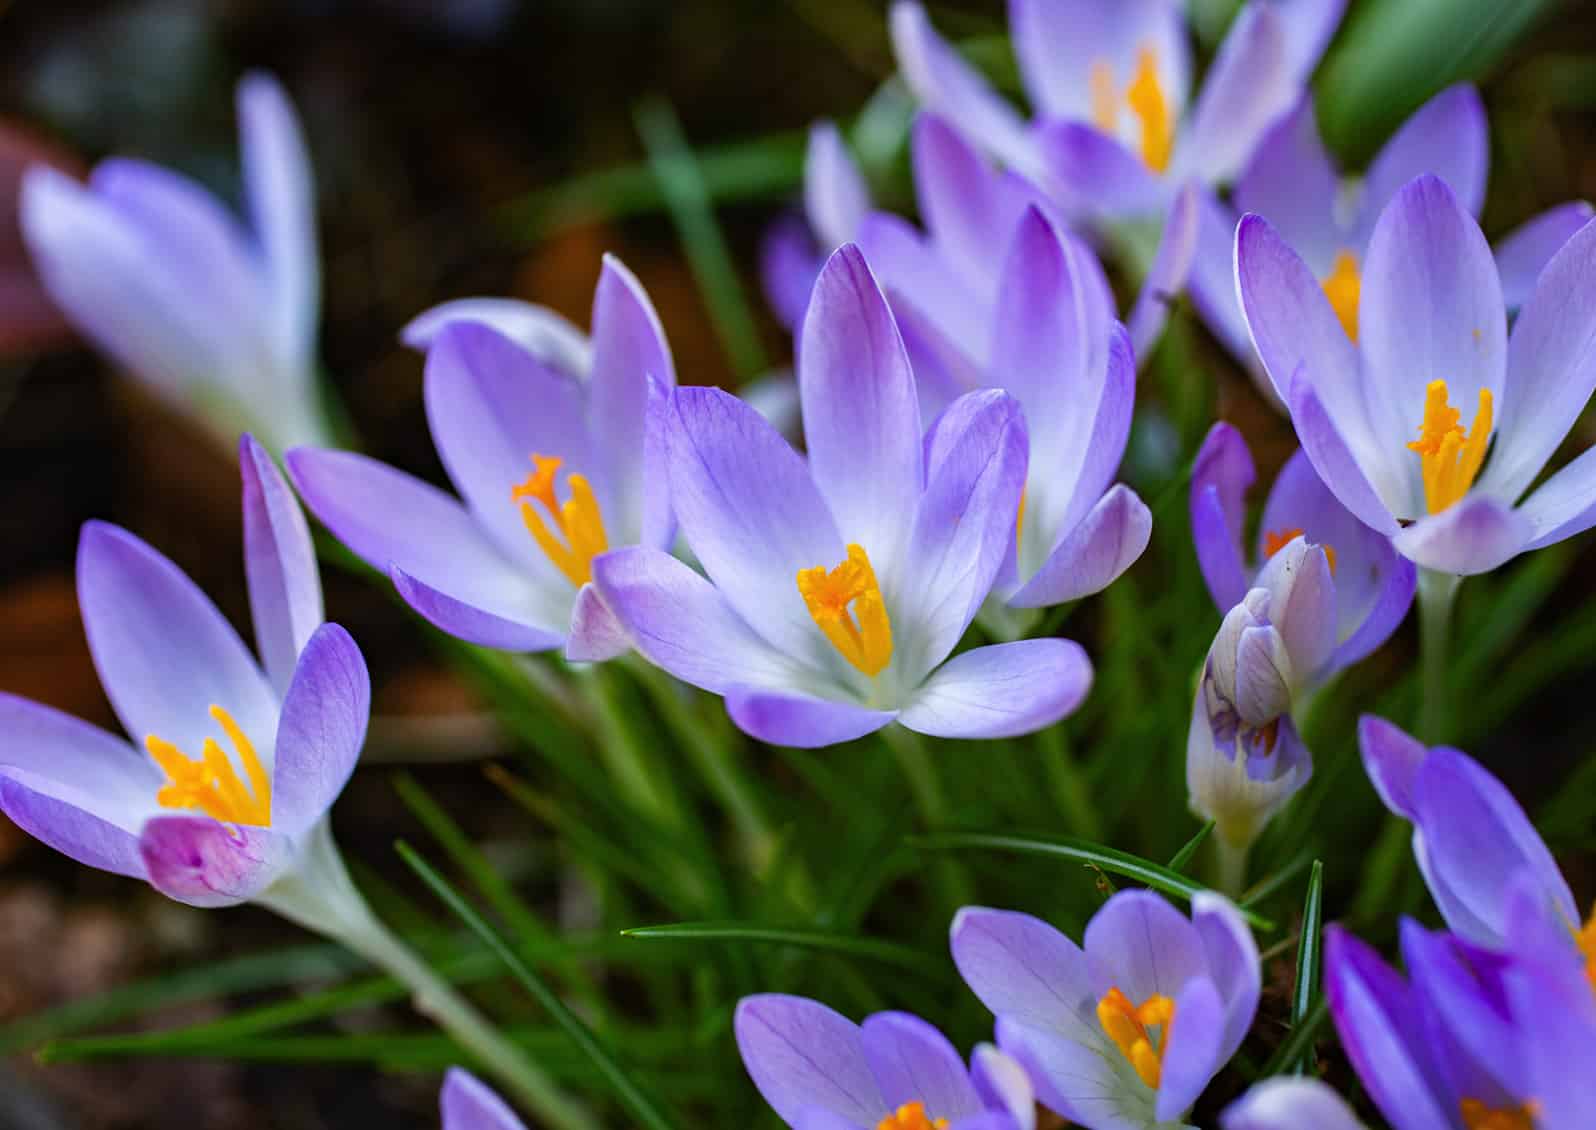
Crocus tommasinianus © Jessamyn Tuttle

Crocus tommasinianus © Jessamyn Tuttle

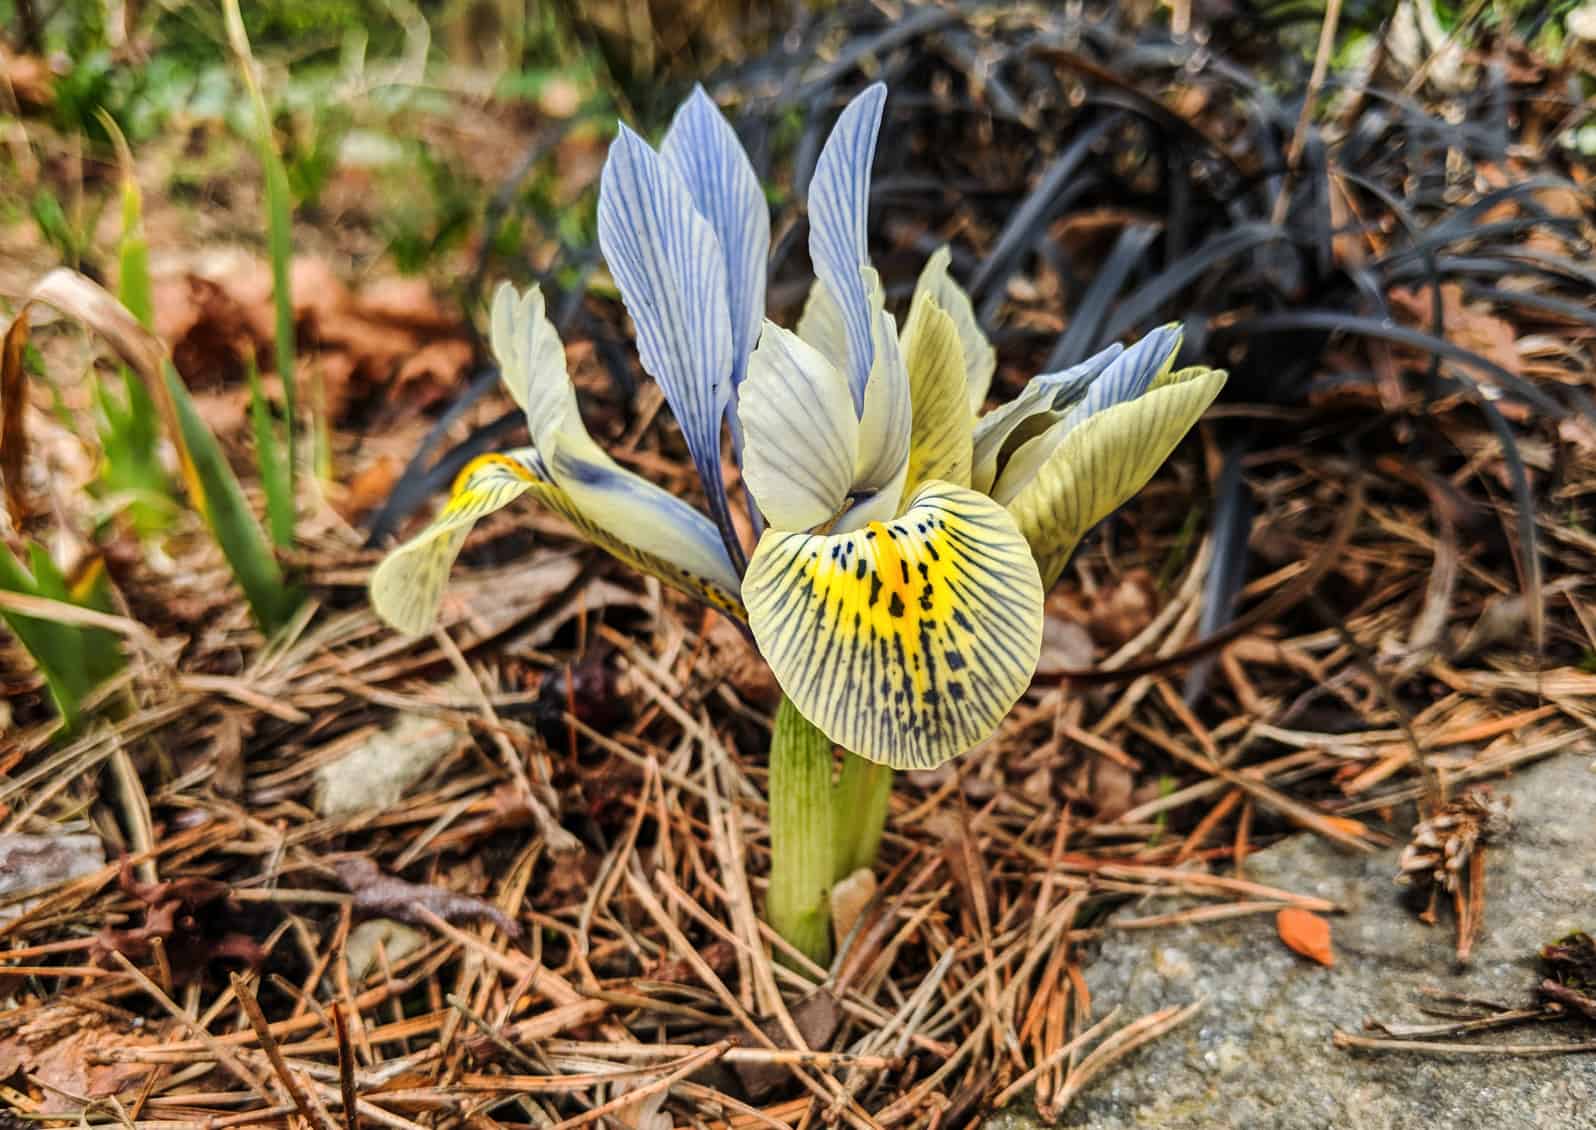
Iris histrioides 'Katharine Hodgkin' © Jessamyn Tuttle

Iris histrioidesKatharine Hodgkin’ © Jessamyn Tuttle

Early Bloomers
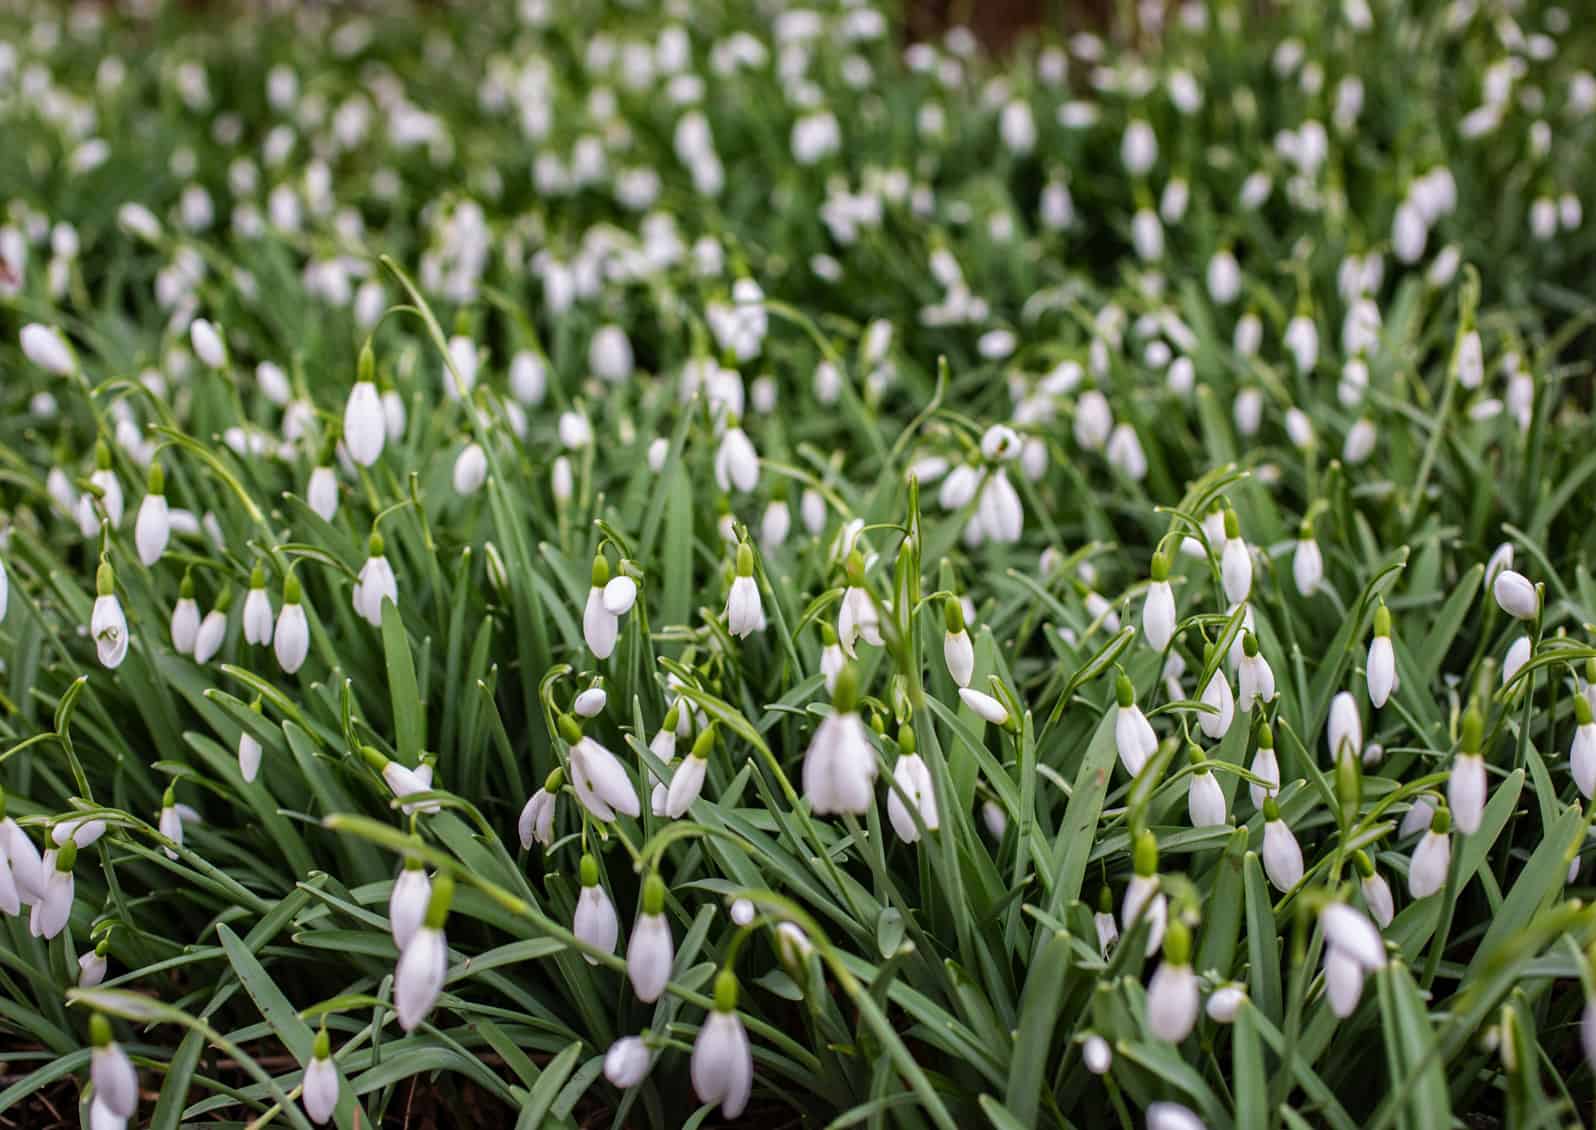
The first bulbs to bloom here in Western Washington are typically snowdrops (Galanthus spp.), often emerging in January but coming into their full bloom in late February. Whether planted in clumps or a massive drift, snowdrops are a sure sign that spring is on the horizon. Snowdrops are always white with green or yellow markings, the double-flowered varieties are particularly charming.

Winter aconite (Eranthis hyemalis) is a tuberous member of the buttercup family, providing a vivid spot of yellow surrounded by a frill of greenery. It blooms around the same time as snowdrops with a bonus in that it’s resistant to deer and rabbits.

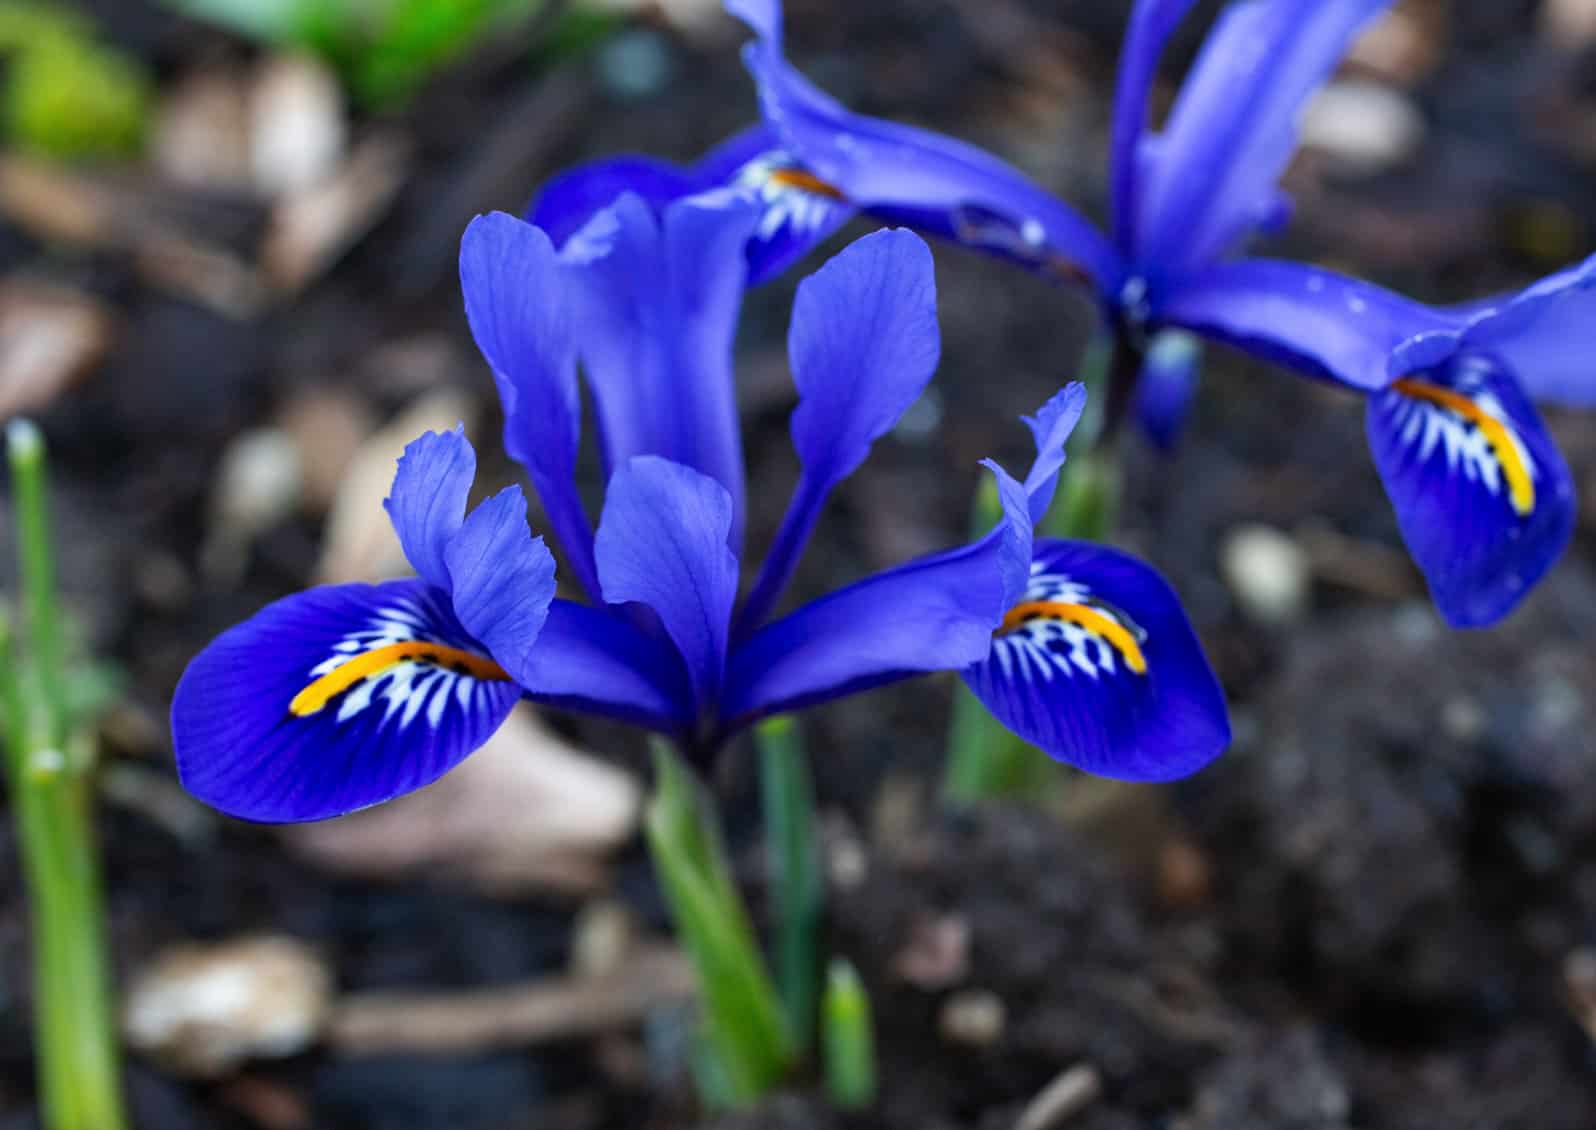
Iris reticulata 'Harmony', Discovery Garden © Jessamyn Tuttle

Iris reticulata ‘Harmony’ © Jessamyn Tuttle

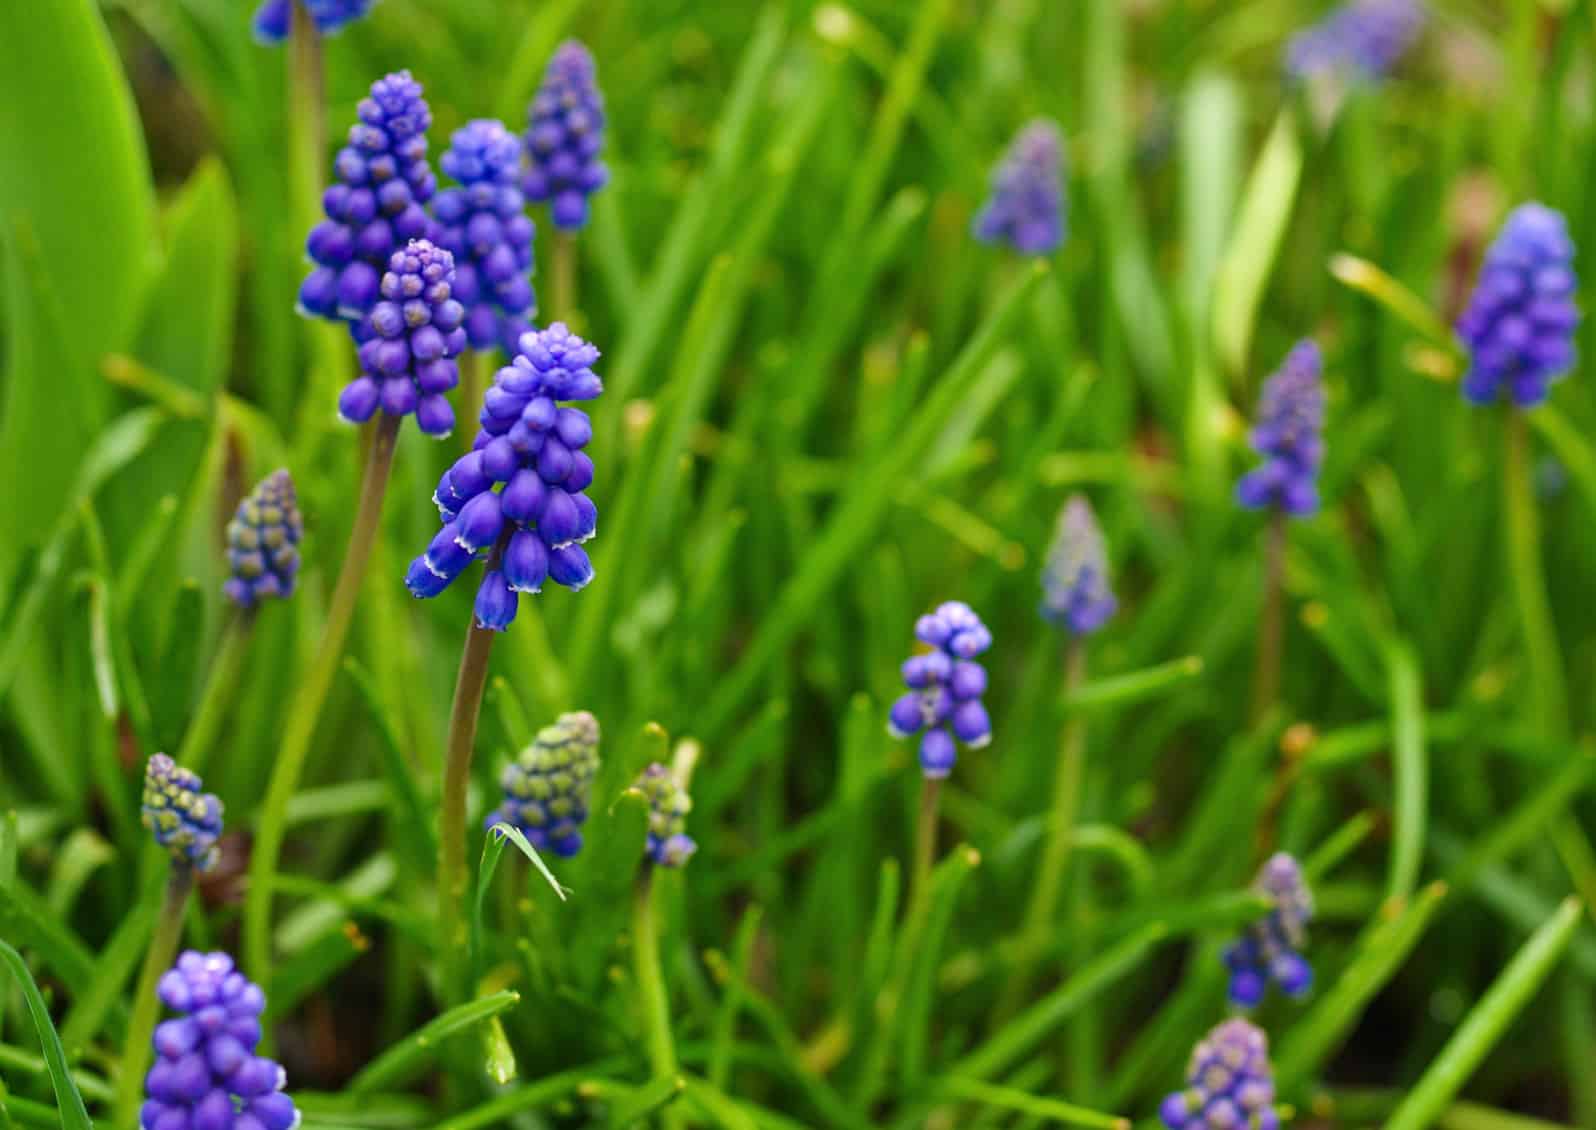
Muscari © Jessamyn Tuttle

Miniature iris, also called rock garden iris or bulbous iris, begin blooming in February. Unlike bearded irises, which grow from rhizomes, these come from small bulbs and are easy to slip into the garden wherever you have a bit of space between plants, especially those that go dormant in the winter. The miniature iris flowers are only a few inches across and sit on short stems. They are unfortunately wildly popular with slugs, so you may need to get out in the garden with slug bait earlier than usual to protect them. The most commonly available species, Iris reticulata, comes in white, blue, and purple. You can also find bright yellow I. danfordiae, or look for the fancy veining of I. histrioides (‘Katharine Hodgkin’ is a particular favorite.)

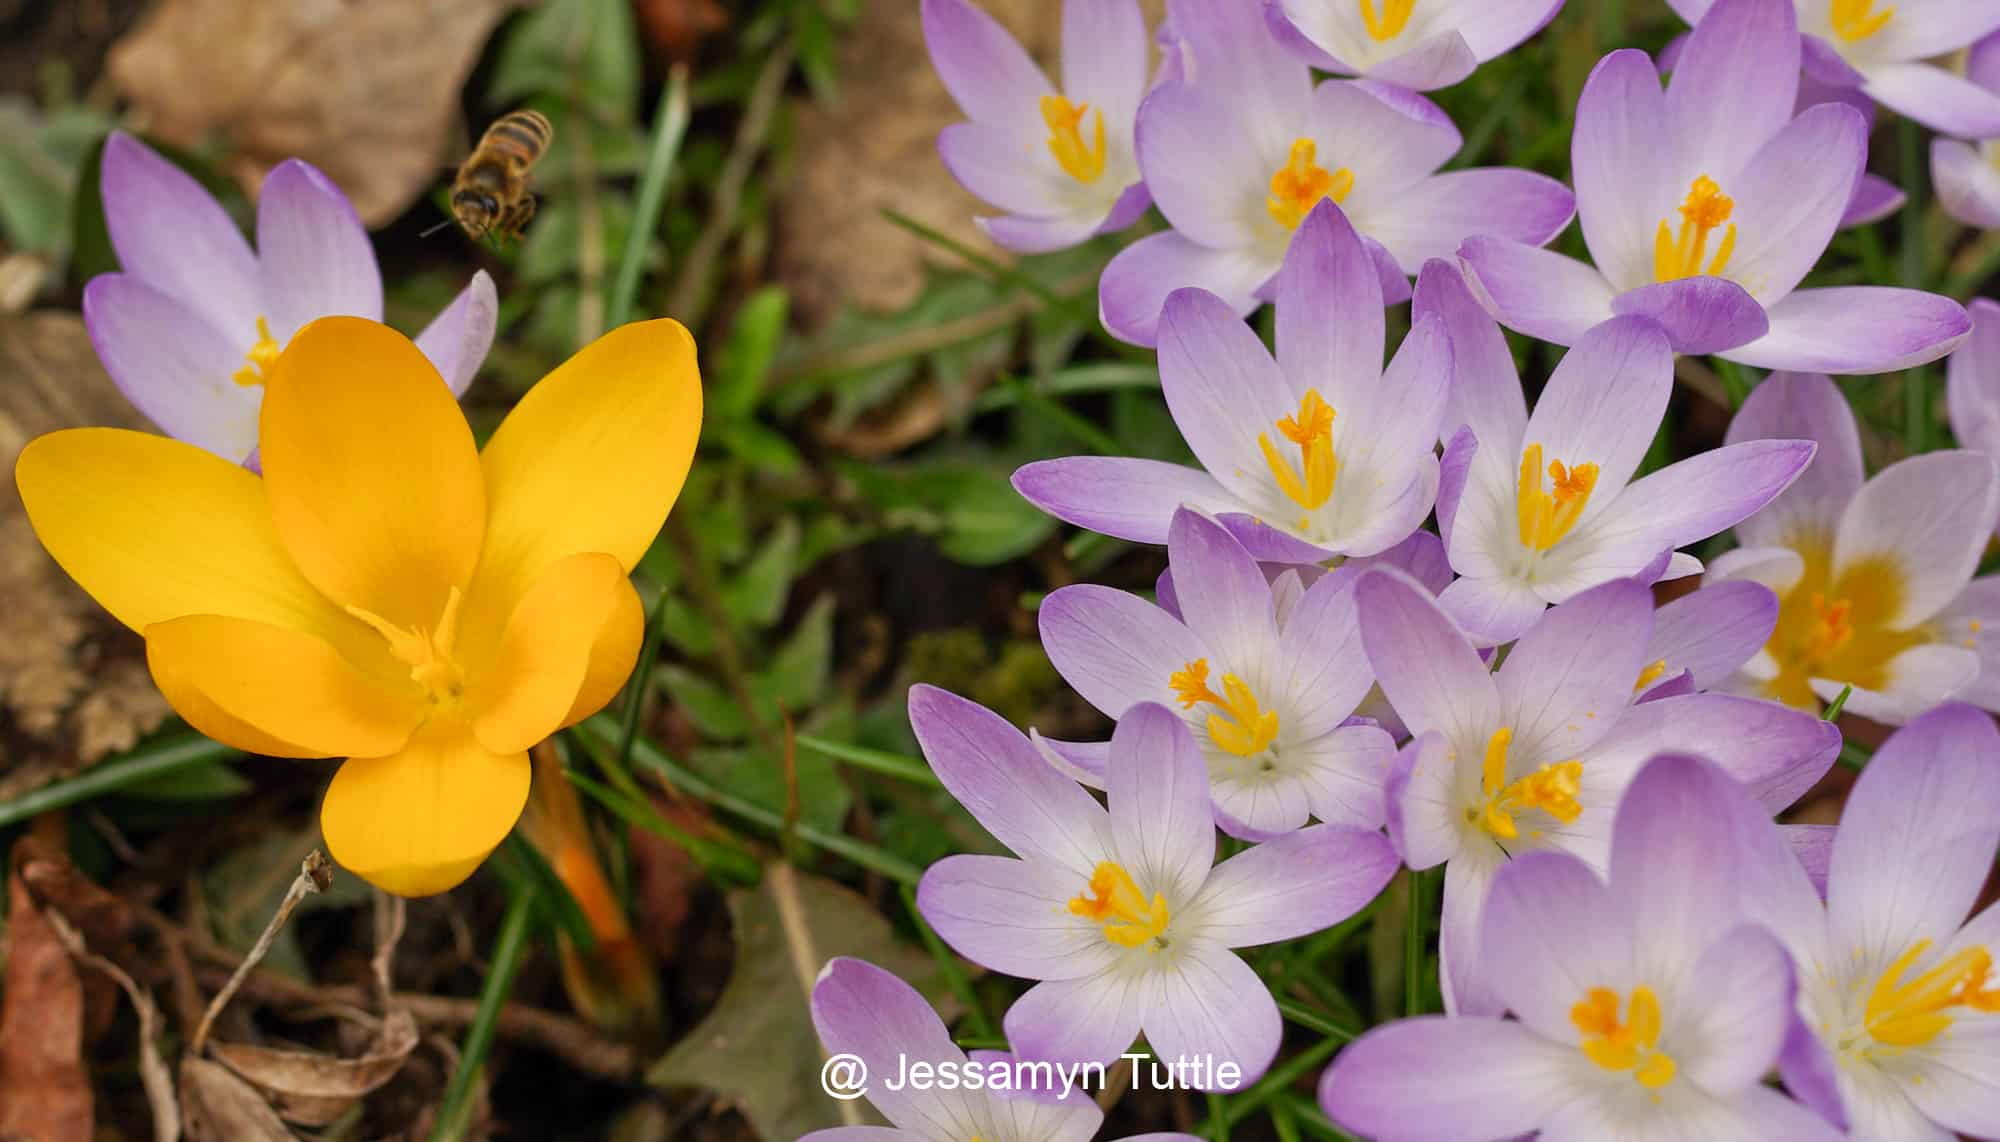
Crocuses pop up on the heels of snowdrops. Their grassy foliage comes up from the corm in February or March, followed quickly by delicate flowers in brilliant colors including white, yellow, lavender, and deep purple. They only open on sunny days, protecting their fragile petals from rain. The earliest varieties, commonly called snow crocus, include smaller-flowered species like Crocus chrysanthus and Crocus tommasinianus, which come in a lovely range of colors and patterns. The larger cultivars, sometimes called Dutch crocus, like C. vernus ‘Pickwick’ and ‘Jeanne d’Arc’ appear a few weeks later. Crocuses are deer-resistant, although not slug-resistant. Crocuses can be planted in swathes in lawns if you’re able to hold off on mowing until the foliage has ripened, otherwise, they fit nicely anywhere in the garden where they will get some sun.

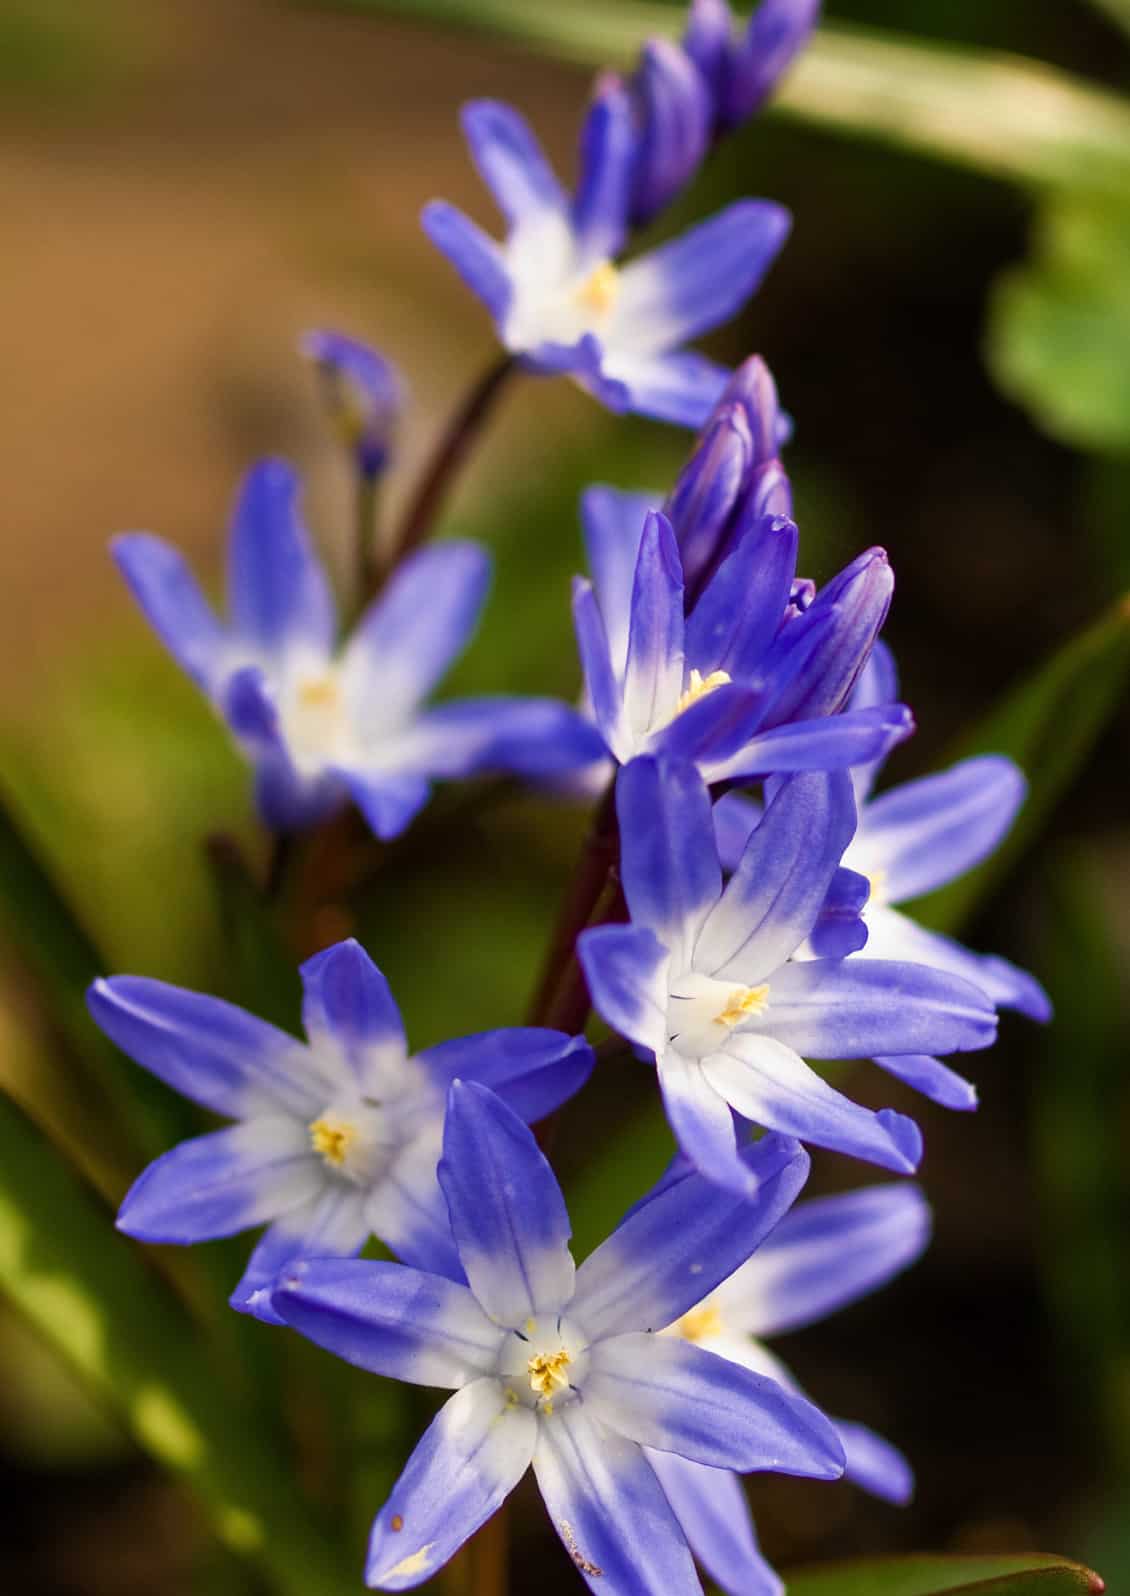
Muscari armeniacum, also known as grape hyacinth, is a wonderful addition to the spring garden thanks to its pure blue color (they also come in white, purple, and pink). Muscari spreads with enthusiasm by both seed and bulb offset, so be aware of the commitment you’re making when planting it. Blooming in March and April, it makes a perfect companion for daffodils. A slightly earlier option for blue flowers is Chionodoxa or Glory-of-the-Snow. These deceptively fragile little blossoms pop out of seemingly nowhere and look their best when planted en masse. Species include C. luciliae and C. forbesii, among others, and also come in pink and white.

Snowdrops in the Discovery Garden © Jessamyn Tuttle

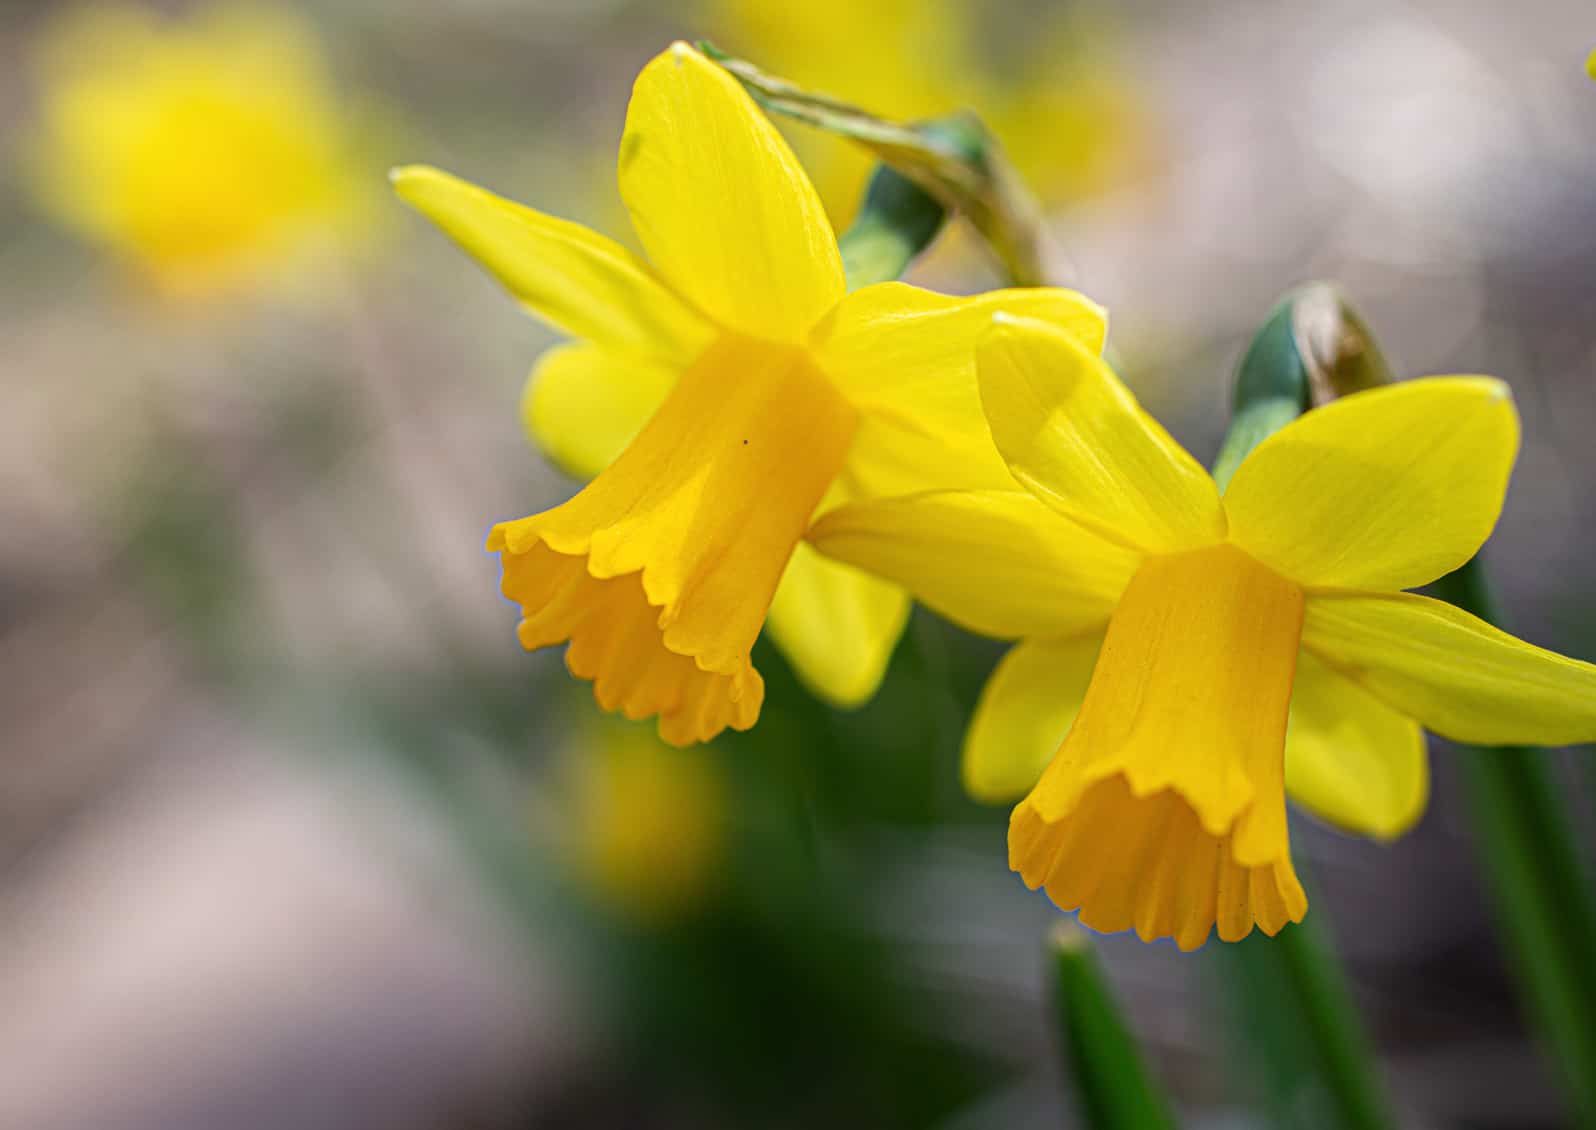
Tete a tete miniature Narcissus © Jessamyn Tuttle


Snowdrops in the Discovery Garden © Jessamyn Tuttle

Snowdrops © Jessamyn Tuttle


The Narcissus Family is Wide and Diverse
While the most commonly seen type of narcissus is the large yellow trumpet daffodil like ‘King Alfred’ or ‘Dutch Master,’ there are hundreds of varieties to choose from, including early blooming miniatures like ‘Tete a Tete,’ a tiny yellow trumpet narcissus, which is often available in pots very early in the season, but does just as well planted out in the garden, often coming up through a layer of snow. ‘February Gold’ is a slightly taller yellow miniature, while ‘Jack Snipe’ is a handsome dwarf Narcissus featuring a yellow trumpet surrounded by white, swept-back petals.

For a real punch, the distinctive Narcissus ‘Jetfire’ offers bright yellow and red-orange blooms. One of the very earliest daffodils, however, is ‘Rijnveld’s Early Sensation’ which produces a full-size trumpet daffodil flower a full month before other daffodils, an impressive show that sometimes gets cut abruptly short by a late winter snowfall or windstorm.

Later blooming varieties include the big trumpet daffodils but also the small cup, doubles, and large cup, like the classic ‘Ice Follies’ with its white petals and flat yellow cup, and the pretty, fragrant tazetta daffodils like the delightful white and orange cultivar ‘Geranium.’ Late season brings the delicate, backswept flowers of Narcissus poeticus var. recurvus, also known as ‘Pheasant Eye’ daffodil.

'Spring Green' tulip © Jessamyn Tuttle

Spring Green’ tulip © Jessamyn Tuttle

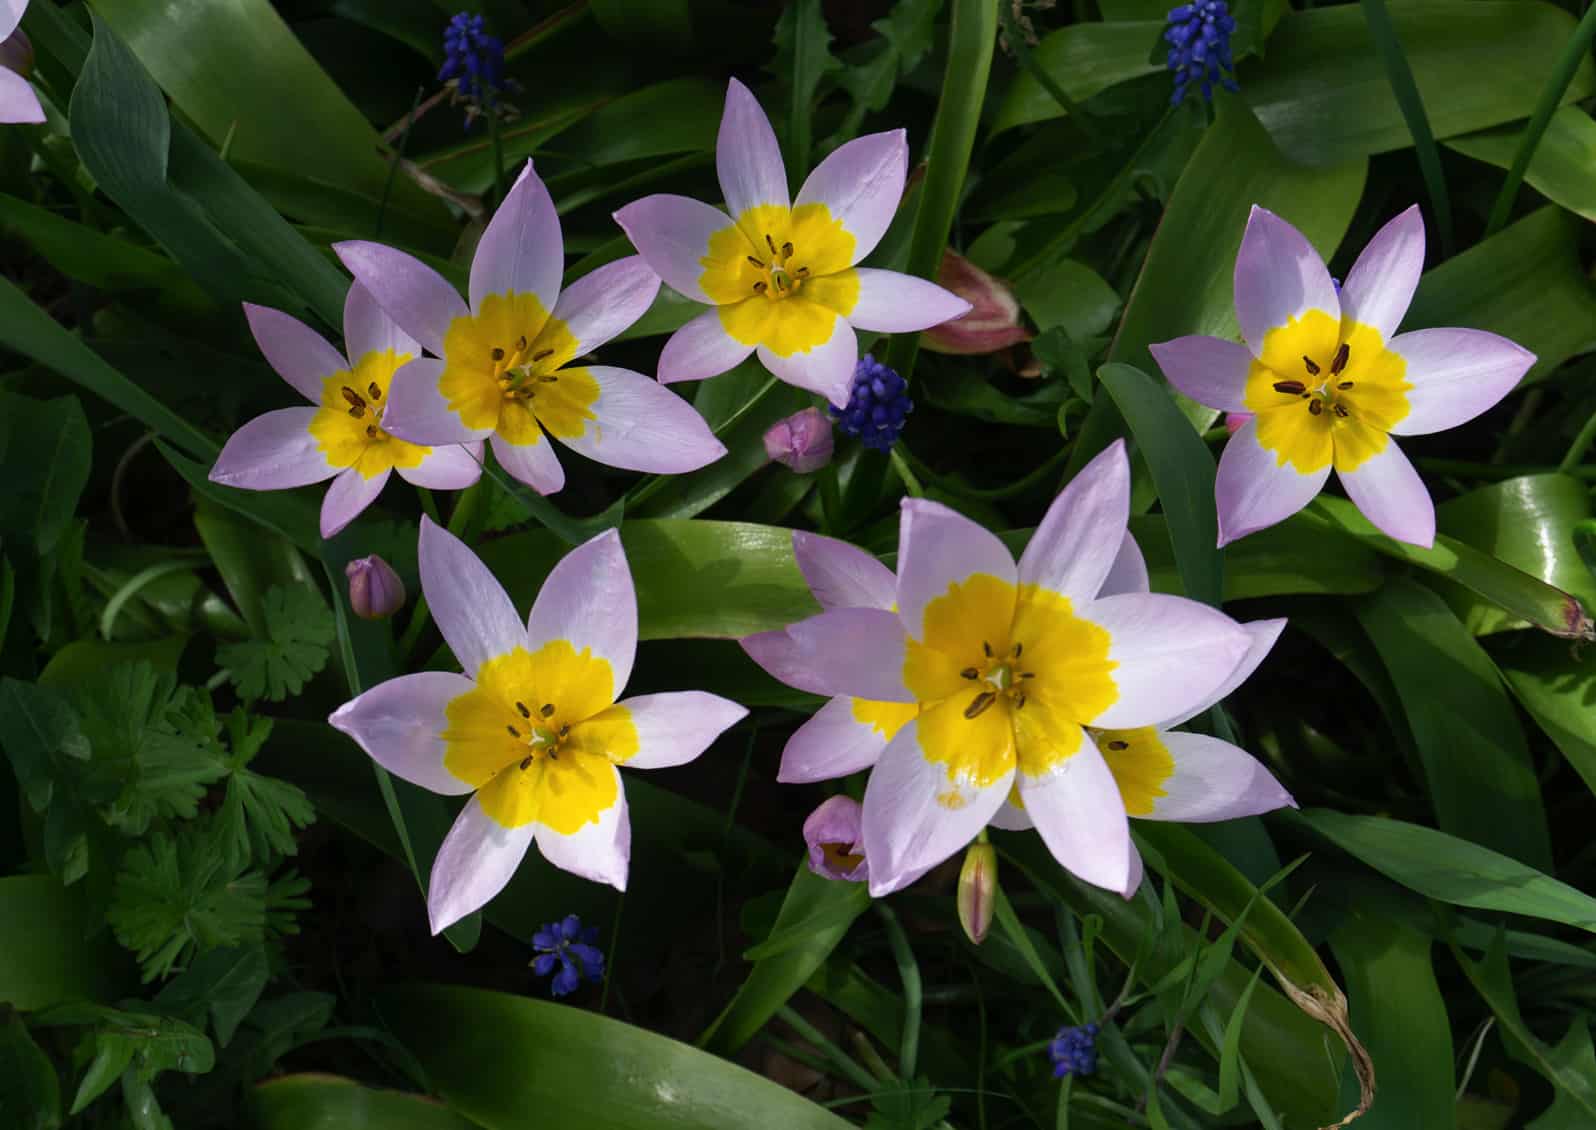
Tulipa saxatilis © Jessamyn Tuttle

Tulipa saxatilis © Jessamyn Tuttle

The Pinnacle of Spring
For many people, especially here in Skagit Valley, the pinnacle of spring is when the tulips bloom. There are many, many varieties of tulips, including single early, single late, doubles, parrots, triumph, Darwin hybrids, emperor, and fringed, each with its own bloom time and flower type. They come in every color except blue, from ‘Spring Green’, a white tulip with pale green stripes to the nearly black ‘Queen of Night.’

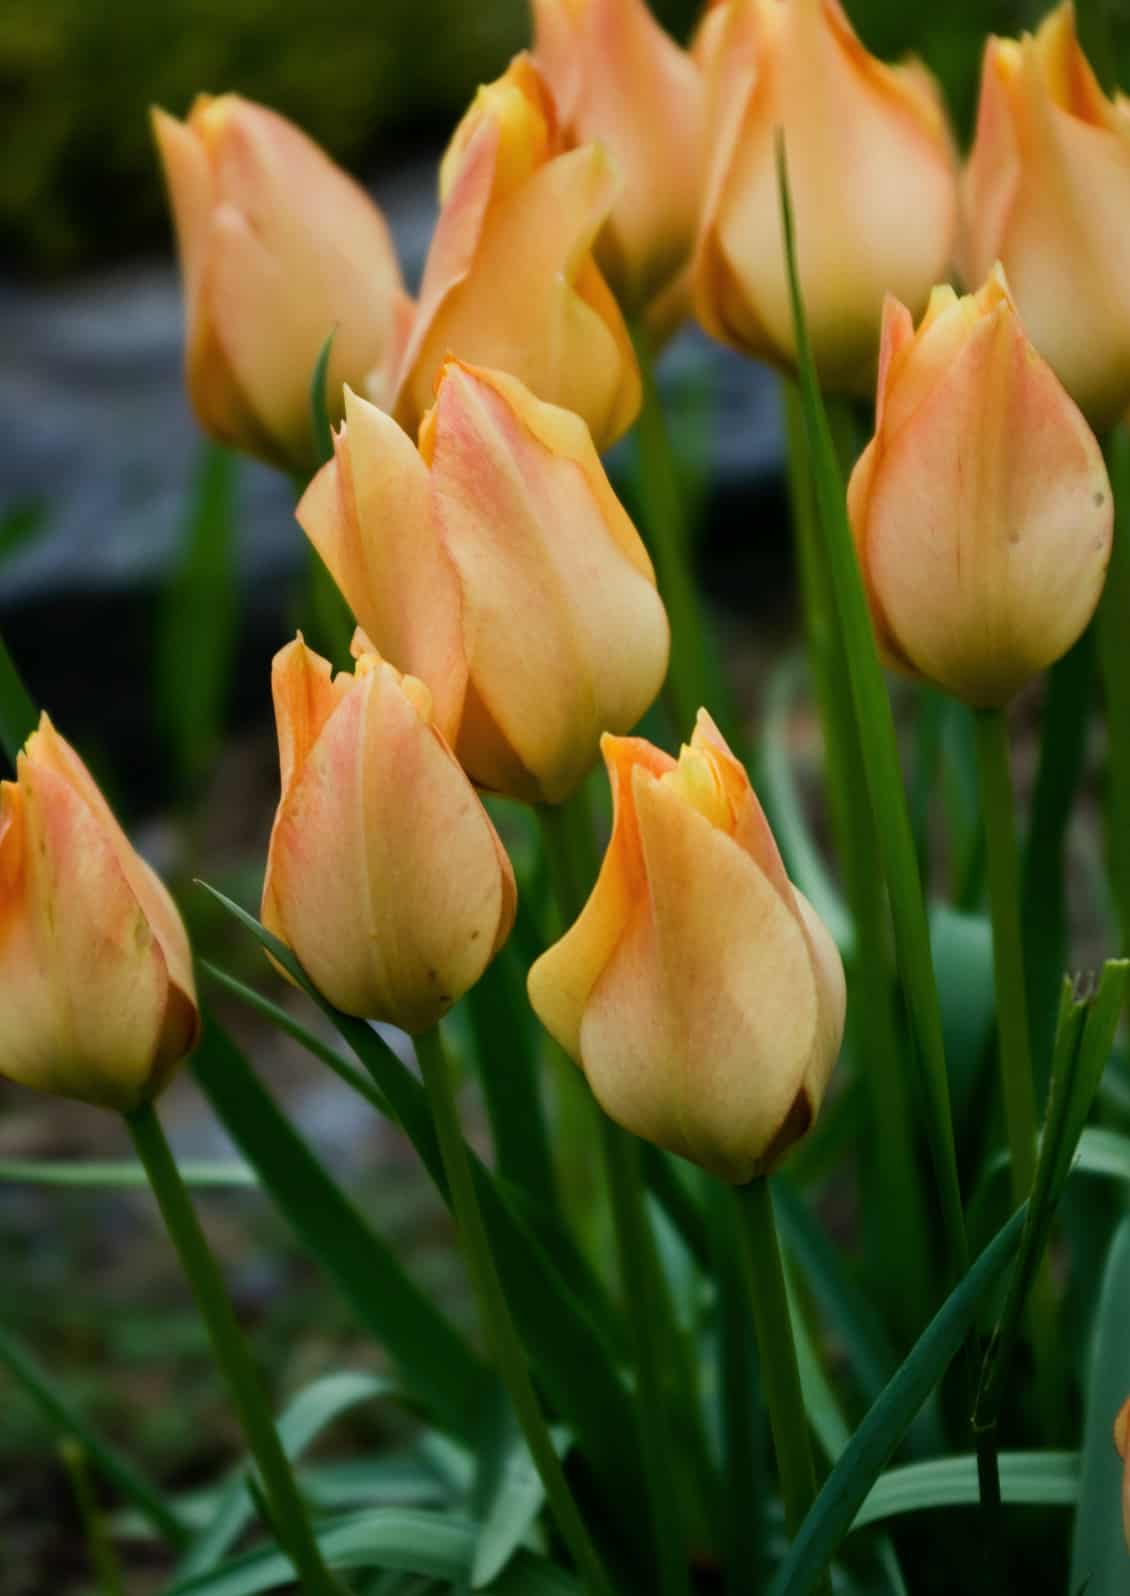
There are also species of tulips which are less showy than the big hybrids but very hardy and great for naturalizing in the garden. Tulipa saxatilis is a vigorous spreader that carpets the ground with showy lavender-pink flowers with brilliant yellow centers, while T. batalinii ‘Bright Gem’ has blue-green foliage topped with yellow or apricot flowers streaked with pink.

Chionodoxa, or Glory-of-the-Snow  © Jessamyn Tuttle

Chionodoxa, or glory-of-the-snow © Jessamyn Tuttle

Tulipa batalini 'Bright Gem' © Jessamyn Tuttle

Tulipa batalini ‘Bright Gem’ © Jessamyn Tuttle

Planting Spring Bulbs
The rule for most bulbs is to plant in late fall or early winter, setting them at a depth 2-3 times the size of the bulb. Not planting bulbs deep enough is often what causes them, especially tulips, to vanish instead of coming back year after year. Pick a spot with full or at least part sun, and well-draining soil. Bulbs do not do well in damp spots. You can add some bulb fertilizer to the soil while planting if you like. Small, early-blooming bulbs can be tucked in throughout a garden bed, but all bulbs look beautiful planted together in a group to make swathes of color in the spring.

Bulbs should be well watered at the time of planting and while actively growing and flowering but do best when allowed to stay mostly dry through their summer dormancy. And if you want your bulbs to come back next year, don’t cut the foliage down until it has ripened, since the leaves are what provide the bulb with food for the next season.

If you plant every bulb listed here, you should have a succession of colors starting in January until the rest of the garden fills out in May. Enjoy!


REFERENCES:

https://www.missouribotanicalgarden.org/Portals/0/Gardening/Gardening%20Help/Factsheets/Flowering%20%20Bulbs17.pdf

Botts, B. Early spring bulbs. Chicago Botanic Garden https://www.chicagobotanic.org/plantinfo/smart_gardener/early_spring_bulbs

Slade, N (2014). The plant lover’s guide to snowdrops. Timber Press.

Austin, C (2005). Irises: A gardener’s encyclopedia. Timber Press.


ABOUT THE AUTHOR:

Jessamyn Tuttle is a Skagit County WSU Extension Master Gardener, Class of 2017. She is co-manager of the Plant House and also coordinates the Iris Garden room in the Discovery Garden on Hwy 536 west of Mount Vernon.

_________

Questions about home gardening or becoming a Master Gardener, may be directed to: Skagit County WSU Extension Office, 11768 Westar Lane, Suite A, Burlington, WA 98233; by phone: 360-428-4270; or via the website: https://extension.wsu.edu/skagit/mg/


AMGPost_header5
100823_Header2

Seed Saving and Sharing

Open the door to learning about plants in a whole new way.

              Subscribe to the Blog >

By Sheri Rylaarsdam, Skagit County WSU Extension Master Gardener

Want to see an adult in an eight-foot-tall sunflower costume? Let your vegetables grow into monsters? Save some cold hard cash? Save an heirloom plant or design a new one?

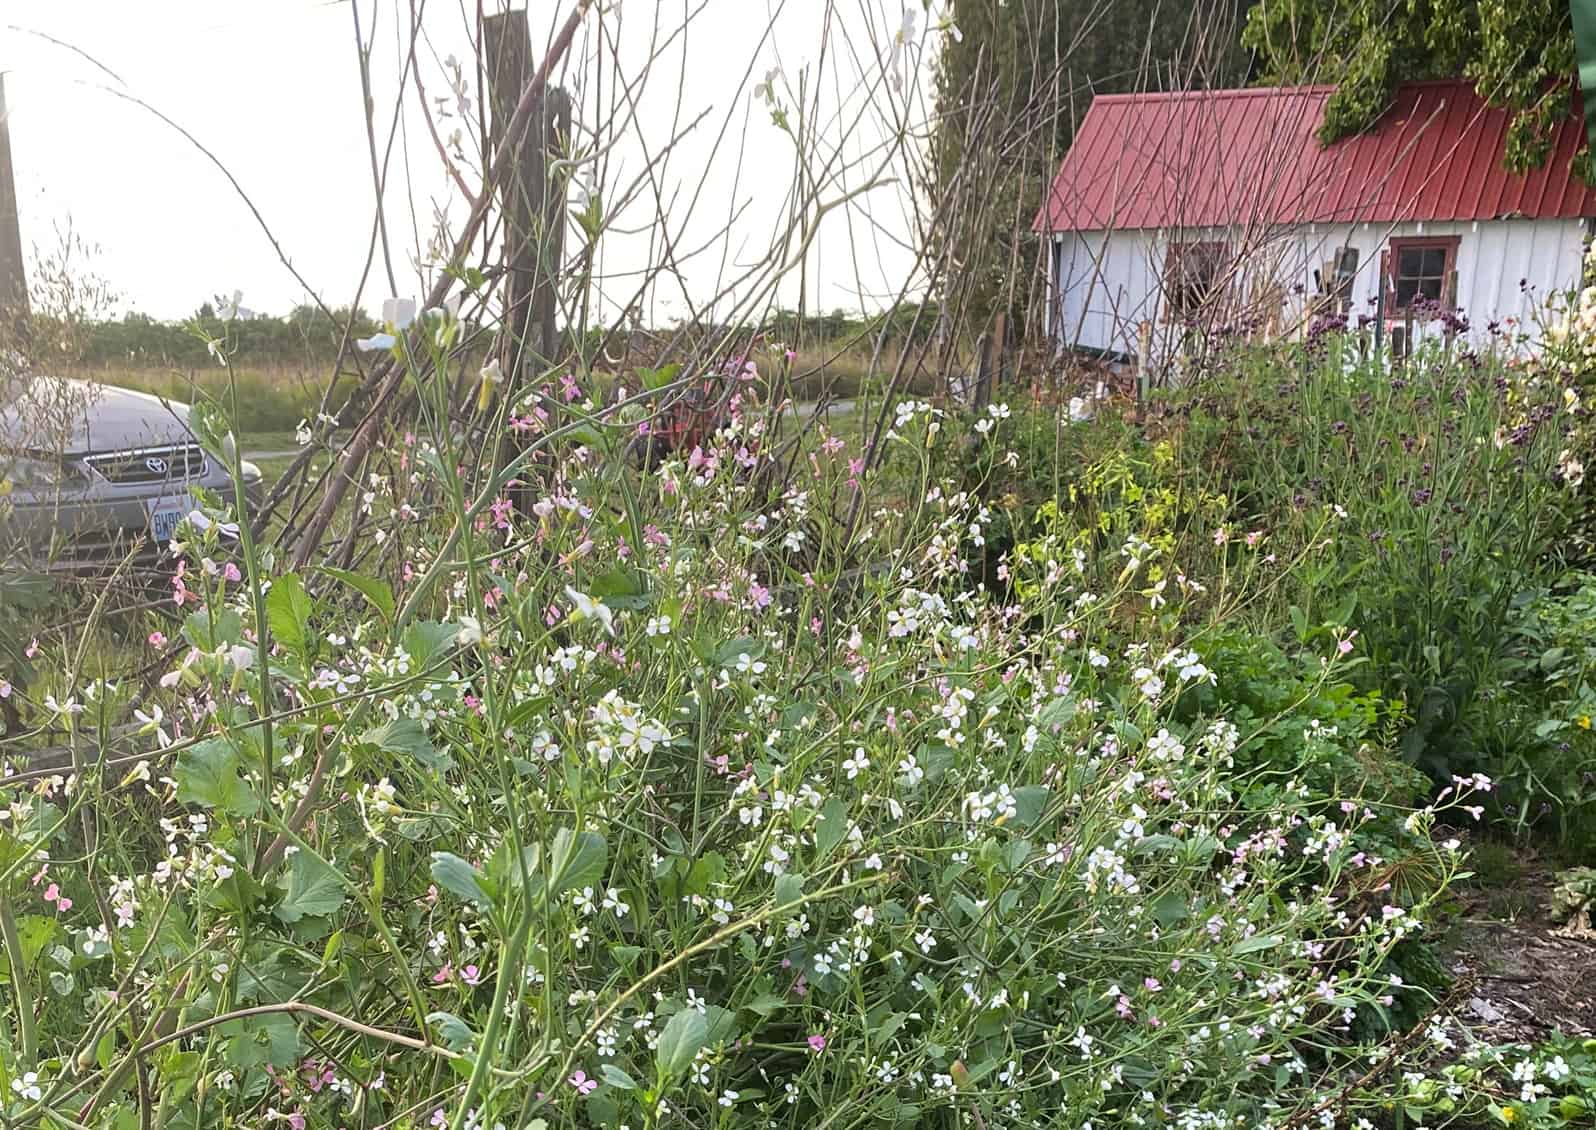
These are all possibilities once one starts down the road of seed saving. You can begin almost accidentally by not pulling all the radishes in the garden. Several weeks later you’ll notice they have grown six feet tall with multiple branches and hundreds of seedpods. The original radish is an unrecognizable nob at the bottom of the magnificent plant.

vegetable garden with plants gone to seed
Radish plants gone to seed in the author’s garden. © Photo by Sheri Rylaarsdam
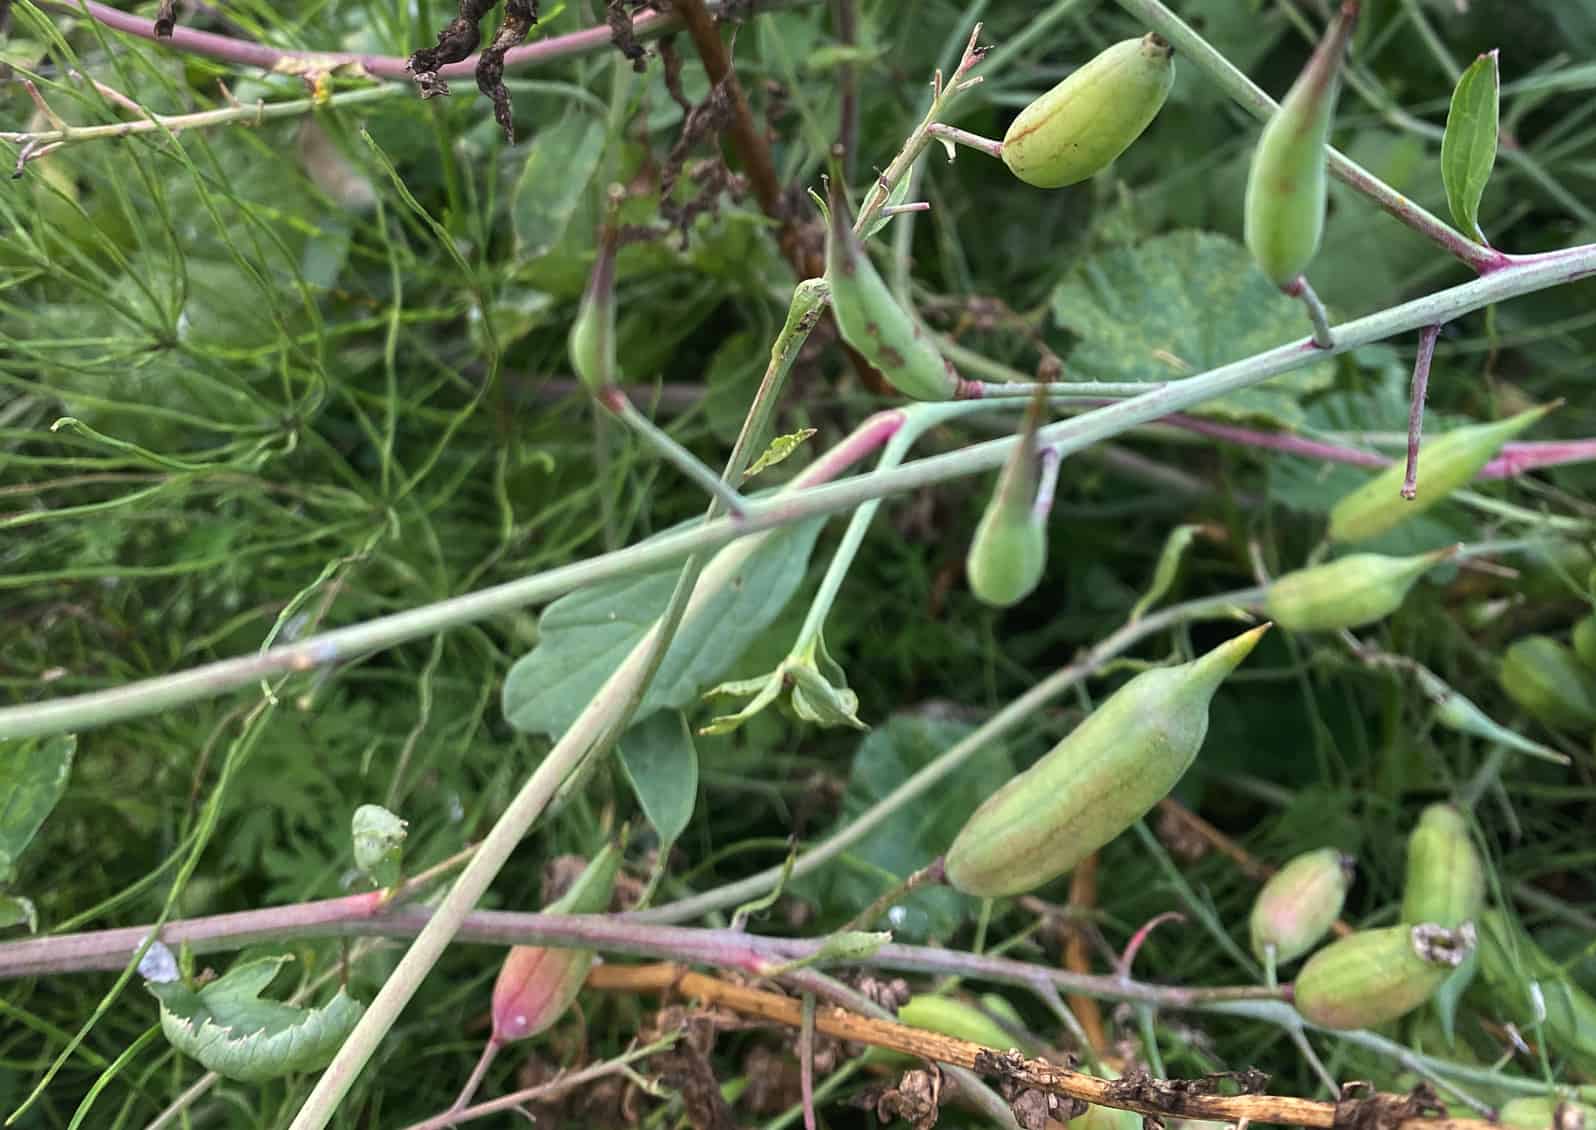
Radish seed pods can be collected when they turn brown and look dried out. Interestingly, they are also edible. © Photo by Sheri Rylaarsdam

Now you know getting started is easy enough. So next you may be asking “What other vegetables produce harvestable seeds when left to grow?”

First, always save seeds from open-pollinated plants, not hybrids. Open-pollinated seeds are plants pollinated openly by wind, rain, or flying critters. Heirloom seeds are included in this category, named so because the saved seeds have produced ‘true to type’ plants for fifty years or more. The seeds collected from hybrid plants are sterile because they are a manually-produced cross between two varieties and will not grow true to form.

It is easiest to save inbred or self-pollinated seeds. These are seeds of plants whose pollen is transferred within the same flower or from one flower to the other within the same plant. Peas, beans, lettuce, and most tomatoes are examples of plants with inbred or self-pollinating seeds.

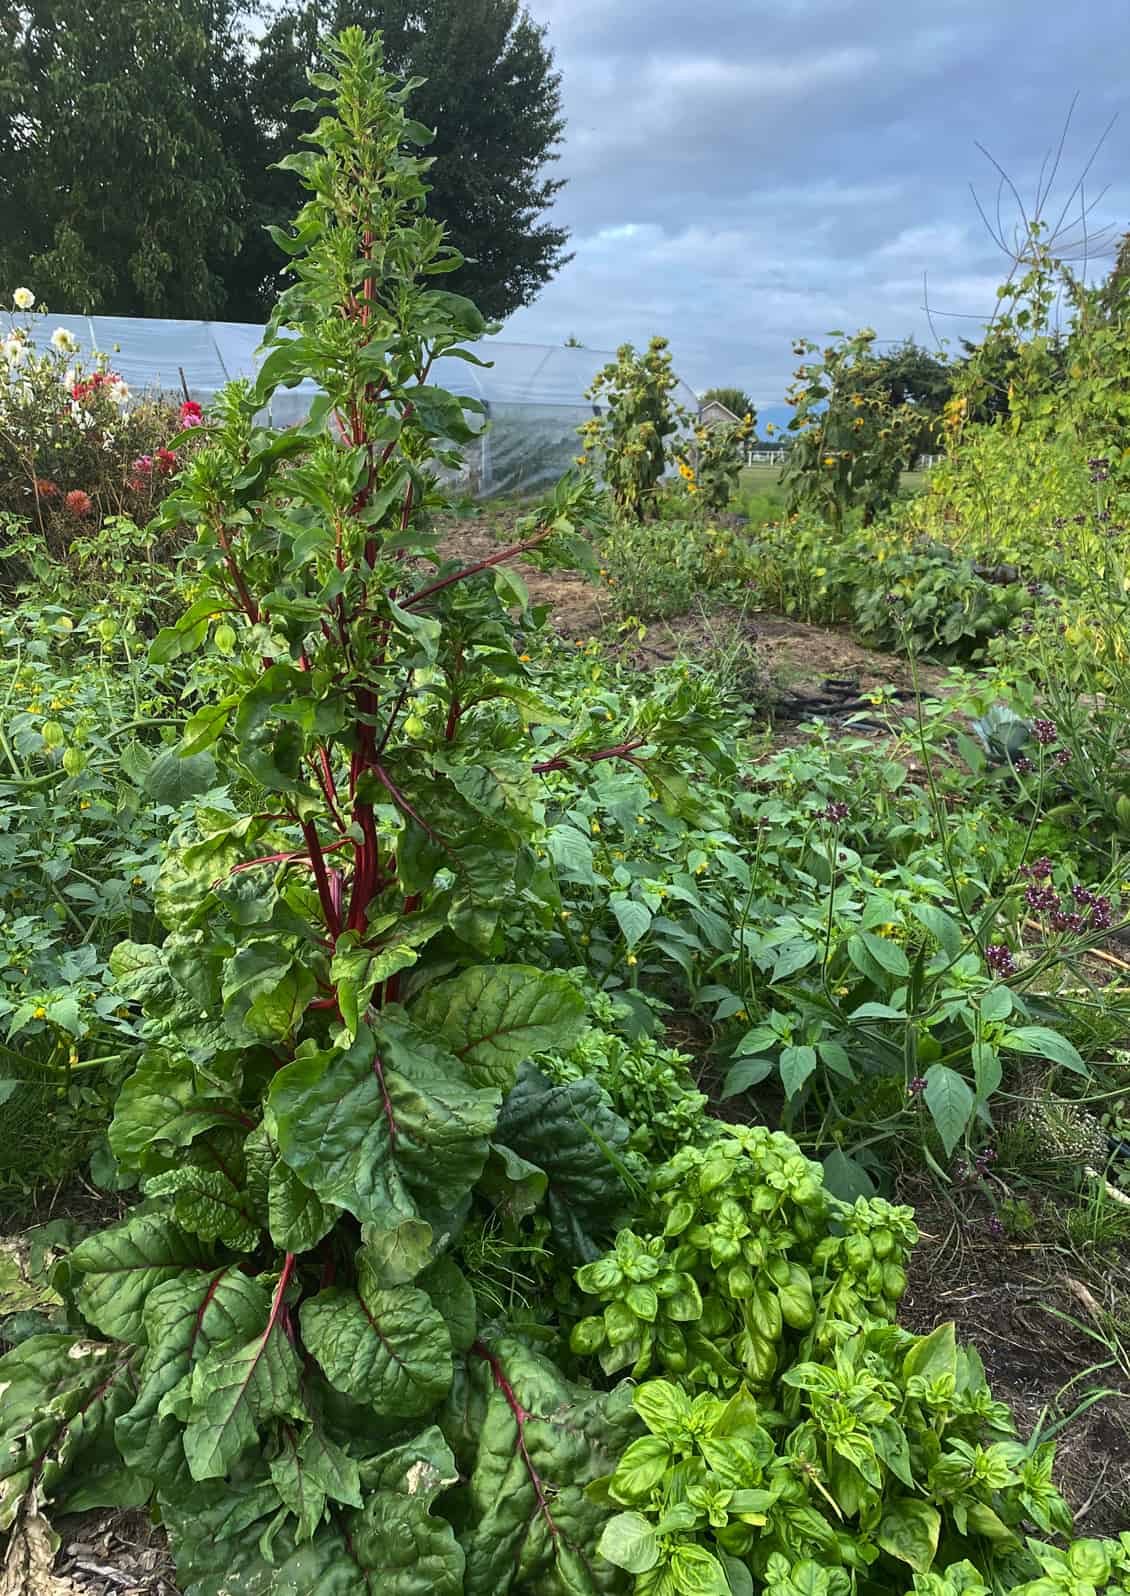
Beet plants grow tall when left to seed. © Photo by Sheri Rylaarsdam
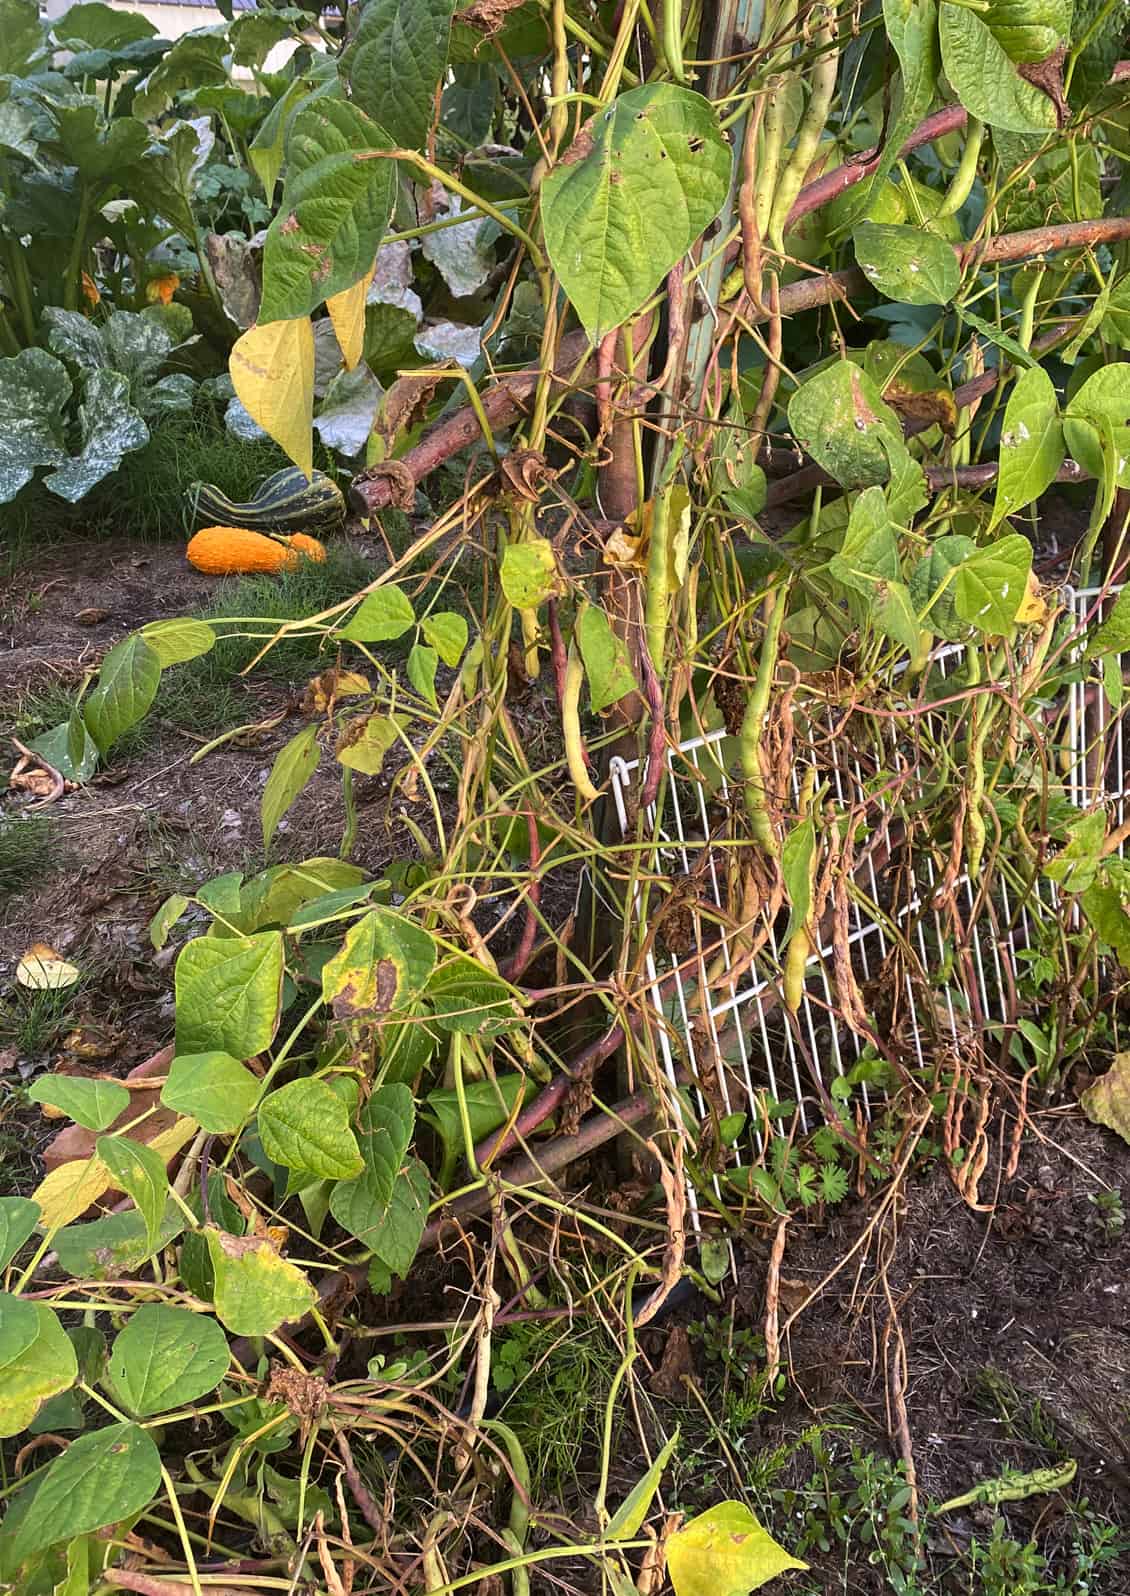
Cobra green pole beans going to seed. © Photo by Sheri Rylaarsdam

Grown from saved open-pollinated seed, this Hungarian Heart tomato is the largest the author has grown. © Photo by Sheri Rylaarsdam

Harvesting Self-Pollinating Seeds
Let beans and peas dry on the plant, then pick the pods to shell. Thresh the pods by hand. The chaff can be winnowed by tossing the pods in the wind and catching the seeds in a basin.

Lettuce seeds send up a seed stalk, ripening two to three weeks after flowering. Harvest daily by shaking the seeds into a paper bag. The lettuce feathers and chaff can then be separated from the seeds using a fine mesh screen.

To save seeds from tomatoes, choose fully ripe tomatoes. Cut across the equator of the tomato and scrape out the gel and seeds. Let the seeds ferment for a couple of days until a black or white mold forms on top. This helps remove any pathogens on the seed surface and also removes the natural germination inhibitor that coats the seed. Strain off the mold and rinse the seeds slowly and carefully. Drain in a fine mesh strainer and dry thoroughly on a saucer. Be sure to label the saved seeds with the name of the variety and the date they were saved. Since the viability of seeds is most affected by fluctuating temperature and moisture levels, it is important to store them in a cool, dry place-ideally in a tightly closed glass jar in the refrigerator.

Harvesting Wind-Pollinated Seeds
Varieties of wind-pollinated plants need to be separated by distance or mature at different times in order not to cross. Wind-pollinated plants include beets, chard, spinach, and corn. Corn pollen is light and can be carried long distances by the wind. A distance of two miles is the recommended isolation distance. A minimum of two hundred plants is needed to have enough genetic diversity.
Harvesting Seeds Pollinated by Bees
Bee-pollinated plants include many ornamental flowers and these vegetable families: Apiaceae (carrots, dill, parsley, cilantro, parsnip, chervil, caraway), Amaryllidaceae (onion, garlic, shallots, scallions, chives, leeks), Brassicaceae (cabbage, broccoli, cauliflower, Brussels sprouts, turnips, kale) and Cucurbitaceae (squash, pumpkins, gourds). If vegetables have the same Latin name they can cross. Avoid cross-pollination by allowing just one type of vegetable from each family to go to seed. For example, if one lets leeks go to seed, do not let onions, garlic, shallots, scallions, or chives go to seed at the same time. The seed-producing vegetable also needs to be isolated from other seed-producing vegetables in its family by one-half mile. Cucurbitaceae are often hand-pollinated. Professional seed savers often use a system of cages to avoid cross-pollination.

Carrots, cabbages, beets, and onions are examples of biennials. These should be left in the ground or stored over the winter and replanted in spring to produce seed in the second year.

Master Gardener Dixie Mitchell repurposes the silca gel packets that come with shipments to keep her seed collection dry until use. © Photo by Ginny Bode

Start with something easy. Choose a variety of beans, peas, lettuce, or tomato that is delicious, grows vigorously, is a good producer, and is resistant to pests and diseases. Once you’ve started saving seeds, collect all the seeds you can. Then you’ll have plenty to plant next year, some to share, some to donate to a seed library or take to a seed swap.

Sharing seeds by donating to a seed library can make it easy for new gardeners to get started. Supplying seeds and information encourages gardeners to be out in nature, eat healthy food, and save money. Seed swaps are an excellent way to get seeds for the garden for the whole next year. Seed swap events usually have music, food, classes, and sometimes adults dressed up like sunflowers!

One can support biodiversity by supporting seed banks, buying from seed companies that increase biodiversity, and contributing to seed libraries and local seed guilds. The U.S. has lost a large percentage of its food plant biodiversity in the last 100 years. By saving seeds, you are doing your part to preserve the genetic diversity which is vital for the future of our food supply.

Seed stewards work to increase, not decrease, biodiversity. By saving and growing open-pollinated varieties of vegetables in the same area for many years and selecting for taste, disease resistance, and productivity, one can develop an improved vegetable. The selected variety will have the characteristics necessary to withstand unfavorable local conditions such as drought or heavy soil.

Seed saving is a gateway to learning about vegetables and flowers in a whole new way, witnessing their whole life cycle and how they interact with other plants. It has led to a new appreciation for nature’s abundance. Through seed sharing, I’ve contributed to altruistic causes that make a difference in the daily lives of people in our community. And I’ve met interesting people that make me smile-such as the fellow seed sharer wearing an eight-foot-tall sunflower costume.


REFERENCES:

Ashworth, Suzanne, 2002, Seed to Seed, Seed Savers Exchange

Gardening for Everyone: Seed Saving/WSU Lewis County Extension/ s3.wp.wsu.edu/uploads/sites/2057/2022/02/Seed-Saving-Handout.pdf

Op-ed: Saving Heirloom Seeds Can Protect Crop Diversity/civil eats/civileats.com/2022/01/27

Community Horticultural Fact Sheet #17/ WSU Jefferson County Extension/ extension.wsu.edu/jefferson/master-gardener-seed-library

Hubbard, Kristina K. January 11, 2019
https://civileats.com/2019/01/11/the-sobering-details-behind-the-latest-seed-monopoly-chart/


Sheri Rylaarsdam

ABOUT THE AUTHOR:

Sheri Rylaarsdam is a Skagit County WSU Extension Master Gardener, Class of 2019. She is an avid seed saver and vegetable grower.

_________

Questions about home gardening or becoming a Master Gardener, may be directed to: Skagit County WSU Extension Office, 11768 Westar Lane, Suite A, Burlington, WA 98233; by phone: 360-428-4270; or via the website: https://extension.wsu.edu/skagit/mg/


AMGPost_header5
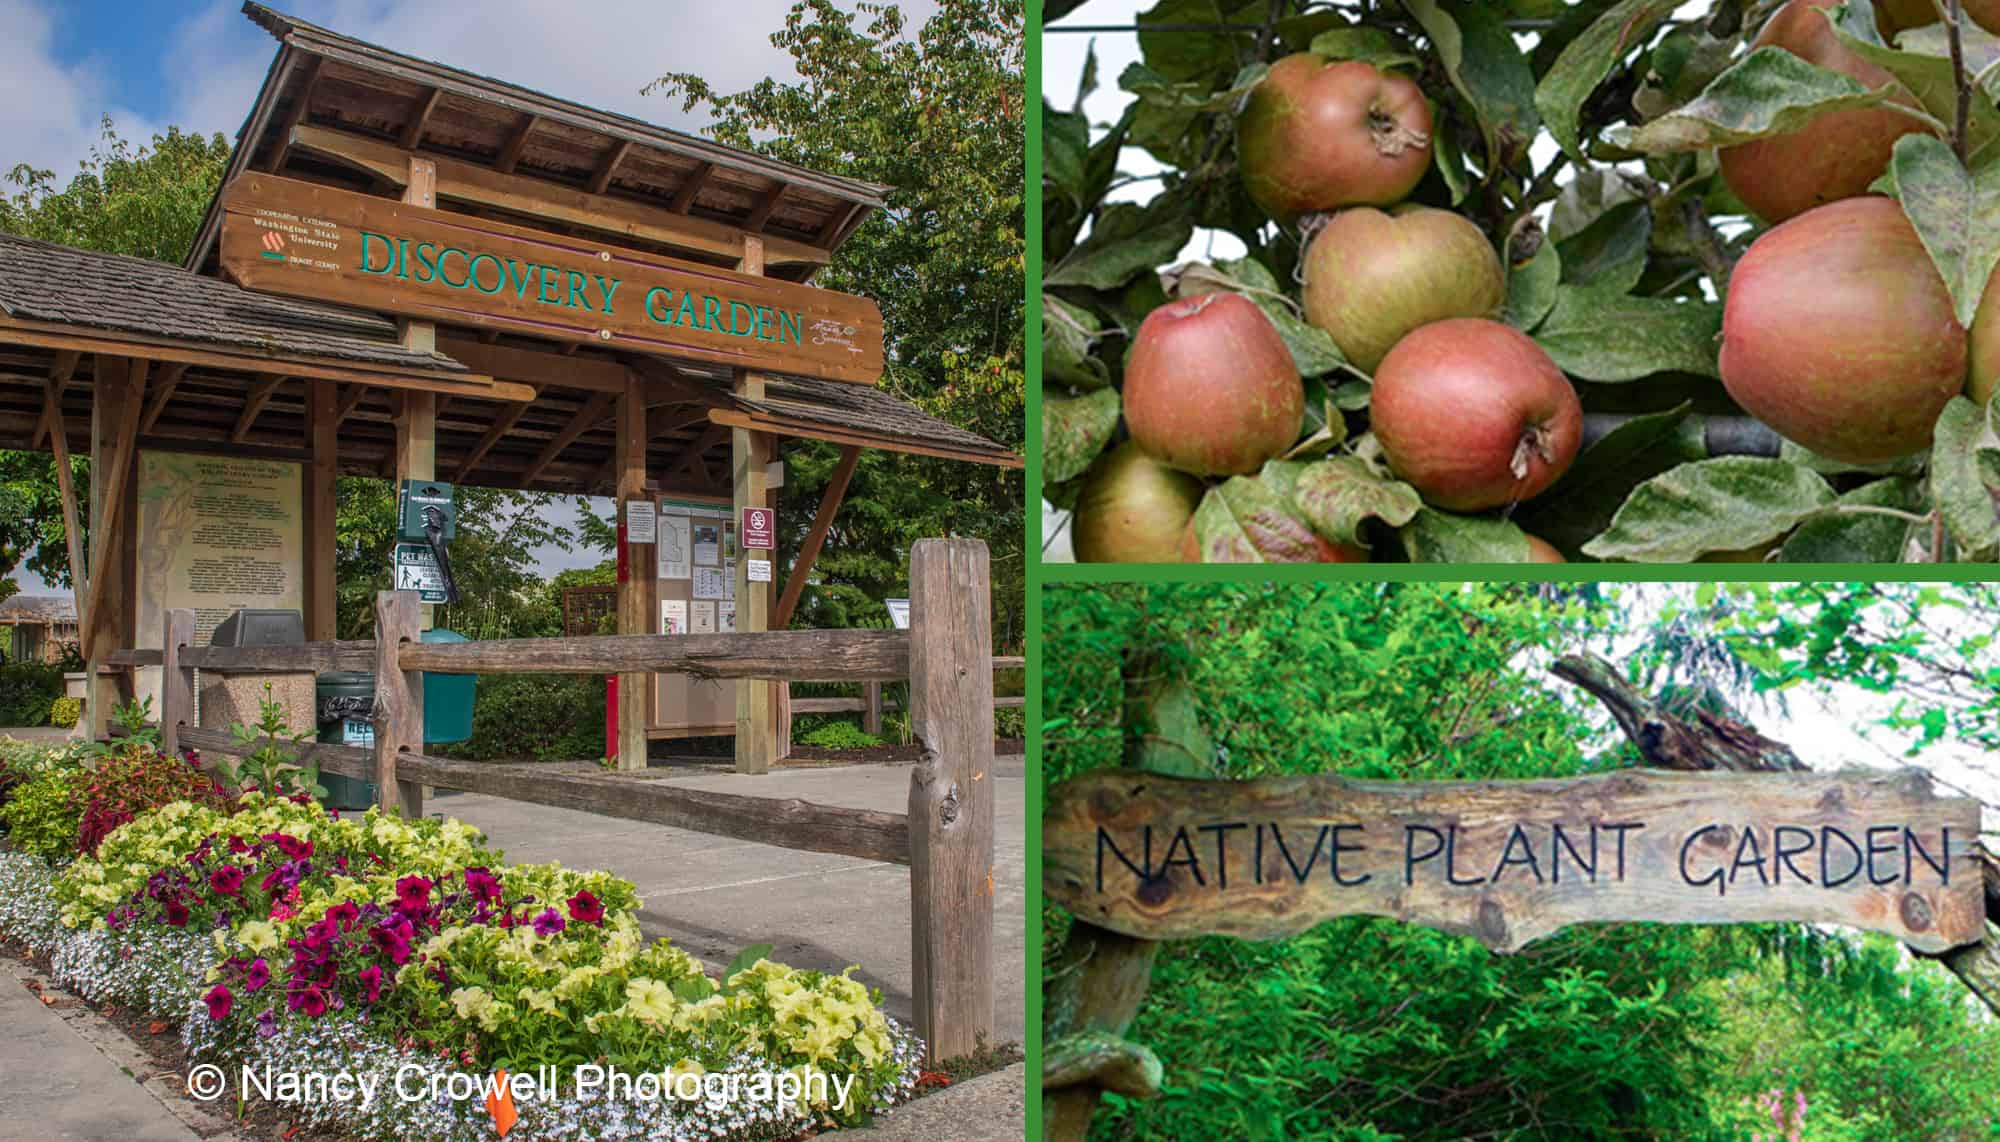
picture of Discovery Garden entrance apples, Salal Native Garden sign


Discover the Skagit Valley Display Gardens Open House

Discover the Discovery Garden, NW Fruit Garden, and the Salal Native Plant Garden

              Subscribe to the Blog >

By Janine Wentworth, Skagit County WSU Extension Master Gardener

June is the beginning of summer blooming, fruit and vegetable growth and early harvests.

Enjoy the summer gardens of Skagit Valley at the Discover the Display Gardens Open House. Skagit Valley is home to 8 acres of display gardens operated by volunteers as a learning resource for the public.

Discover the Display Gardens
Open House

June 24, 2023 · 10 am – 2 pm

Free Admission

  • Skagit County WSU Extension Master Gardener Discovery Garden
  • Western Washington Fruit Research Foundation
  • Salal Native Plant Garden

All three are nestled together in the green fields of the WSU Northwestern Washington Research and Extension Center west of Mount Vernon on HWY 536 (Memorial Hwy.)

While all three of these gardens are open to the public daily, the Annual Open House is focused on educating and inspiring visitors interested in many specific areas of interest, including pollination, water-wise gardening, native plants and raising fruits and vegetables in the Skagit area.

The Discovery Garden
Designed to support Skagit home gardeners by promoting science-based gardening practices, Skagit area WSU Extension Master Gardeners have created 30 garden rooms within the garden, featuring hundreds of plants chosen to flourish in Skagit Valley. Come and spend time with the volunteers who maintain the gardens and learn more about what they grow.

In addition to tours of the garden rooms, Master Gardeners will be on hand offering activities for all ages including:

  • Free garden tool sharpening
  • Solutions to plant problems
  • Plant identification– to help you know what you have
  • Expert advice on weed identification and management

While at the Discovery Garden, visit the small fruits garden and learn more about food you can grow in your own back yard. Photo © Nancy Crowell Photography
Visit the learning station near the pond in the Naturescape Garden. There you will see Koi fish and learn about pond maintenance and construction as well as drip irrigation.
Bring a blanket and picnic lunch and enjoy the day at the Discovery Garden. Photo © Nancy Crowell Photography

Learn about effective gardening at the 8 education stations located throughout the garden area. Master Gardeners will offer instruction on topics such as:

  • Developing healthy soil
  • Composting
  • Pollinator support
  • Fruit tree pruning and thinning
  • Gardening with native plants
  • Weed identification: Match examples of common weeds with their names so you can learn how to identify them and control them
  • Clean water and water conservation: Visit the learning station near the pond in the Naturescape Garden. There you will see Koi fish and learn about pond maintenance and construction as well as drip irrigation

Pollinators: Learn about plants that support pollinators from Master Gardeners who plant and care for the pollinator gardens and the pollinators that live in the garden. The pollinator station at the Open House will teach ways to help native bees and other pollinators thrive in home and community landscapes because pollination is an essential survival function.

Local Food: The Skagit County WSU Extension Master Gardeners offer extensive resources for local gardeners. During the Open House, Master Gardeners will be giving talks on drawing of food baskethealthy soils, growing your own vegetables, and weed identification and eradication. The Grow Your Own Food page at https://www.skagitmg.org/home/resources/food/ is also an excellent resource for gardeners getting started.

While at the Discovery Garden, visit the Vegetable, Small Fruits, and Doc’s Arbor garden rooms for ideas and examples of food-producing plants that grow well in the Skagit County area.

Educators from the Xerex Society will be at the Open House demonstrating techniques for making your garden pollinator friendly
Learn smarter vegetable gardening tips from the Master Gardeners who have research and tested a variety techniques that face gardeners in the North Puget Sound area.
Throughout the growing season, garden waste is sorted, chopped, and chipped-- the browns and greens are com­bined and turned, giving us nutrient-rich compost in a few months.
Throughout the growing season, garden waste is sorted, chopped, and chipped– the browns and greens are com­bined and turned, giving us nutrient-rich compost in a few months.

Composting: Curious about how to get started composting? Composting reduces waste and provides an inexpensive treatment for home gardens and landscapes. Healthy soil is essential to have healthy plants. Come talk to our soil experts and learn about your soil and what you can do to improve it.

Growing the Discovery Gardens since 1996
In 1994, the Skagit County WSU Extension Master Gardeners had a vision for a garden that would demonstrate best practices for gardening in the Skagit area. After two years of planning, the garden’s first structure of trees and fences was placed in the fall of 1996. Over the following two years, many committed WSU Extension Master Gardeners, along with the help of the community, planted the gardens.

MG-Healthy-People_Healthy-Planet-Diagram

The WSU Master Gardener Program addresses important sociologic and environmental issues by teaching research-based horticulture information. We want people to have important skills and abilities that help mitigate challenges and to understand that everyone has a role to play in creating and sustaining healthy and resilient communities.

Salal Native Plant Garden
The second garden participating in the Tri-Garden Open House is the Salal Native Plant Garden. Bordering the Discovery Garden to the south, the Salal Native Plant Garden is entered by walking through the Discovery Garden following the paths to the south. This labor of love and concern for native plants is manifested in an extensive and charming display garden.

Created twenty-five years ago as a collaborative effort between volunteers of the Salal Chapter of the Washington Native Plant Society and the Washington State University Agriculture Extension Agency at Mount Vernon (WSU), the Native Plant Garden is now a half-acre oasis that holds the seeds for the future of native plants in the lower Skagit Valley. The garden is a terrific resource for homeowners who want to learn how to incorporate more native plants into their landscaping.

Western Washington Fruit Research Foundation (NW Fruit)
The third garden on display is the fruit garden known as the Western Washington Fruit Research Foundation (or NWFruit.org). Here volunteers will answer questions about fruit trees. The 6-acre garden was designed and constructed by volunteers of the foundation and contains large informational signs and handouts based on the research conducted by Washington State University.

During the Open House volunteers will be on hand to explain examples of netting for bird control, a Tatura trellis, and answer questions about the expansive espalier display.

The fruit garden contains a large collection of fruiting plants with many unique varieties, including a collection of 17 variations of Gravenstein apples, a collection of antique apples from all over the world, and unusual fruits such as medlar and blue honeyberry. Located on the west side of the Discovery Garden the fruit garden is open to the public seven days a week from dawn to dusk.

Please join us for the Open House festivities on June 24, 2023 from 10 am – 2 pm. You are welcome to bring a blanket and picnic lunch and enjoy the day with family and friends.

The gardens are open and free to the public throughout the year, 7 days a week from dawn to dusk. Visit the gardens throughout the seasons to view the seasonal changes. Signage in each garden identifies plants and makes for interesting and educational self-guided tours.


RESOURCES:

ABOUT THE AUTHOR:

Janine Wentworth became a master gardener in 2018. She and Kay Torrance are co-chairs of the Discovery Garden Open House.
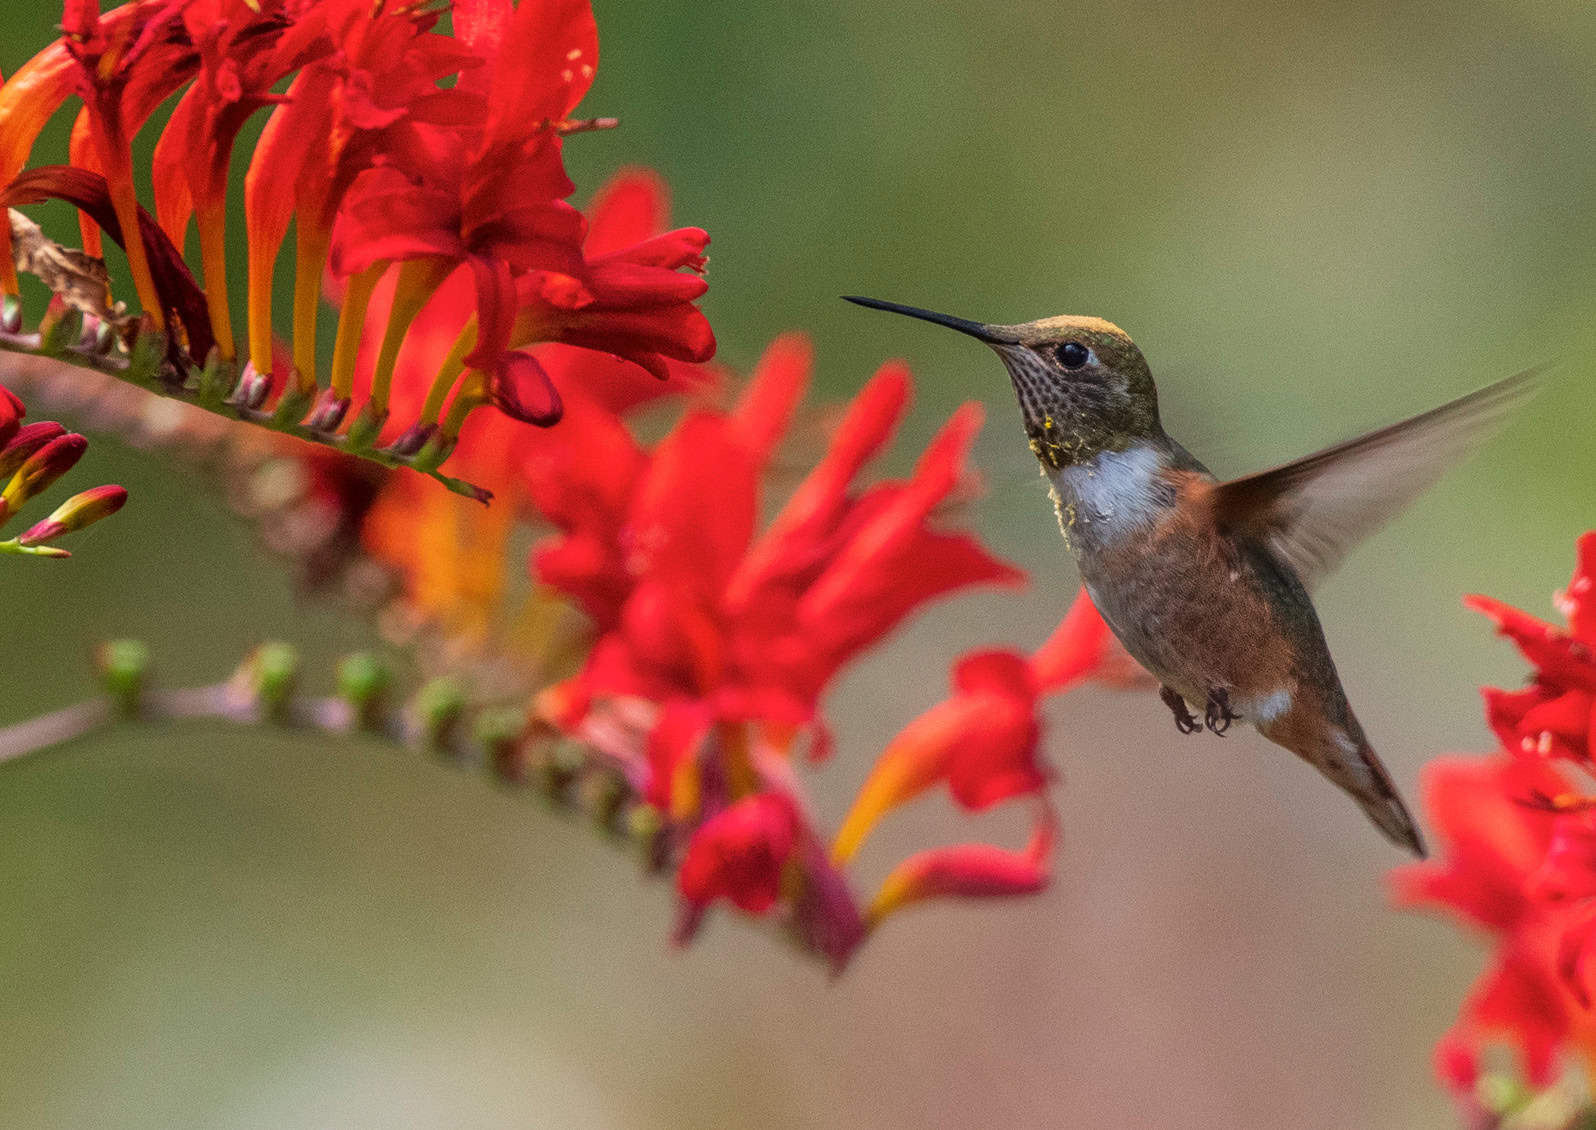


Questions about home gardening or becoming a master gardener may be directed to: Skagit County WSU Extension Office, 11768 Westar Lane, Suite A, Burlington, WA 98233; by phone: 360-428-4270; or via the website: www.skagit.wsu.edu/mg