AMGPost_header5
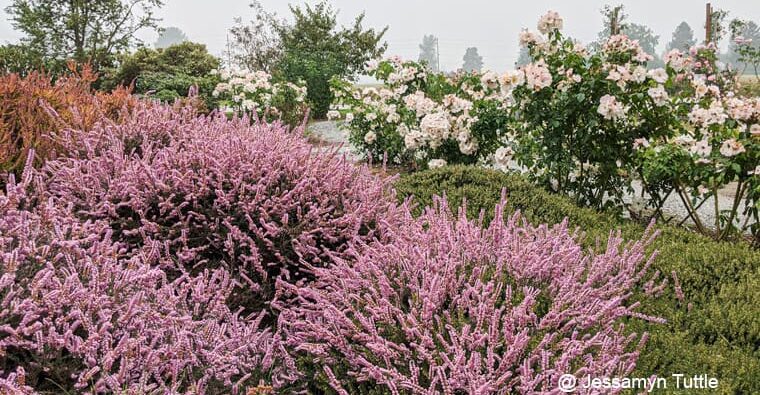
Summer heather blooming in the Discovery Garden  Photo by Jessamyn Tuttle

Heathers and Heaths

An evergreen shrub well-adapted for Pacific Northwest landscapes

              Subscribe to the Blog >

By Robin Fowler-Lee, Skagit County WSU Extension Master Gardener

“No evangel among the mountain plants speaks Nature’s love more plainly than Cassiope.”
                                                – John Muir

Heathers and heaths, common in our area, have a multitude of characteristics and are well-adapted to the Pacific Northwest landscape. Ericaceae is the family of the heather plants, but it also includes rhododendrons, blueberries, mountain laurels, and more. While it’s a bit of a misnomer to categorize all shrubs of this character as “heather,” it is the predominant term for describing these compact, evergreen shrubs.

Our usage of the term “heather” includes:

  • Heath, or Erica
  • Heather, or Calluna
  • Daboecia

Robin Fowler Lee

Characteristics:

Erica (heath) has greater than 800 species and varies in size, texture, color, and form. Very few grow higher than 36 inches, and they can vary in width from 10 – 70 inches. There are tree heaths that can grow up to 10 feet tall, although they are easily damaged by frost in the Pacific Northwest. Heaths have ‘teeth,’ or needle-like foliage.

Calluna (heather) have ‘feathers,’ or flat, fan-like foliage. With over 300 cultivars, Calluna has the greatest variety in foliage color and can be attractive year-round.

Daboecia is the smallest group of heathers, usually growing smaller and seen in higher altitudes. There is another high-altitude species, Cassiope mertensiana, which is one of the wildflowers that grow along Mount Rainier.

Heathers can bloom in summer or winter, depending on the species. Foliage can change colors throughout the seasons. Calluna has more dramatic foliage changes but can also be winter or summer bloomers. They are drought-resistant, deer-resistant, unaffected by gophers, moles, slugs and snails, and dramatic if planted in drifts with room to spread.
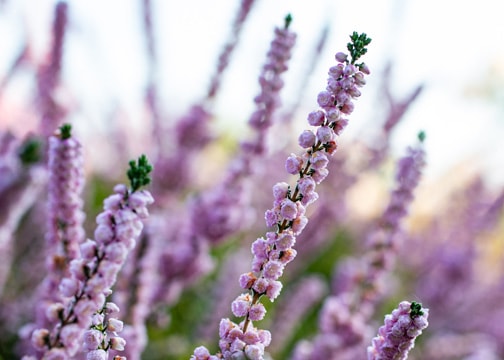
 

Photo by Jessamyn Tuttle/ Skagit County WSU Extension Master Gardeners.
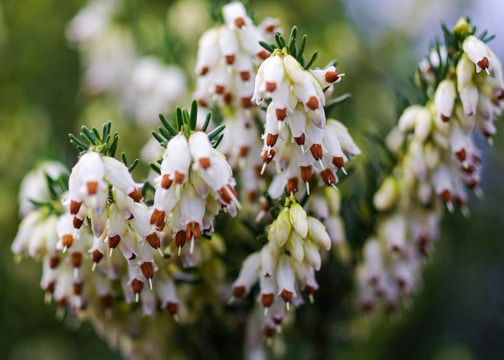
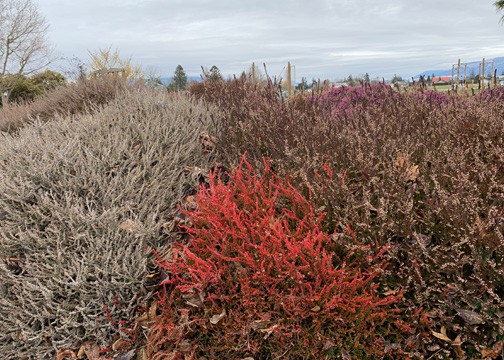
Heaths and Heathers found the Discovery Garden on Highway 536 west of Mount Vernon begin blooming in early February and continue through the summer. Photo by Ginny Bode/ Skagit County WSU Extension Master Gardeners.
Use in the landscape:
Designing with heathers can be an adventure, as there are so many forms, flowering colors, foliage colors, and textures. They mix well with conifers, rhododendrons, grasses, and other drought-tolerant perennials such as rosemary and sedum. They also fit in many garden styles including cottage, formal, Japanese, perennial gardens, and work well in containers. They provide nutrition for bees, butterflies, and birds.
Planting and cultivation:
Heathers grow best in acidic soil and sunny locations. In general, heathers should be planted in a location with at least 6 hours of full sun, where there is good drainage. Peat moss can be mixed with an acidic soil base to help roots establish. They have low nutritional needs; supplying a small amount of acid-loving fertilizer once a year for two years is all that is needed for healthy development.

Drip irrigation, if used, should emit water away from the crown. Mulching with a bark of various sizes, such as aged compost, partially decomposed conifer bark, pine needles, or chopped oak leaves is best. When mulching, allow breathing room around the crown. Although they love our fog, heathers can be susceptible to fungi if mulched heavily around the crown, and also if they are crowded with minimal airflow.

Pruning:
Compact heathers minimize weed proliferation and preserve moisture. Pruning should occur after flowering. Because there is so much variety in bloom time, sometimes it is easiest to prune both heather and heath in the early spring. Pruning should not occur in the extremes of winter or summer. When pruning, the stems should be cut just below the spent flowers but maintaining green foliage. They can be pruned with shears or an electric hedge trimmer. Hand clippers can also be used on the new plantings to develop a compact form. Pruning to a mushroom shape will give the shrub a compact form. The sides are best pruned as well as the top; just avoid cutting all the foliage on the sides, as this gives the heather a boxed look with naked, woody sides.

Erica usually requires less pruning and is less cold-tolerant. They tend to maintain their compact nature more than Calluna. Erica will grow fuller if dead flowers are removed in the early spring. They will send out new, fuller growth and more blooms with the early spring pruning. Calluna, however, depending on the variety and bloom time, can be pruned in the fall. Calluna will have a much better appearance if pruned annually. After the flowers fall off the stem no new foliage grows, and thus they can become gangly and unappealing if not pruned.

You can learn more about heathers at heatherworld.org or stop by the Skagit County WSU Extension Master Gardener demonstration gardens: Discovery Garden (16650 WA-536, Mount Vernon, WA 98273) to explore the Heather Garden. Look closely at the foliage to see if you can distinguish the heaths from the heathers.

RESOURCES:

  • David Small and Ella May T. Wulff, Gardening with Hardy Heathers, Portland, OR Timber Press, 2008
  • Lloyd Eighme, “Heathers for Warm Gardens,” Pacifichorticulture.org
  • John Muir, PlantID.net, White Mountain Heather
  • Maria Krenek, UCCE, Master Gardener of Humboldt and Del Norte Counties, youtube, August 2020

ABOUT THE AUTHOR:

Robin Fowler Lee is a 2022 graduate of the Skagit County WSU Extension Master Gardener Program and is the coordinator for the Heaths and Heathers Garden at the Discovery Garden on Highway 536 west of Mount Vernon.


AMGPost_header5
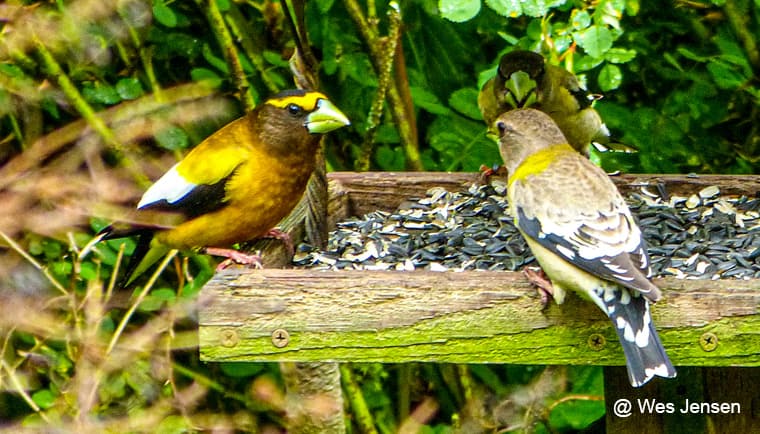
Evening Grosbeaks feeding on sunflower seeds on a simple platform feeder.  Photo by Wes Jansen

Birds In Winter

Enjoy the Antics of Winter Birds While Giving a Hand to Their Survival

[sibwp_form id=]

By Kathy Wolfe, Skagit County Master Gardener

Ah, January! The perfect time to relax in your favorite chair, a nice hot beverage and a few shortbread cookies at hand, and gaze out into the garden. It is a chance to dream: the first step to creating, planning and implementing new ideas, whether for your garden or in your life. It is also a good time to take stock of your garden seeds, cull out the old and order new. The earlier your order is placed, the better chance of getting the varieties you seek.

Kathy Wolfe, Skagit Master Gardener

From the comfort of your chair, you may also notice winter birds flitting about. Birds are an integral part in the cycle of nature. Helping them get proper food, water and shelter will assist their winter survival and allow you to enjoy their antics.

On chilling winter days most birds fluff up their feathers to form insulating air pockets to help them stay warm. You may sometimes find a bird standing on one leg with the other tucked into its breast for warmth. Food availability is limited so filling your clean feeders with high calorie, fat containing food will help them survive. All feeders should be located out of the wind with some type of cover such as a bush, tree or ground plantings nearby to offer shelter, protect them from predators and allow them to survey the feeding area.

There are several types of feeders to use depending on what birds you wish to attract. Foraging, ground feeding birds, e.g., sparrows, juncos, quail and towhees, need low plantings or branches for cover so they can scoot in and out to a ground level feeding area with ease.

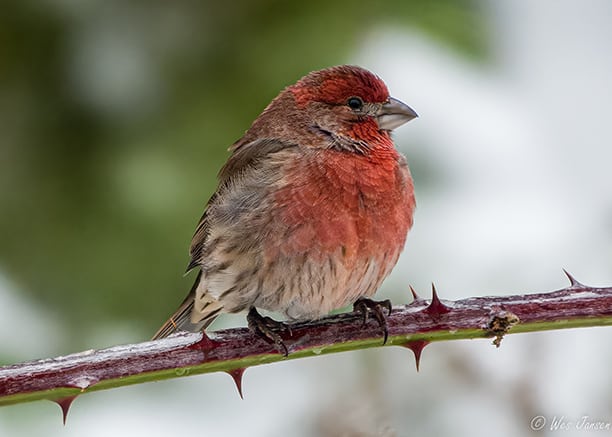
finch sitting berry cane in winter
A male House Finch. Photo by Wes Jansen
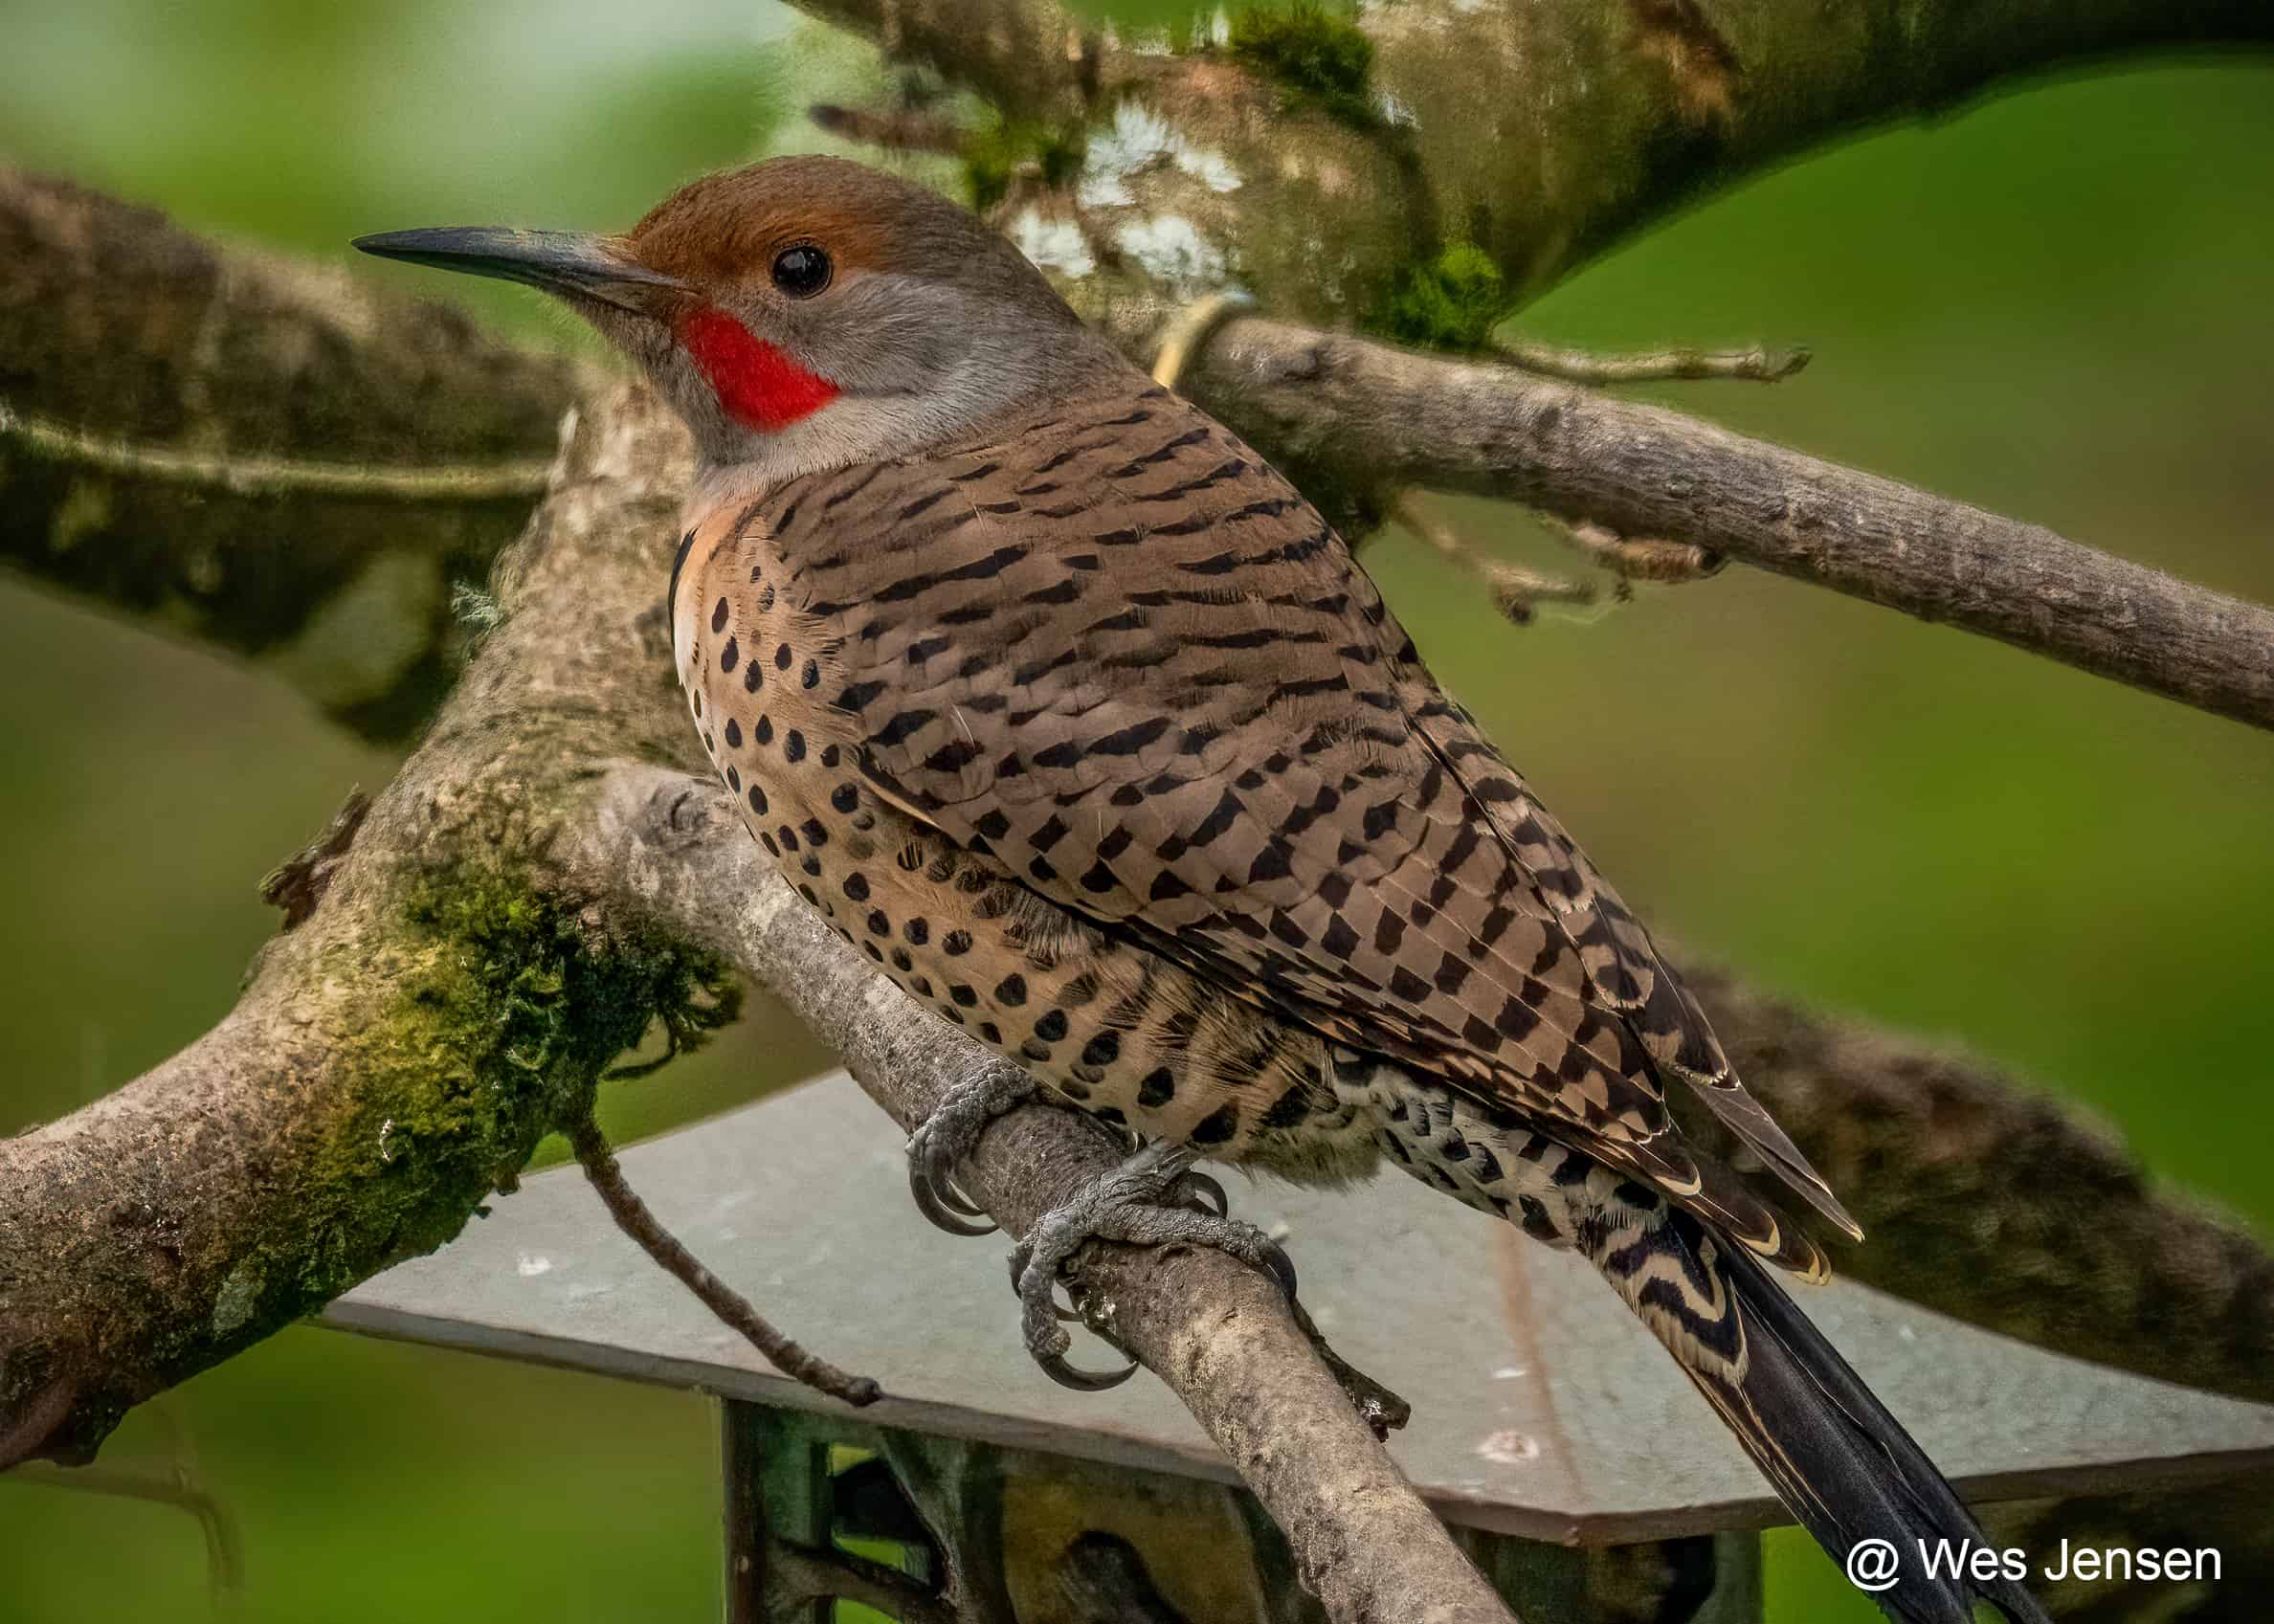
A male Northern Flicker perched near suet feeder in the background.  Photo by Wes Jensen
A male Northern Flicker perched near suet feeder in the background. Photo by Wes Jensen
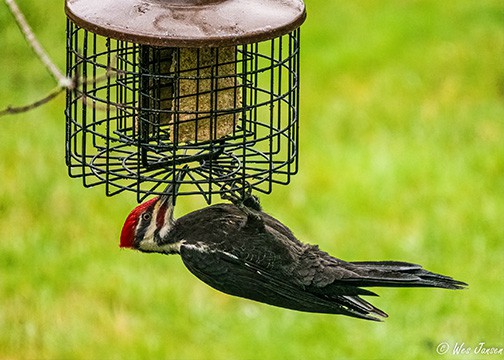
woodpecker feeding on suet
A Pileated Woodpecker feeding on a hanging suet. Photo by Wes Jansen

Anna’s male hummingbird in winter. Photo by Wes Jansen.

Tube feeders with shorter metal perching stations may attract smaller birds such as chickadees and finches, while excluding larger birds like jays. These feeders can build up mold and bacteria in the bottom which are harmful to birds so bring them in, clean out the bottom-most part of the tube, wash and dry thoroughly, before adding new seed.

Nyjer or thistle feeders, usually a fine-wired tube, are popular with goldfinch and pine siskin. They can become quite wet with rain so clean frequently, as you would all tube feeders.

Suet feeders can be constructed of wire or plastic-coated mesh and are either hung on a branch or nailed to a tree. Woodpeckers, nuthatches, and chickadees are some of the birds attracted to these feeders.

All feeders should be cleaned on a regular basis because moldy and decomposing seeds and hulls can get trapped and make birds sick. Bird droppings and contaminants also can spread infection and disease. Start by removing old seeds, take the feeder apart and handwash in hot, soapy water or with a diluted 1:9 parts bleach to water solution. Rinse thoroughly, dry and refill. Clean the area under your feeders to remove waste and spoiled food, as well as to avoid attracting rodents.

What to feed your birds? Black oil sunflower seeds are a great overall offering due to their high fat and protein content. They have twice the calories per pound of striped sunflower seeds and a smaller shell for less mess. Suet and peanuts are another great winter food. DO NOT feed birds bread in winter because it provides little nutrition, can cause obesity and malnourishment, as well as usually having preservatives and excess salt.

If you are lucky enough to have hummingbirds, continue to feed them a 1:4 solution of refined white sugar to tap water, the best and least expensive food for them. Boil this mixture until the sugar is dissolved then cool before filling the feeder. Clean once each week in winter using hot water and a bottle brush. Do not use soap. A diluted bleach/water mix (see above) can be used if you rinse the container very thoroughly before refilling. It is better not to have hummingbirds drink cold nectar because it can cold-stun them so bring feeders in overnight when it is cold and take out again first thing in the morning when the birds most need food.

In addition to food and shelter, birds need a reliable source of water. Shallow bird baths, fountains or small ponds, if kept clean and ice free near protected areas, will be well used.

In addition to seeds, birds also thrive on insects and berries. Viburnum, holly, cotoneaster, pyracantha, roses with hips, mahonia (Oregon grape), crab apple, snowberry, beautyberry and Pacific wax myrtle are all bird favorites in winter. Tuft-forming grasses left uncut in winter can house many varieties of insects for the birds’ enjoyment. Pines and spruces provide another source of seed that can be harvested all winter long from their cones. You might consider adding some winter fruiting plants or grasses to your yard for both winter interest and as treats for the birds.

Use this filter from The Cornell Lab of Ornithology to find specific birds by region, what they eat and which feeders they prefer: Common Feeder Birds – FeederWatch .

To interpret some interesting and entertaining bird interactions in your yard and for more information on backyard bird feeding go to: Power Struggles Are Playing Out at Your Feeder-Here’s What to Look For | All About Birds All About Birds .


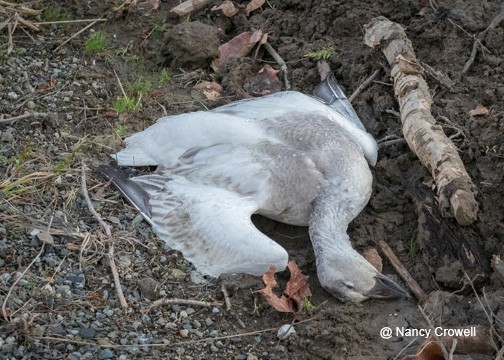
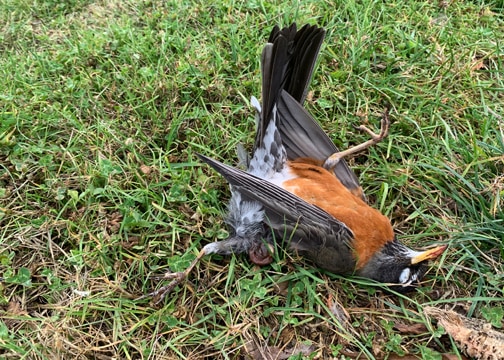
Note to Readers: The highly pathogenic avian flu has hit the Skagit County Bird population particularly hard. If you see a dead swan or other bird, do not touch it. For swan please call the swan hotline for WDFW at 360-466-4345 x266. Here’s an update on the avian flu, including what to do if you see dead birds and how to keep your pets safe:

https://wdfw.wa.gov/newsroom/wdfw-statement/wdfw-statement-avian-influenza-outbreak-among-waterfowl-around-skagit-bay?mibextid=Zxz2cZ

Photo by Nancy Crowell
Photo by Ginny Bode
Photo by Ginny Bode
Photo by Ginny Bode
Photo by Ginny Bode
Our thanks to these photographers for lending use of their photos for this article:

Wes and Rosi Jensen of Fine Feathered Friends in La Conner www.fine-featheredfriends.com

Nancy Crowell, Crowell Photography

Ginny Bode


AMGPost_header5
Web_headerLisianthus

How to Grow Lisianthus

A rose by any other name…

[sibwp_form id=]

By My Thanh Kim, Skagit County WSU Extension Master Gardener

Call it love at first sight. Four years ago, I fell hard for some mysterious flowers in a lobby of a hotel. They looked like roses except more striking with an abundance of green buds surrounding luxurious blooms. This was the beginning of an obsession.  I checked nurseries for plants but had no luck.  Over the next several years I saw them again, and then, while watching the 2020 (2021) Tokyo Summer Olympics, I saw my beauties, lisianthus flowers prominently displayed and my love affair with them started all over again.

While hard to find in flower nurseries it is possible to start lisianthus from seeds. Mastering the seed-starting techniques was a months-long process, but well worth it. In the end, I had nearly 2,000 plants and gave away buckets of beautiful blooms all summer long. These are the best flowers ever, and I want everyone to enjoy them.

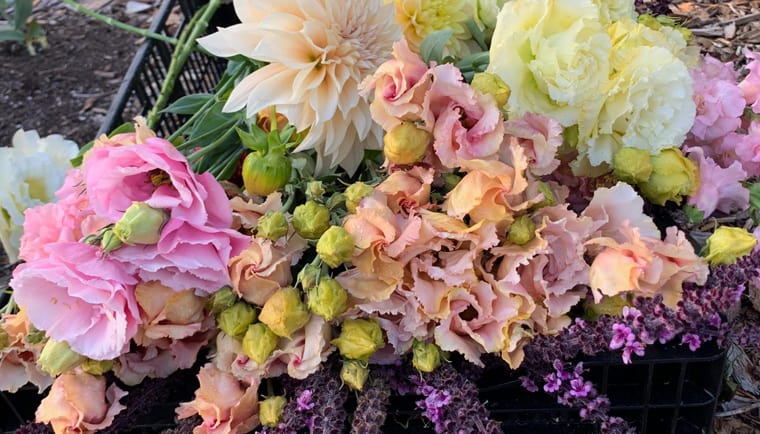
Lisianthus, Eustoma grandiflorum, (commonly called prairie gentian, bluebell gentian) are valued for many reasons including their resemblance to roses, their long vase life as cut flowers, and their unique beauty. They come in many vibrant colors, romantic soft tones, and mysterious bicolor flowers.  In addition to their colors and shape, they are sought after by florists for their strong stems, lush succulent leaves, and graceful buds that continue to open in a vase for several weeks.  They are hardy in USDA hardiness zones 8-10. Lisianthus is not hard to grow, and starting them from seeds may be your best option if you want to have these gorgeous flowers blooming in your garden this summer.

Rosanne Green Lisianthus
Photo by My Thanh Kim
Rosanne Green Lisianthus
Photo by My Thanh Kim
Lisianthus stems can be 18-36" tall
Photo by My Thanh Kim
Lisianthus stems can be 18-36″ tall
Photo by My Thanh Kim
Lisianthus blooming in the author's garden. Photo by My Thanh Kim
Lisianthus blooming in the author’s garden. Photo by My Thanh Kim

January is the perfect time to start lisianthus seeds

It’s January. It’s dark and cold. Though it is too early to start many seeds indoors but it is not too early to start lisianthus. Since they need at least 6 months from planting to bloom, starting them early is a must. Growing lisianthus from seeds is not for the faint of heart. They need constant attention for several weeks if not months. You may need to try multiple times before you can master the skill.  Follow these tips and with some practice and patience, you’ll be able to get many beautiful plants for your garden.

My Thanh Kim, Skagit County Master Gardener

Get started with seeds, a container, seed starting mix

Make sure you get seeds from a reputable source. Lisianthus seeds can be challenging to germinate so make sure the seeds are fresh. The germination rate goes down with older seeds. You want to start with the best seeds possible. Seeds from reputable companies should come in pelleted form for easy handling. Seeds can also be collected from mature flowers. They must be handled with care because they are tiny like specs of dust.

Choose a container or tray that is at least 1.5″ deep to allow room for root growth unless you are starting them in soil blocks. Soil blocking is a method of starting seeds that allows for healthy root growth. Sterilize the container before planting the seeds to prevent diseases.

Don’t start in garden soil. Instead, choose a sterile seed starting mix that has either coco coir or peat moss. Since lisianthus seeds are so tiny, you’ll need a medium that is as fine as possible to allow for better contact with the seeds, sifting out all the large pieces before using it.

small seeds
Lisianthus seed pods contain tiny seeds.
Photo by My Thanh Kim
Lisianthus seedlings. Photo by My Thanh Kim
ABC purple, Voyage 2 green, ABC green, and Rosanne green lisianthus. Photo by My Thanh Kim

Light, temperature, and moisture are critical to seed germination

Lisianthus seeds are considered some of the most difficult to germinate but provided with the right conditions, you’ll have a better chance of success. One of the most important things to remember is that lisianthus seeds need light to germinate. Sow the seeds on the surface of the seed starting mix and do not cover them. Keep the seeds from drying out by misting them with a spray bottle several times a day. Cover the tray with a clear plastic cover until they germinate in 10-14 days. The seeds germinate best at a temperature of 70 degrees Fahrenheit.

Congratulate yourself when the seeds germinate

If the seeds have germinated, pat yourself on the back. You’ve done the hard part. When about 50% of the seeds have germinated, remove the plastic cover. Place the seedlings under grow lights and fertilize lightly every week. Seedlings can be planted in the garden when they have 4 sets of true leaves. Lisianthus can tolerate some frost so they can be planted outside 6 weeks before the date of your last frost. Plant them in a sunny location in well-drained soil and water when the soil is dry. If everything goes well you will have beautiful blooms in July or August.

Quick Summary Tips

Getting lisianthus seeds to germinate is not hard but requires commitment and patience. Here is a summary of the tips to help get the seeds to germinate.

  1. Fill a tray or container with some fine and sterile seed starting mix.
  2. Sow the seeds on the surface of the mix. They need light to germinate so do not cover them with the mix.
  3. Spray a few times a day to prevent the mix from drying out but do not over-water.
  4. Cover the tray with a clear plastic cover to retain moisture.
  5. Place under light to germinate. A desk lamp, LED light, or fluorescent shop light will work.
  6. Keep the tray at room temperature around 70 degrees Fahrenheit.
  7. Remove the plastic cover once about 50% of the seeds germinated (10-14 days).
  8. Feed lightly every week. Place under grow lights.
  9. Plant out in the garden or container once they have 4 sets of true leaves.
  10. It may take multiple attempts to be successful but keep practicing. They are worth it.

About the Author:

My Thanh Kim is a graduate of the Skagit County WSU Extension Master Gardener Class of 2022. She currently serves as the greenhouse co-manager for the SCMG. She has a BS in biochemistry from Tulane University and a teaching credential for San Diego State University.

Resources

https://sakataornamentals.com/wp-content/uploads/sites/13/2022/02/Lisianthus-Cut-Flower-0921-SAKATA.pdf

Zigler, Lisa Mason (2014) Cool flowers: How to grow and enjoy long-blooming hardy annual flowers using cool weather techniques. St. Lynn’s Press, Pittsburg, PA.

Questions about home gardening or becoming a master gardener, may be directed to:  WSU Skagit County Extension Office, 11768 Westar Lane, Suite A, Burlington, WA 98233; by phone: 360-428-4270; or via the website: www.skagit.wsu.edu/mg

Washington State University Extension helps people develop leadership skills and use research-based knowledge to improve economic status and quality of life. Cooperating agencies: Washington State University, U.S. Department of Agriculture, and Skagit County. Extension programs and policies are available to all without discrimination.  To request disability accommodations contact us at least ten days in advance.


AMGPost_header5

Skagit Master Gardeners Share Favorites from Their Bookshelves

By Ginny Bode, Skagit County Master Gardener

Since I was young, I remember the happiness of curling up with a good book as the holiday festivities came to a close. Whether I found a book in the library or received it as a gift, my memories of books and Christmas go hand in hand. Now, often the non-fiction book in my hand is gardening related.

As a recent trainee and now graduate of Skagit County’s WSU Master Gardener program, a new world of books has opened. Early in the program we were taught to find scientifically-proven solutions for the challenges gardeners face instead of anecdotal remedies. Program leaders shared the best reference books for plant propagation, identification, pruning, even noxious weeds and pests found in our area.

The key identifier among Master Gardeners is desire to learn, particularly in their area of focus. When joining the program, I soon became aware that I was among people who not only shared my interest in growing plants, they were also very generous in sharing their knowledge and resources.

To create this list of books for gift giving I solicited fellow Master Gardener classmates for their recommendations to include along with those of program teachers. The following books are top-of-mind choices for both inspiration and reference this holiday season.

For Inspiration:

Windcliff by Dan Hinkley
It may look like a coffee table book, but Windcliff by Dan Hinkley is so much more than stunning photographs. Renowned plant hunter Dan Hinkley shares the stories of creating his two private gardens, Heronswood and Windcliff on Washington’s Kitsap peninsula. Through these stories he captures what it means to be a gardener. His warm prose with the photographs makes this a book you’ll go back to often, putting words to the passion for plants and creating outdoor spaces.
Animal, Vegetable, Miracle by Barbara Kingsolver
This book by best-selling fiction writer Barbara Kingsolver tells the story of the year she and her family attempted to live off only what they could grow or buy locally. An early proponent of the ‘eat local’ movement, Kingsolver brings to life our connection with the food we eat and the value of making meals together.
Handbook of Northwest Gardening by Anne Lovejoy
Considered a classic read for gardeners, Anne was one of the first to write about using organic techniques in the ornamental garden. Focused on building a sustainable garden, Lovejoy emphasizes good soil preparation, composting, mulching, and–the Master Gardener mantra-Right Plant, Right Place.

Skagit Authors:

Erin Benzakein’s books Discovering Dahlias, The Cut Flower Garden and a Year in Flowers, are an excellent resource for gardeners whose focus is growing flowers to share as well as to create a profitable business.

A Little Bit of Land by Jessica Gigot
This recent publication by Jessica Gigot opens the door for readers to her life as a sustainable farmer in the Skagit Valley. The joys and challenges of small scale farming, as well as making her way in an often male-dominated industry, and the path that led her to our valley.
picture of Windcliff book cover

Hinkley’s warm prose with stunning photographs captures his passion for plants and creating outdoor spaces.

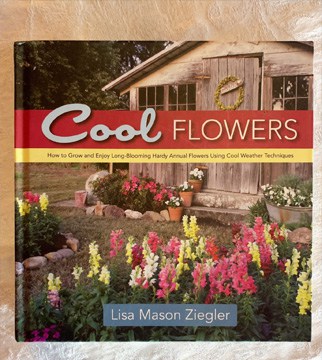
Picture of Cool Flowers book cover

Bring the first blooms of spring to your garden sooner by using Zeigler’s techniques for jumpstarting hardy annuals.

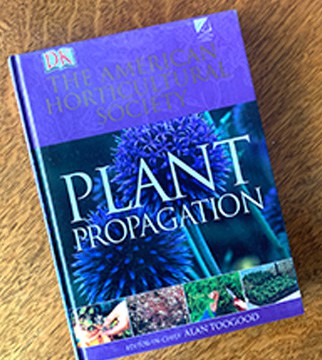
Picture of Plant Propagation book cover

The American Horiticultural Society’s Plant Propagation book is a go-to reference for propagating plants in Skagit Master Gardener’s plant house at the Discovery Garden.

For Nuts and Bolts Learning:

Cool Flowers by Lisa Mason Ziegler
Between the first frost in November, and the warmer days of spring, we long to bring in the first blooms of spring and enjoy the beauty inside the home. Lisa Ziegler’s book Cool Flowers explains how to get a jump on early spring blossoms. She profiles over 25 long blooming ‘hardy annuals’ which can be planted during cool conditions rather than waiting for the warmth of spring. Embracing the Master Gardener mantra, Right Plant, Right Place, local gardeners have applied her techniques in our climate with gorgeous results.
American Hort. Society’s: Plant Propagation by Alan Toogood
Rather than taking an unvetted opinion from the Internet, seasoned Master Gardeners use this book as a go-to reference guide for propagating almost any plant. If you’re wondering when to cut, where to cut, when to use root hormone, or when just a cup of water works fine, you’ll find this fully illustrated guide to be an indispensable resource for multiplying your favorite plants.
Kew Gardener Guides:
The Kew Gardens, part of England’s Royal Botanical Gardens is home to 27,000 plant species and subspecies. The science gained from their garden research is captured in a wide range of books for gardeners, including many children’s books. The company’s garden books cover topics as diverse as growing drought friendly plants, medical plants, and recipes for what you grow.
The Apple Grower: A Guide for Growing Organic Apples by Michael Phillips
Looking for a way to grow good fruit organically? Orchardist and researcher Michael Phillips first wrote The Apple Grower almost twenty years ago. Now updated, Phillips guides readers through creating a healthy orchard ecosystem as well as evaluating natural strategies against pests.
100 Plants to Feed the Bees: Provide a Healthy Habitat to Help Pollinators Thrive by The Xerces Society
Bees play a critical role in our ecosystem. This user-friendly guide helps home gardeners create a healthy environment for pollination. Readers will be inspired by this book’s pictures and for attracting bees, butterflies or hummingbirds, learning how to protect and attract bees throughout the season.

When giving books for gardeners, unless they are pure photo inspiration (which truly has its place on a dark January evening in the PNW) look for books with clear instructions, pictures and/or illustrations. Look for climate relevance, i.e., while the world of succulents is enticing, many can be challenging to protect through our Northwest winters. Books listing both the common name and the proper name are helpful for both the seasoned and novice gardener. Find a book for a specific interest if known, i.e., bird feeding, vegetable growing in small spaces, kitchen gardens, or nature around us.

We live in one of the most wonderful places on earth for gardening. Joining the Master Gardener program for many is like finding your tribe. Whatever your growing focus is, the Skagit County WSU Extension Master Gardener program is an excellent resource for those interested in plants and learning to grow better.

—-

Questions about home gardening or becoming a master gardener, may be directed to:  WSU Skagit County Extension Office, 11768 Westar Lane, Suite A, Burlington, WA 98233; by phone: 360-428-4270; or via the website: www.skagit.wsu.edu/mg

Washington State University Extension helps people develop leadership skills and use research-based knowledge to improve economic status and quality of life. Cooperating agencies: Washington State University, U.S. Department of Agriculture, and Skagit County. Extension programs and policies are available to all without discrimination.  To request disability accommodations contact us at least ten days in advance.


AMGPost_header5
Winter Seed Sowing

Jump Start Your 2023 Garden with Winter Sowing

By Kelly Maupin, WSU Skagit County Master Gardener

An easy, low-maintenance method for seed starting

picture of author

Kelly Maupin is a long-time gardener and resident of Camano Island

The dark days of winter are upon us. As a gardener, this is the time of year we pull out the seed catalogs and start planning for next year. If you’re like me, you may already have been collecting and buying seeds throughout the summer and fall. Now is the time to prepare for winter sowing.

I first tried the winter sowing method last winter. It appealed to me because I can be a lazy gardener and I liked the ‘set it and forget it nature’ of this method of seed starting. I began with a few gallon jugs and before I knew it the number had blossomed to 40! I give full credit for this technique to Trudi Davidoff, who pioneered the method in upstate New York over 20 years ago.

The Advantages of Winter Sowing as Compared to Other Methods

–    No lights needed
–    No trays, tables, or shelves
–    Minimal watering is required”
–    Up-cycling of containers
–    Seedlings are weed free
–     Minimizes the risk of not dampening or hardening off well enough because seeds are stratified and germinate in their ‘milk jug’ environments naturally.
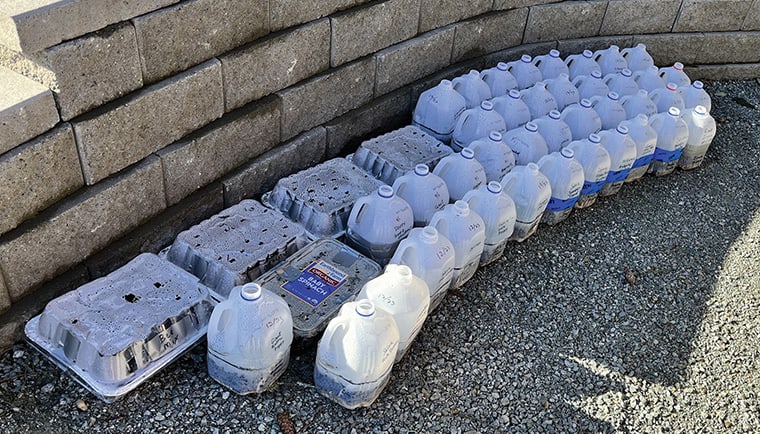
Web_00521

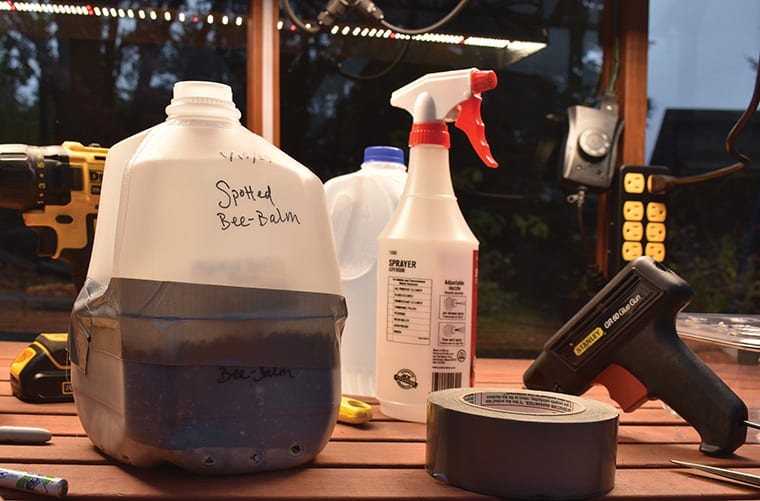
You can be creative if you use containers other than jug-type containers, make sure you can cut vent holes in the lids for air transpiration and widen these as the plants grow!

Web_0053

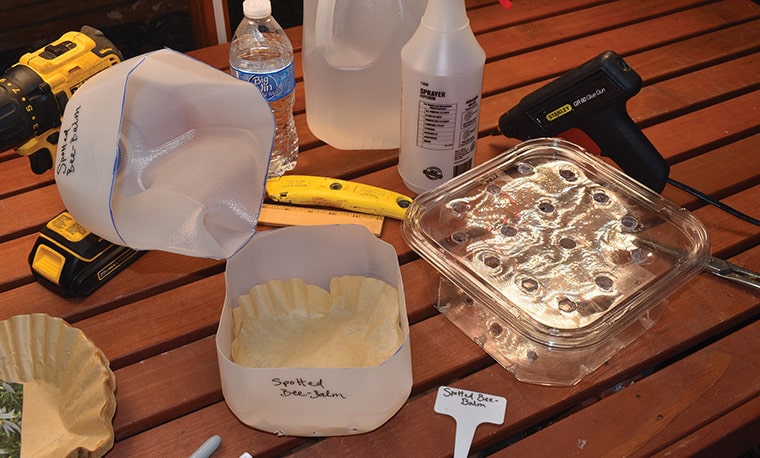
Place a coffee filter in the bottom of the jug (to keep the slugs out and hold soil in) and add pre-moistened potting soil to a level just below the hinge line.

Web_0059

Tape the jug closed using clear poly or duct tape around the circumference. Place jugs in the sun, a SE location is best. Snow or rain will do some of your watering for you, but make sure your spot has good drainage so they are not sitting in water.

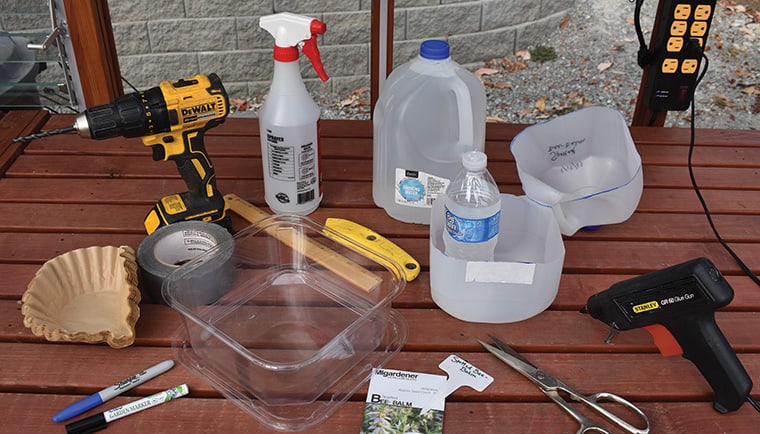
Materials you will need:

  • Clean translucent milk or juice jugs without lids
  • Other large, clean, rigid clear plastic containers like those used for roasted chicken, or salad greens with lids
  • Utility knife or scissors
  • Potting soil without moisture control or fertilizer
  • Poly or duct tape
  • Plant markers
  • UV-resistant, waterproof marker
  • Coffee filters
  • Seeds
  • Spray bottle and water bottle with holes in cap (for watering)

Steps for Winter Sowing

1) Turn the jug/container bottom up and cut or burn multiple small drainage holes in the bottom. I recommend adding multiple bottom-side drainage holes because in our climate having only one center drainage hole didn’t work well. To do this, I use an old glue gun, making sure to have good ventilation when burning plastic. A utility knife or drill will also work for creating drainage holes.

2) Use a ruler to measure and mark a cut line 4″ from the bottom of the jug. Mark the line with a marker all around the jug.

3) Using a utility scissors or knife, carefully cut the jug along the line you have measured, leaving a hinge at the back of the jug under the handle so that the top portion will flip open while still attached.

4) Place a coffee filter in the bottom of the jug (to keep the slugs out and hold soil in) and add pre-moistened potting soil to a level just below the hinge line.

5) Label the container with the plant name and date in three places using a no-fade, UV, water-resistant marker. Label the bottom of the jug, the top of the jug, and the plant marker in the soil. Household Sharpie-type markers are not recommended because the info will fade after months of being outside.

6) Plant your seeds to the recommended depth on the packaging and moisten them with water from a spray bottle.

7) Tape the jug closed using clear poly or duct tape around the circumference. Place jugs in the sun, a SE location is best. Snow or rain will do some of your watering for you, but make sure your spot has good drainage, so they are not sitting in water.

8) Check for moisture in the jugs at least once a week.  Peek inside the jug, looking to see if the soil looks moist. Another way to check for adequate moisture is noticeable condensation on the inside hips of the jug. In the early days, I only watered about once a month. If they need watering, use the water bottle you’ve prepared with the holes in the lid, squirting a little water on to wet the soil.

9) As the seedlings germinate and grow and the weather warms up, open the containers during the day and close them at night.

10) When seedlings have pushed out their true leaves after the initial cotyledons, and the weather has warmed as needed, transplant them into the ground or a 4″ pot. You can pull out 2-3 seedlings at a time using the taffy method or use the brownie method and cut them into blocks of seedlings for planting.

What to Plant and When 

December through February: For our zones, this would start around December 21st, on Winter Solstice when the daylight is at its shortest.

Examples of hardy annuals and perennials that can be started in winter include coneflower, columbine, sweet pea, lupine, native grasses, lavender, hollyhock, spinach, kale, thyme, oregano, and parsley.

March through April: Tender annuals and vegetables can be started.  Examples include Cosmos, Zinnia, marigold, Alyssum, Lobelia, Impatiens, beets, broccoli, basil, cilantro, and lettuce. Using this method, wait until April to start tomatoes, peppers, eggplant, melons, squash, and pumpkins.

When I started, I originally focused on starting perennials. Later, I sowed annuals and other seeds I had collected around my yard or traded with friends, but be careful not to plant late tender annuals like cosmos and zinnias too early. Pay close attention to the general planting dates I’ve outlined above. Despite planting some of these tender annuals too early, I still had a nearly 90% germination rate overall.

From last year’s trials, I also learned green algae can grow on the surface of the potting soil. This year I will add more drainage holes and use potting soil that does not contain moisture control products since PNW winters are typically ‘a bit moister’ than the winters in the eastern US where this method originated.

Another important reminder, not all seeds will germinate by May. Don’t be disappointed, be patient.  Some seeds like columbine, milkweed, and others can take months or longer so don’t throw those milk jugs out too quickly–you may be surprised by what germinates late.  As the days and nights grow warmer and the plants get bigger, you’ll open up the jugs.

I hope you enjoy this seed starting technique as much as I do and share your bounty with family, friends, and neighbors. Once you get the hang of it you will have plenty of plant babies to gift. Cheers and happy gardening!

RESOURCES:

  • Starting Seeds in Winter, Lori Voll-Wallace, PennState Extension extension.psu.edu/starting-seeds-in-winter
  • Winter Seed Sowing, Nicole Flowers-Kimmerle, Illinois Extension
    illinois.edu/news-releases/winter-seed-sowing

Questions about home gardening or becoming a master gardener, may be directed to:  WSU Skagit County Extension Office, 11768 Westar Lane, Suite A, Burlington, WA 98233; by phone: 360-428-4270; or via the website: www.skagit.wsu.edu/mg

Washington State University Extension helps people develop leadership skills and use research-based knowledge to improve economic status and quality of life. Cooperating agencies: Washington State University, U.S. Department of Agriculture, and Skagit County. Extension programs and policies are available to all without discrimination.  To request disability accommodations contact us at least ten days in advance.


AMGPost_header5
Dyes_header

Preserve the Color of Your Gardens Through Natural Dyes

By Jennifer Eddleman, Skagit County WSU Extension Master Gardener

Jennifer Eddleman is Skagit County Master Gardener and avid knitter.

As the summer blooms fade and the bright hues of autumn give way to the gray of November, gardeners and crafters alike find themselves looking for ways to brighten their days. One way to retain some seasonal color is to grow and create your own natural dyes. Whether you’re a knitter, a quilter, a crafter, or you just want some fun kids’ projects – homemade watercolors or Playdough, or naturally-dyed Easter eggs for instance – natural materials provide an endless array of magical color options.

The basics: dyestuffs, mordants and modifiers

Sources of natural dyes are everywhere: in flowers, leaves, roots, bark, berries, fruits, and vegetables. Plants provide the dyestuff. The dye bath is created by cooking or soaking the dyestuff and then straining the solution. The amount of plant material used, and the simmering and soaking time will determine the depth of color. Washing fibers, in a process called scouring, readies them for the dyeing process. Because colors from natural dye sources can be somewhat less colorfast than modern synthetic options, they benefit from the help of mordants and modifiers when dyeing fibers.

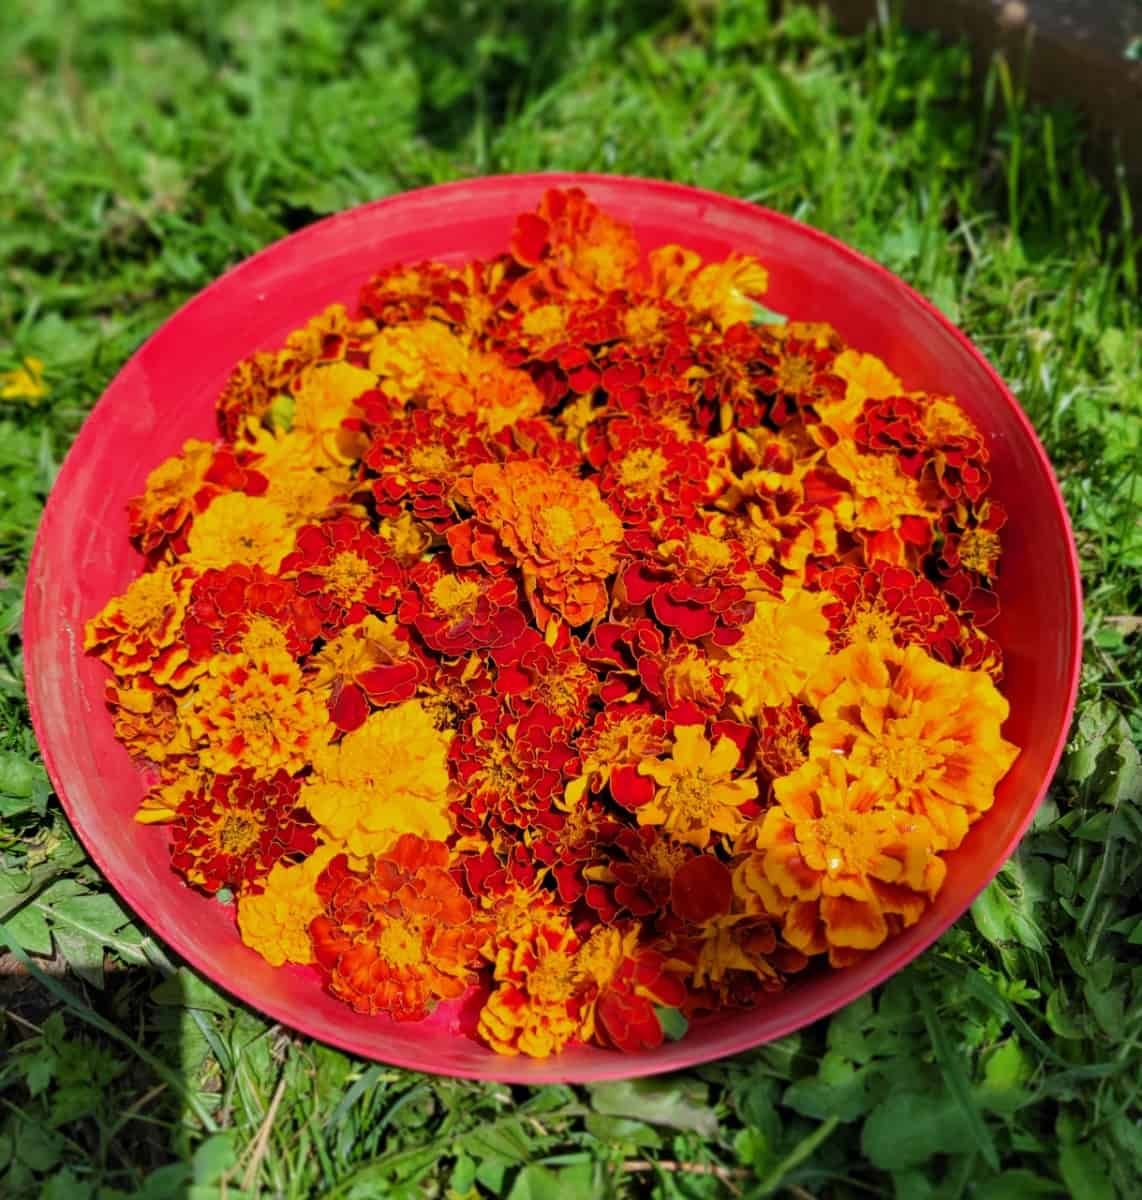
Bowl of Marigolds

Marigold blossoms are an excellent source of color for natural dyes. Photo by Jennifer Eddleman

Yarns drying on rack

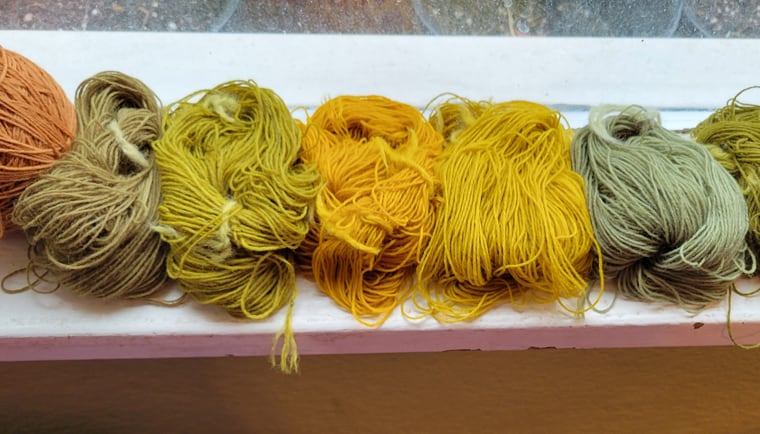
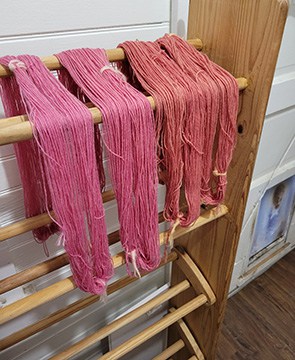
Hopi Red Amaranth Dye yields an array of shades.  Photo by Jennifer Eddleman

Multi-colored yarns on table

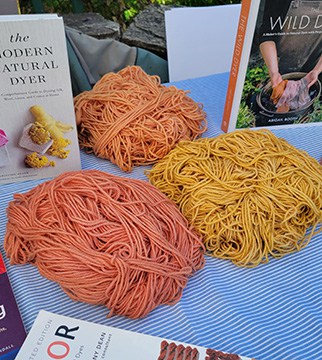
Mordants make a difference in colors. Here, three shades of color are produced by beets manipulated by the choice of mordant. Photo by Jennifer Eddleman

A mordant is a substance that helps bind the color to the fiber to help it last longer and resist fading in sunlight. There are several mordant methods, including soaking your fiber in a mordant solution, adding the mordant directly to the dye bath, or using old aluminum, copper, or iron pots to impart the mordanting qualities of those metals when you soak your yarn or fabric. Online shops dedicated to the craft of dyeing offer mordants in powder form, and you can also create them yourself. Rhubarb leaves, normally discarded because they are inedible, can be cooked down for a mordant that also imparts a yellowish hue to the colors you’re creating, and bark from trees such as cedar can be soaked for a tannin mordant. Aluminum sulfate, used on animal fibers (wool, silk, mohair, alpaca, etc.) happens to be the main ingredient in baking powder, which many people already have on hand.

Modifiers, used before or after dyeing a fiber, can completely change the color of a particular dyestuff. Baking soda and vinegar make excellent inexpensive and effective modifiers by adjusting the acidity level of the dye. Red cabbage makes a great example. Cooking down shredded red cabbage leaves yields an excellent dye bath. Adding vinegar will create a pink or lavender-colored dye, while the addition of baking soda yields blue! Making black bean soup? Soak the dried black beans for 24 hours before cooking and save the soaking water. Vinegar and baking soda will have the same effect as red cabbage dye.

Growing your own dye:

Starting a dye garden can be as simple as adding a few extra plants to an already-established bed. If you’re a vegetable gardener, you have excellent low-commitment opportunities. Beets, red cabbage, and marigolds are common additions to the garden and are excellent dyestuffs. Onion skins are one of the best sources of natural dye. Red onions and yellow onions produce different colors, so consider growing both. Sunflowers make great supports for pole beans, so consider growing Hopi Black Dye sunflowers in your garden and planting black beans around the base. Rhubarb leaves, as mentioned before, are good for mordant, and the roots can be used for dye. This makes rhubarb a multi-purpose plant. If you have fruit trees the bark and leaves of your pear, plum, and cherry trees can be utilized for dyestuff, giving you a use for the trimmings when you prune your trees. Berries can be juiced down and used to create pinks, purples and blues, but be aware that they are “fugitive” dyes, meaning they may fade easily to a grayish color over time and mordants are especially important.

Your existing landscaping may already include dye plants. Heather, Hibiscus, sumac, juniper, Eucalyptus, Oregon grape and willow shrubs, bracken ferns, birch trees, and more are common landscape plants that are also known as dye sources. Flowers you may already be growing, like dahlias, hollyhocks, and daffodils, are useful. Choose the brightest, most color-rich blossoms at the early height of their bloom for the best results. Some annuals that are easy to grow from seed and fit nicely into flower beds include Calendula, marigold, safflower, and amaranth. One variety specifically grown for natural dye purposes is Hopi Red Dye amaranth. If you decide to sow seed or add starts to your existing flower beds, be sure to check your seed packets or tags for the mature size of your plants and allow enough room for them to grow to their potential.

You may choose to create a garden specifically dedicated to growing dye plants. In addition to the landscape shrubs and flowers mentioned previously there are many perennial herbs, flowers and shrubs that will come back yearly and make great anchor plants- madder, agrimony, and goldenrod for example. Leave room for annuals such as those mentioned before, as well as indigo and blue butterfly pea flowers.

Getting started

A quick online search or trip to your local library will yield a plethora of books, websites and blogs dedicated to natural dyeing. There are some great resources out there that provide instructions from start to finish, with all you need to know about equipment, processes, variations, growing and foraging for dye plants, and many of them include projects and recipes to give you a place to start. Plan now for next year and have some fun!

Resources:

A Garden to Dye For: How to use plants from the garden to create natural colors for Fabrics and Fibers; Chris McLaughlin

Wild Color: The Complete Guide to Making and Using Natural Dyes; Jenny Dean

The Craft of Natural Dyeing: Glowing Colors from the Plant World; Jenny Dean

Colors from Nature: Growing, Collecting, & Using Natural Dyes; Bobbi A. McRae

The Wild Dyer: A Maker’s Guide to Natural Dyes with Projects to Create and Stitch; Abigail Booth

The Complete Guide to Natural Dyeing: Techniques and Recipes for Dyeing Fabrics, Yarns, and Fibers at Home; Eva Lambert & Tracy Kendall


Questions about home gardening or becoming a master gardener, may be directed to:  WSU Skagit County Extension Office, 11768 Westar Lane, Suite A, Burlington, WA 98233; by phone: 360-428-4270; or via the website: www.skagit.wsu.edu/mg

Washington State University Extension helps people develop leadership skills and use research-based knowledge to improve economic status and quality of life. Cooperating agencies: Washington State University, U.S. Department of Agriculture, and Skagit County. Extension programs and policies are available to all without discrimination.  To request disability accommodations contact us at least ten days in advance.


AMGPost_header5
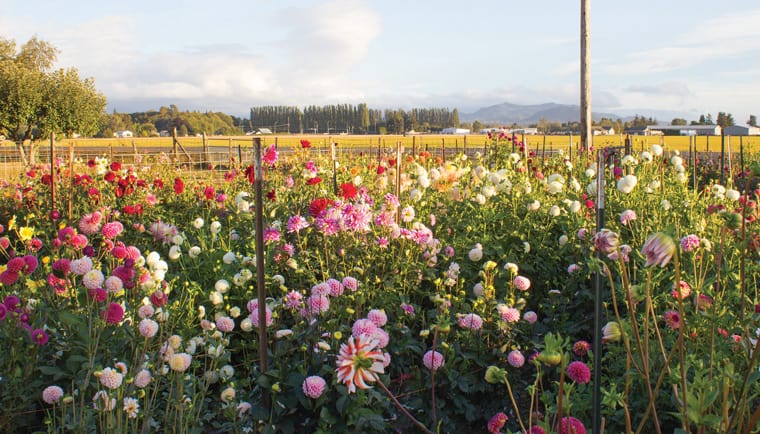
field featuring 100's of dahlia varieties grown for cutting

Master Gardeners share their overwintering techniques

By Anne Hays, Skagit County WSU Master Gardener

Photo of writer

Anne Hays is a resident of La Conner and a Skagit County Master Gardener

Dahlias, first imported from Mexico and Central America, provide a rich and enthusiastic floral display in Pacific Northwest gardens. Continuous hybridization of Asteraceae has resulted in the development of a plethora of colors, flower forms, and sizes. The blossoms can be as tiny as the minion under 2 inches, or as large as the giant or dinner plate size at over 10 inches. Conventional wisdom incorporated in most PNW and national reference guides for Dahlia growers just about universally recommend digging Dahlia tubers in the fall and storing them in a cool dry place. The reference materials I consulted noted that while dahlias are considered hardy in our zones – digging and storing is their preferred recommendation for overwintering dahlias in our Zones 8-9.

I then looked out my window. My street garden is abundant with tall, healthy dahlias, and I didn’t dig them last winter. So, I decided to do a very unscientific survey of WSU Extension Skagit County Master Gardeners to see what their preferences and protocols for digging dahlias and overwintering them indoors.

Master Gardeners are a treasure trove of local gardening knowledge, underscoring the depth of their experience and knowledge and differing opinions. Their gardens represent a variety of unique “microclimates” found in our area. The following is a brief synopsis of replies I received with a notation on where their garden is located.

Karen from Camano has ten years’ experience raising dahlias. At first, she was a Dahlia digger, but now she leaves them in the ground after struggling with mold issues trying to store them. She cuts her 150 Dahlia stalks after the first frost, covers them with a layer of mulch and then with sword ferns and rocks to keep water from rotting the dahlias.

Dahlia_3

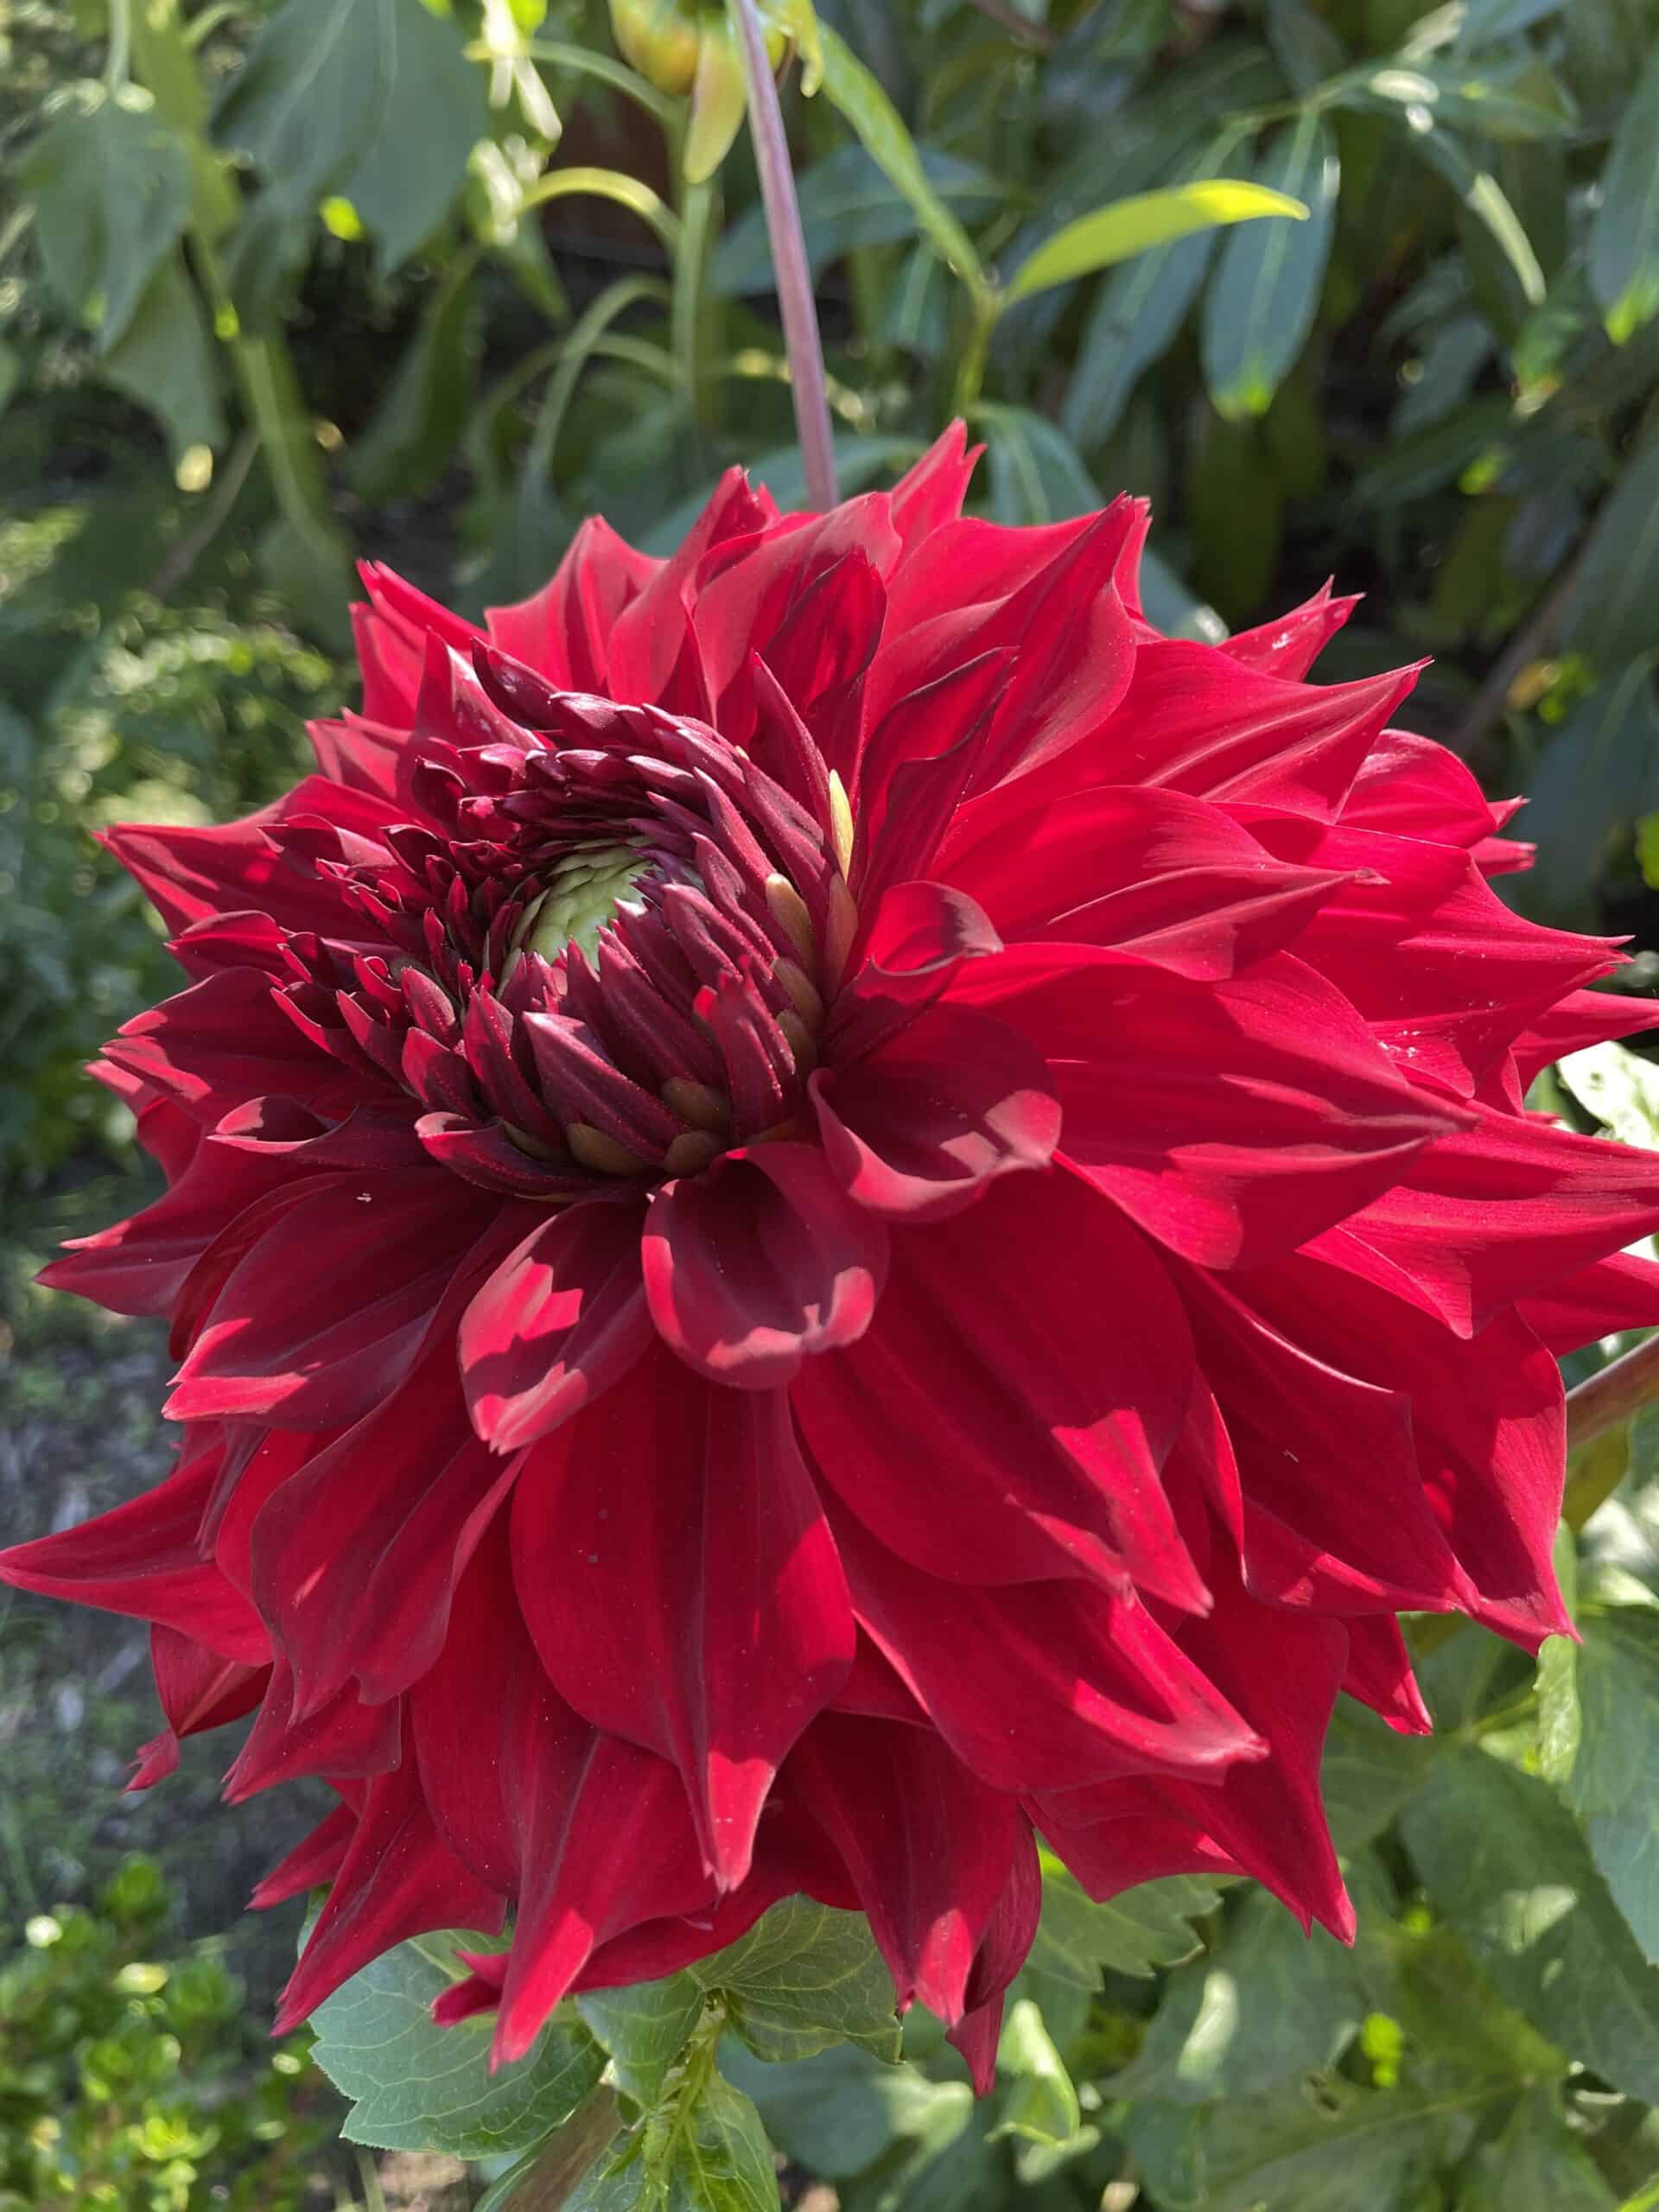
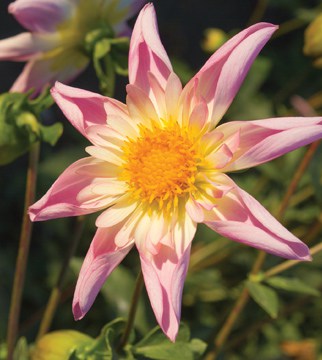
Among gardeners, selecting a favorite Dahlia is unique to each individual. Dahlias range in size from under 2″ to over 10″ and are classified into 18 categories by form. Photo by Anne Hayes

ThomasEdison

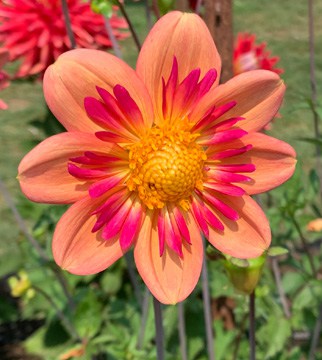
The Thomas Edison dahlia is a beautiful example of the deep vivid hues found among the fifteen different colors and color combinations recognized by the American Dahlia Society.  Photo by Anne Hayes

Dahlia_2

Though the dahlia’s origins can be traced back to the high mountains of Central America, the plants thrive in the moist, moderate climate of the Pacific Northwest, blooming from midsummer until the first frost.

Jan from La Conner is a recent convert to the in-ground overwintering school of thought. Until last year she routinely dug her dahlias, wrapped them in newspaper and stored them in plastic. She left them in the ground last season and intends to again, though she plans to cover the planting area with cardboard and heavy mulch.

Rin from Anacortes describes her soil as sandy and has determined her tubers do best when left in the ground — mostly because she hasn’t found an overwintering strategy that doesn’t result in mold issues.

Linda from Orcas Island digs her tubers, being careful not to damage or pierce the tubers. She then rinses the soil and lays them flat to dry for a day or two. She brushes the tubers – inspecting them for any signs of rot and places them in cardboard boxes using vermiculite. She places the top of the box on the tubers after barely moistening the vermiculite. She does not allow the tubers to touch and stores the box in her basement.

Allison on Samish Island digs her dahlias and stores them in cardboard with peat moss on top in a cool dry place in her garage.

Among all the WSU Extension Skagit County Master Gardeners I contacted, dividing dahlias is typically undertaken every three years in the spring. Many of the local Master Gardener’s caution that new Dahlia starts are “slug candy” and recommend careful slug containment and control at the start of a new Dahlia season. Dahlias need good soil, enriched with organic matter and some recommend bone meal. Planting depths vary from 6 inches to one foot, and many recommend placing stakes for larger varieties as you plant the tubers to avoid damaging the tubers.

I also asked each of the responders for their recommendations on their methods for placing cut dahlias in display vases. The consensus was to place them in water as soon as possible using a fresh cut and change the water frequently. Many mentioned using a floral preservative.

What was abundantly clear from the replies I received is the passionate enthusiasm among those in Dahlia growing communities! Color, abundance, ease of growing, all were mentioned as reasons to add dahlias to your garden. If you decide to include dahlias in your garden next spring, the WSU Extension Skagit County Master Gardeners are available at Plant Clinics throughout the county to offer guidance and answer questions. Please don’t hesitate to give us a call at 360-428-4270 to be directed to a Plant Clinic near you.


Resources:

Gardening in the Pacific Northwest, Carol Hall & Norman Hall, Timber Press, 2008 Ornamental

Bulbs, Corms & Tubers, A. R. Rees, C A B International, 1992

Sunset Western Garden Book, Sunset Publishing, Edited by Kathleen Norris Brenzel Gardening in the Pacific Northwest, Paul Bonine and Amy Campion, Timber Press


Questions about home gardening or becoming a master gardener, may be directed to:  WSU Skagit County Extension Office, 11768 Westar Lane, Suite A, Burlington, WA 98233; by phone: 360-428-4270; or via the website: www.skagit.wsu.edu/mg

Washington State University Extension helps people develop leadership skills and use research-based knowledge to improve economic status and quality of life. Cooperating agencies: Washington State University, U.S. Department of Agriculture, and Skagit County. Extension programs and policies are available to all without discrimination.  To request disability accommodations contact us at least ten days in advance.