Photo: © Adobe Stock
© Adobe Stock

Post: April 3, 2026

Subscribe to the Blog >

Cultivating Community: How local libraries help grow gardeners

You’ll find resources and inspiration at your local library

By Skagit County WSU Extension Master Gardeners

For many of us, gardening is more than just a hobby that brings us joy. It’s a way of life that puts fresh food on the table and connects us to our neighbors.

For both seasoned gardeners and curious beginners, local libraries provide a valuable resource on the path to greener thumbs. Beyond books, libraries offer a vibrant array of services tailored for gardeners: from seed libraries and expert-led workshops to curated gardening resources and community events.

Earlier in the year, a group of Skagit County WSU Extension Master Gardeners set out with a list of questions to ask their local library about gardening services. The library staff at each library welcomed our questions and encouraged master gardeners’ participation in their programming and book selections.

What Libraries Have in Common for Gardeners

As expected, each library confirmed that it has a collection of non-fiction books related to gardening. They encourage questions and are happy to help with resource questions. When searching for books and DVDs in the library catalogs, they said to use multiple keywords to narrow your search; for instance, a book about learning to garden in a warming environment may be found under “Climate Change” rather than “Gardening.”

Online Resources: 

A library card from any library opens the door to Libby through the free statewide Washington Anytime digital library system. Along with hundreds of books, Libby has more than 700 magazines under the Home and Garden tab.

Events for Gardeners:

Checking or subscribing to each library’s e-newsletter, or following their social media, are the best ways to stay informed about presentations of interest to gardeners.

Library of Things: 

The Mount Vernon and Burlington Libraries offer a “Library of Things” for checkout. Items range from telescopes and microscopes to park passes and games, many of which are geared toward youth. Gardening items include seed starting kits, mats, seed blocks, and microscopes.

Seed Library: 

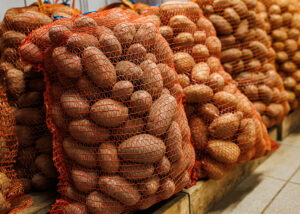
A community-driven, open-to-the-public resource, all libraries, except Central Skagit, offer a seed library. Each seed library operates differently. Mount Vernon and La Conner’s are shelved with access whenever the library is open. Others offer a seed exchange on a seasonal basis, or as a one-day event. Seed libraries are a great way to save money while trying a limited number of new varieties. Jars and packets are well-labeled with take-home envelopes provided.

Gale Research: 

For those wanting a deeper dive into a topic, all libraries subscribe to Gale Research, a renowned publishing company specializing in authoritative reference materials and digital resources for libraries, schools, and academic institutions. Its comprehensive digital research tools and collections support students, educators, and researchers in conducting in-depth research on many topics, including science and botany.

Specific Plant Questions:

The master gardeners who interviewed librarians at their local libraries noticed an interesting correlation: librarians are often avid gardeners in their off hours. That said, they can direct patrons to plant identification and other relevant resources, but plant-specific questions are best directed to the Skagit County WSU Extension Master Gardener Plant Clinic and resources.


A Note about
Skagit County Libraries:

Unlike the library systems in neighboring counties, the libraries in Skagit County are funded through each city or in some cases a local taxing district. Each library offers free cards to residents, property owners, business owners within their area of service, and all teachers and students no matter where they live. Residents in unincorporated areas can purchase a card. Cardholders have reciprocity with other libraries in the county for no extra fee. See the footnote below about reciprocal agreements between libraries.


hummingbird on branch

For the Love of Hummingbirds: The Ecology of Anna and Other Hummingbirds

April Know & Grow

Free. No registration required.

With Greg Green, senior instructor at Western Washington University

Tuesday, April 21, 2026 ~ 1 p.m.

Sakuma Auditorium
16650 SR 536, Mount Vernon, WA 98273

Want to learn more about hummingbirds and the ecology surrounding them?  WWU Instructor and wildlife biologist Greg Green has been studying hummingbirds for more than a decade. His presentation will include the story of the Anna’s hummingbird march north over the past 75 years. Come hear about  this fascinating relationship between plants and animals.

Photo © Greg Green

Anacortes Public Library

By Andrea Saxton, Skagit County WSU Extension Master Gardener

The Anacortes Public Library offers a robust selection of gardening books in nonfiction, covering topics from general techniques to landscaping, indoor and outdoor gardening, and PNW-specific practices. Part of the collection is funded by a donation from the Jeane Thomson family to the Anacortes Library Foundation.

The library subscribes to Horticulture magazine, and issues are available for browsing and checkout.

The APL hosts a Seed Library, maintained and stocked by Transition Fidalgo’s Seed Share group. Transition Fidalgo is a non-profit organization committed to climate resiliency and occasionally hosts gardening-related workshops and educational programs at the library.

Burlington Public Library

By Kari Ranten, Skagit County WSU Extension Master Gardener

The Burlington Public Library has a wide variety of gardening books ranging from bulbs to plant starts. The library has how-to books on creating different types of gardens, including cutting gardens, vegetable gardens, container gardening, and landscaping.

If a good afternoon for you includes perusing a magazine that you can hold in your hands, the BPL has subscriptions for Garden Gate, Mother Earth News, and Better Homes and Gardens

Every April, the Burlington Library holds a class on flower arranging, and in the summer, Sarah Wagstaff from SUOT Farm & Flowers hosts a story time for kids. Subscribe to the library’s newsletter to stay up-to-date about coming events at the library.

kit showing books and activities about gardening for children.
La Conner Swinomish Library “Stay Sharp” Kit for children. Photo © Aven Wright-McIntosh
Spanish books about gardening on shelf
Spanish books about gardening in Mount Vernon City Library. Photo © Ginny Bode

Central Skagit Library

By Cindy Bjorklund, Skagit County WSU Extension Master Gardener

The Central Skagit Library in Sedro-Woolley offers a wide variety of publications for the home gardener including books on fruit and vegetable gardening, flowers, gardening in the Pacific Northwest, and homesteading.

The summer reading program is titled Nature. Their physical magazine subscriptions include Self-Reliance, Mother Earth News, Fine Gardening, and Mary Jane’s Farm.

La Conner Swinomish Library

By Aven Wright McIntosh, Skagit County WSU Extension Master Gardener

The newest addition to the city library system, the La Conner Swinomish Library, reports a small but engaging adult non-fiction gardening section and a children’s section.

  • For the past several years, LCSL has hosted workshops on eliminating food waste and Master Gardener Katryna Barber’s worm composting presentation.
  • A small seed library with an ever-changing selection of seeds is open to the public for give-and-take. It is located in the community room and is open during library hours.

Library patrons learn how to easily research any topic on in-library computers, locate it on the shelves, or request a transfer from another in-district library. Burlington, Central Skagit, and Concrete share an in-district agreement. A La Conner Swinomish Library card still gives access to all six county libraries, it just works a bit differently for the libraries in Mount Vernon and Anacortes.

The library has the “Stay Sharp” Garden kit which can be checked out providing hands-on nature-inspired learning activities. The librarian also recommends the new “Steam Kits” program available online, which includes activities for kids’ gardening adventures.

Book and vials for soil testing
‘Library of Things’ soil test kit Mount Vernon City Library. Photo © Ginny Bode
seed packets and jars in wood box
Seed Library La Conner Swinomish Library Photo © Aven Wright-McIntosh

Mount Vernon City Library

By Ginny Bode, Skagit County WSU Extension Master Gardener

Mount Vernon City Library has an excellent seed library open to the public during library hours. The seed library along with the resources of the “Library of Things” are the inspiration behind this article. Beyond the books in the Dewey Decimal category 635 Gardening, librarians encourage patrons to look for garden-related books under all the 630 categories-Agriculture and Related Technologies, as well as under 580-Plants and Botany and 550-Earth Sciences. 

The collection of resources for gardeners depends on the size of the library; this factor is particularly important when discussing resources for children learning to garden. The Mount Vernon City Library, which boasts the largest children’s collection north of Seattle, includes many children’s books about science and gardening.

Along with hard-copy books and magazines for gardeners, the MVCL has a USDA-certified commercial kitchen which can be rented by the hour. Entrepreneurs starting food-certified businesses can rent space to make food for farmers’ markets, food trucks, and restaurants. The fees are affordable and a great resource for enterprising gardeners wanting to take their recipes to the next level. Learn more about the library’s kitchen facilities

Sno-Isle Regional Library System

By Linda Olmstead, Skagit County WSU Extension Master Gardener

The Sno-Isle Library system includes 24 libraries located in Island and Snohomish Counties. Library membership allows residents access to all libraries within the system. A “Library on Wheels” option is also available. Sno-Isle has an extensive collection of gardening and related materials in a variety of formats, including books, DVDs, e-books, magazines, and academic journals. Multiple databases provide access to a wealth of materials. Sno-Isle hosts online and in-person events at many of its locations. Library staff can also help members with advanced research on topics of interest through an in-person or virtual session.

  • More than 1,000 gardening-related traditional format books are available for checkout by library members.
  • More than 1,200 online gardening-related e-books can be checked out on the library’s website.
  • The library offers gardening courses on DVD, some of which can be checked out and the remainder accessed online. Examples include “The Great Courses: How to Grow Anything,” “The Science of Gardening,” containing 24 episodes on various gardening topics, and “The Botanist’s Eye: Identifying the Plants Around You.”
  • More than 80 gardening magazines are available digitally, along with physical subscriptions to Fine Gardening, Garden Gate, Martha Stewart Gardening, Gardens Illustrated, and Gardeners’ World.
books about gardening on library shelf
The Central Skagit Library’s summer reading program is titled “Nature.” © Cindy Bjorklund
kits in plastic boxes on shelf
The “Library of Things” at the Mount Vernon City Library has a collection of items for check out which help the gardener get started. Photo © Ginny Bode

Upper Skagit Library, Concrete

By Ginny Bode, Skagit County WSU Extension Master Gardener

The Upper Skagit Library reports “all sorts of gardening books from small-scale to market gardening how-to books,” along with several field guides on PNW native plants, including weeds.

The Upper Skagit Library occupies a storefront space in Concrete and works in concert with the Central Skagit, Burlington, and La Conner Libraries, so you can get any book from those libraries delivered to the Upper Skagit Library. Their physical magazine subscriptions include Mother Earth News, Fine Gardening, and Garden Gate.

Librarian Cody Johansen suggests “Secret Gardeners: Growing a Community and Healing the Earth” as a great book on sustainable gardening practices for children.

For online local resources, the librarian recommends: 

  • “Sproutshare” is a Facebook group managed by Kerry Higgins at the Mansford Grange near Darrington. It hosts a community platform for posting available seeds, starts, and cuttings.
  • “Seedtime” is a great app for planning and has educational courses as well.
  • “Farm My Yard” is another great app for planning and shows which plants grow well in our area.

Elisabeth C. Miller Library, Seattle, Washington

By Ginny Bode, Skagit County WSU Extension Master Gardener

The Elisabeth C. Miller Library serves as a premier horticultural resource for both the public and professionals. Located near U-Village and UW Stadium, your Washington State Driver’s License qualifies you to receive a library card.

The library has more than 15,000 books and 400 magazine titles in-house. Managed by the Elisabeth C. Miller Foundation (not the UW Library system), the library is a welcome oasis for learning about all things horticultural. The large children’s library, with 1,090 books in the Youth Collection available for borrowing and another 449 in the Parent/Teacher Resource Collection. It is easy to many resources on specific areas of horticulture within the huge collection of books and periodicals focusing on gardening, botany, landscape design, and plant sciences. The library is a treasure trove of learning, offering community programs, garden walks, lectures, workshops, botanical art shows, and children’s activities.

The Miller Library website keeps an up-to-date calendar of local plant sales, garden tours, a plant answer line (much like the Skagit County WSU Extension Master Gardener Plant Clinic), and ongoing book reviews.

Whether you’re a seasoned gardener or planting your first seeds, your local library is ready to support your journey. By connecting people, sharing resources, and nurturing curiosity, libraries help gardens-and communities-flourish.

Library Reciprocity in Skagit County
(as provided by Central Skagit Librarian Anne Booker)

A brief overview: 

  • Skagit County does not have a countywide library system but rather six independent library districts. Many, but not all of the people living in Skagit County pay library-supporting taxes to one of these districts.  
  • Four of the library districts in the county have formed a consortium (Burlington, La Conner, Upper Skagit, Central Skagit). Patrons living in any of these four districts can use a card from any of these four libraries to check out at any of these four libraries.
  • These four libraries share a catalog and share materials.  
  • Folks living in either the Mount Vernon Library district boundaries or the Anacortes Library district boundaries are able to get cards at any of the other libraries, but do require a separate card.

If someone lives outside the boundaries of any library district, they are still able to obtain a library card at any of the libraries in Skagit County, but will need to pay a fee directly to the library. The fee varies from library to library and grants access only to the library where it is paid.

ABOUT THE AUTHORS:

This article was researched by a team of Skagit County WSU Extension Master Gardeners, and was compiled by Ginny Bode with Kari Ranten, Linda Olmstead, Aven Wright-McIntosh, Cynthia Bjorkland, and Andrea Saxton.


Questions about home gardening or becoming a master gardener may be directed to Skagit County WSU Extension Office, 11768 Westar Lane, Suite A, Burlington, WA 98233; by phone: 360-428-4270; or via the Skagit County WSU Extension website.

Washington State University Extension helps people develop leadership skills and use research-based knowledge to improve economic status and quality of life. Cooperating agencies: Washington State University, US Department of Agriculture, and Skagit County. Extension programs and policies are available to all without discrimination. To request disability accommodations contact us at least ten days in advance.


seed potatoes in bins for sale
© Skagit County WSU Extension Master Gardeners

Post: March 20, 2026

Subscribe to the Blog >

A successful, nutritious potato crop requires the right start

Certified potato seed will get the home gardener on the right track


<alt>
Kari Ranten


By Kari Ranten, Skagit County WSU Extension Master Gardener

Potatoes are a staple on many dinner tables, which may prompt home gardeners to try their hand at growing these nutritious, plentiful vegetables. With a few tips in hand, these tubers are straightforward to plant, tend, harvest, store, and enjoy – some say “easy,” which is the perfect combination for the home vegetable gardener.

The vital step in gaining a successful potato harvest takes place before you start.

Every resource consulted in the preparation of this article, including an interview with Chakradhar Mattupalli, assistant professor of plant pathology at Washington State University’s Northwestern Washington Research and Extension Center (NWREC), points to one key action: Start with certified, disease-free potato seed.


“The main recommendation to any grower is to plant certified and clean seed to avoid as many diseases as possible,” said Mattupalli, who leads the Berry and Potato Pathology program at NWREC.


Mattupalli and fellow researchers at NWREC play a vital role in working with commercial growers to limit the impact of disease and pests on potato crops, plus work with developing new varieties that grow well in the temperate Pacific Northwest. In Skagit County, 11,000 acres were planted to potatoes in 2024, with most of the harvest sold in the fresh market. With that volume of commercial production, home gardeners can be assured that potatoes typically grow well in Skagit and the surrounding counties.

It’s also good to know that this vegetable, a member of the nightshade family, has nutritional benefits. Potatoes are a complex carbohydrate offering nutrients important to healthy eating such as minerals (potassium), fiber, and vitamins (antioxidant vitamin C, folic acid, and iron). More antioxidants are present in darker colored potatoes.1

sign by highway

Researchers at WSU Mount Vernon Northwestern Washington Research & Extension Center (NWREC) play a vital role in working with potato growers in northwestern Washington. Chakradhar Mattupalli, assistant professor of plant pathology, leads the Berry and Potato Pathology program, conducting research and extension activities addressing the biology and management of diseases of highbush blueberry and potato crops. He provided guidance and resources in the preparation of this article. For more information about Mattupalli’s research, go to Berry and Potato Pathology | Washington State University.

NWREC is one of four WSU Research Centers operated by the College of Agricultural, Human and Natural Resource Sciences, housing nine research programs, extension outreach, and research affiliates. The research center works to solve plant-related problems and develop cost-effective and environmentally-sound plant production practices based directly on results from experimental field, greenhouse, and laboratory research trials.

Start with certified potato seed

Back to the beginning: Selecting certified potato seed from a reputable grower or seed distributor is the key. Home gardeners should not plant potatoes purchased at a grocery store, because the tubers are treated with sprout inhibitors. Neither should they use potatoes from the previous year’s harvest, to avoid transfer of potential pests and pathogens that will significantly reduce yield and quality.2

Certified seed potatoes are available from reputable retailers online, and in late February or early March, will begin to make their way to nursery and farm supply stores in Skagit County.

Home gardeners should think about the variety of potatoes to grow based on the desired use, the length of harvest season, and storability. The Pacific Northwest is known as a premier potato-producing region, where scientists in Washington, Oregon, and Idaho have developed 40 new varieties. Key varieties grown in the region include russets, those many think of as “baking” potatoes, with names like ‘Ranger’ and ‘Rainier’. Specialty or heirloom varieties also grow well in the region, including the ‘Makah Ozette’, a noteworthy historic fingerling variety. Others come with similarly interesting names including ‘Purple Majesty’ and ‘Russian Banana’. This list of potato varieties from the Northwest (Tri-State) Potato Variety Development Program and details on tuber qualities, yield, and disease resistance. Gardeners can choose varieties that span from early (65 days to harvest) to late season (more than 90 days to harvest).

person planting potatoes in raised bed
Potatoes require full sun, meaning at least six hours of sun each day, and ideally eight to 10 hours per day, during the growing season. Avoid planting near tomatoes or in an area where tomatoes have been planted.
© Adobe Stock
flowering potato plants on hilled mound
When plants reach six inches in height, gently mound soil from between the rows to cover the tubers. This “hilling”will need to be repeated every two weeks to keep the growing tubers from being exposed to sunlight. © Adobe Stock

Once a gardener has certified seed in hand, selecting a location to plant, watching soil temperatures and pH, and preparing the seed are the next steps to take before planting:

Location and rotation: Potatoes require full sun, meaning at least six hours of sun each day, and ideally eight to 10 hours per day, during the growing season. To prevent disease, use crop rotation techniques and choose a plot in the garden that has not been used to grow tomatoes, potatoes, peppers, eggplants, or tomatillos in the past three to four years. You may also use a raised bed.3

Soil pH and temperature: Check the pH of the selected garden location. Potatoes grow well in slightly acidic soil with a pH of 6.0, high in organic matter. Tubers grown in more alkaline soil are more prone to developing common scab. Planting can take place four to six weeks before the last frost date, and when the soil temperature hits at least 50° F.2 Soil should be well-drained, as tubers will rot if exposed to extended cold and wet conditions.

Preparing and curing the seed: Potato seed should be firm and without sprouts. Small seed potatoes (those smaller than a chicken egg) can be planted whole, while larger seed should be cut (using a clean knife) into 1.5-inch cubes with one to three buds or “eyes” on each piece. Once cut, seed potato pieces should be cured for a few days at 50 to 65° F, before planting. Cornell University’s Growing Guide for Potatoes recommends curing seed potatoes by putting the cut potatoes into a large, paper grocery bag and folding the top closed. Leave the bag at room temperature for two or three days, then shake the bag to make sure the pieces are not stuck together. Let them sit for two or three more days before planting.4

Next steps involve soil preparation, planting, “hilling,” and watering:

Soil preparation: Once the soil temperature has reached at least 50° F, modest tilling, six to eight inches into the soil, is recommended along with amending the soil with compost or aged manure, (not fresh, which may introduce soilborne pathogens). Add fertilizer as recommended from soil-test results.3

Planting: Create shallow, four-inch trenches and place seed spaced every 10 to 12 inches in the bottom of the furrow. Cover the seed with four inches of soil. Rows should be two to three feet apart. Gardeners should see sprouts emerge in three to four weeks.3

Hilling: A technique called “hilling” is commonly used when growing potatoes and requires covering the potatoes with additional soil as they grow. When plants reach six inches in height, gently mound soil from between the rows to cover the tubers. This will need to be repeated every two weeks as the growing potatoes are again exposed to sunlight.3

Keeping the tubers covered with soil will help prevent the potatoes from turning green due to chlorophyll responding to sunlight. While chlorophyll is harmless, the green color can indicate the presence of solanine, a toxic compound that can cause bitter taste or illness.5

The importance of water: To avoid seed rot, do not water potatoes before the plants sprout. Once plants are up, they will need about two inches of water per week to keep the top 18 inches of soil moistened. Watering is recommended in the evening.3 Reduce watering in mid-August and wait until the plants die back before harvesting.5

orange eggs on underside of potato leaf
Using the non-chemical IPM technique of early detection and removal of Colorado potato beetle eggs (Leptinotarsa decemlineata) helps manage this common potato disease. Learn other techniques on the Hortsense site listed below for managing Colorado potato beetle. © Whitney Cranshaw | Colorado State University.
beetle eating potato leaves
Another sign of Colorado potato beetle infestation is leaf damage. Photo © Howard F. Schwartz | Colorado State University

Pests and Diseases:

Potatoes can be prone to a variety of pests, diseases, and physiological disorders. Some, such as common scab or hollow heart, may not be known until harvest, as they affect the exterior or interior of the underground tubers respectively. Other issues, such as late blight, may affect the leaves and tubers. WSU’s Hortsense resource will help home gardeners learn more about the pests and diseases that may impact potato crops in the region. WSU’s comprehensive site features more than 1,000 fact sheets with photos to guide home gardeners, manage problems in hundreds of plants using integrated pest management (IPM), including cultural controls and Washington state registered pesticides.

Pests to watch for include Colorado potato beetles, aphids, flea beetles, and wireworms. Diseases can include early and late blight, common scab, black scurf, and Verticillium wilt. Potatoes also can suffer from viruses such as potato mop top virus and potato virus Y (PVY).

For detailed, comprehensive, science-based information about potato varieties, pests and diseases, read:

potato leaves with grey spots
One Integrated Pest Management non-chemical treatment to avoid late blight (Phytophthora infestans (Mont.) de Bary) is to not plant potatoes near tomatoes. Read more about management techniques at WSU’s Hortsense potato diseases page referenced above.
© Thirunarayanan Perumal | Invasive.org.
red potato with small brown growths
WSU’s Hortsense offers multiple non-chemical options for avoiding common scab of potato first of which is planting tolerant varieties such as ‘Nooksack’, ‘Norgold’, ‘Russet Burbank’, and ‘Targhee’. ‘Red Norland’ is a red potato that is moderately resistant to common scab. © Florida Division of Plant Industry | Invasive.org

potatoes stored in net bags

Store potatoes in perforated plastic bags or in well-ventilated containers in a dark, well-ventilated location with high humidity. Good storage areas include a refrigerator set to 40-46° F, an insulated garage, or a cool, dark basement. © Adobe Stock

Harvest and storage:

It can be a surprise when it’s time to harvest potatoes as the season’s action takes place underground. Gardeners are hoping for unblemished, disease-free, uniform tubers that will contribute to menus for months to come.

Mature tubers may be harvested about two weeks after the foliage has dried, generally 70 to 120 days after planting. Stop watering after the plants have died back. Dig carefully with a garden fork to avoid injuring the potatoes.

Clean the potatoes after harvest, either by brushing or lightly rinsing away soil. Sort the tubers and dispose of those that are shriveled, blemished, or diseased. During cleaning and storage, potatoes should be kept away from light as “greening” can happen during these phases as well.

Storability is a quality based on variety and skin thickness. To store potatoes, place them in a warm, well-ventilated area to allow the skin to set. Keep potatoes under cover or in the dark and allow them to cure for 10 days before storage.3 Gradually lower the temperature to 40-46° F, placing potatoes in perforated plastic bags or well-ventilated containers in a dark location with good ventilation and high humidity.2 Good storage areas include a refrigerator set to 40-46° F, an insulated garage, or a cool, dark basement.5

Thinking about sweet potatoes? Sweet potatoes fare well when grown in warmer southern U.S. states. However, NWREC scientists are working on trials to develop sweet potato varieties for commercial growers in Skagit County. The first commercially grown harvest from Hedlin’s Family Farm was sold at the Skagit Valley Food Co-op in Mount Vernon in November 2025. For more info, read Sweet Potatoes find their way to Washington 

FOOTNOTES AND REFERENCES:

  1. Posner, A. (2022) “Potato health benefits and why you should eat more spuds.” University of California Davis Health.
  2. Ophardt, M. (2015) “Vegetables: Growing Potatoes in Home Gardens.” Washington State University Extension Fact Sheet # FS165E.
  3. Schuh, M. and Tong, C. (2022) “Growing Potatoes in home gardens.” University of Minnesota Extension.
  4. Cornell University. (2006) “Growing Guide: Potatoes.”
  5. Pokorny, K. (2023) “Best practices for harvesting and storing homegrown potatoes.” Oregon State University Extension Service.
  6. Pokorny, K. (2024) “How to grow sweet potatoes successfully in Oregon’s climate. Oregon State University Extension Service.

University of Maryland Extension. (2023) “Growing Potatoes in a Home Garden.”

ABOUT THE AUTHOR: Kari Ranten is a retired journalist and health care communicator who became a certified Skagit County WSU Extension Master Gardener in 2024.


Questions about home gardening or becoming a master gardener may be directed to Skagit County WSU Extension Office, 11768 Westar Lane, Suite A, Burlington, WA 98233; by phone: 360-428-4270; or via the Skagit County WSU Extension website.

Washington State University Extension helps people develop leadership skills and use research-based knowledge to improve economic status and quality of life. Cooperating agencies: Washington State University, US Department of Agriculture, and Skagit County. Extension programs and policies are available to all without discrimination. To request disability accommodations contact us at least ten days in advance.


Post: December 6, 2025

Subscribe to the Blog >

Hoe! Hoe! Hoe! Gifts for gardeners

Choose tools, gadgets, and technology for gardeners based on their interests

By Kari Ranten, Skagit County WSU Extension Master Gardener

 
Kari Ranten

The holidays provide a great opportunity to give your favorite gardener something to serve as a helping hand to support their hobby.

While the ideas ranging from old school to high tech are endless, think about what the gardener in your life enjoys most and hone in on the tools of the trade that will help them in their growing endeavor. Do they want to start seeds indoors? Are they interested in propagating plants? Do they want to learn about pruning? Are they left-handed? What about tools for maintaining the garden? How about garments for the garden? Do they like to use technology?

To assist in your search for the perfect gift, here are a few ideas for tools, gadgets, and technology that can be procured at a local garden center or nursery, hardware store, or online.

hand writing in a log book
A logbook or calendar can be a handy way to plan for the coming season, record when and where planting took place, what seeds or starts were used, and track progress and success to aid growing seasons to come. Photo ©: Adobe Stock
packets of seeds in airtight envelopes
An air-tight seed-saving system to help organize seeds by type, planting season, color, location, and other factors is another handy gift idea. Photo ©: Adobe Stock
water timer stuck in soil under a plant
Rather than guessing, moisture meters are inexpensive and handy for keeping plants properly watered in the greenhouse or garden. © Adobe Stock

The gardener interested in starting seeds or propagating plants ahead of the spring season can always use a few supplies:

  • A log book or calendar can be a handy way to plan for the coming season and then record when and where planting took place, what seeds or starts were used, and track the progress and success to aid in growing seasons to come.
  • Seeds, of course. Winter is a fun time to explore seed options and look forward to the possibilities presented by the coming growing season. To provide your gardener with options to peruse and dream over, order up a few seed catalogs from purveyors specializing in the Northwest growing environment.
  • An air-tight seed saving system to help organize seeds by type, planting season, color, location, and other functions is another handy gift idea. Throw in some plant markers or tags to identify what’s sprouting and, ultimately, transplanted to the garden.
  • A seed starting operation will benefit from a few basics, including trays for planting, proper seed-starting soil, and, of course, seeds. Several companies offer kits with everything a gardener needs to use soil blocking or other seed starting techniques, including some with self-watering options.
  • For the seed starting trays, include humidity domes with space to keep the seedlings warm and moist and allow them to grow a bit after sprouting. A succession of small pot sizes will also support the plant growth progression.
  • Depending on the space available – from a corner shelf in the garage to a full-on greenhouse setup – heat mats and lights come in all sizes with timers and programming options. Again, some companies offer small-scale seed starting kits, including LED lights, suitable for a shelf or tabletop in the house.
  • A fan, such as a small battery-operated or electrical device, is helpful for air circulation for starting seeds and cuttings.
  • For those who want to propagate plants from cuttings, such as geraniums, fuchsias, houseplants, and more, include the items for seed starting, plus some small, sharp clippers for trimming stems for planting.
  • A soil thermometer and/or moisture meter can be handy too.
serrated two-edged garden knife with wood handle
An overwhelming choice among Skagit County Extension Master Gardeners for a must-have garden tool is a hori hori knife. Photo ©: Skagit County Master Gardeners
hand holding 8-inch battery operated chain saw next to thick branch
Hand-held battery-operated chainsaws are available in a variety of models and weights for cutting and pruning tree and shrub limbs. Photo ©: Ginny Bode
v-shape shovel blade on a red handled tool
The V-shaped “Root Slayer” shovel is a great help when dividing, moving, or removing plants. Photo ©: Hallie Kitner

What will be helpful for pruning?

  • To trim back grasses or cut small tree or shrub limbs, lightweight handsaws, and hand-held battery-operated chainsaws are available in a variety of models. Be sure to evaluate whether the blade is suitable for the intended use and the size of the limbs that will require trimming.
  • On a smaller scale, a nice set of small, straight-blade, hand-held pruners make a great stocking stuffer. The more sets of pruners a gardener has, the merrier!
  • If your favorite gardener is left-handed, manufacturers offer pruners and other hand tools tailored to their needs.

What’s most helpful to maintain the established garden? There are a variety of ways to look at garden maintenance, which can be aided by the right tools.

  • An overwhelming choice among Skagit County Extension Master Gardeners for a must-have garden tool is a hori hori knife. This tool can be handy for weeding, planting bulbs, dividing perennials, cutting roots, and more. Be sure to include a sheath for safe transport in the garden and storage.
  • For weeding, a stirrup hoe aids in the task, separating roots and leaves with a scrubbing action, allowing the gardener to remain standing for the job.
  • For dividing, moving, or removing plants, the “Root Slayer” gets high marks from Skagit County Extension Master Gardeners and others. The tool is a V-shaped shovel with serrated edges that helps cut through roots and soil.
  • A garden cart or wagon always comes in handy for moving plants, pots, soil, or delivering garden debris to the compost pile.
  • Watering is an important job for the gardener, and a variety of tools:
    • Watering cans in the appropriate sizes for doing the job manually. The gardener should have at least one with a long, extended spout to reach into small spaces and make sure everything gets moisture.
    • Hoses in the required length to reach plants that will routinely need watering are helpful, along with the proper attachment or wand to reach pots, hanging plants, and beds.
    • If a gardener is interested in an automated watering system, do some research into potential DIY options or consider hiring a professional to install a system.
  • Combination garden kneeler and stools have become popular to improve accessibility and comfort when weeding and planting.
padded kneeling bench in garden with weed bucket and tools
Kneeler benches or stools improve accessibility and comfort when weeding and planting. Photo ©: Ginny Bode
two smiling gardeners standing side by side wearing overalls
Overalls are a popular choice for the busy, bending-over, hard-working gardener. Photo ©: Nancy Crowell | Crowellphotography.com
person wearing apron with gardening tools in pocket
Garden aprons or tool belts provide easy access to tools for lighter garden chores. Photo ©: Adobe Stock

What are the best garden garments?

  • Garden gloves are always welcome, and preferred materials can vary by the season. From waterproof models for fall and winter to lighter-weight options for summer, a gardener can always use another pair.
  • It may seem cliché, however, overalls are a popular choice for the busy, bending-over, hard-working gardener. Bib overalls offer comfort, flexibility, and breathability along with a plentiful number of pockets for tools, tough, soil-resistant fabrics in plain colors and fun patterns, and reinforcement at the knees.
  • For overalls or shirts that go with them, many gardening garments offer UPF sun protection, which is a nice feature to prevent sunburn.
  • An apron with pockets for lighter duty gardening chores is also useful.
  • On the sun-protection front, a wide-brimmed hat for the garden is a must, to keep the rays off the neck and face.
  • If you don’t have your gardener’s size, remember that a gift card is a one-size-fits-all solution.

For the gardener who enjoys technology:

  • A wide variety of small weather stations for the home are available for those who want to know about rainfall, humidity, barometric pressure, wind speed and direction, and temperatures in their garden that include a real-time wireless feed to deliver data to your phone and indoor console.
  • Monitors for the greenhouse can provide information on temperature, humidity, and more. Similar systems are available for watering systems.
  • Compact countertop seed starting and herb growing units can bring the gardening to the kitchen all year round.
  • Apps for the phone include a wide range of options from alerting gardeners to an impending frost, reminders to water, and a fertilizer calculator.

As you can see, there is no shortage of gift ideas to support your favorite gardener. Happy holidays!

hand holding phone with plant app on screen
Apps for the phone help the gardener with everything from identifying plants and diagnosing diseases to receiving alerts about an impending frost and a fertilizer calculator. Photo ©: Adobe Stock

Resources for more information:

Compagnucci, S. (2025) This $28 Garden Tool Cut My Weeding Time in Half. The New York Times Wirecutter.

Kumar, G. (2016) Propagating Shrubs, Vines, and Trees from Stem Cuttings. Oregon State University Extension. PNW 152.

Kumar, G., Larsen, F. and Shekel, K. (2009) Propagating Plants from Seed. Oregon State University Extension. PNW 1i70.

Murgel, J. (2025) Simple Plant Propagation: How to divide plants and conquer hearts. Colorado State University Extension.

Rennie, A. (2023) The Best Pruning Saws to Keep Your Trees and Shrubbery Neat and Tidy. Popular Mechanics.

ABOUT THE AUTHOR:
Kari Ranten is a retired journalist and health care communicator who became a certified Skagit County WSU Extension Master Gardener in 2024.


Questions about home gardening or becoming a master gardener may be directed to Skagit County WSU Extension Office, 11768 Westar Lane, Suite A, Burlington, WA 98233; by phone: 360-428-4270; or via the Skagit County WSU Extension website.

Washington State University Extension helps people develop leadership skills and use research-based knowledge to improve economic status and quality of life. Cooperating agencies: Washington State University, US Department of Agriculture, and Skagit County. Extension programs and policies are available to all without discrimination. To request disability accommodations contact us at least ten days in advance.


Post: November 21, 2025

Subscribe to the Blog >

Dreaming and decision-making for a greenhouse

Questions and options to consider if a greenhouse is right for you

By Kari Ranten, Skagit County WSU Extension Master Gardener


Kari Ranten

The short days of the coming winter have gardeners missing the abundant growth, harvest, and busy days of the summer just past. Many are already dreaming about the potential of the upcoming growing season.

At this time of year, characterized by shortened days and gray skies in the Northwest, the opportunities for spring seem endless: What to grow? What seeds to buy? What were the favorites from seasons past that could be wintered over? Is there something new to try? More vegetables? More flowers? Something tropical?

With all of this potential, it makes sense that many gardeners’ thoughts turn to ways to fill the gardening void of winter. The likely answer may be to add a greenhouse to extend the growing season or make gardening a more year-round enterprise.

“When people make something by hand – with their own hands – it takes on a different level of value. So, it is with the food and flowers that we grow with our own hands. Having a greenhouse enables you to enjoy this therapy on a daily basis in any season,” writes Shane Smith, author of Greenhouse Gardener’s Companion, Growing Food & Flowers in Your Greenhouse or Sunspace (2000). Smith’s book is considered by many to be a must-have for those who desire or use a greenhouse. The Chicago Review Press notes Smith’s book is “The most comprehensive book on greenhouse gardening available today.”

The extension of the joy of gardening throughout the year is certainly a big draw. However, adding a “hobby” greenhouse requires considerable planning, decision-making, and resources. Winter may be just the season to spend time researching the idea of a greenhouse and to learn more about a potential project for the coming year. It takes some time to evaluate the right option for your specific goals, location, and budget, as well as address the myriad of questions that will come up. This column will pose some of the key questions you will want to ponder before moving forward with a greenhouse or other structure, such as a lean-to, cold frame, or tunnels. (Beddes, et al. 2022)

The most fundamental questions to start with are: What do you want to grow? How do you plan to use a greenhouse? Answers to these questions will help you get started as you dig into the details of location, space, materials, size, power, and lighting needs for a growing space.

A greenhouse can be used in a variety of ways. Before making a decision, know that each option presents a decision-making path to get to the ultimate plan for a structure that is right for you.

person using tools to assemble a greenhouse frame
Many considerations go into planning for a greenhouse. What will you grow? How big will it be? What materials will you use? These considerations and more will help you make the best decision for your wants and needs. Photo: © Adobe Stock

Here are a few considerations:

Want to start seeds? The first use that naturally comes to mind when thinking about adding a greenhouse is its use as a venue to get a head start on seeding flowers and vegetables, including tomatoes, squash, beans, and others, in early spring. Here, you will need to consider whether you want a heated or unheated space, based on the plants you plan to start.

“Because seeds like warm temperatures to germinate (often in the 65 to 75°F range), you will have to provide heat and light to help get your seeds to germinate. This can be done with LED grow lights and a heat mat, but that also means that you will need electricity in your greenhouse.” (Marshall, 2022).

quonset hut style greenhouse with poly wrap material
Greenhouses come in all shapes, sizes, and materials. Know what you want to grow and plan a structure that meets your budget and needs. Photo: © Adobe Stock
greenhouse positioned in the distance beyond raised beds in sunshine
Ideally, the location of your greenhouse will afford a south or southwest exposure to meet the daily sunlight needs of a greenhouse, which acts as a collector of solar heat. Photo: © Adobe Stock
greenhouse with cold frame units beside it
The cold frames located beside this greenhouse are a type of season extender that protects plants on chilly nights in spring and late fall, extending the growing season at both ends. Photo: © Adobe Stock

Extending the season? A greenhouse can also be used as a season extender beyond summer, with fall planting of vegetables such as lettuce, spinach, and other greens, for harvest and enjoyment throughout the winter months. Heat and light requirements will also apply in this case. (Beddes, et al. 2022).

Protecting fragile plants? Suppose you want a protected place for delicate plants to spend the winter out of the cold, including cuttings of favorite perennials such as fuchsias, clematis, or herbs. In that case, a greenhouse can be a handy solution. Additional candidates may include geraniums and other annuals you want to hold over for another season. Some may not require a greenhouse; instead, they may need a garage or basement (Howard, 2025).


Tropical plants require a different environment than growing vegetables. Knowing which types of plants you want to grow helps you make decisions. Photo:© Adobe Stock


Tropical ideas? A greenhouse can be a year-round place for plants that may need a slightly warmer environment than our Zone 8b provides (https://planthardiness.ars.usda.gov/), such as citrus trees and orchids. “For example, it is said that George Washington grew lemon, limes, pineapples, and other tropical fruit in a greenhouse in 1787 at Mount Vernon. Glasshouses, as they were originally called, became the rage in England and later in America. They eventually came to be called greenhouses because the plants inside stayed green all winter long.” (Marshall, 2022)

Free-standing or lean-to? Designs and materials? Take advantage of resources on design options and materials to build with, including fiberglass, plastic, polycarbonate, and glass. Floor materials can also vary, including a slab, pavers, or gravel. Many do-it-yourself kits are available on the market, offering a wide range of sizes and amenity options. Design plans are also available online, offering options for building with recycled materials, including windows, doors, shelving, and other reusable building supplies.

plants growing outside of the greenhouse wall
Master Gardener Anita Johnson located a raised bed growing area adjacent to the side of the greenhouse. Photo: © Anita Johnson
greenhouse with door open and electrical box on post outside
Anita used a long extension cord to operate a fan in the greenhouse until a couple of years ago, when she hired an electrician to trench and put in a remote electrical outlet near the greenhouse. Photo: © Anita Johnson
close up of electrical box on post with cords running to greenhouse
Access to power and water is helpful when locating a greenhouse. Photo: © Anita Johnson

Power? Heat? Lights? Ventilation? Research the climate and weather patterns where you live and match them with the desired use for the space to determine if you need access to power for heating, lighting, fans, or ventilation. An extension cord from the house may be enough. Otherwise, running power to the facility may be the right choice. Options can include space heaters, heat mats, and grow lights, which can be set to timers and scaled as needed. Technology also enables in-home, real-time monitoring linked to your cell phone, allowing you to view 24/7 conditions in the greenhouse, including humidity and temperature. Thermally activated automatic vents can also be installed and adjusted for temperature control. A drip watering system on a timer is also an option, or you can rely on rain barrels and watering cans.

Where will you put the greenhouse? How big should it be? A greenhouse requires a level area (or space that can be leveled) and meets the size and light needs. Many greenhouse owners caution gardeners to be honest about the space they need, based on their goals for use, to avoid an undersized project. Also, consider whether storage for gardening items, as well as plants, is needed.

What is the correct exposure? Ideally, the space will afford a south or southwest exposure to meet the daily sunlight needs of a greenhouse, which acts as a collector of solar heat. (Smith, 2000).

What about shelving or spaces to hang baskets? Plants, including seed starts and succulents, require more shelf space compared to plants in large pots. Pay attention to the materials used in greenhouse construction or the kit to make sure additional shelving or a bar for hanging plants is included or can be easily added. Gardeners recommend allowing for maximum flexibility to move plants, lights, and heat mats around as needed, while avoiding overcrowding.

Have a budget based on your decisions: With all these considerations in mind, they must match up with the project budget. “Before spending time and money, it is best to define your crop production goals, budget, and local climate challenges.” (Beddes, et al. 2022).

It takes work! Remember, once in place, the greenhouse requires ongoing maintenance, cleaning, watching for evidence of pests (like aphids, scale, etc.), disease (fungal and bacterial) and over- or under-watering (like edema or damping off), as well as regular time and attention – even with timers and automation.

For now, enjoy the dreaming and promise of spring.

Resources for more information:

Extending the Garden Season from Utah State University Yard and Garden Extension. 

The Hobby Greenhouse by Oklahoma Cooperative Extension Service.

References:

Beddes, T., Caron, M., Hansen, S., and Gunnell, J. (2022) Extending the Garden Season. Utah State University Yard and Garden Extension.

Chicago Review Press. (2025)The Greenhouse Gardener’s Companion 

Howard, D. (2025). How to Overwinter Plants: Protect Geraniums, Roses, Herbs & Tropicals From Frost. The Old Farmer’s Almanac. 

Marshall, R. (2022) A Greenhouse for Everyone. Massachusetts Horticultural Society. 

Schnelle, M., Dobbs, S., Needham, D., and Dole J. (2017) The Hobby Greenhouse. Oklahoma State University Extension Fact Sheet HLA-6705. 

Smith, S. (2000) Greenhouse Gardener’s Companion: Growing Food & Flowers in Your Greenhouse or Sunspace. Fulcrum Publishing. Golden, CO.

ABOUT THE AUTHOR:
Kari Ranten is a retired journalist and health care communicator who became a certified Skagit County WSU Extension Master Gardener in 2024.


Questions about home gardening or becoming a master gardener may be directed to Skagit County WSU Extension Office, 11768 Westar Lane, Suite A, Burlington, WA 98233; by phone: 360-428-4270; or via the Skagit County WSU Extension website.

Washington State University Extension helps people develop leadership skills and use research-based knowledge to improve economic status and quality of life. Cooperating agencies: Washington State University, US Department of Agriculture, and Skagit County. Extension programs and policies are available to all without discrimination. To request disability accommodations contact us at least ten days in advance.


garlic bulbs
Nancy Crowell | Crowell Photography

Post: September 6, 2025

Subscribe to the Blog >

Gearing Up for Garlic Planting Season ~

A Few Tips to Ensure a Successful Harvest Next Year

By Laura Kuhn, Skagit County WSU Extension Master Gardener

Author: Laura Kuhn

As our long days of summer wane, now is the time to consider if garlic is a contender for your garden space. For many Pacific Northwest gardeners, garlic (Allium sativum) is a staple crop. Washington state is well known for its commercial garlic production as the climate is suitable for growing a variety of garlic types. And, thankfully, garlic is simple to grow, easy to harvest, and stores for many months.

For those gardeners who want to have more information about growing garlic, many online sources accurately capture information about the types of garlic, planting methods, and related information. The Washington State University Extension fact sheet (# FS162E) Vegetables: Growing Garlic in Home Gardens discusses types of garlic, planting sites, pest management, common problems, as well as tips for harvesting and storage. To supplement the information found in this free fact sheet, here we will focus on specific tips related to local sources for buying garlic for planting, selecting where to plant, and preparing your beds for planting.

Picture of cover of WSU fact sheet

The WSU Extension fact sheet discusses types of garlic, planting sites, pest management, common problems, as well as tips for harvesting and storage.

Garlic growing in garden beside marigolds.

A single row of garlic in a raised bed. Photo © Laura Kuhn
Sourcing Garlic to Plant
Local sources for finding quality garlic to grow in your garden

When shopping for garlic seed, you will notice a distinct difference between the garlic you see in the grocery store and that sold for planting-namely, the price. Garlic seed is more expensive than culinary garlic. Many home gardeners are tempted to plant culinary garlic for this reason; however, this is not recommended. Culinary garlic can introduce disease into your garden. Grocery store garlic typically lacks much information, if any, on where it is from, the variety of garlic that it is, and therefore its suitability for planting in your climate. Purchasing garlic seed allows you to know all these things, which helps to ensure the most successful harvest next year.

“Seed garlic” is for planting and sells by weight as full bulbs. An individual “seed” is what chefs refer to as a clove. Once planted, a clove or seed will grow into a bulb of garlic, which has multiple cloves. Many online sources sell garlic in the early summer for shipment in the late summer or early fall, depending on the climate zone and the type of garlic you buy. There are several sources for garlic seed online right here in Washington. Online pre-sales often lead to sold-out stock by planting time. The good news is that even if your favorite online seed source sells out, there are locally sourced garlic seeds to plant.

garlic bulbs on table with dirt around them

A harvest of Music hardneck garlic. Photo © Laura Kuhn

two garlic bulbs, one large, and one smaller

Two bulbs of garlic, same variety. Plant the seed from the larger bulb on the left. The larger the seed garlic, the larger the resulting bulb. Photo © Laura Kuhn

The top sources include your local co-operative markets, garden centers, farmers market, or gardening enthusiasts you already know. When shopping at your farmers markets, ask about the garlic they sell, where they grew it, and the qualities of the varieties they carry. Talk to staff at the co-operative or garden centers, and ask the same questions. A final and often overlooked source is your gardening community or neighbors who already have a stash of garlic seed ready to plant from this summer’s harvest.

The biggest consideration in selecting varieties (besides compatibility with your growing conditions) is to ask yourself how you plan to use the garlic. This question helps you refine your choices and determine whether to choose hardneck or softneck garlic. Another consideration is the level of garlic flavor or spiciness. The mildest form of “garlic” is known as elephant garlic, which is an onion. This type produces exceptionally large cloves in a huge bulb.

The Pacific Northwest is particularly suited to growing hardneck varieties that generate a tasty scape in June. (A scape is the flower stalk of the garlic). If removed when the flower head points downward, the plant will focus on bulb development, making for a larger bulb. Scapes are also tasty to eat and can enhance any culinary dishes that call for a garlic flavor. Hardneck varieties also have large cloves that are easy to clean and use for cooking. Softneck garlic is a crop that produces smaller cloves without a scape. Softnecks offer a longer storage life and the potential for creating a garlic braid.

A final word on selecting your garlic-bigger is better. When picking amongst various garlic bulbs, select the largest bulbs you can find. The larger the garlic seed planted, the larger the bulb it will produce. Larger cloves of garlic are easy to peel and use in recipes.

different varieties of garlic lined up by size

Garlic seed or cloves. Top Row (left to right): Hardneck elephant garlic; Magic, Georgian Fire, German Porcelain, Blanak, Chinese Red/White, and Vincent. Bottom Row (left to right): Softneck; Sicilian, Inchellium Red, Messidor. Photo © Laura Kuhn

Selecting and Preparing Garden Beds for Garlic
Once you are ready to grow garlic, September and October are the best months to prepare the beds. Select a spot that will receive full sun (minimum of 6-8 hours a day) and has good drainage (too much moisture and the seed will rot).

Alliums are a crop that requires rotation to reduce the potential for problems like rust. Onions, leeks, or garlic should not be planted in the same location for three years. Rotating crops can avoid certain diseases and viruses that linger in your soil. Rust (Puccinia allii) is a problem particular to the Pacific Northwest, where higher rates of humidity are present. Rotating crop locations helps to alleviate the problem; however, other tactics can be used in combination with rotation.

Spacing of seed is typically four to six inches, with a minimum of 12 inches between planting rows. Spacing out your garlic seed to increase air flow can help, so use the widest spacing possible. Using a single row of garlic as a border around a planting bed can allow for interplanting other crops. When it comes time to harvest your garlic in July, pulling the garlic will not affect the plants nearby. If you end up doing multiple rows of garlic in one area, wider spacing (such as 18 or more inches) will improve air flow. Given the high amount of precipitation in our area, it may be impossible to avoid rust altogether. Rust certainly looks bad, but it does not affect the garlic crop itself. When removing the stalks after harvest, be careful not to spread rust spores.

This Month in Your Garden

– September –

  • Prune bamboo culms to thin your bamboo. Prune older (without sheaths), leaning, or damaged culms and cut them close to the ground. Prune any culms encroaching into an undesired area, and don’t forget root pruning to contain your grove.
  • Stop dead-heading your roses and allow them to begin developing rose hips. The shortening hours of sunlight, along with allowing the rose hips to develop, lets the rose bush know it has done its job of making seed and can now prepare for dormancy. Remove wilted petals and any leaves with black spot, rust or mildew to keep any developing fungus away from plant.
  • Deadhead perennials that self-seed, such as calla lilies, Shasta daisy, and crocosmia to prevent propagation.

Garlic is a root crop that grows underground, and like all alliums, is a heavy feeder. Preparing your beds to create workable soil supplemented with organic matter takes a bit of work. Root crops require the soil to be loose to allow for bulb formation. Working compost into the soil helps loosen the soil and adds nutrients.

Local sources of compost include your local garden and landscape supply centers. Using organic compost is particularly important for garden beds that will grow plants that you will eat. Since your garlic will grow through winter, mulching your beds to protect from erosion is important to retain topsoil. If you mulch with compost after planting, remember to consider this in the overall depth of seed planting.

rows of cured garlic bulbs

A recently cured harvest of garlic, graded by size. Next year’s crop will come from the bulbs on the left because they are larger. Photo © Laura Kuhn

garlic bulb stalks

Garlic infected with rust. Photo © Laura Kuhn

A cost-effective way to promote soil health and nutrition is to add composted manure to your beds. Using bagged organic compost from a garden center is costly unless you can generate your own. If not, look for a local farmer in your area who can provide a responsible and clean source of composted manure. Ask about the use of herbicides and pesticides before taking home any farm products to ensure you do not add unwanted chemicals to your soil. Work the compost into the top six inches of soil to create the perfect environment for planting your garlic seed. You can mulch with composted manure as well.

red tractor moving composted manure.

Locally sourced, clean composted manure from Valleyview Farm Stand near Big Lake, WA. Photo courtesy: Linda Lanting, Valleyview Farmstand

Once your beds are ready, plant your seed and add your mulch. The best time to plant is in late October, but earlier and later can work, or even planting in the spring. Spring garlic will be much smaller in size than fall-planted garlic. You will get to see your garlic tops come up in early spring for a spectacular harvest come summertime. Adding garlic to your collection or trying new varieties can spark some great culinary experiences next year.

variety of green houseplants on window sill

Know & Grow: Houseplants

Free, no registration required
Come hear local houseplant expert Lily Hirdler speak on how to keep your houseplants in tip-top condition.
Tuesday, September 16, 2025
1 pm – 2:30 pm
NWREC Sakuma Auditorium
16650 State Highway 536, Mount Vernon

WSU-Classes

New Certificate Programs in Skagit County

Washington Gardener Certificate Program is designed to provide comprehensive research-based horticulture and environmental stewardship education. This option is ideal for individuals seeking to enhance their gardening skills without the commitment of volunteering. This self-paced, online-only course provides a certificate upon successful completion. Registration deadline: Sept. 30, 2025. For more information, go to Washington Green School.

Climate Stewards Certificate Program is a collaborative, multi-institutional group working across disciplines to promote climate awareness, education, and action. Registration deadline: Sept. 16, 2025. Learn more about the Skagit Climate Steward Program

RESOURCES AND REFERENCES :

Martini, N. (2025) Vegetables: Growing Garlic in Home Gardens. WSU Extension Fact Sheet #FS162E

Hodges, L. (2013) Garlic Production in the Home Garden. University of Nebraska-Lincoln, Extension Publication G2221

Page-Mann, P. (2019) Six Mistakes to Avoid When Planting Garlic and Shallots. Cornell University, College of Agriculture and Life Sciences, Small Farms Quarterly, October 2019

Garlic (allium sativum) Rust. Oregon State University, Pacific Northwest Pest Management website.

ABOUT THE AUTHOR:
Laura is new to the Skagit Valley but has more than 30 years of experience growing in coastal, inland valley, and desert climates. She had fun trying to grow herbs while traveling full-time in an RV. Laura is a 2023 graduate of the Skagit County WSU Extension Master Gardener program.


Questions about home gardening or becoming a master gardener may be directed to Skagit County WSU Extension Office, 11768 Westar Lane, Suite A, Burlington, WA 98233; by phone: 360-428-4270; or via the website: www.skagit.wsu.edu/mg

Washington State University Extension helps people develop leadership skills and use research-based knowledge to improve economic status and quality of life. Cooperating agencies: Washington State University, US Department of Agriculture, and Skagit County. Extension programs and policies are available to all without discrimination. To request disability accommodations contact us at least ten days in advance.


summer garden with colorful flowers and birdbath

Attracting Pollinators to the Home Garden

Making the right plant selections will help draw pollinators to the home garden

Posted July 18, 2025

Subscribe to the Blog >


By Kari Ranten, Skagit County WSU Extension Master Gardener

Kari Ranten

Pollinators are the heroes in our landscape and food chain. The small but mighty bees, hummingbirds, butterflies, and other birds and beneficial insects are key to crop production and creating a diverse environment. The home gardener often sets out to create a pollinator-friendly landscape and quickly discovers how enjoyable it is to watch these pollinators in the garden.

Proper plant selection and placement is key to luring vital pollinators to the home garden.

Scientific research emphasizes the importance of pollinators, crediting them with the reproduction of 90 percent of flowering plants and one-third of human food crops. “Each of us depends on these industrious pollinators in a practical way to provide us with the wide range of foods we eat. In addition, pollinators are part of the intricate web that supports the biological diversity in natural ecosystems that helps sustain our quality of life,” say the authors of Selecting Plants for Pollinators.

“Without bees, there would be no apples, pumpkins, strawberries or many other fruits and vegetables . . . Approximately one in three mouthfuls of food and drink require the presence of a pollinator.” – Xerces Society

Research shows that pollinator populations, including bees and butterflies, are declining in Washington state and the United States. “Unfortunately, the numbers of both native pollinators and domesticated bee populations are declining. They are threatened by habitat loss, disease, and the excessive and inappropriate use of pesticides.” 2 In March of 2025 Washington State University staff published a study showing that butterfly numbers have decreased by more than 20 percent from 2000 to 2020, with some species declining by more than 90 percent.7

Selecting the right plants is foundational to drawing pollinators to your garden. The two Pollinator Gardens in the Skagit County WSU Extension Master Gardener Discovery Garden, west of Mount Vernon, provide examples of plants that attract pollinators throughout the seasons. Master Gardener Alix Foster oversees the Pollinator Gardens and several years ago wrote an article describing the basics about the pollination process and why pollinators are so important, along with what each gardener can do to support pollinators. Read the article here >

pink flowers on bush with bright green leaves

Spiraea japonica Golden Princess attracts pollinators in the Pollinator Garden in the Discovery Garden.
© Skagit County Master Gardeners

blue purple flowers blooming in the garden

Jacob’s Ladder (Polemonium reptans) and foxglove attract various pollinators, especially bees. Other pollinators like butterflies, moths, and flies are also attracted to the flowers. © Skagit County Master Gardeners

Foster recently led a tour of one of the compact Pollinator Gardens to showcase the selection and placement of plants that maximize the number and variety of bugs and birds visiting the garden. Efforts are underway to add more native plants and enhance the number of plants that bloom in sequence over the months along with a variety of colors, shapes, and sizes to span the seasons. During daytime hours, 365 days a year, enjoy a self-guided tour of the Discovery Garden where signs list the plant names, what pollinators they draw, and the bloom time for the specimens on display. To see the complete list of plants in the Pollinator Gardens at the Discovery Garden, go to https://skagitmg.org/home/discovery-garden/pollinator-garden/.

Fortunately, there is an abundance of options for pollinator-friendly plants. The Pollinator Partnership, a global non-profit dedicated to the protection and promotion of pollinators and their ecosystems, offers a tool on their website to generate a list based on zip code at https://www.pollinator.org/find-your-roots-tool. A search using Mount Vernon, WA 98273, yields a list of 1,172 perennial flowers, shrubs, and trees to consider for a pollinator landscape.

Several fundamentals apply when choosing plants to draw pollinators:

Use native plants: Natives, including wildflowers, shrubs, and trees, are naturally adapted to the region’s climate and soil. Research by Gordon Frankies 3 shows native plants are four times more likely than non-native plants to attract bees and significantly increase the abundance of butterflies and moths. The Salal Native Plant Garden, adjacent to the Discovery Garden, introduces home gardeners to many varieties native to northwest Washington. According to the Pollinator Partnership, “Non-native plants such as cultivar and hybrid plant species are, in most cases, not good for pollinators as they can result in double flowers, changes in flower color, and sterile flowers with no pollen.”

Select plants that bloom across the seasons: Flowering plants, including annuals and perennials, serve as a draw for pollinators. When shopping for plants, nursery tags often list the pollinators that are attracted to the specific plant. As an example, a tag on Monarda fistulosa, a perennial commonly called bee balm, lists that the deep pink blooms attract bees, hummingbirds, and butterflies.

Pollinators love flowers – keep blooms going throughout the seasons: Pollinators are drawn by a variety of plant qualities, colorful blooms, and the availability of pollen and/or nectar.

Interested in Becoming a Master Gardener?

Application period is now open through August 15, 2025.

WSU has recently launched a new training platform called Washington Green School, designed to provide comprehensive research-based horticulture and environmental stewardship education. The Washington Green School offers two distinct tracks:

  • Washington Gardener Certificate Track
    This option is ideal for individuals seeking to enhance their gardening skills without the commitment of volunteering. This self-paced, online-only course provides a certificate upon successful completion.
  • Extension Master Gardener Volunteer Track
    This track is for those interested in becoming certified WSU Extension Master Gardener volunteers and includes the Green School online coursework, in-person, local volunteer training, and a commitment to volunteer service hours.

For more information, go to https://skagitmg.org/home/green-school/

To apply for the Skagit County WSU Extension Master Gardener Program, go to https://extension.wsu.edu/skagit/mg/apply/


In the search for food resources, each type of pollinator has preferences for the color, nectar, odor, pollen, and flower shape. The Pollinator Partnership has compiled the Pollinator Syndromes chart below describing characteristics which draw eight different pollinator groups. For example, butterflies prefer flowers shaped like a narrow tube with a spur and a wide landing pad, often in bright red and purple colors. Bats pollinate plants which emit strong musty scents and open at night.


In addition to referring to the plant lists for the two local Pollinator Gardens, consider regular visits to the Discovery Garden or local nurseries to check what is blooming each month, or seek out another pollinator garden, such as Pollinator Pathway Northwest at 21 Acres in Woodinville (https://21acres.org/).

Plant several similar plants in close proximity: Create several extensive, round plantings of each plant to minimize the distance pollinators need to travel to obtain their nutrition and transport pollen. Additionally, experts recommend planting at least three different pollinator plants within each of the three blooming seasons: spring, summer, and fall 3 for maximum benefit.

Consider a bee lawn: Adding flowers in with turfgrass can provide a draw for pollinators seeking nectar and/or pollen. The bee lawn is available for human recreation and as an attraction for dozens of species of native bees 4.

Use care with chemicals: For details about chemical use to protect pollinators, see Washington State University Extension bulletin “Pollination and Pollinator Protection” in the references below.

In addition to flowers and plants, home gardeners should be aware of the basic needs of pollinators:

  • Appropriate nesting areas Off-season hibernation sites
  • Good sun exposure
  • Adequate source(s) of water
  • And lastly, allow leaves to gather [and self-mulch] on the ground as a haven for insects, birds, and others through winter.
swallowtail butterfly on purple stalks of lavender bush
In the warmth of summer, the tiger swallowtail butterfly is attracted to lavender. Photo © Shelly Hanks, WSU Photo Services
Yellow Welsh poppies blooming in garden
Yellow Welsh poppies bloom from June – August, providing nectar and pollen for bees and butterflies. Photo © Skagit County Master Gardeners

REFERENCES AND RESOURCES:

  1. Lawrence, T. (2015) WSU Extension bulletin FS174E. Pollination and Pollinator Protection (Home Garden Series). 
  2. Ley, E., Buchmann, S., and Holmes, K. (2025) Selecting Plants for Pollinators Including the states of: Oregon and Washington a Regional Guide for Farmers, Land Managers, and Gardeners in the Pacific Lowland Mixed Forest Province. The Pollinator Partnership™/North American Pollinator Protection Campaign.
  3. Mader, E., Shepherd, Matthew, Vaughan, M., Hoffman, S., LeBuhn, G. (2011) Xerces Society Guide: Attracting Native Pollinators. Storey Publishing. North Adams, MA.
  4. Moncada, K., Reiter, M., and Wolfin, J. (2023) Planting and maintaining a bee lawn. University of Minnesota Extension.
  5. Pollinator Partnership. (2025)
  6. Pollinator Threats. (2025) Pollinator Partnership.
  7. U.S. Butterfly Populations are Severely Declining. (2025) Washington State University Office of Research. (2025)
  8. Wollaeger, H., Getter, K. and Behe, B. (2015). Consumer Preferences for Traditional, Neonicotinoid-free, Bee-friendly, or Biological Control Pest Management Practices on Floriculture Crops. Michigan State University Department of Horticulture. HortScience 50(5):721-732.

ABOUT THE AUTHOR:

Kari Ranten is a retired journalist and health care communicator who became a certified Skagit County WSU Extension Master Gardener in 2024. 


Questions about home gardening or becoming a master gardener may be directed to Skagit County WSU Extension Office, 11768 Westar Lane, Suite A, Burlington, WA 98233; by phone: 360-428-4270; or via the website: www.skagit.wsu.edu/mg

Washington State University Extension helps people develop leadership skills and use research-based knowledge to improve economic status and quality of life. Cooperating agencies: Washington State University, US Department of Agriculture, and Skagit County. Extension programs and policies are available to all without discrimination. To request disability accommodations contact us at least ten days in advance.


blueberries in the palm of a person's hands

Planting, growing and maintaining blueberries

Growing blueberries: Start with the right soil to get “superfood” results

How to choose blueberries well suited for success in the Pacific Northwest

Posted July 4, 2025

Subscribe to the Blog >


By Kari Ranten, Skagit County WSU Extension Master Gardener

Kari Ranten

Blueberries are a staple of Skagit County’s thriving commercial agricultural economy and are an increasingly popular plant and crop for northwest home gardeners.

Commercially, Washington leads the nation in blueberry production, with 26 percent of U.S. blueberries generating a revenue of $205 million, according to the U.S. Department of Agriculture (USDA-NASS.2025). Blueberry acreage in Skagit County increased eightfold since 2000. In 2023, 4,800 acres of blueberries were grown commercially in Skagit County, ranking third in crop acreage behind only field crops and potatoes, according to Washington State University Extension Skagit County’s Crop Acreage and Yield Report.

These strong statistics show that northwest Washington is an excellent growing environment for home and commercial production of blueberries, yielding a delicious summertime fruit crop or serving as a sturdy, attractive ornamental addition to the home landscape.

Blueberries have gained popularity among consumers for their nutritional qualities and are recognized as a “superfood,” offering an excellent source of essential nutrients, vitamins C and K, and dietary fiber. Blueberries are also a nutritional source of valuable “phyto-components,” contributing to antioxidants and anti-inflammatory qualities.

For those interested in growing blueberries in the home garden, there are some decisions and preparatory steps to take to get ready for planting from January to March.

Common varieties
Of the five main types of blueberries grown in the United States, northern highbush blueberries (Vaccinium corymbosum L.) are most common in Washington. These deciduous, perennial shrubs are shallow-rooted, take six to eight years to reach full production, and varieties can reach five to nine feet in height.

sign by highway

Researchers at WSU Mount Vernon Northwestern Washington Research & Extension Center (NWREC) play a vital role in working with commercial blueberry growers. Chakradhar Mattupalli, assistant professor of plant pathology, leads the Berry and Potato Pathology Program, conducting research and extension activities addressing the biology and management of diseases of highbush blueberry and potato crops. He provided guidance and resources in the preparation of this article. For more information about Mattupalli’s research, go to Berry and Potato Pathology | Washington State University

NWREC is one of four WSU Research Centers operated by the College of Agricultural, Human, and Natural Resource Sciences, housing nine research programs, extension outreach, and research affiliates. The research center works to solve plant-related problems and develop cost-effective and environmentally sound plant production practices based directly on results from experimental field, greenhouse, and laboratory research trials.


The publication “Blueberry Cultivars for the Pacific Northwest” notes that half-high blueberries, the result of crosses between northern highbush and lowbush blueberries, can also grow in the region and reach three to four feet tall. The cultivars are also used as attractive landscape plants and are suited to container production.

The NW Fruit Garden, next to the Discovery Garden on Memorial Highway in Mount Vernon, provides home gardeners with an excellent illustration of 30 blueberry varieties suitable to the local environment. The garden is maintained by volunteers, including Beth Jones, a NW Fruit volunteer since 2019, who leads the blueberry team charged with caring for 122 plants, some more than 20 years old.

Northern Highbush “Duke”

blueberries
© Photo Chad E. Finn, OSU PNW Extension Publication

Northern Highbush “Draper”

draper blueberries on branch
© Photo Chad E. Finn, OSU PNW Extension Publication

Northern Highbush “Bluejay”

highland blueberry on branch
© Photo Chad E. Finn, OSU PNW Extension Publication

Start by selecting a location and testing soil acidity

Home gardeners can start by selecting the right location and soil for blueberry bushes. Blueberries require acidic soil with a pH of 4.2 to 5.5, similar to rhododendrons and azaleas, according to a 2025 presentation to Skagit County Master Gardeners trainees by Lisa Wasko DeVetter, associate professor of small fruit horticulture at Washington State University’s NWREC in Mount Vernon. Soil can be lab tested for pH, and if needed, acidification can be enhanced. A publication by Oregon State University Extension titled “Acidifying Soil for Crop Production West of the Cascade Mountains” provides a good resource on evaluating and enhancing soil acidity.

Because of the acidic soil needs of blueberries, home gardeners will need to plan ahead and prepare the space and soil before the arrival of the early spring planting season.

Blueberries can also be grown in containers and flourish in the full sun.

Plant selection, pollination, and care
Home gardeners should select two- to three-year-old plants (when shopping, ask at the nursery about plant age) and be on the lookout for those that are disease and heat-resistant “Legacy”, “Rubel”, and “Liberty”, have shown resistance to common diseases and rising summer temperatures in the NW Fruit Garden.

Plant blueberries from January to March, spacing three feet apart, in holes large enough to handle all of the shallow roots and allow three to four inches of soil to cover. Once established, blueberry plants are quite sturdy, with most producing fruit for 20 years.

While northern highbush blueberries are self-fertile, experts advise home gardeners to plant at least two different cultivars with overlapping bloom times in proximity to one another to benefit from cross-pollination and larger, earlier fruit.

All northern highbush blueberries are compatible with each other for cross-pollination.

Remove all flowers during the first year or two after planting to prevent fruit from setting and to give plants time to mature and enhance future yield.

Fertilize annually with a focus on nitrogen. For more information, see Oregon State University Extension publication EM 8857 titled “Nutrient Management for Blueberries in Oregon.” 

Blueberries require regular, supplemental watering from May to August and annual mulching with untreated wood chips.

Interested in Becoming a Master Gardener?

Application period is now open through August 15, 2025.

WSU has recently launched a new training platform called Washington Green School, designed to provide comprehensive research-based horticulture and environmental stewardship education. The Washington Green School offers two distinct tracks:

  • Washington Gardener Certificate Track
    This option is ideal for individuals seeking to enhance their gardening skills without the commitment of volunteering. This self-paced, online-only course provides a certificate upon successful completion.
  • Extension Master Gardener Volunteer Track
    This track is for those interested in becoming certified WSU Extension Master Gardener volunteers and includes the Green School online coursework, in-person, local volunteer training, and a commitment to volunteer service hours.

For more information, go to https://skagitmg.org/home/green-school/

To apply for the Skagit County WSU Extension Master Gardener Program, go to https://extension.wsu.edu/skagit/mg/apply/


Prune each year in winter or early spring to eliminate any dead or weak shoots and select two to three new canes to retain for the next season. Prune carefully to retain the desired shoots, creating a vase shape that opens up the middle of the plant to provide air and light. Half-high cultivars do not need to be pruned as severely or as regularly as highbush types.

Healthy, established blueberry plants can yield more than one gallon of fruit per plant.

Blueberry plants can decline over time and should be replaced when they stop sending up new shoots during the growing season.

Pests and common diseases
A variety of pests and diseases can impact blueberry bushes and fruit.

Birds enjoy feasting on blueberries. To protect the fruit harvest from birds, home gardeners may want to cover plants with fine netting mounted on a frame and anchored to the ground from mid-June through harvest completion in August. If the bushes are growing for landscape purposes, let the birds have a summer snack.

Spotted wing drosophila, aphids, scale insects, root weevils, inchworms, and fruit worms can damage blueberry plants and fruit. To prevent or manage such infestations, refer to WSU’s publication “Growing Small Fruits in the Garden.”

In northwest Washington, blueberries are impacted primarily by two diseases: mummy berry and botrytis blight or gray mold.

blueberries with shrunken mummy berry disease
Mummy berry © Photo Jade Florence, Oregon State University
dead branch of blueberry caused by mummy berry
Mummy berry infection is identified by a spore mat covering the leaf stem. © Photo Jay W. Pscheidt Oregon State University

Mummy berry is easily identified by the home gardener in the mid- to late- stages as the mature mummified fruit appears gray, shriveled, hard, and inedible. The disease is caused by a fungus that infects young flowers and vegetative buds in spring. About three weeks after primary infection, a brownish-gray mass of spores develops on blighted flower stalks and leaves that are spread by wind, rain, and honeybees (pollinators) to healthy flowers.

To manage the disease, the home gardener must remove the mummified fruit from the plant and lift it off the ground, add about two inches of mulch around the plants, and regularly disturb the soil during the spring. Healthy fruit can be harvested and used. At season’s end, clean the area to prevent infected berries from overwintering.

Blueberries, strawberries, and raspberries, especially on the west side of the Cascades, are affected by botrytis blight and gray mold. The cool and wet weather in western Washington is conducive to the development of this disease. Pruning creates airflow in the plant canopy, and reduced moisture on the foliage or fruit can help slow down the fungal growth.

blueberries with botrytis
© Photo: Jay W. Pscheidt, 2010. PNW Pest Management Handbook
blueberry plant with brown husks of disease
Botrytis rot of green fruit. Here the floral tissue is seen still attached to the berry. © Photo: Jay W. Pscheidt. PNW Pest Management Handbook

REFERENCES AND RESOURCES:

Brun, C. A., DeVetter, L., and Benedicts, C. (2016) Growing Small Fruits in the Home Garden. Washington State University Extension Home Garden Series. Publication #EM103E

Finn, C., Strik, B., and Moore, P. (2024) Blueberry Cultivars for the Pacific Northwest. Oregon State University Extension Service. PNW #656

Hart, J., Strik, B., White, L., and Yang, W. (2020) Nutrient Management for Blueberries in Oregon. Oregon State University Extension Service. EM 8918. 

Horneck, D., Hart, J. Stevens, R., Petrie, S., and Altland, J. (2004) Acidifying Soil for Crop Production West of the Cascade Mountains (Western Oregon and Washington). Oregon State University Extension Service. EM 8857. 

Pscheidt, J.W., and Ocamb, C.M. (2025a). Blueberry (Vaccinium corymbosum)-Mummy Berry.  Pacific Northwest Plant Disease Management Handbook. Oregon State University. 

Pscheidt, J.W., and Ocamb, C.M. (2025b). Blueberry (Vaccinium corymbosum)-Botrytis blight. Pacific Northwest Plant Disease Management Handbook. Oregon State University.

Washington State University Northwestern Washington Research and Extension Center. (2025) Berry and Potato Pathology.

Washington State University Skagit County Extension Skagit County Agricultural Statistics. (2024) Crop Acreage and Yield Report.

Yan, L. (2023) Blueberries and Health. USDA Agricultural Research Service.

ABOUT THE AUTHOR:

Kari Ranten is a retired journalist and health care communicator who became a certified Skagit County WSU Extension Master Gardener in 2024. 


Questions about home gardening or becoming a master gardener may be directed to Skagit County WSU Extension Office, 11768 Westar Lane, Suite A, Burlington, WA 98233; by phone: 360-428-4270; or via the Skagit County WSU Extension Master Gardener website.

Washington State University Extension helps people develop leadership skills and use research-based knowledge to improve economic status and quality of life. Cooperating agencies: Washington State University, US Department of Agriculture, and Skagit County. Extension programs and policies are available to all without discrimination. To request disability accommodations contact us at least ten days in advance.


grass in standing water
AMGPost_header5

Dealing with Wet Spots in the Yard and Garden

Do you ever look at the bog in your yard and wonder, “What can I do with THAT area?”

              Subscribe to the Blog >

Carla Glassman

By Carla Glassman, Skagit County WSU Extension Master Gardener

When dealing with soggy areas in your landscape, it’s essential to understand the underlying causes of the wetness and how to manage them effectively. Identifying the root issue is the first step toward improvement. Determine if the wet area is due to natural water saturation, faulty drainage, or runoff from impervious surfaces.

Some areas are just naturally wet, but to be sure, it is essential to rule out other problems like a broken sewer or water pipe. With underground issues ruled out, the next step is determining if the excess water is caused by impervious surface runoff (i.e., rooftops, sidewalks, or driveways.) If so, redirect the water to an area with better drainage.

If none of these issues are the problem, you may wonder, “Is it possible to fix it?” Often, the answer is yes. The solutions range from re-grading your yard and installing drains to working with the wet area and installing plants which grow well in wet conditions.

Some consider aggressive solutions such as adjusting the flow of the land. Doing so likely will require effort, equipment, time, and money. And possibly applying for a permit. Before moving any soil, check out the county’s Land Disturbing Activity Guide, and if necessary, call to determine if a permit is required. In Skagit County, you may need a permit for projects that:

  • Exceed 100 cubic yards
  • Modify drainage patterns in any way
  • Has a depth or height of 3 feet or greater

You may try to “fix” the wet area by working with what you have, using less expensive or less extensive options. Soggy areas can be improved somewhat by aeration or adding compost or mulch. These improve soil structure in poorly drained soils by increasing soil aggregation. While mulch, compost, and aeration can improve overall soil health and drainage, they will not change the character of the underlying soil or the position on the landscape nor repair severely compacted or altered soil.

When finished, landscaping in wet areas may look much like a rain garden planting; the difference is in the underlying soil type.
drawing of a rain garden, highlighting the wettest area in the middle.
Typically, an area will have wetter areas, just like the zones in a rain garden. Select plants for the wet area as you would select plants for a rain garden based on the plant’s specific needs for soil type, sunlight or shade, moisture, etc. 

Fortunately, there is another option. There are a lot of beautiful plants that do very well in wet soils. Using the principle of “Right Plant, Right Place” or in this case “right purpose” you can install suitable plants in the area that will naturally slow runoff and allow the water to spread out.This will increase the permeability of the soil and also reduce the maintenance needs of the wet area.

Working in wet areas requires care to protect the soil. Cover bare soil with woody mulch; avoid walking or working on it when saturated. Choose plants that thrive in wet places. Landscaping in wet areas may look much like a rain garden planting when finished, because many of the same
plants will likely be happy in both places. However, installing a landscape in a wet area is different from installing a rain garden in your yard. Rain gardens are created on well-draining soils that can handle a lot of run-off directed into them. Unlike a rain garden, naturally wet areas do not have well-draining soils. They should not have additional runoff directed to them because this would cause further problems. If soil compaction or heavy soil type is part of the drainage problem, installing plants with good root structures will improve the soil structure by growing roots deeper and making pathways for the water to follow. Over time, this allows material from plants, insects, and microbes to increase the soil’s humus improving its ability to absorb water.
A plug for native plants: They belong here! Native plants are well adapted to our local environment. They don't require extra care, water, fertilizer, or anything. More than that, many of our native wildlife depend on them and won't survive without them.
050225_pic 2

Consider Using Native Plants: Native plants are well adapted to our environment. They don’t require extra care, water, or fertilizer. More than that, wildlife depends on them and won’t survive without them. Red twig dogwood and Pacific sword fern are native and do well in moist environments.

Whether you use native plants, non-natives, or a mix, include plants of varying heights and root zones. Using varying heights and textural layers (different leaf types) is healthy for plants and wildlife and a beautiful technique. Mix various colors and textures for visual interest with a common thread that ties everything together through a consistent style.

Choosing Form and Function
Now, select plants keeping in mind the place they will be. For best results, know what your area is like during all the seasons of the year. Is your soggy spot in the sun or shade or something in between? Is it always soggy, somewhat soggy-to-damp, or does it dry out in the summer? Typically, an area will have some wetter areas, just like the zones in a rain garden.

Consider nearby physical restrictions like powerlines, underground pipes, or easements. A little planning at the beginning can save a lot of repair work in the future.

Select plants for the wet area as you would select plants for a rain garden based on the plant’s specific needs for soil type, sunlight or shade, moisture, etc. Selecting the “right plant” based on the plants needs saves time, money, and effort reducing fussing, tending, and possibly replacing later.

Zone 1 in a rain garden is the wettest area. Zone 1 plants must be able to tolerate periods of inundation (standing water.) Most rain gardens are not continually wet in Zone 1 because they are supposed to drain. They may even be totally dry for part of the summer.

Zone 2 in a rain garden is the next wettest area of a rain garden. Plants for Zone 2 are seldom inundated with water but usually damp.

Zone 3 of a rain garden is generally dry. Zone 3 plants would do well in the area whether or not there was a rain garden and may even need to be drought-tolerant. When selecting plants, choose plants that will be able to tolerate the amount of water inundation in your area. Zone 1 plants can tolerate wet conditions and seasonal flooding, so they are a good choice for your wet spot. From that group, choose plants that have the “right” light needs for your space.

Select plants depending on the degree of water inundation in your “wet” area. If your location is generally moist with seasonal wet, you might choose plants listed in the chart below suited to “Rain Garden Zone 2.” Many plants are less fussy and are able to do well in more than one zone. You may want to “hedge your bet” by selecting a variety of plants, increasing the odds of success.

Accept the challenge of wet spots in your garden as an opportunity to create a thriving ecosystem! By selecting plants that naturally filter water and develop robust root systems, you can improve the underlying soil structure while enhancing the beauty of your landscape. These resilient plants will not only thrive in the moisture but will also work to improve drainage over time, turning a soggy area into an area you can enjoy. Make the most of your garden&#39;s unique characteristics and watch it flourish!

Soc-Media_Ad_sq
Mark Your Calendar: Always the Saturday Before Mother’s Day
We’re growing 3,600 tomato plants, and over 4,000 flower and vegetable starts along with edible and ornamental perennials for you to bring home and plant your garden this season.

The following list is a compilation based on information from The Washington Native Plant Society, Great Plant Picks, Missouri Botanical Garden, Native Plants PNW, USDA Plant Database, oregonflora.org, and kingcounty.gov/goNative.

* = non-native    D = Deciduous   E = Evergreen  SE = Semi-evergreen

1@ = Tolerates seasonal flooding   2@ = Tolerates moderately wet sites   3@ = Tolerates seasonal dry

Table of Plants-1
Table of Plants-2
Table of Plants-3
Table of Plants-4
Table of Plants-5
Table of Plants-6
Table of Plants-7b

REFERENCES AND RESOURCES:

King County interactive native plant list which can be sorted by plant type, height, etc. Native Plants. King County: Retrieved at:
https://green2.kingcounty.gov/gonative/Plant.aspx?Act=list
Native landscaping plans:
Landscaping with Native Plants. King County: Retrieved at:
https://green2.kingcounty.gov/gonative/Plan.aspx?Act=list
Information on Permits. Skagit County, Washington
Retrieved at: https://www.skagitcounty.net/Departments/PlanningAndPermit/forms.htm
Testing and Improving Soil Drainage. Iowa State University Extension:
https://yardandgarden.extension.iastate.edu/how-to/testing-and-improving-soil-drainage
Don’t Just Landscape, Rainscape. Create beautiful landscapes that protect water quality and reduce runoff. Skagit County
Retrieved at: skagitcounty.net/PublicWorksSurfaceWaterManagement/Documents/Stormwater/RainScape%20Brochure.pdf
What is Humus in Soil? Explore the Critical Advantages for Your Crops. Retrieved at:
https://forestry.com/guides/what-is-humus-in-soil/
Enhancing Urban and Suburban Landscapes to Protect Pollinators. Oregon State University.
https://extension.oregonstate.edu/catalog/pub/em-9289-enhancing-urban-suburban-landscapes-protect-pollinators

From soggy to sublime: Trees, shrubs and perennials that love soggy sites. (April 2014) Retrieved at: Oregon Live.com

ABOUT THE AUTHOR:
Carla Glassman is a Skagit County WSU Extension Master Gardener, Class of 2014.


Questions about home gardening or becoming a master gardener may be directed to Skagit County WSU Extension Office, 11768 Westar Lane, Suite A, Burlington, WA 98233; by phone: 360-428-4270; or via the website: https://extension.wsu.edu/skagit/mg/

Washington State University Extension helps people develop leadership skills and use research-based knowledge to improve economic status and quality of life. Cooperating agencies: Washington State University, US Department of Agriculture, and Skagit County. Extension programs and policies are available to all without discrimination. To request disability accommodations contact us at least ten days in advance.


plant fair photo collage

Mark Your Calendar!

Skagit County Master Gardener Plant Fair is Saturday, May 10

Anticipation is Building for the Annual Event on Mother’s Day Weekend

              Subscribe to the Blog >

By Kari Ranten, Skagit County WSU Extension Master Gardener

Kari Ranten

Featuring thousands of plants for sale, the Skagit County Master Gardener Plant Fair is a local celebration of spring and gardening.

Gardeners across the region count on the plant fair as a place to purchase quality plants and look forward to gathering inspiration for the coming growing season. Did you know that all of the tomatoes – more than 3,600 plants – available at the plant fair are grown from seed by volunteer WSU Extension Master Gardeners? Not only that, the varieties grown are chosen because they are ideal for our climate.

The 31st annual Plant Fair is set for 8 a.m. to 2 p.m. on Saturday, May 10, 2025, at the Skagit County Fairgrounds. The event and parking are free, enter through the south gate of the fairgrounds. Attendees are encouraged to bring a wagon or wheelbarrow to help transport their selections. Boxes are available at the site and customers can leave purchased plants at a free plant parking area monitored by volunteers as they continue to shop and enjoy the plant fair. An ATM will be available on site.

3,600 Tomato Plants – 2,000 Flowering Annuals
2,000 Vegetable and Herb Starts
Hundreds of Perennials and Native Plants
Small Fruits: Grapes, Figs, Currants, Berries

“As an organization and a community of people who live and love all things gardening, we are looking forward to this amazing annual event,” said Master Gardener Claire Cotnoir, who, along with her husband and fellow Master Gardener Hank Davies, co-chairs the plant fair. “This is our way to inspire all gardeners by offering quality plants suited to growing successfully in our region. We enjoy the opportunity to share information and enthusiasm for gardening, along with educating the public about how to embrace gardening as a way to care for and protect the environment.”

The plant fair will offer thousands of plants for sale, including vegetables, tomatoes, herbs, perennials and native plant varieties. Most of the plants are grown or propagated by master gardener volunteers.

The plant fair is truly a highly anticipated event, as illustrated by those who waited in line at the gates last year. Some called their annual visit to the event a “Mother’s Day weekend tradition” for their family. One smiling woman, with a wheelbarrow in tow, proclaimed “It’s the only holiday I celebrate – Plant Fair Day!”

multicolored tomatoes

Need Tips on Growing Tomatoes?

Master Gardener Denny Organ, an expert in growing tomatoes in the region, will provide short workshop-style presentations with tips on planting, pruning and general care for tomatoes between 9 a.m. to noon on Saturday, May 10 at the Master Gardener Demonstration Booth. Between presentations, Denny will be available to answer one-on-one questions about growing tomatoes. Check at the master gardener information booth at the Plant Fair for specific times of the presentations.

woman checking her plants at the free plant parking table
Free ‘parking’ for your plant purchases while you shop and learn.
master gardener answering questions at plant fair
Master gardeners will be available to answer all of your plant and gardening questions at the Plant Clinic inside the Pavilion entrance.
people browsing vegetable plants for sale in the Pavilion
Thousands of flowering annuals, perennials, edible vines and bushes, and native plants will be on sale in the Pavilion.
woman selling dahlia tubers at outside booth
50+ vendors will be selling plants, garden art, jewelry, fibers, woodwork, food etc.
varieties of vegetables close up
Over 2,000 vegetables and herbs grown by master gardeners and selected for success in this area will be on sale.
jugs showing example of water run-off at booth
Learn how to control water runoff from the people at the Water Conservation District booth.

In addition to plant sales, the Plant Fair will feature:

  • More than 50 vendors will offer garden accessories, gifts, plants, garden art and hand-crafted items. Several food vendors will also be on site.
  • Skagit County Master Gardeners will host an educational booth and display, with a focus on pollinators, firewise gardening and growing tomatoes.
  • Master gardeners will staff a Plant Clinic at the fair to help address plant questions or concerns.
  • Master gardeners will offer free tool sharpening, with a limit of one tool per customer.

The annual Skagit County Master Gardener Plant Fair is the primary fund-raising event run by the Skagit County Master Gardener Foundation (SCMGF). Proceeds enable the foundation to support master gardener outreach, events, education and activities. Beyond fundraising, the plant fair builds community awareness of the master gardener program, encourages community participation in gardening and growing local food, and inspires people to become master gardener volunteers.

Master gardener volunteers also maintain the Discovery Garden just west of Mount Vernon on Memorial Highway, which is open to the public daily as a showcase for the variety of plants that grow in the region.

women with tomatoes

Cherry, slicers, salad, paste, and dwarf are among the fifty tomato varieties available at the Plant Fair.

plant buyers happy with their purchase of tomato plants

Now you own a lovely tomato plant. Read on to help your plant grow and thrive, producing delicious tomatoes throughout the season.

Soon to be a proud owner of a tomato plant? What’s next?

Many Skagit County Master Gardener Plant Fair customers are laser focused on one thing: Buying tomato plants. As they check out, with plants in hand, the question many have is what to do next with these amazing plants?

Past customers, many who have purchased tomatoes at the plant fair for several years running, express satisfaction with the product. Of course, each growing season is unique and 2024 presented some challenges with rain and cooler temperatures. Between the May plant fair and the end of the 2024 growing season, customers describe the tomato plants produced by master gardeners as healthy, hardy and offering a “really great yield.”

tomato varieties on plates on a table

In the fall, master gardeners taste test 30+ varieties of tomatoes to select the varieties to grow for the Plant Fair.

Master gardeners grow all of the tomato plants from seed. The process begins in February to have them ready for the plant fair. Lights, heat mats and tender loving care help nurture the seeds to germination and on to developing into fledgling plants. As they grow, the tomatoes are transplanted into six-pack plugs, then four-inch pots and ultimately to the one-gallon pots available for sale.

Going into the plant fair, customers may check out the list of varieties available on the Skagit County Master Gardener website and make selections based on a desire for snacking, sauces, slicing and other tomato uses. All varieties are carefully chosen by master gardeners and tested for growing conditions in Skagit County. In addition, for a comprehensive A-Z listing of tomato varieties featuring go to the tomato selection tool on this website.

At the end of each season, master gardeners gather for a taste-test session of fruit from their plants to help inform future variety selection. Some of the varieties available for purchase at the plant fair will be marked as “Winner of Our MG Tomato Tasting Event.”

Tomatoes: What do I do next?
So, once you take home tomato plants at the mid-May plant fair, what should you do next to have success? Here are a few tips on how to plant and care for these fledgling tomatoes from master gardeners who head up the “Tomato Team” and other resources:

Hardening off: The tomato plants, in one-gallon pots, will have spent more than a month in an unheated greenhouse leading up to the plant sale. As temperatures warm, they will need gradual introduction to sunlight and the outdoors. Place the plants in a sheltered location near the house or other structure and expose the plants to indirect sunlight gradually. Start with one hour on the first day and add one hour each day, building up to a full day. Plants can tolerate direct sunlight after three to five days.

According to the Washington State University Extension Fact Sheet FS145E titled Growing Tomatoes in Home Gardens,“After a week, leave plants outside overnight. If temperatures drop below 50°F, keep them indoors . . . Do not plant them before the frost-free date for your area because spring frost can kill young tomato plants.” Plants should not be transplanted unprotected until nighttime temperatures stay above 45 to 50 degrees, which may not be until June, according to Vegetable Gardening in the Pacific Northwest by Seattle author Lorene Edwards Forkner.

two master gardeners posing with flower covered hats

Kari Ranten and Jeremy Stevens

If the people in the fun, creative hats (master gardeners) look a little giddy, it is because they have crossed the finish line, successfully raising nearly 10,000 healthy, happy plants for you to bring home and enjoy this summer.

Planting: Whether using a container or transplanting into the ground, plant in well-drained soil in a sunny location. Plant in a deep hole and cover the stem up to the bottom leaves with soil to inspire root growth and plant development.

Trench planting is also an option. Trench planting involves digging a trench about six inches deep, adding a tablespoon of super phosphate to the soil (well mixed), and laying the whole plant in the ground with only the very top of the plant exposed to the sunlight. For more information about trench planting, go to North Carolina State University Extension Publications, Growing Tomatoes in the Home Garden in the references below.

Growing in pots: Tomatoes do not like to be confined to small pots for too long. The master gardener tomatoes are sold in one-gallon pots, which will work for a while, however, be sure to have 10-gallon grow bags, pots, or buckets with holes drilled in the bottom at the ready when overnight temperatures are appropriate to transplant outdoors for the season. Remember, tomato plant roots can go more than six inches deep into the soil so the more room you give them in a pot the happier they will be. Also, consider growing determinate plants in pots and indeterminate in the ground if possible. Determinate plants top off at around five feet tall and are easier to grow in pots than indeterminate which are vining and will grow until fall frost. Another wonderful option available for pots or patio growing this year are dwarf varieties, also available at the plant fair.

Watering: Tomatoes will perform better if they are a little dry rather than soggy. For plants in pots, providing a plastic roof or clear plastic cloche to keep the rain off is helpful, but not required. “Water regularly and deeply since tomatoes are deep-rooted plants, but avoid overhead irrigation, which can encourage disease,” according to “Sunset Western Garden Book of Edibles.” Author Forkner suggests reducing watering near the end of the season to encourage fruit ripening.

Support: Indeterminate tomatoes, those that grow like vines, benefit from supports such as cages, trellises or pole supports. Determinate varieties are more compact and bushier, reaching a fixed height.

Light and exposure: In the Pacific Northwest, placing pots along a south-facing wall is best for tomato success. A garden space with full sun for at least six hours per day, according to the Washington State University Extension Fact Sheet FS145E.

Potential problems: Tomatoes can be impacted by a variety of diseases and pests. Research and select cultivars that are disease resistant. Washington State University Extension Fact Sheet FS145E lists a variety of potential problems, including:

  • Late blight: The fungal disease appears as gray-green coloration on leaves, stems and fruit, turning to dark blotches on the fruit. The fact sheet suggests avoiding over watering, removing infected plants or plant parts when symptoms are noticed, but do not compost them. Give plants ample space to support air circulation.
  • Slugs: Common in Western Washington, slugs can completely consume younger plants, damage foliage of more mature plants and cause “hollowing damage” on fruit. To protect plants, remove weeds and debris, encourage predators; hand-pick and kill slugs that feed at night and use chemical-based baits with caution.
  • Blossom End Rot: According to the University of Wisconsin, Wisconsin Division of Horticulture Extension, this condition often occurs on the first fruits formed on plants. Initially, water-soaked spots (resembling small bruises) appear, most often on the bottoms of fruits and include dark, leathery, sunken areas on the blossom end of the tomato. This is caused by a lack of calcium uptake and conditions where there is too much or too little water. Water evenly and mulch the soil to retain moisture during dry periods. Avoid practices that would damage roots, such as cultivating too near plants thereby cutting roots, use a good Cal-Mag fertilizer and do not “wash” out soil nutrient with heavy over watering.
  • An additional resource regarding pests and diseases with tomatoes is the University of Maryland Extension’s Key to Common Problems of Tomatoes

Harvest and use: Harvest when the fruit reaches mature color. Tomatoes can be used in a wide range of preparations from fresh to frozen or dried to canned. For more information, check out the National Center for Home Food Preservation (http://www.uga.edu/nchfp/) or Oregon State University Extension Service’s site focused on canning tomatoes and tomato products (https://extension.oregonstate.edu/catalog/pub/pnw300-s).

REFERENCES:
Fredericks, G., Cowan, J. and Daniels, C. (2014) Vegetables: Growing Tomatoes in Home Gardens. Washington State University Extension Fact Sheet #FS145E. 

Forkner, L. (2012) Vegetable Gardening in the Pacific Northwest. Portland, OR. Timber Press.

North Carolina State University Extension Publications, Growing Tomatoes in the Home Garden.

Skagit County Master Gardener Tomato Variety Selection Tool

Sunset. (2010) Sunset Western Garden Book of Edibles: The Complete A to Z Guide to Growing Your Own Vegetables, Herbs, and Fruits.” Menlo Park, California. Sunset Publishing Corporation.

Key to Common Problems of Tomatoes University of Maryland Extension.

Blossom End Rot. (2024) University of Wisconsin-Madison, Wisconsin Horticulture Division of Extension.

Washington State University CAHNRS and WSU Extension Hortsense.  

Looking Ahead to Summer-
Join us for a Free Open House
Saturday, June 28 – 10 am – 2 pm

Explore the three gardens in one location: the WSU Extension Master Gardener Discovery Garden, the NW Fruit Garden, and the Salal Native Plant Garden at the Discovery Day Open House. Talk to the volunteers that manage each of the gardens.

ABOUT THE AUTHOR:
Kari Ranten is a retired journalist and health care communicator who became a certified Skagit County WSU Extension Master Gardener in 2024.


Questions about home gardening or becoming a master gardener may be directed to Skagit County WSU Extension Office, 11768 Westar Lane, Suite A, Burlington, WA 98233; by phone: 360-428-4270; or via the website: www.skagit.wsu.edu/mg

Washington State University Extension helps people develop leadership skills and use research-based knowledge to improve economic status and quality of life. Cooperating agencies: Washington State University, US Department of Agriculture, and Skagit County. Extension programs and policies are available to all without discrimination. To request disability accommodations contact us at least ten days in advance.


25-0406_Header2

Small Changes Can Make a Big Impact in Reducing Food Waste

Master Gardener Katryna Barber and WSU Extension’s Diane Smith discuss food waste and how we can help the planet by managing it better.

              Subscribe to the Blog >

By Katryna Barber, Skagit County WSU Extension Master Gardener and Diane Smith, WSU Extension faculty member

The Rising Cost of Food Waste
Food prices are changing, impacting how we plan and use food. This isn’t a brand-new phenomenon. Food costs are constantly fluctuating. Cooks must adapt and find a way to feed people with what they have. Sometimes, it leads to some very tasty creations. Food prices these days are just one aspect of a larger situation that is getting more attention: Food Waste and what to do about it.

The average US family of four discards approximately $1,600 worth of produce annually. This waste isn’t limited to lost money paid for food at the grocery store. It also includes the wasted resources used to produce and distribute the food and the negative environmental impact that occurs when food is thrown away.


In our country, 1 in 6 people is food-security challenged, a fancy term for not having enough food. Happily, there is something we can do about it: eat more of the food we buy and not wasting it.


Cooking with scraps isn’t a new idea, but it has been refreshed and replated. What we can create with food “scraps” is incredible. This is a movement towards eating as much as possible of what we buy so it doesn’t get thrown away. For example, do you eat the leaves of radishes or carrots? They are edible. Do you use the liquid left in the can of garbanzo beans? How about corn cobs?

food in trash bin
When food is wasted, so is all the energy, time, and resources it takes to produce it. Those resources could have been saved. Our hard-earned money could have been saved. © Adobe Stock

Learn new ways of reducing food waste
at these FREE events

Celebrate at MoNA
Sculpting Sustainability:
Solutions for Skagit Food Waste
Saturday, April 12 ~ 1 pm

at the Museum of Northwest Art in La Connor
This event is free, but registration is required.

Know & Grow:
Preventing Food Waste
Tuesday, April 15 ~ 1 pm

at NWREC Sakuma Auditorium, 16650 SR 536,  Mount Vernon
Free, no registration required.
From Waste to Wisdom
As a professor of Food & Consumer Sciences, Diane Smith has spent more than 30 years exploring and teaching about food and nutrition. She is passionate about helping people use food more mindfully.

Smith’s focus on food waste prevention began a couple of years ago when she took a sabbatical to study the connection between climate and diet. She traveled to Denmark, Italy, and NYC to explore food waste prevention activities that are happening elsewhere. The answer became clear when studying how our food choices affect the climate and what we can do to reduce that impact: keep food out of our landfills. We can do that by using the food we buy and not letting it go to waste. The expense is the most obvious reason people should care about their food waste.

When we waste food, we waste everything that goes into producing it. This includes the hidden costs, as well as our money. Ask a child where milk comes from, and many will say, “The grocery store.” They don’t realize how many resources are used to grow and get the food to our kitchens or restaurants: water, manual labor (planting, tending, harvesting), transportation, mechanical labor, fertilizers, pesticides, herbicides, electricity, packaging, and storage. When food is wasted, so is all the energy, time, and resources it takes to produce it. Those resources could have been saved. Our hard-earned money could have been saved.

In the end, we pay to throw our trash away. But there is no “away.” Our landfills are filling up and creating greenhouse gases that are contributing to climate change. Organic material sent to a landfill is buried and decomposes without air, a process called anaerobic digestion. The bacteria living in this anaerobic environment exhale carbon dioxide and methane gas. Humans can deal with small amounts of these gases but not in larger quantities or for long periods of time. Human exposure to these gasses, often referred to as “greenhouse gases,” increases damage to the body’s systems. The cardiovascular, respiratory, reproductive, central nervous, immune, and digestive systems can be affected. The good news is that we can reduce the health risks by changing our habits and behaviors.

Find uses for food scraps before composting
Surprisingly, composting is not the first and best option for dealing with food waste, such as banana peels and coffee grounds. The new EPA chart suggests feeding livestock or pets first, then composting, and then, as a last resort, send it to the landfill.

graphic showing food waste cycle

In this chart, you can see the hierarchy of the best ways to deal with food waste. The main goal is to keep food out of landfills. Some studies suggest that 8% of global greenhouse gas emissions come from landfills. The most significant contributor to this problem is food waste. Washington State Department of Ecology has been focusing on reducing food waste and is committed to lowering landfill-disposed organic material by 75% by 2030. Right now, Washingtonians place 1.2 million tons of food waste into landfills per year. This waste is food from restaurants, institutional food services, and households. About 35% of this food is edible. Of that edible food waste, 37% of it is generated by households; 60% is from the commercial sector.

Smith employed the notion of cooking with scraps when invited to discuss the topic of food waste; she wanted to make it more fun, hands-on, and practical. When talking about concepts of edible and nonedible food waste, she wanted to give options to her audience to have them reimagine how to use what Americans consider nonedible food parts. Just because a part of the food is culturally nonedible does not mean it is trash. While not a new concept, cooking with ends and stems has been reimagined for modern kitchens as a creative and sustainable approach to cooking. Different cultures, customs, and culinary uses of food parts make cooking adventurous and fun. It’s about transforming what might typically be discarded into delicious, nutritious additions to your meals.

Innovative chefs and food writers around the country have created excellent guides to help you master the art of waste-free cooking. Check the internet for no-waste cooking, keeping food out of the garbage, a zero-waste diet, using peels, cores, rinds, and stems in meals, etc. The ideas are amazing!

Cooking with Scraps: Turn Your Peels, Cores, Rinds, and Stems into Delicious Meals by Lindsay-Jean Hard is a comprehensive guide that transforms traditional food scraps into sophisticated cuisine.

Waste Not: How to Get the Most from Your Food by the James Beard Foundation features recipes and tips from renowned chefs.

Root to Stem: A Seasonal Guide to Natural Recipes and Remedies for Everyday Life by Alex Laird focuses on using whole ingredients for both culinary and medicinal purposes.

The No-Waste Vegetable Cookbook: Recipes and Techniques for Whole Plant Cooking by Linda Ly specifically addresses how to use every part of your vegetables.

IKEA’s Scraps Book is a creative digital cookbook featuring recipes from prominent chefs focusing on recipes using ordinary kitchen scraps. Download here >


Discover how items we often discard-such as broccoli stems, citrus peels, and herb stems-can become the stars of our next meal. This can save money while reducing waste. From turning stale bread into creative croutons to transforming vegetable scraps into flavorful broths, the possibilities are endless. When we keep this awareness of what it takes for food to get to us in the front of our consciousness, we can more easily make mindful choices when buying our food and remember to use food well.

We need to be more mindful, or conscious, about using food well, creating little waste, and remembering that food is a finite resource. Being mindful means enjoying the food we prepare and serve, considering the miles the food has traveled. It means appreciating the personal effort spent nourishing ourselves, our family, and our friends. If we purchased a basket of strawberries, would we intentionally let it rot? Being mindful means using the food we buy to its highest purpose. Planning what to buy, storing the food for its longest shelf life, and using food to feed ourselves and family are ways of being mindful about and honoring our food.

We all have busy, full lives. How does one get started? Is it hard?

Smith suggests several approachable ways to reduce food waste:

 Be Practical–Start Small  

  • Create meal plans: Consider the cycle of the food you buy for different opportunities to reduce food waste.
  • Inventory existing supplies: Know what you have already and what needs to be consumed. Educate yourself about expiration and use-by dates and safe storage techniques.
  • Shop with a list and eat before shopping (this helps avoid impulse buys).
  • Buy the amount of food you need for the meals you plan to serve; this reduces leftovers.

leftover sign on refrigerator shelf

Washingtonians place 1.2 million tons of food waste into landfills every year. About 35% of this food is edible. Of that edible food waste, 37% of it is generated by households. © Adobe Stock

Planned Leftovers
As you consider what to prepare for a meal, consider leftovers so you can plan to use all that you cook. Once a week, enjoy a Leftover Day (think Taco Tuesday followed by Waste-Free Wednesdays). Use visual reminders like the “Eat Me First” sign to gobble up those leftovers instead of tossing them.
Use Everything
Cook with vegetable scraps (like radish leaves and carrot tops). Save aquafaba (chickpea liquid) for baking, use corn cobs for stock, and repurpose celery ends and leaves. Freeze, can, or dry scraps for later. Feed livestock. Look for new creative ways to use leftovers and scraps.

Admittedly, a change in habits takes some effort. It has been very easy to throw food away in this country. Try considering why you prepare food the way you do. For example, take a rib of celery to put into soup. How much of either end of the rib do you cut off? Are those ends really inedible? Could they actually be used now or in another dish?

Check the websites in the references below for quick ideas on using dabs of leftovers, peelings, pits, and tidbits: freeze-drying, fruit leathers, baking, and soup stocks. We think you’ll be surprised and inspired. 


Other benefits of using food more mindfully include gathering food before it gets composted and distributing it to people in need as gleaners and food banks do.


If you are entrepreneurial, consider how to use a waste product and squeeze the last drop from the garbage. Here are examples of what is already being done.

  • A juice company uses unwanted watermelon rinds to make flavored water.
  • A pickle company in Denver reuses water that was used to make pickles. The water’s second act is in a Bloody Mary mix.
  • A Danish distillery offers apple farmers a bottle of cider in exchange for their unwanted apples.
  • In 2022, the local gleaners’ group diverted 1.4 million pounds of food from entering the landfill

Every household, even people living alone, can make a difference.
After completing her studies, Smith wondered how much of a difference one person or even one household could make. She did a food inventory and waste audit and was surprised at the amount being wasted. This type of inventory and audit can teach anyone where to start. Taking charge of how we cook and eat is one way to generate hope for the planet. Use the example of The Butterfly Effect: This proverb illustrates that seemingly inconsequential events can set off a chain of unpredictable consequences. Tossing out just one slice of bread into the landfill might not change anything. Still, if every household tosses bread into the landfill, it contributes to climate warming and indirectly results in climate change. The reverse is also true. Eat the slice of bread.

worm chalet sign
worm cycle graphic explaining how worm bin works

This past year, the staff at the Skagit Extension office decided to “walk the talk.” The Food Waste Prevention team advocated for office changes, including using leftovers discarded from lunches and food demos to feed the worms in the new worm bin. (Exceptions include onions, garlic, citrus, hot peppers, meat, dairy, etc.) The staff contacted the Skagit County WSU Extension Master Gardeners, and champions Herta Kurp, Claire Cotnoir, and Hank Davies to design and build a state-of-the-art worm bin. Fondly referred to as the Worm Chalet, it is just outside the Extension office front door. The composting area signage teaches about the foods that worms can eat, including which lunch scraps go in, and which scraps cannot be eaten. Since August, the office staff has fed the worms over 200 lbs. of scraps. The rich worm castings are created as the worms process the food and are used to enrich garden beds. The effort also included diverting paper towels to the green bin rather than the trash. Since the start, the office has filled and diverted 90 bags of paper towels to green waste recycling.

Efforts to reduce food waste are gaining momentum at state, national, and international levels. Check out these examples of government agencies working to reduce food waste and greenhouse gases:

  • In Washington, the Department of Ecology supports a state-wide effort with the Use Food Well campaign and provides consumer resources to help reduce food waste.
  • The United Nations Sustainable Development Goals (SDGs) provide a roadmap for addressing food waste on a global scale. Specifically, SDG 12.3 aims to halve per capita global food waste at the retail and consumer levels and reduce food losses along production and supply chains by 2030. This goal underscores the interconnectedness of food waste reduction with broader sustainability efforts, including poverty alleviation (SDG 1), zero hunger (SDG 2), and climate action (SDG 13).
  • In the US, the EPA’s 2030 Food Loss and Waste Reduction Goal aims to cut food waste in half by 2030, while initiatives like the US Food Loss and Waste 2030 Champions program engage businesses in this mission (EPA, 2023).
plant fair poster with wheelbarrow and veggies

 Mark Your Calendar: Always the Saturday Before Mother’s Day
We’re growing 3,500 tomato plants, and over 3,000 flower and vegetable starts along with edible and ornamental perennials for you to bring home and plant your garden this season.

How can people become more involved in combating food waste?
This coming fall, WSU will be offering a Climate Steward Certificate program in Skagit and Island counties. The purpose of the six-week hybrid course starting in mid-September is to improve people’s literacy and understanding of climate change. The Climate Steward program explores how policy supports or hinders climate change. The goal is to create a cadre of climate stewards trained to be liaisons for the community. Keep an eye on the Extension website: https://extension.wsu.edu/skagit/ or call 360-428-4270 for more information.

Here locally, on Saturday, April 12, 2025 (1 p.m. – 2:30 p.m.), the Skagit Food Waste Prevention Coalition is hosting a day of learning “Sculpting Sustainability: Solutions for Skagit Food Waste” at the Museum of Northwest Art (MoNA).The fun, family-friendly event includes activities for kids and a panel discussion featuring local culinary experts giving an overview of the Skagit food landscape. They will provide ideas and outline solutions already in play! The cost is free, but an RSVP is required. Learn more at: https://www.monamuseum.org/events/foodwasteprevention

Join the movement to reduce food waste! Get started by doing your own food inventory and audit. Discover new recipes, learn how to cook with scraps, save money, help the environment, and positively impact our local community.

RESOURCES:

Websites discussing the connection between climate and diet:

Climate is Action. Chicago Field Museum.

National Food Museum

Skagit County WSU Extension: Food Waste Prevention Program.

Washington State Department of Ecology: Use Food Well Program. 

Resources for recipes and learning to cook with scraps:

James Beard Foundation (2018) Waste Not: How to Get the Most from Your Food. Rizzoli Press

Laird, A.(2019) Root to Stem: A Seasonal Guide to Natural Recipes and Remedies for Everyday Life. Penguin Life Press

Ly, L. (2020) The No-Waste Vegetable Cookbook: Recipes and Techniques for Whole Plant Cooking. Harvard Common Press

Hard, L. (2018) Cooking with Scraps. Workman Publishing Company

Project Drawdown

www.Niehs.nih.gov National Institute of Environmental Sciences, Health and Education

Naiyer, S. (2022) Effect of Greenhouse Gases on Human Health. Springer Nature Link. Retrieved from: https://link.springer.com/chapter/10.1007/978-981-16-4482-5_5

Eat this first sign download 

ABOUT THE AUTHORS:
Katryna Barber is a Skagit County WSU Extension Master Gardener, Class of 2019. She has completed the Skagit County Solid Waste Division Master Composter Recycler Training. Katryna currently helps maintain the compost area at the Discovery Garden on Memorial Highway West of Mount Vernon.

Diane Smith, RD, MA, is a Professor, Food & Consumer Sciences, Food Access & Health Promotion, WSU Extension Youth and Family, Skagit County. Her research and publications include food access/food security, direct-to-consumer marketing, and program implementation.


Questions about home gardening or becoming a master gardener may be directed to Skagit County WSU Extension Office, 11768 Westar Lane, Suite A, Burlington, WA 98233; by phone: 360-428-4270; or via the website: www.skagit.wsu.edu/mg

Washington State University Extension helps people develop leadership skills and use research-based knowledge to improve economic status and quality of life. Cooperating agencies: Washington State University, US Department of Agriculture, and Skagit County. Extension programs and policies are available to all without discrimination. To request disability accommodations contact us at least ten days in advance.


AMGPost_header5
hummingbird and purple flower

Hummingbirds in the Garden: Food Sources and Benefits

Food sources for resident Anna’s and migrating Rufous hummingbirds and tips for safely hosting a feeder in your garden.

              Subscribe to the Blog >

By Joan Stamm, Skagit County WSU Extension Master Gardener

There’s a wealth of information out there about our beloved hummingbirds-fascinating mythology, a horrifying feather trade history, descriptions of dazzling aerial dynamics, and arduous migratory habits-but this article will focus on beneficial food sources for our resident Anna’s and migrating Rufous, as these hummingbirds are not only an important part of our ecosystem that helps control insects, but are great pollinators. If this weren’t enough, they are simply a delight to watch.

Let’s start with the basics:

© Photo: Mason Maron | Audubon Society
25-0117_Pic-1

In early spring, Anna’s hummingbird finds nectar in the red-flowering currant (Ribes sanguineum) © Photos: Mason Maron | Audubon Society 

Insects and Spiders
The least glamorous but one of the most important hummingbird food sources is insects. Female Anna’s, when raising their young, can eat up to 2,000 bugs per day. In fact, Douglas Tallamy, a professor of entomology at the University of Delaware, claims that although “Hummingbirds like and need nectar … 80 percent of their diet is insects and spiders.”

Native trees and shrubs, more than “introduced” varieties, provide the highest potential for attracting native insects. To ensure a steady supply of native invertebrates that all birds, but especially hummingbirds, enjoy, plant a variety of native plants in your garden. Another way to increase insect populations is to leave the leaves in the fall. Many insects hide and winter in leaf litter. Instead of tidying up and throwing all those wonderful leaves in the compost bin, pile them up around your plants and postpone cutting away all the dead flower debris until spring. These practices will increase your insect population, and hummingbirds will help keep your bugs in check.

Make the choice to avoid pesticides.
Pesticides containing neonicotinoid insecticide are widely used by farmers and homeowners, and on pets for flea and tick treatments. Even though neonicotinoids are relatively less toxic to beneficial insects and pollinators, and their use is supported by WSU and USDA, many gardeners prefer to avoid their use. Some research institutions have found that hummingbirds exposed to systemic neonicotinoid insecticides for even a short time can disrupt their high-powered metabolism. Hummingbirds are pollinators. They can visit hundreds of flowers in a day. Any pesticide that can harm bees will likely harm hummingbirds.


Though not native to the Pacific Northwest, the brilliant red flowers of Crocosmia 'Lucifer' attracts hummingbirds throughout the summer. © Photo: Nancy Crowell | Nancy Crowell Photography

Though not native to the Pacific Northwest, the brilliant red flowers of Crocosmia ‘Lucifer’ attracts hummingbirds throughout the summer. © Photo: Nancy Crowell | crowellphotography.com

The Rufous hummingbird is attracted to 'Black & Blue' anise sage (Salvia guaranitica) © Photo: Phil Green | philgreen.net

 The Rufous hummingbird is attracted to ‘Black & Blue’ anise sage (Salvia guaranitica) © Photo: Phil Green | philgreen.net

Tree Sap
We don’t often think of tree sap as being an important food source for birds, but when flower nectar is scarce our migrating Rufous hummingbird will turn to sap in tree wells left by red-breasted sapsuckers and woodpeckers. If your garden can accommodate aspen, birch, or pine, you will create another potential food source for our Western Washington hummingbirds; plus providing important nesting and perching habitat.
Native and Non-native Flowers
Along with the protein, fats, and amino acids found in insects and the minerals found in tree sap, other nutrients important to hummingbirds are found in flower nectar. “Scientists have learned that the richness of the nectar matters more than the color of its source,” which in most cases would come from plants native to our region. A perfect example is our native snowberry (Symphoricarpos albus) which has tiny pink (not red) flowers that hummingbirds return to again and again. They also like our native nodding onion (Allium cernuum) with its tiny pinkish mauve flowers. Even osoberry (Oemleria cerasiformis), with its white pendulous flowers, offers good quality nectar early in the season as they are one of the first native trees to bloom.

But if you want to give hummingbirds their preferred red-orange range, try our native red paintbrush (Castilleja miniata), western columbine (Aquilegia formosa), red-flowering currant (Ribes sanguineum), Cascade penstemon (Penstemon surrulatus), and hot pink and scarlet monkeyflower (Mimulus lewesii and cardinelli) to name a few.

Along with natives, and to ensure a steady supply of flower nectar throughout the year, there are many introduced varieties that hummingbirds love. Most notably in my garden are the salvias- ‘hot lips’ and ‘black and blue.’ They also like bee balm, crocosmia, fuchsia, and weigela. For winter bloomers, Ciscoe Morris, the NW gardening guru and host of “Gardening with Ciscoe” recommends witch hazel, Camellia sasanqua ‘Yuletide,’ sweetbox, Daphne odora, Viburnum x bodnantense ‘Dawn,’ Grevillea victoriae, and the Asian hybrid Mahonia x media.

During breeding season, the hummers helicopter from plant to plant until they get their fill, mixing nectar with insect protein to feed their young, which is strictly the female’s job, along with nest building. The males resume their independent lifestyle.

Western columbine (Aquilegia formosa) is native in our area and provides food for Anna's hummingbird © Photo: Phil Green | philgreen.net

Western columbine (Aquilegia formosa) is native in our area and provides food for Anna’s hummingbird © Photo: Phil Green | philgreen.net

Many enjoy feeding hummingbirds, but doing so comes with the responsibility of keeping the feeders clean and free of bacteria to avoid harming the birds. It may be easier to native plants such as snowberry and red currant to help the hummers through late winter. © Photo: Nancy Crowell © Nancy Crowell Photography

Many enjoy feeding hummingbirds, but doing so comes with the responsibility of keeping the feeders clean and free of bacteria to avoid harming the birds. It may be easier to grow native plants such as snowberry and red currant to help the hummers through late winter. © Photo: Nancy Crowell | crowellphotography.com

Hummingbird Feeders
If you are going to use hummingbird feeders-and it’s really the overwintering Anna’s that mostly benefit as the Rufous is long gone by the end of summer-then the overwhelming advice from experts is that feeders be clean, clean, and clean. Some say feeders should be cleaned every 3 to 4 days, some say 5, and others say if the weather is above 65 degrees, they should be cleaned daily to prevent the sugar water from fermenting. “Sugar water is a nursery for bacteria, mold, and potentially dangerous pathogens.” Fermented sugar water can enlarge a bird’s liver imperiling its health. “Ten percent or more of the hummingbirds who wind up in rehabilitation centers have yeast infections from improperly maintained feeders.” Clean feeders with hot, soapy water or vinegar. Never use bleach as any residue is not only toxic to birds but to the environment in general.

The recipe for the sugar solution is one part plain white non-organic refined sugar to four parts water. Do not use red coloring or any commercial product with chemicals or dye. Boil the solution, let it cool, and fill your feeder. Hang more than one feeder to avoid competition. Hang them away from a window to prevent hummingbirds from flying into the glass and breaking their neck. In summer, hang them in the shade. In winter, hang them in the sun. If temperatures drop, you will need to rig up a heating element to keep the solution from freezing or rotate your feeders throughout the day. If all this sounds like too much work and responsibility-inadvertently harming hummingbirds rather than helping-it might be easier to grow a variety of nectar-rich flowers instead and leave the rest to nature.


Learn from the experts at the
Country Living Expo
& Modern Homesteading
Saturday, January 25, 2025
Stanwood High School 

Learn More and Register Here >>

These Gardening Topics and More:

  • Fruit Tree Pruning
  • Microclimates in the Garden
  • Garden Design
  • Roses
  • Bee Keeping
  • Growing Vegetables, Herbs and Flowers
  • Tool Care and Maintenance
  • Small Fruits: Elderberry and Blueberries
  • Growing Lavendar

https://extension.wsu.edu/skagit/countrylivingexpo/

A native plant that thrives in the Pacific Northwest, Mahonia provides winter food for hummingbirds and is a well-behaved foundational planting in many home gardens. © Photo: Nancy Crowell © Nancy Crowell Photography

Mahonia x media, pictured here, is an Asian hybrid that blooms in winter. Several native Mahonias also attract hummingbirds and bloom in early spring. © Photo: Nancy Crowell | crowellphotography.com


The coastal hedgenettle (Stachys chamissonis) is a native plant in the Pacific Northwest that thrives in moist soil near forests and provides support to birds, bees and butterflies. © Photo: Nancy Crowell © Nancy Crowell Photography

The coastal hedgenettle (Stachys chamissonis) is a native plant in the Pacific Northwest that thrives in moist soil near forests and provides support to birds, bees and butterflies. © Photo: Nancy Crowell | crowellphotography.com


REFERENCES AND RESOURCES:

BOOKS:

  • Link, R.Landscaping for Wildlife in the Pacific Northwest. Washington Department of Fish and Wildlife. 1999
  • Shewey, J.Hummingbird Handbook. Portland: Timber Press. 2021
  • Stark, E. M..Real Gardens Grow Natives. Seattle: 2014
  • Tallamy, D.Nature’s Best Hope: A New Approach to Conservation That Starts in Your Yard. Portland: Timberpress. 2019

ON-LINE:

Joan D. Stamm

ABOUT THE AUTHOR:

Joan D. Stamm, is a certified Skagit County WSU Extension Master Gardener and the author of several books, including The Language of Flowers in the Time of COVID:  Finding Solace in Zen, Nature and Ikebana.


AMGPost_header5
Photo © Cathy Markham, used with permission by Skagit County Master Gardeners

Tips to Making Strategic Vegetable Seed Selections

Helpful Ideas for Choosing What to Grow in the Vegetable Garden

              Subscribe to the Blog >

By Kari Ranten and Cathy Markham, Skagit County WSU Extension Master Gardeners

Planning a vegetable garden for the upcoming growing season is the perfect indoor activity for the cold gray month of January in northwest Washington. Those plans all begin with the process of choosing the right seeds for the produce you want to plant, grow, harvest, eat, and preserve.

Shopping for seeds can be just as fun and educational as any step in the vegetable garden.

Giving a gardener a stack of seed catalogs is like the veritable “kid in a candy store.” These volumes, filled with colorful images and tempting descriptions of dozens of vegetables – from asparagus to zucchini – create a shopping experience like no other. As certified Skagit County WSU Extension Master Gardener Cathy Markham notes, “The problem is there are thousands of choices and, yet, that’s the fun part.”

The challenge in seed selection is to remain focused, strategic, and practical in making the right choices.

25-0103_Pic-1
Start your research of seed options after making a list of favorite vegetables and evaluating your space, facilities, and skill level. Begin with learning how to read a seed description in a catalog, on a website, or a seed packet.
Photo © Cathy Markham, used with permission by Skagit County Master Gardeners

25-0103_Pic-2
In our area warm-season crops such as tomatoes, peppers, eggplant, and melons need to be started indoors. Cathy uses a soil-blocking method (pictured above) to start seeds. This allow roots to grow vigorously without confinement and minimizes transplant shock.
Photo © Cathy Markham, used with permission by Skagit County Master Gardeners

Getting started
Here are some important considerations to help narrow down what seeds to purchase:

  • Grow your favorites: Think about the produce that is most used and appreciated at the dinner table or preserved in the freezer or pantry. Putting a priority on these vegetables can help pare down the list of what to grow and the seeds to purchase. Cathy is a tomato aficionado, and pours over the seed catalogs and websites for her favorites and opportunities to try new varieties.
  • Space: Based on the favorites list, look at the pots, raised beds, or garden space available for growing vegetables. Look at the space with an eye on directional exposure, light, and surroundings. An experienced vegetable gardener, Cathy grows a little bit of everything, including lots of tomatoes plus greens, peas, beans, and root vegetables. While she once had five acres, she now has a small garden space and works hard to maximize the potential by mapping out a plan for the garden space each year. She records progress notes to help in future seasons. In planning, also keep in mind that some crops, such as tomatoes, a member of the nightshade family, need to be rotated to a different area of the garden each season to limit pests and disease.
  • Equipment: When choosing seeds for warm-season crops such as tomatoes, peppers, eggplant, and melons, remember that these need to be started indoors at home or in a greenhouse to be successful. A greenhouse is not required as many compact options are available to set up lights and heat mats on shelves indoors or in a garage.
  • Skill level: For beginners, start on a smaller scale and add more vegetable varieties in future seasons. Also, consider doing some research and ask friends or neighbors with experience with vegetable gardens. Experienced vegetable gardeners rely on previous experience and notes taken during prior seasons on successful varieties and harvest results.
  • Expense: Think about the vegetables that can be more expensive at the store or market and compare them to the cost of seeds and the season’s labor of love by the gardener. It can be easy to go crazy in the seed “candy store” so be mindful to purchase only the number of seeds to accommodate the space and objectives for the garden.

25-0103_Pic-3
25-0103_Pic-4

A greenhouse is not required to start seeds. Many compact options are available to set up lights and heat mats on shelves indoors or in a garage. Read more about building a DIY grow stand here > DIY Indoor Grow Stand  Photo © Cathy Markham, used with permission by Skagit County Master Gardeners

Research and understand seed options
After evaluating favorite vegetables, space, facilities, and skill level, research seed options. For starters, it helps to know how to read a seed description in a catalog website or seed packet. The gardener also needs to understand key terms, such as cultivar, heirloom, open-pollinated, hybrid, and resistance, as outlined in an article by Kym Pokorny and Nicole Sanchez of Oregon State University titled “Learn the Terms on Seed Packets to Make the Right Selection.”

When looking at seed options, consider the following key elements to consider for success in the maritime climate and relatively short growing season of northwest Washington:

  • Days to maturity: It’s key to check how many days the crop needs to reach maturity. Cathy recommends choosing “early” varieties with 55 to 60 days to maturity to gain a successful crop. Seeds with 70 to 80 days to maturity can work; however, they may be more challenging. Seeds identified as reaching maturity at more than 80 days are rarely suited for northwest growing conditions.
  • Understand the Zone: Check out the USDA Plant Hardiness Zone Map to confirm and learn more about the environment of the garden location.
  • Consider Pacific Northwest-based seed producers: Several seed producers are located in Washington, Oregon, and British Columbia that may provide seed options designed for the region’s climate. Longtime Northwest seed producers include Ed Hume Seeds, Territorial Seed Company, and West Coast Seeds.
  • Disease resistance: Look for seeds that will produce disease-resistant plants. The Pacific Northwest Vegetable Extension Group of Washington State University, Oregon State University, and University of Idaho has a great deal of information for gardeners at https://mtvernon.wsu.edu/path_team/
  • Bolt tendency: When under stress, such as heat, some vegetables have a tendency to bolt, sending up flowers and producing seeds before the harvest. Check the seed description and look for “bolt resistant” or “slow bolting.”
  • Space requirements: Matching up with the earlier evaluation of available pots, raised beds, and garden space, choose seeds for varieties sized to fit. Buy only what you will need for one or two years.
  • Keep a record: Since 2010, Cathy has kept a notebook filled with clippings from seed catalogs or packets and adds notes about the season’s successes and failures to inform seed selection in future seasons.

Photo © Cathy Markham, used with permission by Skagit County Master Gardeners
A focus on tomatoes
As noted, Cathy has a special interest in raising tomatoes. This can be a joy and a challenge for Northwest gardeners based on the shorter growing season. The same can be said for peppers, eggplant, and melons, which all must be started in a greenhouse or indoor growing set up with heat and lights. Read more about building a DIY grow stand in blog article: https://skagitmg.org/indoor-grow-stand/

When reviewing tomato seeds, Cathy recommends giving special attention to the days to maturity, space needs, and available natural light. Dwarf, determinate varieties work well in pots as they are smaller and more compact. Also, think about the uses and flavors for tomatoes and select varieties to span salads to sauces.

In her search for seeds, Cathy focuses on growing different sizes of tomatoes in a “rainbow of colors” to enjoy fresh and in different types of preparations. She receives a variety of seed catalogs and orders favorites such as Italian Red Pear, an Italian heirloom (seeds available at Seeds of Italy, growitalian.com), and she is willing to try a new, emerging variety that may not be available locally.

Cathy’s small-scale garden space means her seed search must match her garden’s layers and vertical growth opportunities. Cathy uses a soil-blocking method to start seeds, planting a few more than needed to make sure she has enough, and uses an indoor shelf lighting and heat mat system in the garage to get her tomatoes started. Tiny tomatoes need daily monitoring for moisture, temperature, and light. As the small plants grow, Cathy occasionally will put the flats of fledgling tomatoes outside for a very brief time on warmer days to get a boost of sunshine.

tomatoes
Tomatoes: Determinate vs. Indeterminate
According to Washington State University Extension Fact Sheet #FS145E titled Vegetables: Growing Tomatoes in Home Gardens, “there are 7,500 varieties of tomatoes with differences in color, shape, growth habit, length to harvest, taste, and disease resistance. Tomatoes are classified as either determinate or indeterminate. Determinate varieties are bush-like, with all the tomatoes ripening about the same time. Indeterminate varieties are vine-like, with the tomatoes ripening throughout the growing season- until frost kills the plant.” Find a listing of Determinate vs. Indeterminate tomatoes on the Skagit Master Gardeners’ website > Determinate vs Indeterminate Tomatoes
Seeds selected, what’s next?
Learn more about germination, propagation, and the basics of growing vegetables. Resource publications include:  Propagating Plants from Seed by Pacific Northwest Extension Publishing and Home Vegetable Gardening in Washington by Washington State University Extension.

This is a non-inclusive list of seed purveyors to consider:

REFERENCES AND RESOURCES:

Bubel, N. (2018) The New Seed-Starters Handbook. Emmaus, PA. Rodale.

Daigre, S. and Garbee, J. (2015) Tomatomania!: A Fresh Approach to Celebrating Tomatoes in the Garden. New York, NY. St. Martin’s Griffin.

Fredericks, G., Cowan, J. and Daniels, C. (2014) Vegetables: Growing Tomatoes in Home Gardens. Washington State University Extension Fact Sheet #FS145E.

Kumar, M., Larsen, F. and Shekel, K. (2022) Propagating Plants from Seed. Pacific Northwest Extension Publishing. #PNW0170. Link here > 

LeHouiller, C. (2014). Epic Tomatoes: How to Select and Grow the Best Varieties of All Time. North Adams, MA. Storey.

Miles, C. (2013) Home Vegetable Gardening in Washington. Washington State University Extension Publication #EM057E. Link here > 

Pokorny, K. and Sanchez, N. (2021) Learn the Terms on Seed Packets to Make the Right Selection. Oregon State University Extension. Link here >

Ryan, K. (2015) Using Crop Rotation in Home Vegetable Gardens, Snohomish County Extension Fact Sheet. Link here>

Sanchez, N. (2019) The Basics of Selecting Garden Seeds. Oregon State University Extension. Link here >

United States Department of Agriculture, 2024, USDA Plant Hardiness Zone Map. Link here > 

head photos of two women

Authors Kari Ranten and Cathy Markham

ABOUT THE AUTHORS:

Kari Ranten, MHA, is a retired journalist and healthcare communicator who became a certified Skagit County WSU Extension Master Gardener in 2024. Cathy Markham, a certified Skagit County WSU Extension Master Gardener since 2022, has a degree in food and nutrition from the University of Idaho and is a Registered Dietician.


AMGPost_header5
Fruit of Ficus carica 'Desert King' at the NW Fruit Garden in July has not yet ripened. © Sonja Nelson

The Fig Tree-A Horticultural Challenge

Though best suited for a Mediterranean climate, figs can be successfully grown in the Pacific Northwest.

              Subscribe to the Blog >

By: Sonja Nelson, Skagit County WSU Extension Master Gardener

Gardeners are adventurous folks, always on the lookout for a new and captivating plant to add interest to their gardens. One such beckoning horticultural challenge is the edible fig tree (Ficus carica). An example of a mature, edible fig can be found at the edge of the NW Fruit Garden on State Route 536 west of Mount Vernon. Located next to the Skagit County WSU Extension Master Gardener Discovery Garden, the NW Fruit Garden features over 200 fruit cultivars, including fig trees.

Although edible figs are widely grown in Europe’s warm Mediterranean basin, the climate of the Pacific Northwest is too cool for many varieties. However, the mature edible fig is part of NW Fruit’s experimental planting program to find the best fruits for growing in our area.

The fig specimen is the cultivar ‘Desert King,’ about 10 feet tall. The white bark on this multi-trunked, deciduous shrub is a pleasing contrast to its large, three-lobed, dark green leaves veined a lighter green. In July, the pear-shaped fruit is dark green (see photo), but the skin changes to greenish white when ripe.

One of the First Plants Cultivated
Each plant in our gardens has a story to tell. However, the fig tree story may be one of the most captivating. Judging from fossils found dating from 9400-9200 BC in the Jordan Valley, which today forms the border between Jordan and Israel, the fig is believed to be one of the first plants cultivated by humans, preceding the domestication of wheat, barley, and legumes by a thousand years. Figs were widespread in ancient Greece and described by Aristotle. They were also a common food source for the Romans. Rome’s first emperor, Augustus, was poisoned with figs from his garden that his wife smeared with poison. The well-known Biblical source in the Book of Genesis refers to Adam and Eve using fig leaves to cover their private parts in shame for eating the forbidden fruit. From the 15th century, the edible fig was grown in Northern Europe and the New World. In 1769, missionaries brought the first figs to California.
The Interesting Botany of the Fig
The edible fig fruit humans consume for its delectable sweetness is produced by Ficus carica, one of over 800 fig species in the genus Ficus. The three types of edible figs are distinguished from one another by their pollination process. The type most amenable to growing in our area is the “common fig.” The fruit skin, referred to by botanists as its “syconium,” is 1-2 inches long and green in color that ripens to purple or brown. Its interior is lined with unisexual flowers that produce seeds through a process called “parthenogenesis,” a natural form of asexual reproduction. The single-seeded fruits line the inside of the syconium, producing soft, reddish flesh containing crunchy seeds.

Most varieties of figs can produce two crops a year. The first crop is called “Breba,” which bears fruit on last year’s wood, and the second is called “Main,” which bears fruit on the current year’s wood. The Puget Sound region is usually too cool to ripen the Main crop.

Fig Research and Much, Much More
Figs are among the many varieties of fruit tested for research in the NW Fruit Garden. Recently, a new row of fig trees was planted with eight fig trees, and another row will be planted soon. The group is also planning to install a protective structure to demonstrate how to cover and protect figs in winter.

NW Fruit’s search for fig tree varieties that grow well in the Northwest extends worldwide. For instance, NW Fruit volunteer and co-chair Sam Benowitz traveled to the Brittany region in northwest France to observe and get a cutting of the fig variety ‘Madeleine de deux Saisons’ to grow and test at NW Fruit. Other new varieties include: ‘Little Ruby,’ ‘Olympian,’ ‘Brown Turkey,’ ‘Nordland,’ ‘Grantham’s Royal,’ and ‘Lattarula.’ Benowitz is a longtime volunteer at NW Fruit. Sam established and owned Raintree Nursery near Morton, Washington in 1972, building it into one of the country’s leading edible fruits nurseries, prior to selling it in 2018. His enthusiasm for his work is characteristic of the garden volunteers caring for and testing the many fruit varieties.

The Western Washington Fruit Research Foundation, now called NW Fruit, was created in 1991 to help support the tree fruit research at the Washington State University (WSU) Northwestern Washington Research & Extension Center (NWREC) Fruit Horticulture Program in Mount Vernon. It is dedicated to supporting research and educating the public about the special fruit-growing conditions of the Pacific Northwest region.

The six-acre NW Fruit Garden currently has over 200 fruit cultivars growing for research and demonstration to the public.

Growing Figs in the Ground
The climate of the Pacific Northwest differs from that of the Mediterranean region, where the species Ficus Caria is native. Although our climate is sometimes compared to a Mediterranean one because of its warm, dry summers, it falls short of being ideal for many varieties of figs. Hence, Sam Benowitz traveled to France’s Brittany area to find edible fig varieties from a climate more like ours and test them at NW Fruit.
Ficus carica 'Desert King' at the NW Fruit Garden.
Ficus carica ‘Desert King’ at the NW Fruit Garden. Photo: © Sonja Nelson

NW Fruit volunteer Sam Benowitz kneels next to a recently planted variety of Ficus carica. This fig is one in a row of eight fig trees planted at NW Fruit to test for adaptability to the Pacific Northwest climate. Photo: © Sonja Nelson

NW Fruit volunteer Sam Benowitz kneels next to a recently planted variety of Ficus carica. This fig is one in a row of eight fig trees planted at NW Fruit to test for adaptability to the Pacific Northwest climate. Photo: © Sonja Nelson

The edible fig, Ficus carica, and its varieties thrive in rich soil and a warm microclimate. The high temperatures sometimes experienced in our area should not be a problem for figs. However, in temperatures below 10 degrees F, plants may need cover. From his experience at NW Fruit, Benowitz believes the most significant shortcoming of our climate for figs is the lack of summer heat during the growing season. The program experiments on-site with techniques, such as walls that capture heat. Regular watering of the fig trees in the garden is necessary, especially as they start. An irrigation system is set to water the figs once a week throughout the summer.

The soil for in-ground figs should be slightly acidic (6.0 – 6.5). Allow spread for fibrous, shallow root systems. Do not fertilize at planting time, but mulch with compost. Training a young fig tree involves spacing the branches and forcing them to one main trunk. Figs can also be trained to an open center or vase shape, allowing good light penetration into the canopy. In training a newly planted tree, cut it to 2 to 3 feet in height, forcing lateral buds to produce new, low branches. In the following winter, select three to four main branches, cut them back to 30-36 inches, and remove the rest. Annual pruning, which should be done in the dormant season, is usually limited to cutting back the previous year’s growth. Thinning may be necessary if the canopy gets too dense. The leaf and root sap of fig trees may cause skin irritation in humans.

Growing Figs in Containers
In the Northwest, fig trees can be planted in containers in any season. Place the pot where you want it to go, preferably in full sun, and add a few inches of well-draining potting mix to the bottom. Place the tree at the same planting depth in which it was growing in the nursery pot. Then, backfill the remainder of the pot with potting mix. The fig’s root ball should be level with the soil line, but leave two inches of space between the soil and the rim of the pot to make watering easier. Add a thin layer of organic mulch around the base of the water line. Water when the top two inches of soil feels dry to the touch. Fertilize in the spring and fall with a balanced, organic fertilizer. Pruning, if necessary, should be done in winter. Ripe figs should be slightly soft and sweet smelling and begin drooping on their stems. Figs with hard necks that remain perpendicular to their stems are not yet ripe and should not be picked.
The dwarf fig 'Little Miss Figgy' was developed for use in a container. Planted in June, this specimen has thrived in a container on the patio of a home in Mount Vernon. Photo: © Sonja Nelson
The dwarf fig ‘Little Miss Figgy’ was developed for use in a container. Planted in June, this specimen has thrived in a container on the patio of a home in Mount Vernon. Photo: © Sonja Nelson

Learn more about Figs and the extensive collection of fruit cultivars at the NW Fruit Open House
On Saturday, October 12 NW Fruit will hold its Sample the Apple and Pear Harvest Day. It is open to members, but anyone can attend by paying a $25 annual membership fee that day. Dr. Cameron Peace of WSU’s School of Horticulture (Pulman) will speak about heritage apple varieties and using DNA to identify varieties. There will be a tour of the many pioneer varieties in the garden and a chance to taste dozens of delicious cultivars thriving in the garden. Bags or boxes of ladder-picked fruit will be available for members to take home in addition to other fruit. Go to the website https://nwfruit.org/apple-pear/ to read more about this event.

NW Fruit is a member-volunteer organization. It includes people who have spent a lifetime growing fruit and people who are just starting on their own journey of learning how to grow fruit successfully. For more information on volunteering, see: https://nwfruit.org

The foliage of  'Desert King' fig in the NW Fruit Garden in July. Photo: © Sonja Nelson
The foliage of ‘Desert King’ fig in the NW Fruit Garden in July. Photo: © Sonja Nelson
Get started growing figs. Several varieties will be on sale at the annual Master Gardener Plant Fair May 10, 2025 Photo: © Skagit County Master Gardener Foundation
REFERENCES AND RESOURCES:

Benowitz, Sam, NW Fruit Co-Chair. Personal communication, 7/18/ 2024.

Landers, L. How to Grow a Fig Tree in a Pot. Better Homes and Gardens, 5-10-23
Retrieved from: https://www.bhg.com/how-to-grow-a-fig-tree-in-a-pot-7487022

Fruit Garden Tour – Fig

https://nwfruit.org/wp-content/uploads/2016/02/

https://en.wikipedia.org/wiki/Fig

Morgan, P. (2023) Figs in the Home Garden. Pennsylvania State University Extension. Retrieved from: https://extension.psu.edu/figs-in-the-home-garden

Biggs, S. (2021) How to Grow Figs Even in Colder Climates. Fine Gardening. Tauten Press, Newton, CT. Retrieved from: https://www.finegardening.com/project-guides/fruits-and-vegetables/how-to-grow-figs-even-in-colder-climates

Figs and Kiwi Fruit. Snohomish County WSU Extension Community Fact Sheet #46 Retrieved from: s3.wp.wsu.edu>2053/2015/09>46FigsKiwiFruit


Author Sonja Nelson

ABOUT THE AUTHOR:
Sonja Nelson is a Skagit County WSU Extension Master Gardener Class of 2009.

There is still time
to apply to become
a Master Gardener in 2025

Questions about becoming a Master Gardener may be directed to: Skagit County WSU Extension Office, 11768 Westar Lane, Suite A, Burlington, WA 98233; by phone: 360-428-4270; or via the website: https://extension.wsu.edu/skagit/mg/


A Second Act for Your Square 1-Gallon Pots at the Discovery Garden!

Bring your leftover square 1-gallon pots to the Discovery Garden (16650 State Route 536, Mount Vernon). The bin for recycling the square 1-gal pots is located in the parking lot, just north (to the right) of the main entrance.
We only need square 1-gallon pots like the ones pictured below (bottom right). The recycling bin will be available now through fall. Simply put your pots into the bin, and we take care of the rest!


pot recycling


AMGPost_header5
090224_Header2

Useful Tips for Harvesting and Preserving Herbs in the Pacific Northwest

Preserving herbs can be a bit of trial and error, but the process is worth the fresh flavor and satisfaction.

              Subscribe to the Blog >

By: Laura Kuhn, Skagit County WSU Extension Master Gardener

Because of their useful nature, herbs are a common addition to home gardens. The use of the term herb is often used interchangeably with spice. However, the terms herbs and spices technically refer to two different things. “Herbs” are defined as the leafy parts of plants, such as oregano, rosemary, thyme, sage, basil, and others. “Spices” typically involve the use of other plant parts such as roots, fruits, flowers, seeds, or bark. Spices include cinnamon, ginger, lavender, coriander, cumin, and many others. Both herbs and spices are used for their savory, aromatic, or medicinal qualities. This article will focus primarily on herb preservation, although many methods mentioned here can also apply to spices.

Gardeners who grow vegetables may also grow herbs for pairing in recipes later. However, some of the best pairings cannot be harvested at the same time. For example, basil can look tired by the time the tomatoes are ready to be harvested. And it is difficult to find an easy, cost-effective way to have bunches of fresh cilantro available at the same time tomatoes and peppers ripen for salsa. Preserving herbs can help to bridge these gaps.

In 2002, when faced with a huge abundance of herbs that could not all be used fresh, I bought one of the popular “As Seen On TV” food dehydrators and dried herbs to make gifts for the following holiday season. The color and flavor of home-dried herbs are superior to store-bought herbs. Since then, I have also started to grow herbs and spices to make tea.

An often-asked question is: What is the best way to preserve herbs? The answer depends on how you plan to use them. The goal is to capture the essential oils in the trichomes (fine outgrowth like hairs) on the surface or epidermal layer of the leaves. These oils have the flavor and aroma we want.

What gardeners choose to grow and preserve is most influenced by the amount of time, budget, and available space. The good news is that with a small investment in time, space, and equipment, home gardeners can achieve excellent results that rival the expensive options available.

Oregano ripe for harvest.  © Photographer: Laura Kuhn
Oregano ripe for harvest. © Photographer: Laura Kuhn
Stevia and ornamental oregano in a vertical container with annuals.  © Photographer: Laura Kuhn
Stevia and ornamental oregano in a vertical container with annuals. © Photographer: Laura Kuhn
Growing Herbs-
Herbs can grow in most garden conditions and be planted directly in the ground, in raised beds, or in containers. Vertical garden systems are a terrific way to get a lot of variety in a small space. Gardeners who are just starting herb growing should start slowly and do their research. Purchasing herb starts at a local garden center is an easy and inexpensive way to begin. However, a far greater selection of herbs are available as seeds. Once gardeners have experience, they can grow their favorites from seed and make space for annual and perennial varieties.
Harvesting Herbs-
The harvesting process is as simple as removing the right part of the plant for the intended use. For most culinary uses, the target is tender fresh leaves (i.e., oregano, thyme, and basil). In some cases, the goal is to preserve flowers for making tea (i.e., chamomile, calendula, or anise hyssop) or to harvest the plant’s mature seeds (i.e., dill or coriander). Yet other plants are used for their roots (i.e., ginger or horseradish). If growing for flowers, it is important to pick the flowers often to encourage the production of more blooms.

For leafy herbs such as basil and oregano, the best flavor comes from young leaves on stems cut before the plant goes into flower production. However, the growing season can be extended by cutting back flowering stem tops to encourage more leaf growth. When doing so, leave four to six leaves on the plant stems for re-growth. If growing for seed, keep the flowers on the plants and wait until the seeds are fully mature. Root harvests take a longer time commitment and can require waiting for several growing seasons to achieve a decent harvest.

Organization is important during the harvesting process. It is best to harvest all of one specific plant at a time, making the cleaning and preservation process easier by avoiding the time-consuming task of separating during the cleaning process. For harvesting, no special tools are needed. Most herbs are tender enough to harvest by hand pinching or using scissors. Small clippers with short-tipped blades are best for harvesting small leaves or stems. Digging roots is a careful process. It is important to provide wide enough margins to avoid shovel damage to the roots.

Mammolo and Lettuce Leaf basils ready for drying in the dehydrator. © Photographer: Laura Kuhn
Preserving Herbs –
After harvesting, the herbs require cleaning before preserving. Most herbs can be immersed in cool water to clean off the leaves (stem and all). Use paper towels, a drying rack on a work surface, or a salad spinner to get as much moisture off as possible. Avoid crushing the leaves unless the herbs are chopped before preserving them. Chives can be washed and cut into small pieces with scissors by holding a bunch of stems and cutting them as a group before preserving them.

The preservation method should strive to achieve the best quality for the intended use. Scientific research has been conducted on various methods of preservation. The winning method for drying herbs is freeze drying because it preserves essential oils, aroma, and color best. However, the cost of such a system for most home gardeners is not reasonable. Therefore, the most common methods involve dehydration (using heat) or drying (using air), which results in a shelf-stable product that can be used year-round, or by freezing.

Bunching and cutting chives to cut and freeze or dry. © Photographer: Laura Kuhn
Echinacea (foreground) and lavender at a local nursery. © Photographer: Laura Kuhn
Chamomile ready to harvest in the Herb Garden at the Discovery Garden. © Photographer: Laura Kuhn
Calendula and various herbs in the Discovery Garden.  © Photographer: Laura Kuhn
Calendula and various herbs in the Discovery Garden. © Photographer: Laura Kuhn

Humidity levels in the Pacific Northwest, particularly western Washington, are a challenge to herb preservation and storage. Humidity levels should be 45-55 percent for proper drying and to avoid mold. Even during our drier summer months, average outdoor humidity levels are more than 60 percent. The water content in the herbs being dried is also a consideration. The more tender herbs, such as basil, tarragon, oregano, lemon balm, and mints, tend to have a higher water content. On the other hand, sage, thyme, parsley, and rosemary tend to be more “woody” and have a lower water content. Taking this into account before picking a preservation method increases the chances of success.

Drying with Air
Drying with air is by far the easiest method of preserving herbs but difficult to master successfully given Pacific Northwest humidity levels. Mold can form on plants, or the dried product will be limp and discolored. Make small bunches of plant stems, wrap with butcher’s twine, and hang the bunches up. The drying area will need to have good ventilation (an oscillating fan works great). Avoid exposure to light during drying as it will affect the color. A barometer or humidity gauge helps decide if drying is possible. Woody plants such as rosemary and sage are best for this process due to humidity levels. The amount of time needed to dry the plants and crush the leaves will vary based on weather and drying conditions. Checking plants often is the best way to gauge if they are ready.
Bunches of herbs ready for hang drying. © Photographer: Laura Kuhn
Failed attempt at airdrying parsley and lemon balm. Conditions were too humid for effective drying. Note loss of color in parsley to the left. © Photographer: Laura Kuhn
Dehydrating with Heat
The National Center for Home Food Preservation recommends drying herbs at 95 to 115 degrees Fahrenheit. Lower temperatures are best for tender plants. Since most home ovens cannot achieve the recommended temperatures for herb drying, food dehydrators have become popular. Many dehydrators come with wire racks so air can flow through the leaves. Arrange the leaves/stems across the rack so they are not touching. Overcrowding during the drying process can result in longer dry times. You can use a mesh-style rack for small leaves to provide air circulation. A tip for selecting a decent food dehydrator is to make sure that it can adjust the drying temperature and time. Select a unit that can dry at as low a temperature as possible to provide the most control over the drying process and quality. Increased heat levels might be needed to compensate for humidity levels. Using heated air to dry herbs can result in a higher loss of essential oils than using air-dried herbs. The amount of time needed to achieve a crisp, dry product that can be easily crushed is variable. Humidity, plant water content, and temperature are all factors to consider. For this reason, I recommend checking on the plants often during the drying process.

For either drying method mentioned above, it is important to note that any moisture left in the plants after drying can lead to spoilage. If your drying space seems to be “too moist” meaning you cannot achieve a crisp dry texture, increase the temperature, and air circulation. A process of trial and error may be needed as the time of year and the water content of plants can vary.

To prepare the dried herbs for storage, the leaves are removed from stems and crushed to the desired size. A tip for this step is to place the dried herbs into a bag and push the leaves off the stems. Set aside stems as you push the leaves into the bag. When the biggest stems are removed, crush the leaves inside of the bag to the desired size. Sift through the dried product to remove smaller stems to achieve the best consistency for cooking. Rougher dried herbs can be used for teas. It really is up to personal preference as to how “clean” the final product will be. Some choose sifters or screens to further improve the visual appeal of the end product.

Dehydrator full of racks of calendula and anise hyssop. © Photographer: Laura Kuhn
Fresh chopped basil freezes well when packed in ice cube trays then filled with water or oil. Once frozen, the basil cubes can be stored in a large freezer bag and used as needed. © Photographer: Laura Kuhn
Freezing
A quick and straightforward way to preserve herbs for later use in cooking is by freezing. Individual leaves can be placed in single layers on cookie sheets and then flash frozen. Cut chives work well this way. Once frozen, place the herbs into storage containers to reduce exposure to air. Another freezing method is to chop the herbs and load them into ice cube trays, then fill with water. Once frozen, put the cubes into storage containers and add them to recipes when needed. Alliums (onions and garlic) can be easily processed this way, also. The biggest downside to freezing is the required storage space in your freezer and a shorter shelf life.

Other methods include layering whole leaves in salt or oil. Herb essential oils can be transferred to other liquids for use in cooking. For example, herbs can be steeped to create herb-infused vinegars or oils. These methods take more time and care than can be covered here, so more research and preparation should be taken before trying these options. Microwaving takes a bit of trial and error to get the right cooking time for the type of herb used and varies with different types of machines.

Most herbs can be processed successfully in a variety of ways for different uses. A good tip is to experiment and see which techniques work best. Gardeners who experiment, find the methods that work best for their intended use.

Air tight containers and light blocking storage bin for dried herbs. © Photographer: Laura Kuhn
Storing Herbs –
Dried or dehydrated herbs do not like exposure to light and air, especially moist air. A simple and effortless way to store extra dried herbs is to put them into marked zip lock bags or a vacuumed sealed mason jar. Once each herb is in its container, they will need to be placed in a dark area like inside of a canister or storage container. Keep your herbs in a cool dry area because exposure to heat during storage can affect essential oil content. Storage time will vary on the herb, but if stored properly, they can last for months or longer.

The two most important tips of all are to grow what you will use and grow from seed for the best plant selection.

REFERENCES AND RESOURCES:

Rodale’s Encyclopedia of Herbs, May 2000, Rodale Press

Drying: Herbs, National Center for Home Food Preservation, University of Georgia, no date cited. https://nchfp.uga.edu/how/dry/recipes/herbs/

Thamkaew, G., Sjöholm, I., & Galindo, F. G. (2020). A review of drying methods for improving the quality of dried herbs. Critical Reviews in Food Science and Nutrition61(11), 1763-1786. https://doi.org/10.1080/10408398.2020.1765309

Author: Laura Kuhn

ABOUT THE AUTHOR:
Laura is new to the Skagit Valley but has more than 30 years of experience growing in coastal, inland valley, and desert climates. She had fun trying to grow herbs while traveling full-time in an RV. Laura is a 2023 graduate of the Skagit County WSU Extension Master Gardener program.

Questions about home gardening or becoming a Master Gardener, may be directed to: Skagit County WSU Extension Office, 11768 Westar Lane, Suite A, Burlington, WA 98233; by phone: 360-428-4270; or via the website: https://extension.wsu.edu/skagit/mg/


A Second Act for Your Square 1-Gallon Pots at the Discovery Garden!

Bring your leftover square 1-gallon pots to the Discovery Garden (16650 State Route 536, Mount Vernon). The bin for recycling the square 1-gal pots is located in the parking lot, just north (to the right) of the main entrance.
We only need square 1-gallon pots like the ones pictured below (bottom right). The recycling bin will be available now through fall. Simply put your pots into the bin, and we take care of the rest!


pot recycling


AMGPost_header5
© Kay Torrance

Gardening for All Ages and Abilities

Practical tips and ideas for adapting the garden through life’s transitions

              Subscribe to the Blog >

By: Ginny Bode with Madelyn Case and Anita Reetz, Skagit County WSU Extension Master Gardeners

Gardeners know spending time in the garden feeds the soul. But sometimes, as life changes, we face the need to adapt how we garden so it is possible for ourselves or those we love to continue cultivating wellbeing through gardening.

For some, physical limitations present lifelong challenges; for others, aging begins to interfere with the bending, kneeling, and digging associated with gardening. There are many reasons to take heart and continue to enjoy gardening by implementing some of these adaptive methods.

In her book Gardening for a Lifetime, Sidney Eddison sums up the reason for adapting when she says, “We are all doing exactly the same thing-trying to hang on to something we love.” Her book is loaded with practical ideas for reducing and removing barriers that hinder and continue the joy of growing plants through life’s transitions.

Reducing the size and work of a garden is the first step, followed by making it easier, more accessible, and user-friendly. A vegetable garden the size you’ve always had, and probably shared with others, can be resized to reduce both the work of maintaining and the work of harvesting. Choose to grow your top favorites, looking for plants that require less maintenance.

Eddison writes about requiring a “standard of good behavior” for perennials. Her measure includes observing a perennial’s health, fortitude, and ability to withstand the extremes of summer and winter. They must be “well-behaved” and not invite pests. As plants age out, replace them with sizes and varieties that are easier to maintain. And, because climbing ladders is problematic as we age, choose low-profile trees and shrubs that are easier to reach for pruning and maintenance.

Pay Attention to Walkways
Every garden needs to be accessible and safe. Falls are problematic and can limit the ability to garden even more. Remove any places that may cause one to stumble. Eliminate a dip in a walking path and poor transitions between surfaces. Smooth pathways such as pavers, rather than woodchips or gravel, ensure ease for every gardener, particularly those who need the aid of a cane, walker, or wheelchair.
green plants growing in pots on patio
Herbs and lettuces can easily be grown in containers making it easy to gather when preparing a meal.
tomato growing in pot on patio
If the space doesn’t allow a large footprint, grow vertically with trellises in pots. Tomatoes are a beautiful addition, and can drive grown vertically with good airflow.
Be Amazed by What Can Be Grown in Containers
Life can throw us a curve, and home may change from acreage or a city lot with a garden to an apartment. Don’t let it rob the joy of gardening. When faced with gardening on a patio, containers can provide an excellent way to get a dirt fix. Most home gardeners are familiar with growing flowers in pots and containers. Many also successfully grow a wide range of vegetables, including tomatoes, beans, and kitchen herbs in pots. Depending on the space and container size, some folks even grow potatoes! The Vegetable Gardener’s Container Bible by Edward Smith provides advice for growing an abundant vegetable garden on your patio or balcony. Smith’s book is a stalwart in gardeners’ libraries because it is packed with information covering sun exposure, pot size, soil choices, and which varieties do best in containers.

A narrow bench fitted to the edge of a raised bed allows for tending without kneeling.

Raised beds are also an excellent solution to making the garden user-friendly, making it possible to get your hands in the dirt without bending or kneeling. By keeping the beds narrow, 4′ or less, every inch of the garden is reachable from a standing or wheelchair position. It is incredible how much can be grown in a raised bed. With the popularity of raised beds, kits that only require simple assembly are available, or you can use the plans referenced later in this article.

Master gardener and adaptive gardening consultant Toni Gattone shares many adaptive gardening ideas in her book The Lifelong Gardener. Faced with chronic back pain, she searched for ways to adapt her northern California garden. She collected considerable wisdom about assessing limitations and finding joy in the changes. In the book, Toni profiles several gardeners faced with specific challenges and how they solved them with intentional choices and tools.

Gattone has a chapter about tools available for gardeners who face physical challenges. Scooters, carts, and ergonomically designed tools reduce some of the problems caused by aging joints. Long-handled hoes and weeders can make it much easier to garden from a bench.

Share a Gardening Space with a Friend or Join a Community Garden
Another way to garden without a home garden is to share a space. Many communities have garden spaces for people who need a place to garden. Whether in a community garden or sharing space in a friend’s garden, both offer the additional benefit of social interaction and shared knowledge.
shows multiple raised bed gardens and terrlis
The Enabling Garden features an abundance of garden possibilities for making it easier to garden for all ages and abilities © Nancy Crowell Photography
See the Possibilities in Action
As spring turns to summer, you will find inspiration for adaptive gardening techniques in the Skagit County WSU Extension Master Gardener’s Discovery Garden on Memorial Highway (SR 536), west of Mount Vernon. Within the one-and-a-half-acre garden, local master gardeners have created an Enabling Garden, showcasing possibilities for people of all ages with limited physical abilities.

The Enabling Garden’s features include:

  • Smooth ground surfaces
  • Raised beds
  • Resting places
  • A display of adaptive gardening tools
  • A selection of plants chosen for their sensory attributes or space

sign showing garden tools
Many tools are available to help ease physical challenges. Long-handled hoes and weeders can make it much easier to garden from a bench.
© Ginny Bode
white rocks in raised bed garden
White stones delineate areas for the visually impaired in this raised bed in the Enabling Garden

Tripartite garden plants; wheelchair accessible.

Rather than wood chips or gravel, pavers allow visitors with walkers or wheelchairs to move about easily. The raised bed design (8-foot x 4-foot x 1-3-foot) permits the gardener to reach every inch of each bed, standing or from a wheelchair. You’ll find more information about raised beds along with plans at https://skagitmg.org/raised-beds-2023/.

One raised bed features a sitting ledge to offer a rest from work. Another bed is designed for the visually impaired and features curved streams of small white rocks separating plant clusters and plants with different textures to touch and feel. A third raised bed is divided into three parts with cutouts to push in a walker or wheelchair.

A fourth raised bed features a vertical lattice panel in the center, supporting various runner beans and clematis. The panel, located in the middle, permits tending from both sides. Square foot gardening techniques are displayed in another raised bed where 24 one-foot squares, laid out with twine, show the variety and abundance of small vegetables, herbs, and flowers that one raised bed produces.

The coordinators of the Enabling Garden choose plants for their ability to satisfy the senses of smell, touch, hearing, and taste. Kids visiting this garden say, “It’s fun to feel” the wooly lambs’ ear (Stachys byzantina), spiky lemon thyme (Thymus citriodorus), saxifrage, trailing English ivy (Hedera helix), and soft moss that flourish in the bed designed for the visually impaired. Fragrant plants throughout the garden include lilies, mint, sage, violets, and sweet peas. Herbs like lavender, rosemary, and lemon verbena can energize the gardener. You will find plants included for their sounds, too! Balloon flowers (Platycodon grandiflorus), bamboo, Chinese lantern plants (Physalis alkekengi), and honesty (Lunaria annua) provide interesting and pleasant sounds.

Within the Enabling Garden, you’ll also find a display picturing enabling tools, showing the tool and explaining how it helps gardeners use less energy and work more effectively.

These tips only touch on surface ideas to make it possible to experience the rewards of gardening no matter what physical limitations a gardener faces. The resources below dig deeper into the possibilities for gardening at any age or ability.

REFERENCES AND RESOURCES:

Eddison, S. 2010. Gardening for a Lifetime: How to Garden Wiser as You Grow Older. Timber Press Portland, OR.

Smith, E. 2011. The Vegetable Gardener’s Container Bible. Storey Publishing, North Adams, MA.

Bartholomew, M. 2018. All New Square Foot Gardening: Grow More in Less Space! Cool Springs Press, Franklin, TN.

Gattone, T. 2019. The Lifelong Gardener: Garden with Ease and Joy at Any Age. Timber Press, Portland, OR.

Ginny Bode
Ginny Bode
Anita Reetz
Anita Reetz
Madelyn Case
Madelyn Case

ABOUT THE AUTHORS :

Ginny Bode, Anita Reetz, and Madelyn Case are Skagit County WSU Extension Master Gardeners. Anita and Madelyn are the coordinators of the Enabling Garden at the Discovery Garden on SR 536 west of Mount Vernon. https://skagitmg.org/home/discovery-garden/

Questions about home gardening or becoming a Master Gardener may be directed to: Skagit County WSU Extension Office, 11768 Westar Lane, Suite A, Burlington, WA 98233; by phone: 360-428-4270; or via the website: www.skagit.wsu.edu/mg


AMGPost_header5
Hummingbird

Gardening for Pollinators

A journey of learning

              Subscribe to the Blog >

By: Patty Puckett Tingler, Skagit County WSU Extension Master Gardener

Pollen is a fine powdery substance, typically yellow, consisting of microscopic grains discharged from the male part of a flower. The term pollinator is not limited to wind, insects, animals, and butterflies. Some unexpected insects such as beetles and moths are also pollinators, performing the critical task of transporting pollen to the female parts of other plants, enabling fertilization and the production of seeds and fruit. Pollinators are vital to global crop production. According to an article published by the U.S. Forest Service, “Of the 1,400 crop plants grown around the world, i.e., those that produce all of our food and plant-based industrial products, almost 80% require pollination by animals.”

It is widely assumed that the honeybee is the predominant pollinator. However, there are many types of bees, solitary and social, and they all play a role in pollination. Typically, in a home garden, you’ll find solitary bees that are not part of a hive; however, all bees play a role in pollen distribution and pollination.

Butterfly on flower
© Patty Puckett Tingler
Island tiger moth, banded wooly bear caterpillar
The Banded Wooly Bear is the larval stage of the Island Tiger Moth. © Virgene Link-New
honeybee on blossom
A honeybee on a kale blossom Caption © Virgene Link-New

Flowers, Fruits, and Veggies

Gardeners should consider choosing plants that will provide pollinators with a variety of feeding choices all season long. Choosing early and mid-spring blooming flowers or bulbs to attract pollinators is a wise strategy. Once the pollinators have been attracted to the garden, vegetables will be bountiful all summer long. Fruit trees in blossom are ready to be pollinated. Be sure to share the bounty with birds later in the season as they were likely part of the pollinator team.

Remember to be patient. Attracting pollinators is laying the groundwork for years to come, so efforts made now will affect the garden and pollinators in the future. Watch and study your space for attractiveness to pollinators as you would for sun and shade. Neighboring plants can repel certain pollinators and you may need to move or rethink what to plant in a particular area to attract the pollinators for garden needs. Gardening for pollinators is a journey of learning and understanding.

swallowtail, butterfly
The Western Swallowtail has a lifespan of only 6 – 14 days. Caption © Virgene Link-New
hover fly
Hover fly on dahlia © Virgene Link-New

Attracting Pollinators

If you personally like scented plants then you already know which plants pollinators enjoy. In addition to scent, think of using the open face of a flower as a landing place for the pollinator to rest while gathering and distributing pollen. Whether it’s a bee, a butterfly, or a bird, rest areas will encourage different pollinators to return. In the Pacific Northwest, especially western Washington, pollinators are lured by crocosmia, coneflowers, lavender, catmint, and sunflowers to name a few. One easy-to-grow pollinator-friendly annual is lacy phacelia, also known as blue tansy. It is a beautiful lavender color, grows easily from seed, and bees will flock to this plant. Distribute the seeds around your yard and enjoy its tall, beautiful splendor.

The number of scented plants in the Pacific Northwest is quite wide, from climbing vines like honeysuckle to lavender and lilac bushes. There are plenty of native species to choose from that are drought tolerant once established such as camas, lupine, salvia, and checker mallow also known as Malva. Daisies, asters, California poppy, catmint, and sage are also pollinator-friendly plants easily grown in the PNW.

What can we do to support pollinators?

How we can best support pollinators depends on the season. In fall, it’s best to put down your rake and leave the leaves on the ground. Mother Nature will do her best to push the leaves together under shrubs or against a structure. Some pollinators burrow under these leaf accumulations to overwinter. Wait until the spring weather is warmer (above 50°F) before cleaning up the garden as the pollinators will need the warmth as they emerge from their winter habitat.

Lorquin’s Admiral butterfly © Virgene Link-New

Reduce the areas of grass on your property by adding shrubs, trees, and perennials that will provide visual interest and habitat for birds and insects. Use fewer toxins and chemicals, when possible. Pollinators need water for many purposes, including drinking, cooling, and reproduction so be sure to provide a source of shallow water near pollinator plants. Recycle pots or repurpose other containers (buckets, watering cans, birdbaths, etc.) on your patio or landscape to encourage more pollinators. Secondhand stores are full of items waiting for a reimagined purpose.

By providing backyard habitats or even a patio garden of scented, open flowers, bees and other pollinators will find your offerings. Support them by providing plants that help them do their job. Look online for native Pacific Northwest plants, shrubs, or seeds. Visit a local nursery to get plant recommendations or attend classes. Use your local library to learn more about creating or filling your garden with pollinator-friendly plants.

The more you learn about the world around you, the easier it is to live simply with our environment. Becoming aware of your environment and learning more about pollinators will open your eyes to the beauty and intricate connectivity of nature. We co-habit with and need insects, birds, butterflies, and other creatures to act as pollinators to plants to provide us with both beauty and nutrition. Our health, both physical and mental, would not exist without the efforts of the earth’s pollinators.

REFERENCES AND RESOURCES:

Why is Pollination Important ? U.S. Forest Service
Retrieved from https://www.fs.usda.gov/managing-land/wildflowers/pollinators/importance

James, D. Pollinators retrieved from https://hortsense.cahnrs.wsu.edu/pollinators/

Krischik, V. Pollinator Conservation Biocontrol: Beneficial Insects | IPM and Pollinator Conservation University of Minnesota retrieved from: https://ncipmhort.cfans.umn.edu/beneficial-insects

Zagory, E., Hetrick, K. (2016) Introducing 10 Bees and 10 Plants They Love. University of California, Davis
https://arboretum.ucdavis.edu/sites/g/files/dgvnsk1546/files/inline-files/10-bees-10-plants_0.pdf

ABOUT THE AUTHOR :

Patty Puckett Tingler

Patty Puckett Tingler is a certified Skagit County WSU Extension Master Gardener, Class of 2022.

Questions about home gardening or becoming a Master Gardener may be directed to: Skagit County WSU Extension Office, 11768 Westar Lane, Suite A, Burlington, WA 98233; by phone: 360-428-4270; or via the website: www.skagit.wsu.edu/mg

bee photo
Learn from the experts at the
Country Living Expo
& Modern Homesteading

Saturday, January 27, 2024

Learn More and Register Here >>

These Gardening Topics and More:

  • Fruit Tree Pruning & Grafting
  • Microclimates in the Garden
  • Low Maintenance Gardening
  • Roses
  • Bee Keeping
  • Soil Sampling
  • Veggie Gardening
  • Growing in High Tunnels, Cold Frames, and Unheated Greenhouses
  • Pest Control
  • Hop Growing
  • Flower Arranging
  • Know Your Native Trees
  • Introduction into Mason Bees


AMGPost_header5
010524_Header2

Help for the Vegetable Garden Novice

Tips every first-time vegetable gardener should consider

              Subscribe to the Blog >

By Anne Hays and Cathy Markham, Skagit County WSU Extension Master Gardeners 

I am a vegetable garden rookie! There, now you know.

Some of us become gardeners later than others. I grew up moving from state to state just about every year. Our family’s unique military and government-dictated lifestyle left few opportunities for gardening growing up. As an adult, I found myself living in Alaska, spending 30-plus years tending fireweed, wild lowbush blueberries, and devils-club. Now, living in the abundantly beautiful Skagit Valley, I have the time and desire to learn how to successfully plant and grow a vegetable garden. As a novice, first-time veggie gardener, I turned to my wonderful friend and fellow Master Gardener, Cathy Markham, and asked her to mentor me through the process. The following is a journal of guidance and learning with the goal of a vibrant and bountiful vegetable garden this coming spring and summer.

Think Before You Leap

As both a gardener and a chef, Cathy has been growing a cook’s garden for many years. Both her Italian grandmother, on the central coast of California, and her mother, in the high mountain desert of Idaho, grew gardens. Cathy has never known a time when her family didn’t grow, harvest, and preserve.

Cathy advises working to get the most out of your garden space. When she teaches about gardening, she advises “Think before you leap.” Answer a couple of key questions such as “What do you want to take away from your decision to garden and what kind of commitment are you honestly willing to make regarding time, dedication, and hard work?” There are no wrong answers; it is just very helpful to define your expectations.

After many, many years of experience gained from multiple acres of gardens, and knowledge collected from gardeners who have gone before her, Cathy asks every novice vegetable gardener to consider:

Do you have a space that is prepared to plant? Is the soil in need of amending? Is there adequate water and is the sunlight appropriate for your garden space?

Is your space protected from deer, rabbits, or other animals that see your garden as a free salad bar?

Are you prepared to tend your garden frequently, checking for insects and disease, weeding, tending seedlings, and then harvesting for maximum yield?

Considering these questions will help you decide if “digging in” and starting a home vegetable garden is for you. In fairness, sometimes our lives or interests can’t support the commitment of growing a garden and it is better to support a local farm stand. Gardening is just not fun when you are constantly trying to keep your plants alive in poor soil and conditions, or when you are doing the added work of trying to keep the deer and rabbits out of your garden. If you are serious about getting a harvest for delicious eating and winter storage, the answers to these questions are important.

After listening to Cathy’s advice, considering her questions, and thinking through our commitment to becoming vegetable gardeners, my partner and I said “Yes! We are ready and committed to growing our own vegetable garden.”

This past fall, we set about building a garden space, installing six vinyl-clad trough-style raised beds which were ordered from an online source.

The start of the process of building a raised bed garden on a small, city lot. © Anne Hays/Skagit County WSU Extension Master Gardener
The raised bed components delivered by the online retailer. © Anne Hays/Skagit County WSU Extension Master Gardener

Opting to use drip irrigation, we installed the necessary infrastructure and then filled the six beds with commercially distributed topsoil. Placed next to the house on the south side, three beds measure 3.5 feet by 3.5 feet. Two beds measure 2.5 feet by 8 feet and one measuring 2 feet by 6.5 feet, adjacent to the square beds with a 6-foot path and workspace in between. We plan to attach hog-wire to the house wall for trellising above the three, square beds.

The investment, not including the raised beds, came to $539.63. Once everything was in place, we invited Cathy to visit the newly minted, naked garden. She thought the raised garden beds looked great; having the potential for lots of sun, available irrigation, and plenty of space for vertical growing! Cathy suggested getting started right away by planting winter veggies such as leeks, kale, and garlic as a first foray into the veggie gardening realm.

Rookie Alert: The eight garlic cloves purchased were about six more than most any household needs. Cathy happily adopted the surplus garlic for her garden. Then she quietly pointed out that the leeks, which by then, looked more like bunches of scallions, needed to be separated from their clumps to grow with adequate space. Who knew?

The raised bed components assembled and ready for DIY drip system installation. © Anne Hays/Skagit County WSU Extension Master Gardener
The finished garden beds ready for planting. © Anne Hays/Skagit County WSU Extension Master Gardener
The Next Step – Planning What to Grow
Here again, Cathy’s advice, based on years of experience and research-based learning, was invaluable-she helped us decide what to grow; when to grow; and whether to buy starts versus seeds. Her advice is to grow what you love to eat. Okay, then not so many cukes since my partner is not a fan. Cathy recommends a wonderful book: Grow Cook Eat by Willi Galloway as a starting point for garden planning.
Starting with Seeds Versus Buying Plant Starts
Locally grown plant starts are a reliable way to get up and running. But spending time with seed catalogs is enthusiastically encouraged! Some favorites are provided in the references below.

The next steps will include getting together during the cold and dark winter months for tea or warm cider to go through seed catalogs and map out the garden planting. Raised bed experts recommend growing tomatoes on a trellis, and weaving in other climbers, such as beans, on the same trellis to efficiently utilize the space. It is key to plant at the right time – don’t start too early!

Here are some of the guiding principles Cathy encourages new gardeners to lean on:

Grow what you love to eat.

  • You have a lot of choices for what to plant in your vegetable gardens but the best choices are the ones you or your family are actually willing to add to your diet and eat. You are more likely to put the work into the garden and harvest for foods you love to eat.

Start small and be successful with easy-to-grow plants.

  • A very small garden can be very productive and rewarding. It gives you a chance to experiment with plants, maybe one tomato plant or eggplant. Greens, bush beans, cherry tomatoes, carrots, and herbs are an easy way to start. Choose bush and dwarf varieties for small spaces so you won’t have to worry about staking. If you have vertical space, climbing vegetables are great; these include peas, beans, cucumbers, indeterminant tomatoes, and now several new varieties of squash have been developed which grow vertically in small spaces.

Grow nutrition-rich and versatile choices.

  • Adding nutrient-dense vegetables to our diet is always a plus! Dark leaved greens like kale, spinach, and chard; rich dark root vegetables like beets and carrots; peas and beans, garlic, onions, leeks, and shallots; broccoli or broccolini; and tomatoes!

Grow what is expensive to buy or is not as flavorful when you buy it.

  • This is especially true of herbs which are easy to grow for the most part and make a huge difference in food preparation. Tomatoes and English peas (shelling peas) are examples of vegetables that are so much better fresh from the garden. Potatoes and corn are plentiful and readily available, so you may choose to skip giving up the space it takes to grow them.

Decide what “mountains to die on.”

  • Based on your time and patience, decide what you are willing to deal with in your garden. For example, you may choose not to grow many vegetables from the cabbage family because you are not willing to deal with the bugs and worms that they attract. You may choose instead to grow broccolini, a short, early-season vegetable, or maybe Kalettes (a cross between kale and Brussels sprouts) because they are fun. You can buy what you choose not to grow at a farmer’s market.
  • We live in an area where an excellent choice of vegetable starts is available. If you have a new garden, this is a big boost to success because you don’t have to deal with the germination of seeds. Beans are the exception here, they do best when grown from seed. The plus for growing from seed is the huge variety of available seed sources. This may not be a priority for new gardeners.

Grow organic as much as possible.

  • The better you take care of your garden the less you will need to use any chemicals on it. Keep the garden clean of weeds, and mulch to keep the weeds down and the soil moist. Keep the pathways clean also; weeds and grass are very difficult to manage when they grow big. It is easier to pick them small, not letting the weeds compete for nutrition. Thinning your growing plants appropriately will cause them to grow strong and able to survive the normal garden bugs. Use a foliar spray made of a mix of kelp concentrate and fish emulsion for fertilizing. Water the plants consistently so they do not become compromised and weak, which leads to disease.

Begin at the right time – don’t start too early.

  • It is so tempting to get the seeds or plants in the garden early. The first sunny day seems warm enough surely we are done with the cold weather! Garden success comes from resisting this temptation. It isn’t a competition with anyone else, or a race to see who can get the earliest peas. Take the time to prepare the gardens, clean out the flower beds, and pace yourself. This may not suit some, but except for garlic, which gets planted in late October, and leeks and shallots in March, planting can wait until April for the cool spring crops, and everything else until mid to late May. Wait patiently until late May and or even early June to plant tomatoes, eggplant, peppers, and tender herbs like basil. Until the soil is warm, so many plants just shiver and sit. But if you wait until the soil is warm, seeds will germinate quickly and plants are stronger. A compromised plant may not ever get back the vigor of one that has not been traumatized by the weather!

Commit to what you start, that is – take care of your garden. And have fun!
As winter turns to spring, we will meet, talk, plan, and put these guiding principles into action. We plan to continue with a follow-up blog post in spring to report back about our plans and decision process. We promise, you’re going to want to learn more about our garden pest-repelling strategies.
The end goal - Cathy Markham's garden yields an abundance of fresh produce for eating and preserving. © Cathy Markham / Skagit County WSU Extension Master Gardener
The end goal – Cathy Markham’s garden yields an abundance of fresh produce for eating and preserving. © Cathy Markham / Skagit County WSU Extension Master Gardener

REFERENCES:

Galloway, W. (2012). Grow Cook Eat: A Food Lover’s Guide to Vegetable Gardening. Seattle, WA. Sasquatch Books.

Raymond, D. (1983) Joy of Gardening. North Adams, MA. Storey.

Damrosch, B. (2008) The Garden Primer: The Completely Revised Gardener’s Bible. New York, NY. Workman Publishing Company.

LeHoullier, C. (2014). Epic Tomatoes. North Adams, MA. Storey.

Robinson, Jo. (2014). Eating on the Wild Side. New York, NW. Hachette Group.

Miles, C. (2013). WSU Home Vegetable Gardening in Washington. Washington State University Extension Publication #EM057E. https://pubs.extension.wsu.edu/home-vegetable-gardening-in-washington-home-garden-series.

This is a non-inclusive list of seed purveyors to consider:

Renee’s Garden Seeds, www.reneesgarden.com
For some varieties of seeds, Renee’s offers combination packages of two or three types of seeds, dyed so you can differentiate. This is especially nice for variety without planting a huge garden. The tri-color beans and three variety zucchinis are particular favorites.

Italy-Franchi www.growitalian.com

Territorial Seed Company https://territorialseed.com/

Johnny’s Selected Seeds Company https://www.johnnyseeds.com/

bee photo
Learn from the experts at the
Country Living Expo
& Modern Homesteading

Saturday, January 27, 2024

Learn More and Register Here >>

These Gardening Topics and More:

  • Fruit Tree Pruning & Grafting
  • Microclimates in the Garden
  • Low Maintenance Gardening
  • Roses
  • Bee Keeping
  • Soil Sampling
  • Veggie Gardening
  • Growing in High Tunnels, Cold Frames, and Unheated Greenhouses
  • Pest Control
  • Hop Growing
  • Flower Arranging
  • Know Your Native Trees
  • Introduction into Mason Bees

Anne Hays

Cathy Markham

ABOUT THE AUTHORS:

Anne Hays and Cathy Markham are certified Skagit County WSU Extension Master Gardeners, Class of 2022. Cathy has a degree in food and nutrition from the University of Idaho and is a Registered Dietician. Her vegetable garden has been featured in the Seattle Times Sunday Magazine.

Questions about home gardening or becoming a Master Gardener, may be directed to: Skagit County WSU Extension Office, 11768 Westar Lane, Suite A, Burlington, WA 98233; by phone: 360-428-4270; or via the website: https://extension.wsu.edu/skagit/mg/


AMGPost_header5
seedlings, vegetable starts, indoor growing,

Turn the Dark Days of Winter into a Spring Planting Advantage

Start an indoor grow stand and you’ll be enjoying homegrown salad before you know it

              Subscribe to the Blog >

By Kay Torrance, Skagit County WSU Extension Master Gardener

The Pacific Northwest offers unique challenges for gardeners. In the fall the endless summer comes to an abrupt end, with daylight decreasing over three minutes a day from mid-August into early November. As the winter solstice arrives on December 21st there are only 8.5 hours of daylight. We can’t change that, so let’s start a project. 

Want to grow herbs and vegetables in the middle of the winter? Want to get a jump on spring gardening by starting vegetables indoors to plant outside after the last frost? Do it with an indoor growing stand. It can be as simple as hanging a light from the ceiling and placing a few trays on a table. Prefabricated kits are available in all shapes and sizes, or build your own. Many Master Gardeners use their grow stands year-round. In the summer it is great for starting fall vegetables, and flowers, or to protect tender plants such as basil from outdoor insects and slugs.

Find a Suitable Location
Gardeners naturally want to place their grow stand near a window. However, with good artificial lighting, you can use a dark corner, unused room, or heated basement. Unused kitchen counters or shower stalls also work well.

Grow stands look tidy, but you are working with dirt and water. Locate them away from carpets and wood floors. Office chair mats work well to protect delicate floors. Hang a white shower curtain behind the stand to keep the wall clean and reflect light. If you are setting the stand on a table, use a vinyl tablecloth. For wood tables, make sure the trays are not touching the wood as the heat and humidity will damage the finish. Locate the stand near a power source for the lights and heating pads. Plants add moisture to the air, so make sure you have good ventilation to keep you and the plants healthy. 

1020 flat, 6-pack, seed starts, dome
1020 flat of 6-pack cells under a dome ready to start germination on a heat pad. Seeds must not dry out during germination. © Photo by Kay Torrance
1020 flat, romaine, lettuce, Box choy, spinach, parsley
1020 flat of one-month-old romaine lettuce, Bok choy, spinach, and parsley (back right). Ready for transplant into 3 1/2-inch pots except for the parsley. © Photo by Kay Torrance
Sizing Up Your Stand
Think about the size needed to match your growing goals. 3.5-inch square pots often work well as a final size. Once the plant outgrows the 3.5-inch pots, the plant is either harvested or ready to go outside. The most common greenhouse tray size is 10 by 20 inches, commonly called a 1020 tray. One tray holds 18 3.5-inch pots, or 12 6-plug trays (72 plugs total), or eight 5-inch pots. If you only have room for one tray, herbs are a great choice. If you have two trays, lettuce, spinach, fennel, and microgreens are good options. If you have four trays, you have room for a dedicated seed starting tray, while the other three trays are staggered to produce enough salad to feed two people.

Once you have an idea of the size, it is time to decide whether to purchase a kit or build your own. If you decide to purchase a kit, there are many options available; some fit on a small tabletop, others are large tents that are mini-indoor greenhouses. Save money by repurposing shelving and lights or by building your own out of pipe or wood.

3.5" pot, parsley, seed start, vegetables
6-pack cells of flat and curly parsley at eight weeks. Ready for transplant to 3.5″ pot. © Photo by Kay Torrance
test
1020 flat of two-month-old romaine lettuce and three-month-old parsley in 3.5″ pots. Ready to start harvesting. © Photo by Kay Torrance
Building a DIY Grow Stand
The easiest way to get started is to hang a grow light from the ceiling, throw a vinyl tablecloth over a table, and put up a section of shower curtain to protect your wall if needed. Add a heat pad and you are ready to go. Hanging lights from the ceiling gives the most flexibility for lighting with unlimited options for height above the plants. If you don’t want holes in your ceiling, a lighting support can be built using shelving, or a frame from PVC, metal conduit, iron pipe, or wood. Think about things you already have that can be repurposed. Sawhorses or a six-foot ladder can make a good light stand support.

Repurpose common household items for your light support. Pictured here is a spare sawhorse. © Photo by Kay Torrance

PVC is easy to work with and has lots of joint options. If you search online, many design plan options are available. Some guidance recommends against using PVC cement on the joints so the racks can be easily disassembled for storage; however, this can result in a wobbly stand. One alternative to gluing is to drill a small hole in the joint and insert a screw.  This allows for disassembly but does not allow pieces to come loose while you are using the stand. (PVC does not accept most paints so don’t expect to hide the bright white pipe with paint.) Using threaded metal plumbing pipe creates a heavy/sturdy stand with a steampunk look, but the pieces are more expensive than PVC. Threaded metal pipe is available in many lengths so you don’t have to cut it. The threads make for easy assembly. Metal pipe can be painted, and you can disassemble it for storage.

For shelving, plywood is readily available and sold in small pieces, called project panels, at home improvement stores. Often, stores will make cuts for you. Use at least 5/8-inch-thick plywood because thinner pieces will sag over time. Countertop remnants are a sturdy and waterproof alternative. I have found that two-inch foam board insulation panels are easy to use. These panels are inexpensive, lightweight, and can be cut with a utility knife. They are also waterproof, and are available in two-foot by two-foot precut panels, which will hold two 1020 trays. Foam board can also be used on a tabletop to protect the surface from heat and moisture emitted from the heat pad and trays.

Selecting Lighting for Your Grow Stand
Grow stands need a good source of artificial lighting, ideally lights that produce a full spectrum of high-intensity light for rapid plant growth. Leafy greens and herbs need around five hours of direct sunlight each day. Most garden vegetables need up to 14 hours of light each day.

Fluorescent or LED tube lights are an inexpensive alternative to a plant or grow light. Florescent lights give off some heat, which is beneficial to plants, but the glass bulbs can be easily broken. LED grow lights produce the highest intensity light but are the most expensive. They are also more energy efficient and rated for long life. Incandescent lights are not a good choice because they use much more energy and generate a lot of heat which can dry out leaves.

Setting Up the Lighting
Fluorescent lights should be hung one to three inches above the plants. The tubes need to fully cover the plant trays. Choose a fixture with four to eight bulbs or mount multiple fixtures side by side to ensure coverage. Fluorescent bulbs sold for home lighting are not as intense as grow lights and will need to be turned on longer each day. Plan on 8-10 hours of light a day for herbs and leafy greens, and 12 to 14 hours for vegetable starts if you are using fluorescent lights.

LED grow lights are placed 10 to 30 inches above the plants. Follow the manufacturer’s directions. Box-shaped LED grow lights are easy to work with. The added height of the light above the plants increases the overall height of a grow stand; however, it is easier to water and tend plants without moving trays. Plan on six hours of light a day for herbs and leafy greens and eight to ten hours for vegetable starts. When selecting an LED grow light, be mindful of the color of the light. Blues and reds are great for plant growth, but if your stand is in the living room, you might not enjoy being bathed in a purple glow.

Experiment and adjust the height of the lighting and duration based on your specific setup. All lights generate some heat. Make sure the lights have adequate clearance per manufacturer’s directions and keep an eye on your plant growth so the plants don’t grow into the lights. When purchasing lights, compare all the features. Some fixtures have outlet plugs for connecting multiple lights. Some of the grow lights have built-in fans which keep the lights cool and provide some air circulation for the plants. The fans do generate noise.

Heating Pad Selection and Use
Make sure to size the pad to cover as much of the footprint of the plant tray(s) as possible. Place the plant tray on top of the pad. Do not put the pad inside the tray with the plants directly on top of it as the pads are not designed to be in direct contact with water. Often heat pads are sold rolled up in boxes. At room temperature, the pads are stiff. Before unrolling a pad, plug it in and let it warm up. Forcing them flat can break the heating elements inside.
Trays, Domes, and Pots
Using standard 1020 greenhouse trays makes pot sizing easy because many pots sold are designed to fit in the trays. Select the trays without holes in the bottom. Use a dome (plastic cover) for starting seeds.  If seeds dry out during germination, it will kill them. Use 6-pack cells to start the seeds and 3½-inch pots after the plants outgrow the cells. When starting vegetables with large seeds like squash or cucumbers, begin with 3½-inch pots. You may want several small trays if you are growing microgreens. It is important to sterilize trays and pots if you are reusing them.
Growing Media and Fertilizer
Always use sterilized growing media. This will help prevent dampening off as well as fungus gnats. Use a water-soluble fertilizer designed for vegetables per the manufacturer’s directions.

Important Safety Considerations:

  • Hang lights with appropriate clearance following the manufacturer’s recommendations.
  • Make sure lights are properly supported. If you are attaching eye bolts connected to the ceiling, make sure they are affixed to the ceiling beams and not just into drywall or other materials where the screws could pull out.
  • Make sure to use UL rated lights, heat pads, and surge protectors.
  • Make sure that any electrical components that require grounding (3-prong plug) are properly grounded.
  • Protect wood surfaces from heat and moisture or you can ruin the finish or warp the wood.
  • If using shelving, attach the shelving to the wall so that the stand isn’t accidentally knocked over.

Two types of timer controls.  The light controller on the left has a single outlet.  The model on the right has four switched outlets for lights and four additional untimed ones for heat pads and other uses. © Photo by Kay Torrance
Two types of timer controls. The light controller on the left has a single outlet. The model on the right has four switched outlets for lights and four additional untimed ones for heat pads and other uses. © Photo by Kay Torrance
UL rated LED grow light with fan and plug outlet. © Photo by Kay Torrance
Accessories to Make the Process Easier
Adding a timer to your lighting to ensure consistency is highly recommended. Even the most organized gardener will forget to turn on or off the lights sometimes, especially if the grow stand is located in a basement or out-of-the-way area. Make sure the timer accommodates the three-prong grounded plugs used by plant lights. Some timers are also surge protectors with multiple outlets controlled by the timer. The heating pad needs to be plugged into an outlet, not on a timer. A small oscillating fan provides good ventilation, reduces fungal problems, and the motion helps strengthen the plant stems as they grow. A set of pulleys allows quick and precise adjustments to the height of the lights.
Selecting What to Plant
As a rule of thumb, plant what you like to eat. However, avoid vegetables that take a long time to grow, keep well, and are inexpensive to purchase. Concentrate on herbs and greens that are best eaten fresh. For detailed information and a planting calendar, read the WSU Home Vegetable Gardening in Washington for help selecting vegetables, learning how to harden and transplant starts, and growing them until harvest.

If you are growing plant starts to transplant outdoors, start seeds around eight weeks before the last frost date. Per WSU AgWeatherNet, the last frost for Skagit Valley is generally in May, so March is a good time to plant indoors. Temperatures in many areas vary due to micro-climates, so experiment to see what works for you

Tabletop grow stand with lights suspended from the ceiling. A shower curtain liner and vinyl tablecloth protect the surroundings from water and dirt. © Photo by Kay Torrance
Plastic shelving used for stand.  © Photo by Kay Torrance
Plastic shelving used for stand. © Photo by Kay Torrance

Bok choy pulled from a 6-pack cell to check root growth. Ready for transplant to 3.5-inch pot. © Photo by Kay Torrance

Starting Seeds
Plant each 6-pack with the same or similar seeds. Some plants like parsley will stay in the 6-pack for four to six weeks whereas lettuce will need to be transplanted in two to three weeks. Twelve 6-packs will fit in one 1020 tray – that is 72 plants! It is easy to get carried away and outgrow your grow stand. Think of how many of each plant you want. You may only need two parsley plants but a dozen lettuce plants. Plants grow at different speeds. Check days to harvest on the seed packets. For each tray, I will usually plant three 6-pack (18 cells) that will grow into 18 four-inch pots. I use small trays to plant microgreens to fill the remaining space as they will be harvested before they need to be moved to larger pots.
Transplanting and Harvest
It will take 5-14 days for seed germination. Some seeds will germinate faster if you soak them in water first. Follow directions on the seed packet and research specific germination information from various seed companies. Growth rates will vary based on your temperature, light, and fertilizer. The young plants should be ready to transplant to 3 1/2-inch pots around three to five weeks from germination. If you are unsure if your starts are ready for a larger pot, carefully pull one plant out of the container and look at the roots. Parsley and spinach seem to take forever whereas lettuce, Bok choy, and tomatoes grow really fast. Look for well-formed roots starting to emerge from holes in the plugs or pots.

Grow light results © Photo by Kay Torrance

When harvesting, take only what you need for a meal and leave the rest on the plant, using the come-and-come-again method. Harvest the older/outer leaves leaving the young leaves for later. This provides enough foliage to keep the plant healthy and prolong your harvest time. When the plants become too big for the 3.5-inch pots, it is time to transplant them or harvest all the leaves and start over. It is great to stagger crops so you are always in fresh greens.

Questions or Comments
Have fun making the most of the dark days of winter with an indoor grow stand. If you have questions or concerns, add them in the comments section below and members of the Skagit County WSU Extension Master Gardener Plant Clinic team will be happy to answer, or visit a plant clinic in person.

REFERENCES:

VanDerZanden, A. (2008). Environmental factors affecting plant growth. Oregon State University Extension. Retrieved from https://extension.oregonstate.edu/gardening/techniques/environmental-factors-affecting-plant-growth

Wooten, H. (2020) Artificial Lighting for Growing Vegetables at Home. University of Florida/IFAS Extension Orange County. Retrieved from https://blogs.ifas.ufl.edu/orangeco/2020/04/09/artificial-lighting-for-growing-vegetables-at-home/

Miles, C. (2013). WSU Home Vegetable Gardening in Washington. Washington State University Extension Publication #EM057E. Retrieved from https://skagitmg.org/wp-content/uploads/Public-Pages/Food%20Gardening/Food%20Gardening%20Library/WSU%20Bulletin%20EM057E%20Home%20Vegetable%20Gardening.pdf

Planting Calendar from WSU Home Vegetable Gardening in Washington https://skagitmg.org/wp-content/uploads/2023/03/Planting-Guide-Calendar-Final-2023-03-15.pdf

Grabowski, M. (Reviewed 2018), How to prevent seedling damping off. University of Minnesota Extension. Retrieved from https://extension.umn.edu/solve-problem/how-prevent-seedling-damping

Pennisi, B. (Reviewed 2022). Growing Indoor Plants with Success. University of Georgia Extension Retrieved from https://extension.uga.edu/publications/detail.html?number=B1318&title=growing-indoor-plants-with-success

Peronto, M., Wertheim, F., Fournier, E.(Rev. 2021) Starting Seeds at Home. Bulletin #2751, University of Maine Extension. Retrieved from https://extension.umaine.edu/publications/2751e/

Skagit County WSU Extension Master Gardener Grow Your Own Food Website
https://skagitmg.org/home/food/
Skagit County WSU Extension Master Gardener Publication Library
https://skagitmg.org/home/library/
bee photo
Learn from the experts at the
Country Living Expo
& Modern Homesteading

Saturday, January 27, 2024

Learn More and Register Here >>

These Gardening Topics and More:

  • Fruit Tree Pruning & Grafting
  • Microclimates in the Garden
  • Low Maintenance Gardening
  • Roses
  • Bee Keeping
  • Soil Sampling
  • Veggie Gardening
  • Growing in High Tunnels, Cold Frames, and Unheated Greenhouses
  • Pest Control
  • Hop Growing
  • Flower Arranging
  • Know Your Native Trees
  • Introduction into Mason Bees


ABOUT THE AUTHOR:

Kay Torrance has been a Skagit County WSU Extension Master Gardener since 2019. She is garden coordinator of the Naturescape garden and pond in the Discovery Garden on SR 536 west of Mount Vernon. https://skagitmg.org/home/discovery-garden/

Questions about home gardening or becoming a Master Gardener, may be directed to: Skagit County WSU Extension Office, 11768 Westar Lane, Suite A, Burlington, WA 98233; by phone: 360-428-4270; or via the website: https://extension.wsu.edu/skagit/mg/


AMGPost_header5
These raised beds in the Discovery Garden show the multiple advantages of raised bed gardening.© Photo by Nancy Crowell / Skagit County WSU Extension Master Gardener

Gardening with Raised Beds

Raised Beds Provide Many Advantages to Home Gardeners

              Subscribe to the Blog >

Editor’s Note: 
As the daylight hours continue to wane, many gardeners turn their attention to planning for next season. Some of us even have a Christmas wish list which has been known to be filled with tools and even projects that will enhance our gardening endeavors. For this reason, the Ask a Master Gardener Blog editors are reprinting a favorite article, complete with plans, a materials list, and updated references which answer one of the most asked questions at plant clinics and market kiosks —“How do I build a raised bed garden?”

_  _  _ 

By Dave Buchan, Skagit County WSU Extension Master Gardener

Want to grow better vegetables but concerned about poor soil quality in your garden plot? Are you frustrated with continually trying to amend your soil for better growing but getting nowhere? Do you have site conditions or drainage problems that prevent establishing a good garden? Your solution might be gardening with raised beds.

What is a Raised Garden Bed?
A raised bed is really nothing more than a device containing a vertical column of quality soil to create the best possible growing conditions for your garden. Raised beds can vary greatly in size, but typical garden beds are generally 12 to 24-inches in height and about 4-feet in width. Your ideal width may vary, but a 4-foot width is a dimension that most gardeners use because you can easily tend half the garden from one side, and then the other half from the other side. Length can vary depending on space and site conditions. Some gardeners choose raised beds up to 16-feet long.
Why Use Raised Garden Beds?

Two beds, at different heights, add interest to the garden. © Photo by Nancy Crowell / Skagit County WSU Extension Master Gardener

Raised beds offer many advantages for gardeners. Most importantly, raised beds allow you to control the quality of your soil. Soil quality is the number one consideration for successful gardening. The second major advantage of raised beds is that you can garden without getting down on your hands and knees to tend your garden. For older gardeners, this is a real benefit and can make gardening more fun. Placing a wood or metal “seat rail” on top of each side of the raised bed allows you to sit on the edge of the planter for easier weeding or tending.

Another advantage with raised beds is that with bed sidewalls exposed to the sun, soil temperature in the beds can be slightly higher than with a normal garden. And surprisingly, a simple degree or two in soil temperature can make a big difference in the growth of your plants.

Other benefits of raised beds are that: (1) vegetables can be planted a bit closer together and thereby a better yield per square foot of garden space, and (2) raised bed soil will not be as compacted as normal garden soil. There are no rows between plants that are walked on and no wheelbarrows traveling over to compact the soil. Less compaction means more fertile soil for better plant growth.

What Types of Raised Beds are Commonly Used?
Raised beds are made from many materials: stone, concrete block, concrete riprap, treated or plain lumber, galvanized steel panels, railroad ties, and more. Whatever material is used the structure needs to be strong and durable. You can imagine that a well-watered 18 to 24-inch high column of soil carries a lot of weight, especially laterally. So, your “container” needs to be strong enough to support that soil weight. If you’re not too handy, there are raised bed kits available online and in some box stores. These kits can vary in quality and durability, so take care choosing a unit that will work for the long haul.

If money is no object, you can buy commercial galvanized steel feed troughs as your raised bed. They come in a variety of sizes and are sturdy, good-looking, and will last years. Simply drill a series of ½ inch holes in the bottom for good drainage and VOILA! -a great raised bed.

More likely, you will choose to make your raised beds using materials that are commonly available from local stores or surplus outlets, such as treated or kiln-dried lumber, concrete block, concrete riprap, stone, or galvanized steel panels.

A completed raised bed awaits installation of weed cloth and galvanized hardware cloth at the bottom of the bed interior. © Photo by Nancy Crowell / Skagit County WSU Extension Master Gardener

Material Considerations
Concrete block: Concrete block can make a good raised bed, but you need to be prepared to spend some time tweaking and adjusting rows of blocks. You need to start with a level site. Blocks are heavy to work with and even a slight change in ground level on the first row can translate to a bigger problem on the second row. This requires patience and some determination to get it right.

Stone or riprap concrete: If you have a supply of stone or riprap to use, great. But this can be heavy work and you need to be careful with stacking stone or concrete to create a solid structure that will last.

Treated or kiln-dried lumber: All wood will eventually rot, even treated wood. Whenever wood is in contact with soil, wood will begin to deteriorate. Especially at today’s lumber prices, you want your investment in a raised bed to provide years of reliable service. There are techniques to add to the life of wood used in raised beds, which are discussed in the website materials described below. Caution: Chemicals used to treat lumber can leach into the soil and contaminate the plants being grown.

A raised bed complete with successful plantings. © Photo by Nancy Crowell / Skagit County WSU Extension Master Gardener

Corrugated galvanized steel panels: From both a cost and durability perspective corrugated galvanized steel side panels with treated wood corner posts and treated wood seat rails are sturdy and long-lasting. The steel panels are lightweight and easily cut with metal shears, skill saw or jig saw with metal cutting blades. These materials are available at almost any hardware or box store. The galvanized steel sidewalls will last many years and will not leach chemicals into the soil as can some treated wood. Placing a treated 2-foot by 6-foot board horizontally across the top of each sidewall creates a handy seat for use when weeding and tending your garden.

If you’d like to learn more about how to build this raised bed, download the pdf here> which includes detailed “how to” information, complete with construction diagrams, instructions, materials list, and cost estimates for a typical 4-foot by 8-foot by 2-foot-high raised bed.

REFERENCES:

Boeckmann, C. A step-by-step guide to building an easy DIY raised garden bed. Updated July 26, 2023. https://www.almanac.com/content/how-build-raised-garden-bed/

Cogger, C. Raised beds: will they benefit your garden. https://pubs.extension.wsu.edu/raised-beds-deciding-if-they-benefit-your-vegetable-garden-home-garden-series

Faust, A. Finlay, E. How to Construct a Raised Bed in the Garden. July 5, 2023. Penn State Extension. https://extension.psu.edu/how-to-construct-a-raised-bed-in-the-garden

ABOUT THE AUTHOR:

Dave Buchan has been a Skagit County WSU Extension Master Gardener since 2012.

Questions about home gardening or becoming a Master Gardener, may be directed to: Skagit County WSU Extension Office, 11768 Westar Lane, Suite A, Burlington, WA 98233; by phone: 360-428-4270; or via the website: https://extension.wsu.edu/skagit/mg/


AMGPost_header5
111723_Header2

Season Extenders

These practices can extend the growing season by as much as two to four weeks.

              Subscribe to the Blog >

By Hallie Kintner, Skagit County WSU Extension Master Gardener

Every spring and fall gardeners commiserate over what feels like a short growing season. Our area has between 200 and 230 growing days,1 whereas locations in southwest Washington can have as many as 50 additional growing days. Here in Skagit County gardeners successfully extend the growing season by using what is called season-extending practices. These practices are quite common in colder climates and can lead to larger plant starts in the spring, earlier harvests, and a longer growing season in the fall. Some add to the growing season as much as two to four weeks in both the spring and the fall.2

This cover stores flat and pops up to form a cylinder around a container or a plant to keep it warm and protect against the wind.  The top mesh unzips for ventilation and rainfall. Photo © Hallie Kintner
This cover stores flat and pops up to form a cylinder around a container or a plant to keep it warm and protect against the wind. The top mesh unzips for ventilation and rainfall. Photo © Hallie Kintner

Spring and fall weather in our area can see nighttime temperatures drop into the 50° F and even into the 40° F range, making the soil temperatures fall below the optimum for some vegetables and early-season fruits like strawberries. Few plants grow well when temperatures drop below freezing.

To extend the growing season and enjoy the bounty of the garden longer, these are some of the methods Skagit County WSU Extension Master Gardeners use in the Discovery Garden on Hwy 536 west of Mount Vernon.

Raised beds
In addition to the many advantages raised beds provide, they extend the garden season. The soil in raised beds warms earlier in the spring and maintains its warmth later in the fall.

Cold frames
Resembling low-walled raised beds, cold frames are bottomless boxes with clear glass or plastic lids attached by a hinge. The lid can be opened or closed depending on the temperature. Cold frames protect plants from wind, rain, ice, snow, and cool temperatures. The hinged lid is opened on warmer days when it becomes too hot inside for the plants and closed again in the evening. Cold frames also have a long history of being used for starting seeds or hardening off plants before planting in the garden. 3

Cold frames should be placed on well-drained soils with southern exposures. Interior temperatures are warmed by the sun heating the frame and soil. With the addition of an external heating element like electric heating cables, a cold frame can become a hot frame.

Cold frames work especially well for growing cool-season crops like lettuce, radishes, and spinach in the spring. Start cool season vegetables in late summer with the cold frame lid open and then, as summer moves into fall and the nights become cooler, close the lid to retain warmth.

Winter Sowing Cloches

Milk jugs or other plastic containers can be used as miniature greenhouses for starting seeds in winter, getting a jump on spring planting. Our 12/22 blog explains this technique at https://skagitmg.org/winter-sowing-technique/

Cloches
These covers act as miniature greenhouses for individual plants. The word “cloche” is a French word meaning a bell-shaped cover. A cloche can be a glass jar or a translucent plastic milk jug, cut in half and placed over an entire plant. As with cold frames, when using a cloche be certain to allow ventilation as the temperature increases. Glass or plastic cloches can protect against wind, weather, and even snails and slugs.

Water-filled tomato protectors are another type of cloche. They are plastic cylinders consisting of water-filled tubes that are placed teepee-style around individual young plants. The protectors act like an igloo to protect heat-loving transplants like tomatoes, peppers, cucumbers, melons, and eggplants early in the season. The sun warms the water in the cells during the day, and the heat is released slowly during the night. The tomato protectors can be removed when the plants grow outside the cylinder and the weather improves. They can protect down to about 16° Fahrenheit. 4

These row covers in the Discovery Garden allow rain to go through them while protecting against cold temperatures and insects. Photo © Kay Torrance
Floating row covers
Row covers are synthetic fabrics placed on top of a plant row or raised bed. They allow rain to go through them while protecting against cold temperatures and insects.5 Unlike the cold frames and cloches, row covers don’t protect against deer and other critters. Use garden staples or soil pins to anchor row covers, keeping them in place during windy conditions.

The synthetic fabrics used for row covers are available in different thicknesses corresponding to varying levels of light transmission and cold insulation. Light-weight row covers transmit 80%-90% of the light but are easily torn and do not protect against frost. Medium-weight row covers protect to 28° Fahrenheit and transmit 85% of available light. Heavy-weight row covers transmit only 35-50% of the light but can protect to 24° Fahrenheit. Heavy-weight covers are best for frost events; remove them after the temperature rises. 

If the plants you are growing need pollination by insects, such as cucumbers, squash, and pumpkins, remove the covers after the plants bloom so that the insects can reach the flowers.

Unfortunately, strong winds can blow away floating row covers and damage tender plants. To solve this, many gardeners attach the fabric to temporary arched structures. These supported row covers consist of row cover fabric draped over and attached to bent tubes or rods, forming a hoop tunnel or a ribbed framework. The ends of the row cover are opened to allow ventilation to enter where the fabric is gathered and secured. The tunnel can be opened on warm, sunny days and then closed overnight.

Tunnels can be low, only 2-3 feet tall for a row of low-growing plants like greens or a raised bed.6 Low tunnels are best for low-growing, heat-tolerant plants including strawberries, melons, herbs, certain cucumbers, and greens.

If fungal diseases are an issue, plastic sheeting can be draped over the hoops to replace the row cover fabric. The resulting tunnels protect plants from the rain6 but the plants will require irrigation and will be warmer than the row cover fabric.

Tunnels can also be tall enough for an adult to stand (high tunnels). Many commercial high tunnels are too large for home gardeners because they are meant for the plants to be grown in the ground. 7 High tunnels for home gardeners are often temporary structures constructed of plastic or fabric draped over a metal ribbing and attached to a short, wooden wall as a foundation.  Both high and low tunnels are typically unheated and without access to electricity.

Gardeners often get creative when it comes to protecting early season tomato starts. Collected on a garden cart, these starts enjoy a sunny spring day, and then are easily moved back into the garage in the evening to protect from cooler overnight temperatures.Photo © Kay Torrance
By loosely laying plastic over the garden cart in the evening, some of the heat captured is heat is retained into the evening hours. Photo © Kay Torrance
Greenhouses
The king of season extenders is the greenhouse. These permanent structures consist of glass or plastic panels built into wood or metal frames usually on a foundation. To provide a warm, moist environment, greenhouses need power for ventilation and lights, drainage, and benches along with garden equipment. A greenhouse is a major investment of resources and requires careful planning. 3  

The purpose of all-season extenders is to protect plants from the cold weather by trapping heat from the sun, keeping plants and soil warmer as the outside temperatures drop, and protecting them from the elements. Try some of the techniques outlined here and you will reap the benefits from an extended growing season.  

REFERENCES:

  1. McMoran, D. (2015) Skagit County Washington State University Extension Agricultural Statistics. https://extension.wsu.edu/skagit/agriculture/
  2. Steil, A. (2023) All about cold frames. Iowa State University. https://hortnews.extension.iastate.edu/all-about-cold-frames
  3. Hamilton, M., Werlin, J., Boone, K., & Austin, G. (2022) An introduction to season extension for high-altitude, short-season gardens. University of Idaho Extension BUL936, September 1, 2022. https://www.uidaho.edu/extension/publications/publication-detail?id=bul0936
  4. Hodges, L., (2007) Early Season Extension Using Hotcaps. University of Nebraska-Lincoln Extension G1745.  https://extensionpublications.unl.edu/assets/pdf/g1745.pdf
  5. Parker, J., Miles, C., Murray, T., & Snyder, W. (2012) How to install a floating row cover. Washington State University Extension Fact Sheet FS089E, 2012. https://pubs.extension.wsu.edu/how-to-install-a-floating-row-cover-home-garden-series

Hallie Kintner

ABOUT THE AUTHOR:

Hallie Kintner is a Skagit County WSU Extension Master Gardener, Class of 2020. She is a member of the Community Outreach and Education Committee and enjoys working in the vegetable garden at the Discovery Garden on Hwy 536 west of Mount Vernon.


Questions about home gardening or becoming a Master Gardener, may be directed to: Skagit County WSU Extension Office, 11768 Westar Lane, Suite A, Burlington, WA 98233; by phone: 360-428-4270; or via the website: https://extension.wsu.edu/skagit/mg/


AMGPost_header5
100823_Header2

Seed Saving and Sharing

Open the door to learning about plants in a whole new way.

              Subscribe to the Blog >

By Sheri Rylaarsdam, Skagit County WSU Extension Master Gardener

Want to see an adult in an eight-foot-tall sunflower costume? Let your vegetables grow into monsters? Save some cold hard cash? Save an heirloom plant or design a new one?

These are all possibilities once one starts down the road of seed saving. You can begin almost accidentally by not pulling all the radishes in the garden. Several weeks later you’ll notice they have grown six feet tall with multiple branches and hundreds of seedpods. The original radish is an unrecognizable nob at the bottom of the magnificent plant.

vegetable garden with plants gone to seed
Radish plants gone to seed in the author’s garden. © Photo by Sheri Rylaarsdam
Radish seed pods can be collected when they turn brown and look dried out. Interestingly, they are also edible. © Photo by Sheri Rylaarsdam

Now you know getting started is easy enough. So next you may be asking “What other vegetables produce harvestable seeds when left to grow?”

First, always save seeds from open-pollinated plants, not hybrids. Open-pollinated seeds are plants pollinated openly by wind, rain, or flying critters. Heirloom seeds are included in this category, named so because the saved seeds have produced ‘true to type’ plants for fifty years or more. The seeds collected from hybrid plants are sterile because they are a manually-produced cross between two varieties and will not grow true to form.

It is easiest to save inbred or self-pollinated seeds. These are seeds of plants whose pollen is transferred within the same flower or from one flower to the other within the same plant. Peas, beans, lettuce, and most tomatoes are examples of plants with inbred or self-pollinating seeds.

Beet plants grow tall when left to seed. © Photo by Sheri Rylaarsdam
Cobra green pole beans going to seed. © Photo by Sheri Rylaarsdam

Grown from saved open-pollinated seed, this Hungarian Heart tomato is the largest the author has grown. © Photo by Sheri Rylaarsdam

Harvesting Self-Pollinating Seeds
Let beans and peas dry on the plant, then pick the pods to shell. Thresh the pods by hand. The chaff can be winnowed by tossing the pods in the wind and catching the seeds in a basin.

Lettuce seeds send up a seed stalk, ripening two to three weeks after flowering. Harvest daily by shaking the seeds into a paper bag. The lettuce feathers and chaff can then be separated from the seeds using a fine mesh screen.

To save seeds from tomatoes, choose fully ripe tomatoes. Cut across the equator of the tomato and scrape out the gel and seeds. Let the seeds ferment for a couple of days until a black or white mold forms on top. This helps remove any pathogens on the seed surface and also removes the natural germination inhibitor that coats the seed. Strain off the mold and rinse the seeds slowly and carefully. Drain in a fine mesh strainer and dry thoroughly on a saucer. Be sure to label the saved seeds with the name of the variety and the date they were saved. Since the viability of seeds is most affected by fluctuating temperature and moisture levels, it is important to store them in a cool, dry place-ideally in a tightly closed glass jar in the refrigerator.

Harvesting Wind-Pollinated Seeds
Varieties of wind-pollinated plants need to be separated by distance or mature at different times in order not to cross. Wind-pollinated plants include beets, chard, spinach, and corn. Corn pollen is light and can be carried long distances by the wind. A distance of two miles is the recommended isolation distance. A minimum of two hundred plants is needed to have enough genetic diversity.
Harvesting Seeds Pollinated by Bees
Bee-pollinated plants include many ornamental flowers and these vegetable families: Apiaceae (carrots, dill, parsley, cilantro, parsnip, chervil, caraway), Amaryllidaceae (onion, garlic, shallots, scallions, chives, leeks), Brassicaceae (cabbage, broccoli, cauliflower, Brussels sprouts, turnips, kale) and Cucurbitaceae (squash, pumpkins, gourds). If vegetables have the same Latin name they can cross. Avoid cross-pollination by allowing just one type of vegetable from each family to go to seed. For example, if one lets leeks go to seed, do not let onions, garlic, shallots, scallions, or chives go to seed at the same time. The seed-producing vegetable also needs to be isolated from other seed-producing vegetables in its family by one-half mile. Cucurbitaceae are often hand-pollinated. Professional seed savers often use a system of cages to avoid cross-pollination.

Carrots, cabbages, beets, and onions are examples of biennials. These should be left in the ground or stored over the winter and replanted in spring to produce seed in the second year.

Master Gardener Dixie Mitchell repurposes the silca gel packets that come with shipments to keep her seed collection dry until use. © Photo by Ginny Bode

Start with something easy. Choose a variety of beans, peas, lettuce, or tomato that is delicious, grows vigorously, is a good producer, and is resistant to pests and diseases. Once you’ve started saving seeds, collect all the seeds you can. Then you’ll have plenty to plant next year, some to share, some to donate to a seed library or take to a seed swap.

Sharing seeds by donating to a seed library can make it easy for new gardeners to get started. Supplying seeds and information encourages gardeners to be out in nature, eat healthy food, and save money. Seed swaps are an excellent way to get seeds for the garden for the whole next year. Seed swap events usually have music, food, classes, and sometimes adults dressed up like sunflowers!

One can support biodiversity by supporting seed banks, buying from seed companies that increase biodiversity, and contributing to seed libraries and local seed guilds. The U.S. has lost a large percentage of its food plant biodiversity in the last 100 years. By saving seeds, you are doing your part to preserve the genetic diversity which is vital for the future of our food supply.

Seed stewards work to increase, not decrease, biodiversity. By saving and growing open-pollinated varieties of vegetables in the same area for many years and selecting for taste, disease resistance, and productivity, one can develop an improved vegetable. The selected variety will have the characteristics necessary to withstand unfavorable local conditions such as drought or heavy soil.

Seed saving is a gateway to learning about vegetables and flowers in a whole new way, witnessing their whole life cycle and how they interact with other plants. It has led to a new appreciation for nature’s abundance. Through seed sharing, I’ve contributed to altruistic causes that make a difference in the daily lives of people in our community. And I’ve met interesting people that make me smile-such as the fellow seed sharer wearing an eight-foot-tall sunflower costume.


REFERENCES:

Ashworth, Suzanne, 2002, Seed to Seed, Seed Savers Exchange

Gardening for Everyone: Seed Saving/WSU Lewis County Extension/ s3.wp.wsu.edu/uploads/sites/2057/2022/02/Seed-Saving-Handout.pdf

Op-ed: Saving Heirloom Seeds Can Protect Crop Diversity/civil eats/civileats.com/2022/01/27

Community Horticultural Fact Sheet #17/ WSU Jefferson County Extension/ extension.wsu.edu/jefferson/master-gardener-seed-library

Hubbard, Kristina K. January 11, 2019
https://civileats.com/2019/01/11/the-sobering-details-behind-the-latest-seed-monopoly-chart/


Sheri Rylaarsdam

ABOUT THE AUTHOR:

Sheri Rylaarsdam is a Skagit County WSU Extension Master Gardener, Class of 2019. She is an avid seed saver and vegetable grower.

_________

Questions about home gardening or becoming a Master Gardener, may be directed to: Skagit County WSU Extension Office, 11768 Westar Lane, Suite A, Burlington, WA 98233; by phone: 360-428-4270; or via the website: https://extension.wsu.edu/skagit/mg/


AMG_header_9-23
091523_Header2

There’s No Better Place to Make Cider than the Skagit Valley

With the feel of fall in the air some of us just can’t resist the lure of a science project. And there is no better than pressing apples to make apple juice and cider. 


              Subscribe to the Blog >

By Ginny Bode, Skagit County WSU Extension Master Gardener

Master Gardeners are an inquisitive bunch and are known for their resourcefulness when it comes to making use of the bounty found in their gardens and orchards. From apples to zucchinis, Master Gardeners have multiple ideas for their preservation and use, all capitalizing on our garden’s harvest because after all, what is better than sitting down to enjoy the food and drink you’ve sourced and prepared?

First off, let’s make sure we are speaking the same language when it comes to apple juice and cider. Many of us think of apple juice as the clear juice that we drank at lunch in school. Apple cider was a rich unfiltered juice we enjoyed in the fall. Those terms are no longer accurate in the marketplace. Though many still use the term ‘cider’ to refer to a non-alcoholic beverage pressed from apples and Websters still defines cider as both fermented and non-alcoholic, in the last 10 years the terminology in the US (both legal and popular) has changed to align with the rest of the world, and cider refers to a fermented drink. For this article, the liquid pressed from apples, both clear and with pulp, is referred to as juice and sometimes sweet cider.

Master gardener Ginny Bode explores Skagit's rich resources
Toby bought his press Correll Cider Press with an electric drive mill more than 20 years ago. He and his friends press 100 gallons of sweet cider each year. © Ginny Bode

While many are content to press their apples to make a pulp-rich juice to drink hot or cold year-round, the juice is also the first step in making ‘hard cider’ or apple cider vinegar. Here we’ll take you through the process of choosing apples and pressing for apple juice and point you to many resources for making fermented apple cider, including that of WSU’s cider research program here in Skagit County.

Choosing The Right Apples For Pressing

Since the settling of America, the northern zones of the US have produced an abundance of apples. Understanding and selecting the right apples for pressing is essential to achieving a delicious and well-balanced flavor.

While many apple varieties can be used and each cider maker has a personal preference, certain types are better suited for cider making than others. Master Gardener Toby Richner has been pressing apples for 40+ years. He believes the key to his success is choosing apples by the season of ripening. Apples ripening early in the season, such as Gravenstein and Pink Lady are tart and considered dessert apples. Ripening later in the season, cider apples such as Kings and Northern Spy produce a sweeter juice because they have been exposed to the sun much longer in the season. Look for apples that possess a good balance of sweetness, acidity, and tannins. He recommends blending apple varieties and possibly adding a ratio of pears to achieve a balanced taste.

These ¾ full 5 gal. buckets of apples pressed into 2 gallons of cider… plus several glasses for 'test' tasting.  © Ginny Bode
These ¾ full 5 gal. buckets of apples pressed into 2 gallons of cider… plus several glasses for ‘test’ tasting. © Ginny Bode
The apples are ground with a mill prior to pressing. © Ginny Bode

At the WSU Mount Vernon NWREC (research center) on Hwy 536 West of Mount Vernon, researchers have compiled a list of 73 cider cultivars-evaluating the apples for their vigor, susceptibility to disease, and quality of the juice for making cider. Though the study is intended for commercial growers the list is helpful when selecting the best apples for your project. https://cider.wsu.edu/ciderweb/

You will need thirty to forty apples to press a gallon of juice. The volume of apples needed to produce many gallons of apples can be cost-prohibitive for the hobbyist unless one has access to an orchard, or can source apples from friends and neighbors. Toby Richner sources the apples needed for the 100 gallons of cider he and his friends produce by relying on years of relationships developed through trading apples for gallons of fresh pressed juice.

Windfall vs. Picked

Many home cider-makers believe windfall apples, those which have fallen due to ripeness and wind, produce the best cider. Scientists say using windfall apples safely depends on how you intend to use the juice-drinking immediately or processing to make hard cider.

If pressing for sweet cider only, WSU Masters student Seth Brawner, working on cider research here at WSU Mount Vernon NWREC, recommends against using windfall apples. He says, that even if pasteurized, the toxin patulin can survive in the juice and cause people to get sick. To avoid this, only use picked apples in sweet cider. Seth goes on to say, “If using your pressed juice to make hard cider, windfall apples can be used because fermentation is considered a “kill step” because the alcohol produced during this process will destroy patulin and eliminate pathogens in the cider.”

When using windfall apples, take extra vigilance. Always cut away any areas bit by deer or other critters, dispose of any rotten or wormy areas, and wash thoroughly in a chlorine bath. Poor-quality fruit will diminish the taste of your cider. Michigan State University Extension has produced an excellent food safety guide referenced below.

Master Gardener Toby Richner has been making sweet cider for more than 40 years. Beyond enjoying great cider year around, he enjoys the community they've built trading apples for fresh pressed cider. © Ginny Bode
Master Gardener Toby Richner has been making sweet cider for more than 40 years. Beyond enjoying great cider year around, he enjoys the community they’ve built trading apples for fresh pressed cider. © Ginny Bode
The press bears down on the milled apples to release the juice which flows into food grade containers-in this case, stainless steel buckets. © Ginny Bode

Equipment Needed for Homemade Sweet Cider

Along with apples, to embark on your home cider making journey you’ll need:

–      Cider Press– to efficiently extract the juice from the apples.
–     Food processor or grinder– to break down the apples before pressing.
–     Large food-grade vessel- 20-30 gal container for mixing juice before bottling
–     2-3 gal. food-grade buckets for ‘catching’ the juice as pressed
–     Jugs and/or bottles – for storage

There are various methods for pressing apples available, ranging from simple hand-pressing techniques to using a specialized cider press. The cider press is the most efficient method of crushing the apples and releasing their juice while leaving behind the pulp and seeds. Home presses are available in many sizes and styles ranging from $100 to over $2000.

Preparing the Apples For Pressing
Start by washing the apples thoroughly to eliminate dirt or debris. Inspect each apple for any signs of damage or rot. Remove any spoiled fruits to ensure the quality of your cider. After cleaning, quarter the apples into small pieces, then, keeping the seeds and stems, grind them with a food processor or mill.
Pressing The Apples, Extracting and Storing the Juice
Now the fun begins-pressing the ground apples to obtain their flavorful juice. Capture the juice as it flows from the press. Strain the juice through a fine mesh, sieve, or cheesecloth to remove any remaining solids that may have slipped through the press. Transfer to clean jugs with airtight lids, leaving headspace for expansion when freezing. If you don’t have room in your freezer, the juice can be preserved through the canning process. Refrigerate if you plan to drink right away.

Commercially sold juices and sweet ciders are usually pasteurized for food safety purposes. Many home juice and cider-makers believe unpasteurized juice retains more flavor, vitamins, minerals, and antioxidants. Though pasteurization doesn’t completely eliminate the risk of foodborne illness, it does reduce it.

The Fermentation Process: Taking the Next Step to Cider

When the apples have been pressed and the juice made, the real science project begins – the fermentation process. This crucial step is what turns pressed apple juice into flavorful and aromatic cider.

Adam Coy started his cider making adventure in his garage. He is now the cider maker for Farmstrong Brewing’s Ragged & Right Project in Mount Vernon. Coy says “cider making is fairly simple when you break it down. You need juice with a fair amount of natural sugar, a clean vessel to put it in, and a little yeast to start it all off. It should be kept cool, but not overly cold/freezing. Then it’s just a matter of time to let the yeast do its work. With just a few basic tools, anyone can make cider at home.”

He started home brewing, referring to it as an adult science project.  And like many cider makers, he bought the juice from a local orchard and found the basic supplies at the local brewing shop: a 6 gal. carboy (water cooler style jug); water lock and stopper; a hydrometer; a siphon and a thermometer.

Master Gardener Bob Bryan does the process from start to finish using apples from his orchard to create the cider. Filling the 6 gal. carboy with fresh pressed juice, he then lets the sediments settle out overnight before getting started. He uses sulfur dioxide (SO2) to kill the microorganisms in the fresh-pressed juice. Then within 12-24 hours adds his preferred strain of yeast. The yeast consumes the natural sugars and converts them to alcohol. Both Bryan and Coy equate cider making to wine-making and enjoy the process of constantly measuring and maintaining proper temperature and oxygen levels to ensure successful fermentation.

The exact steps to the fermentation process can be found at https://cidersage.com/tutorials/hard-cider-making-tutorial/ or in WSU’s publication Hard Cider Production and Orchard Management in the Pacific Northwest. (https://pubs.extension.wsu.edu/hard-cider-production-and-orchard-management-in-the-pacific-northwest/)

Once a prominent part of American culture, cider making in the US is experiencing a resurgence in consumer demand with a 30-fold increase in the number of cideries. Skagit Valley is home to one of the main US apple research programs at WSU Mount Vernon NWREC and is an excellent place to start your cider making journey.

RESOURCES AND FURTHER LEARNING:

If you are highly interested in furthering your hard cider making expertise, the Cider Institute also offers online and in-person courses, including one offered in Mount Vernon in December of 2024. https://www.ciderinstitute.com/courses#Courses

https://cider.wsu.edu/  Washington State University

https://hardcider.cals.cornell.edu/ Cornell University

A brief history of cider in the US: https://cider.wsu.edu/history-of-cider/

https://www.agbizcenter.org/resources/all-things-cider/

https://www.nwcider.com/ Northwest Cider Association (NWCA) is a regional group of cider makers and orchardists from the PNW and British Columbia.

https://www.canr.msu.edu/news/its_cider_time
Sprague, S. and Venema, C.; Michigan State University Extension – November 22, 2022

https://www.canr.msu.edu/news/pasteurized_or_unpasteurized_juice_whats_the_difference

Nichols, J., Michigan State University Extension – September 12, 2014

Ginny Bode

ABOUT THE AUTHOR:

Ginny Bode is Skagit County WSU Extension Master Gardener and Co-editor of the Ask a Master Gardener Blog.

_________

Questions about home gardening or becoming a Master Gardener, may be directed to: Skagit County WSU Extension Office, 11768 Westar Lane, Suite A, Burlington, WA 98233; by phone: 360-428-4270; or via the website: https://extension.wsu.edu/skagit/mg/


AMGPost_header5
picture of Discovery Garden entrance apples, Salal Native Garden sign


Discover the Skagit Valley Display Gardens Open House

Discover the Discovery Garden, NW Fruit Garden, and the Salal Native Plant Garden

              Subscribe to the Blog >

By Janine Wentworth, Skagit County WSU Extension Master Gardener

June is the beginning of summer blooming, fruit and vegetable growth and early harvests.

Enjoy the summer gardens of Skagit Valley at the Discover the Display Gardens Open House. Skagit Valley is home to 8 acres of display gardens operated by volunteers as a learning resource for the public.

Discover the Display Gardens
Open House

June 24, 2023 · 10 am – 2 pm

Free Admission

  • Skagit County WSU Extension Master Gardener Discovery Garden
  • Western Washington Fruit Research Foundation
  • Salal Native Plant Garden

All three are nestled together in the green fields of the WSU Northwestern Washington Research and Extension Center west of Mount Vernon on HWY 536 (Memorial Hwy.)

While all three of these gardens are open to the public daily, the Annual Open House is focused on educating and inspiring visitors interested in many specific areas of interest, including pollination, water-wise gardening, native plants and raising fruits and vegetables in the Skagit area.

The Discovery Garden
Designed to support Skagit home gardeners by promoting science-based gardening practices, Skagit area WSU Extension Master Gardeners have created 30 garden rooms within the garden, featuring hundreds of plants chosen to flourish in Skagit Valley. Come and spend time with the volunteers who maintain the gardens and learn more about what they grow.

In addition to tours of the garden rooms, Master Gardeners will be on hand offering activities for all ages including:

  • Free garden tool sharpening
  • Solutions to plant problems
  • Plant identification– to help you know what you have
  • Expert advice on weed identification and management

While at the Discovery Garden, visit the small fruits garden and learn more about food you can grow in your own back yard. Photo © Nancy Crowell Photography
Visit the learning station near the pond in the Naturescape Garden. There you will see Koi fish and learn about pond maintenance and construction as well as drip irrigation.
Bring a blanket and picnic lunch and enjoy the day at the Discovery Garden. Photo © Nancy Crowell Photography

Learn about effective gardening at the 8 education stations located throughout the garden area. Master Gardeners will offer instruction on topics such as:

  • Developing healthy soil
  • Composting
  • Pollinator support
  • Fruit tree pruning and thinning
  • Gardening with native plants
  • Weed identification: Match examples of common weeds with their names so you can learn how to identify them and control them
  • Clean water and water conservation: Visit the learning station near the pond in the Naturescape Garden. There you will see Koi fish and learn about pond maintenance and construction as well as drip irrigation

Pollinators: Learn about plants that support pollinators from Master Gardeners who plant and care for the pollinator gardens and the pollinators that live in the garden. The pollinator station at the Open House will teach ways to help native bees and other pollinators thrive in home and community landscapes because pollination is an essential survival function.

Local Food: The Skagit County WSU Extension Master Gardeners offer extensive resources for local gardeners. During the Open House, Master Gardeners will be giving talks on drawing of food baskethealthy soils, growing your own vegetables, and weed identification and eradication. The Grow Your Own Food page at https://skagitmg.org/home/resources/food/ is also an excellent resource for gardeners getting started.

While at the Discovery Garden, visit the Vegetable, Small Fruits, and Doc’s Arbor garden rooms for ideas and examples of food-producing plants that grow well in the Skagit County area.

Educators from the Xerex Society will be at the Open House demonstrating techniques for making your garden pollinator friendly
Learn smarter vegetable gardening tips from the Master Gardeners who have research and tested a variety techniques that face gardeners in the North Puget Sound area.
Throughout the growing season, garden waste is sorted, chopped, and chipped-- the browns and greens are com­bined and turned, giving us nutrient-rich compost in a few months.
Throughout the growing season, garden waste is sorted, chopped, and chipped– the browns and greens are com­bined and turned, giving us nutrient-rich compost in a few months.

Composting: Curious about how to get started composting? Composting reduces waste and provides an inexpensive treatment for home gardens and landscapes. Healthy soil is essential to have healthy plants. Come talk to our soil experts and learn about your soil and what you can do to improve it.

Growing the Discovery Gardens since 1996
In 1994, the Skagit County WSU Extension Master Gardeners had a vision for a garden that would demonstrate best practices for gardening in the Skagit area. After two years of planning, the garden’s first structure of trees and fences was placed in the fall of 1996. Over the following two years, many committed WSU Extension Master Gardeners, along with the help of the community, planted the gardens.

The WSU Master Gardener Program addresses important sociologic and environmental issues by teaching research-based horticulture information. We want people to have important skills and abilities that help mitigate challenges and to understand that everyone has a role to play in creating and sustaining healthy and resilient communities.

Salal Native Plant Garden
The second garden participating in the Tri-Garden Open House is the Salal Native Plant Garden. Bordering the Discovery Garden to the south, the Salal Native Plant Garden is entered by walking through the Discovery Garden following the paths to the south. This labor of love and concern for native plants is manifested in an extensive and charming display garden.

Created twenty-five years ago as a collaborative effort between volunteers of the Salal Chapter of the Washington Native Plant Society and the Washington State University Agriculture Extension Agency at Mount Vernon (WSU), the Native Plant Garden is now a half-acre oasis that holds the seeds for the future of native plants in the lower Skagit Valley. The garden is a terrific resource for homeowners who want to learn how to incorporate more native plants into their landscaping.

Western Washington Fruit Research Foundation (NW Fruit)
The third garden on display is the fruit garden known as the Western Washington Fruit Research Foundation (or NWFruit.org). Here volunteers will answer questions about fruit trees. The 6-acre garden was designed and constructed by volunteers of the foundation and contains large informational signs and handouts based on the research conducted by Washington State University.

During the Open House volunteers will be on hand to explain examples of netting for bird control, a Tatura trellis, and answer questions about the expansive espalier display.

The fruit garden contains a large collection of fruiting plants with many unique varieties, including a collection of 17 variations of Gravenstein apples, a collection of antique apples from all over the world, and unusual fruits such as medlar and blue honeyberry. Located on the west side of the Discovery Garden the fruit garden is open to the public seven days a week from dawn to dusk.

Please join us for the Open House festivities on June 24, 2023 from 10 am – 2 pm. You are welcome to bring a blanket and picnic lunch and enjoy the day with family and friends.

The gardens are open and free to the public throughout the year, 7 days a week from dawn to dusk. Visit the gardens throughout the seasons to view the seasonal changes. Signage in each garden identifies plants and makes for interesting and educational self-guided tours.


RESOURCES:

ABOUT THE AUTHOR:

Janine Wentworth became a master gardener in 2018. She and Kay Torrance are co-chairs of the Discovery Garden Open House.


Questions about home gardening or becoming a master gardener may be directed to: Skagit County WSU Extension Office, 11768 Westar Lane, Suite A, Burlington, WA 98233; by phone: 360-428-4270; or via the website: www.skagit.wsu.edu/mg