AMGPost_header5
090224_Header2

Useful Tips for Harvesting and Preserving Herbs in the Pacific Northwest

Preserving herbs can be a bit of trial and error, but the process is worth the fresh flavor and satisfaction.

              Subscribe to the Blog >

By: Laura Kuhn, Skagit County WSU Extension Master Gardener

Because of their useful nature, herbs are a common addition to home gardens. The use of the term herb is often used interchangeably with spice. However, the terms herbs and spices technically refer to two different things. “Herbs” are defined as the leafy parts of plants, such as oregano, rosemary, thyme, sage, basil, and others. “Spices” typically involve the use of other plant parts such as roots, fruits, flowers, seeds, or bark. Spices include cinnamon, ginger, lavender, coriander, cumin, and many others. Both herbs and spices are used for their savory, aromatic, or medicinal qualities. This article will focus primarily on herb preservation, although many methods mentioned here can also apply to spices.

Gardeners who grow vegetables may also grow herbs for pairing in recipes later. However, some of the best pairings cannot be harvested at the same time. For example, basil can look tired by the time the tomatoes are ready to be harvested. And it is difficult to find an easy, cost-effective way to have bunches of fresh cilantro available at the same time tomatoes and peppers ripen for salsa. Preserving herbs can help to bridge these gaps.

In 2002, when faced with a huge abundance of herbs that could not all be used fresh, I bought one of the popular “As Seen On TV” food dehydrators and dried herbs to make gifts for the following holiday season. The color and flavor of home-dried herbs are superior to store-bought herbs. Since then, I have also started to grow herbs and spices to make tea.

An often-asked question is: What is the best way to preserve herbs? The answer depends on how you plan to use them. The goal is to capture the essential oils in the trichomes (fine outgrowth like hairs) on the surface or epidermal layer of the leaves. These oils have the flavor and aroma we want.

What gardeners choose to grow and preserve is most influenced by the amount of time, budget, and available space. The good news is that with a small investment in time, space, and equipment, home gardeners can achieve excellent results that rival the expensive options available.

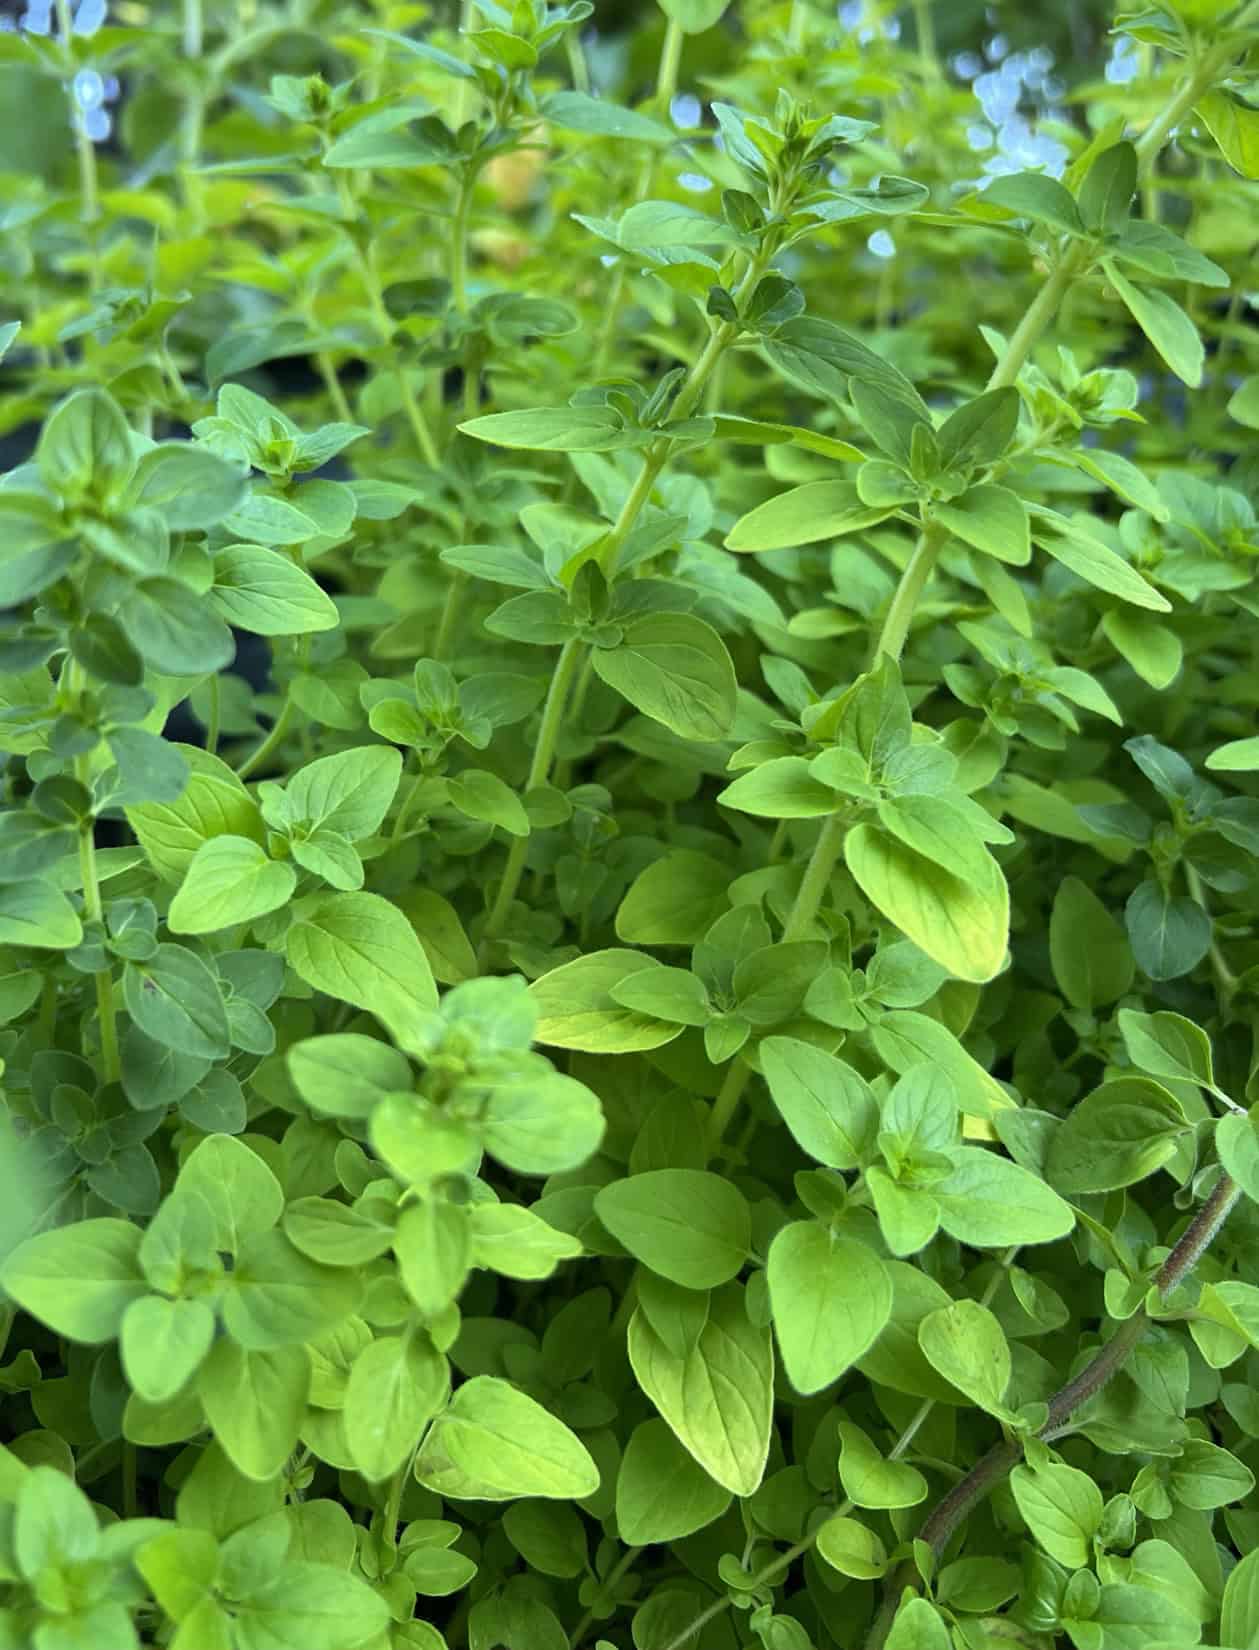
Oregano ripe for harvest.  © Photographer: Laura Kuhn
Oregano ripe for harvest. © Photographer: Laura Kuhn
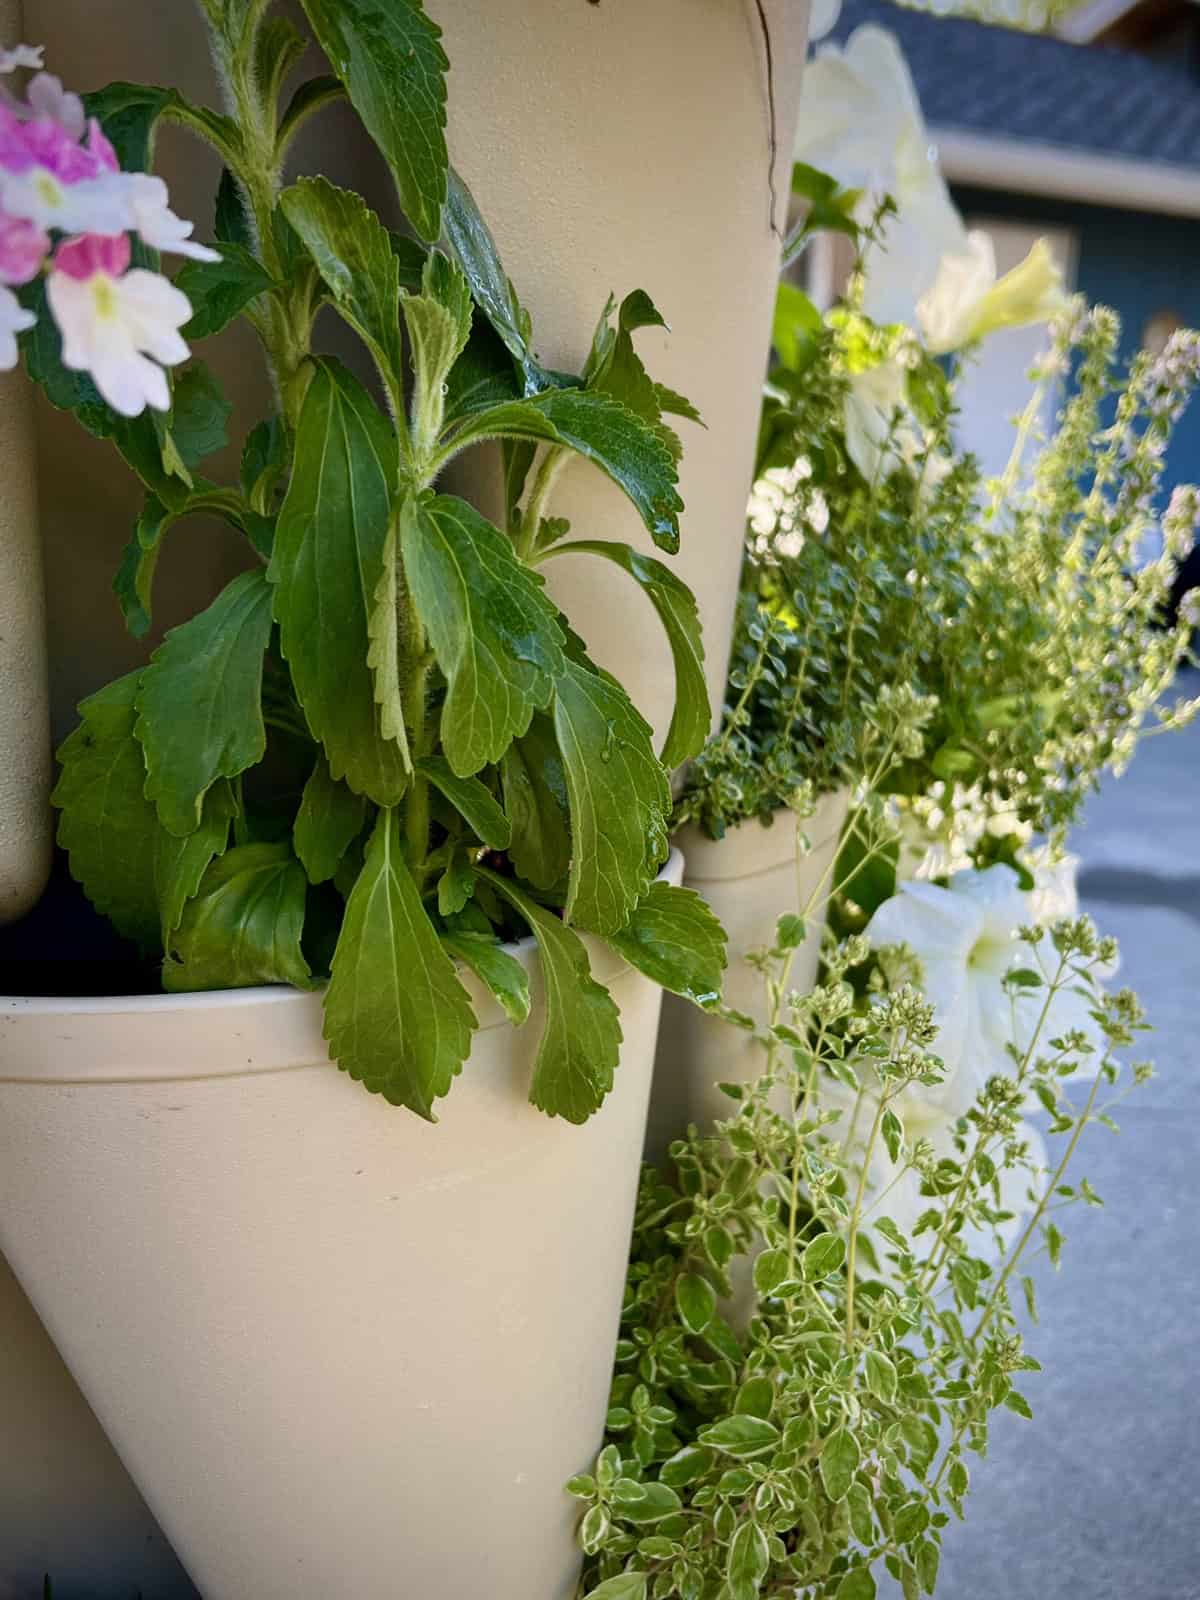
Stevia and ornamental oregano in a vertical container with annuals.  © Photographer: Laura Kuhn
Stevia and ornamental oregano in a vertical container with annuals. © Photographer: Laura Kuhn
Growing Herbs-
Herbs can grow in most garden conditions and be planted directly in the ground, in raised beds, or in containers. Vertical garden systems are a terrific way to get a lot of variety in a small space. Gardeners who are just starting herb growing should start slowly and do their research. Purchasing herb starts at a local garden center is an easy and inexpensive way to begin. However, a far greater selection of herbs are available as seeds. Once gardeners have experience, they can grow their favorites from seed and make space for annual and perennial varieties.
Harvesting Herbs-
The harvesting process is as simple as removing the right part of the plant for the intended use. For most culinary uses, the target is tender fresh leaves (i.e., oregano, thyme, and basil). In some cases, the goal is to preserve flowers for making tea (i.e., chamomile, calendula, or anise hyssop) or to harvest the plant’s mature seeds (i.e., dill or coriander). Yet other plants are used for their roots (i.e., ginger or horseradish). If growing for flowers, it is important to pick the flowers often to encourage the production of more blooms.

For leafy herbs such as basil and oregano, the best flavor comes from young leaves on stems cut before the plant goes into flower production. However, the growing season can be extended by cutting back flowering stem tops to encourage more leaf growth. When doing so, leave four to six leaves on the plant stems for re-growth. If growing for seed, keep the flowers on the plants and wait until the seeds are fully mature. Root harvests take a longer time commitment and can require waiting for several growing seasons to achieve a decent harvest.

Organization is important during the harvesting process. It is best to harvest all of one specific plant at a time, making the cleaning and preservation process easier by avoiding the time-consuming task of separating during the cleaning process. For harvesting, no special tools are needed. Most herbs are tender enough to harvest by hand pinching or using scissors. Small clippers with short-tipped blades are best for harvesting small leaves or stems. Digging roots is a careful process. It is important to provide wide enough margins to avoid shovel damage to the roots.

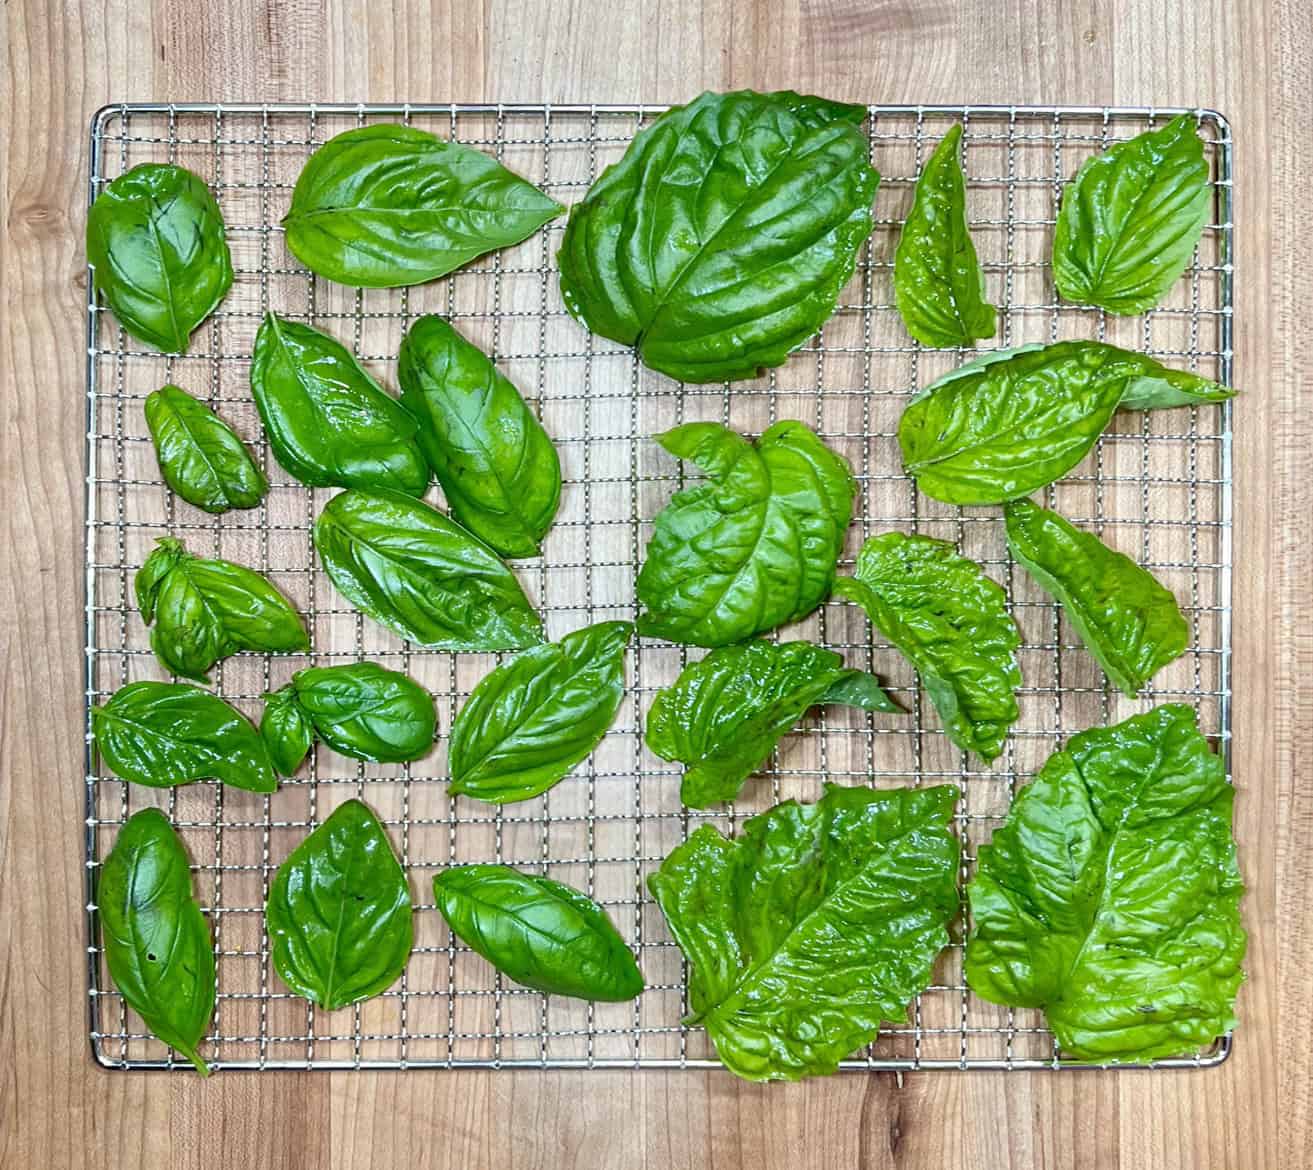
Mammolo and Lettuce Leaf basils ready for drying in the dehydrator. © Photographer: Laura Kuhn
Preserving Herbs –
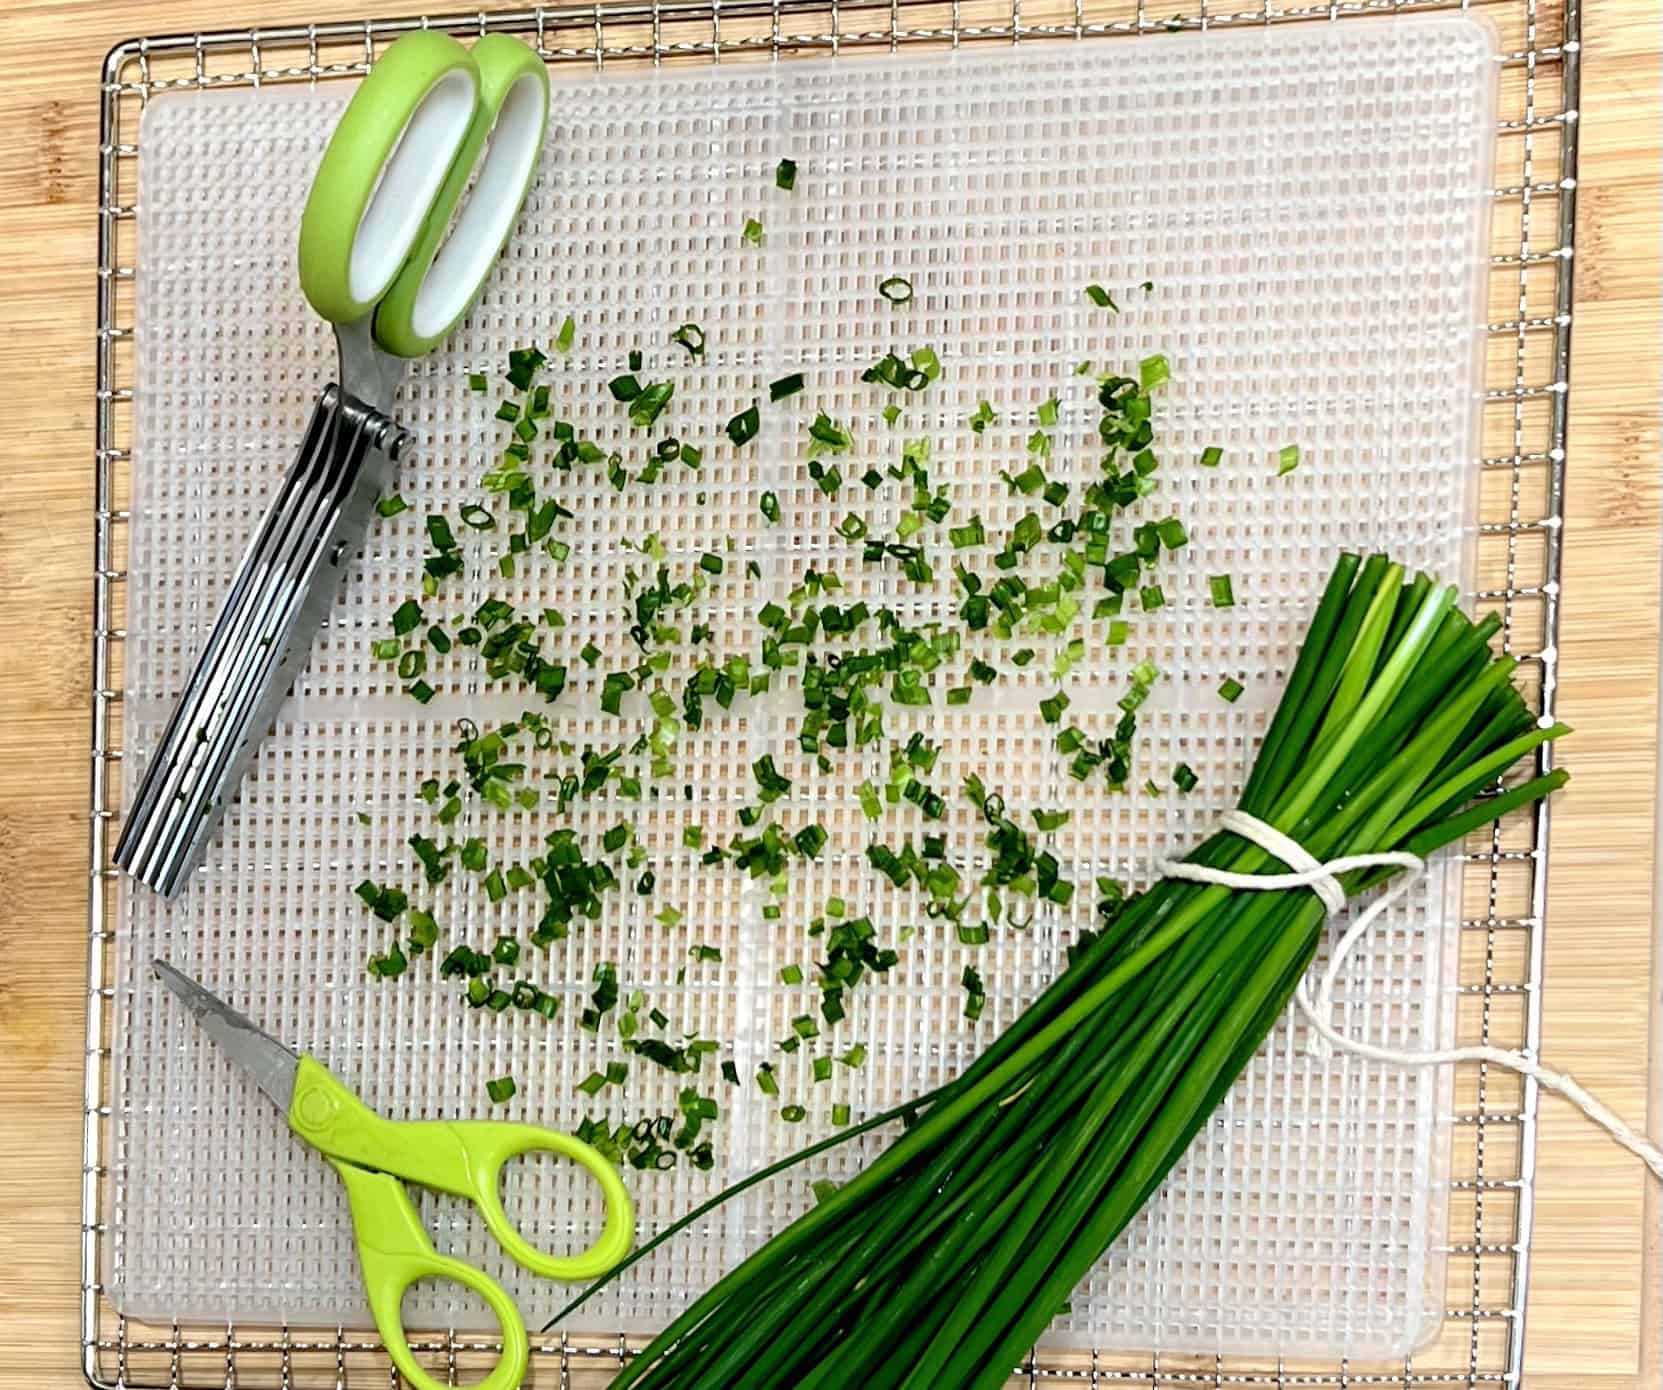
After harvesting, the herbs require cleaning before preserving. Most herbs can be immersed in cool water to clean off the leaves (stem and all). Use paper towels, a drying rack on a work surface, or a salad spinner to get as much moisture off as possible. Avoid crushing the leaves unless the herbs are chopped before preserving them. Chives can be washed and cut into small pieces with scissors by holding a bunch of stems and cutting them as a group before preserving them.

The preservation method should strive to achieve the best quality for the intended use. Scientific research has been conducted on various methods of preservation. The winning method for drying herbs is freeze drying because it preserves essential oils, aroma, and color best. However, the cost of such a system for most home gardeners is not reasonable. Therefore, the most common methods involve dehydration (using heat) or drying (using air), which results in a shelf-stable product that can be used year-round, or by freezing.

Bunching and cutting chives to cut and freeze or dry. © Photographer: Laura Kuhn
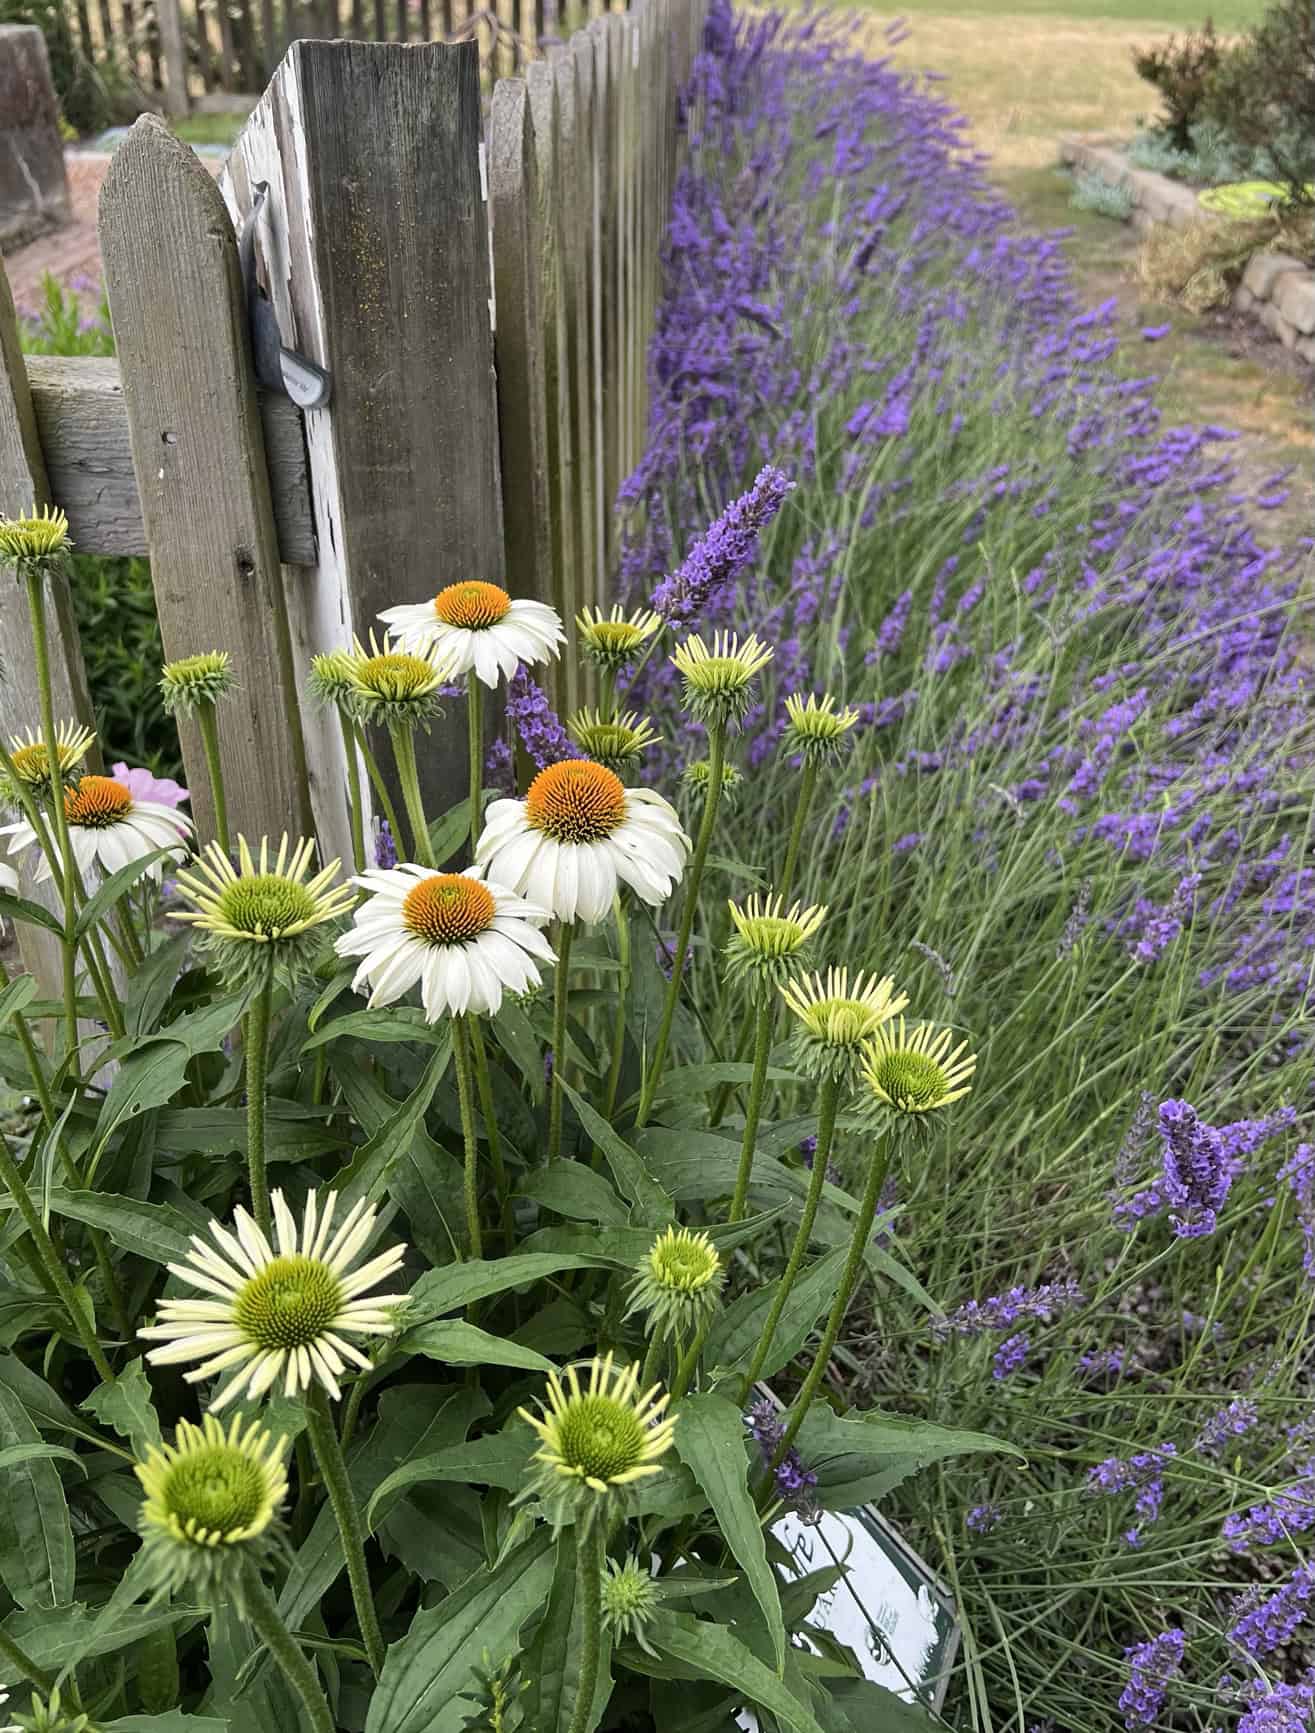
Echinacea (foreground) and lavender at a local nursery. © Photographer: Laura Kuhn
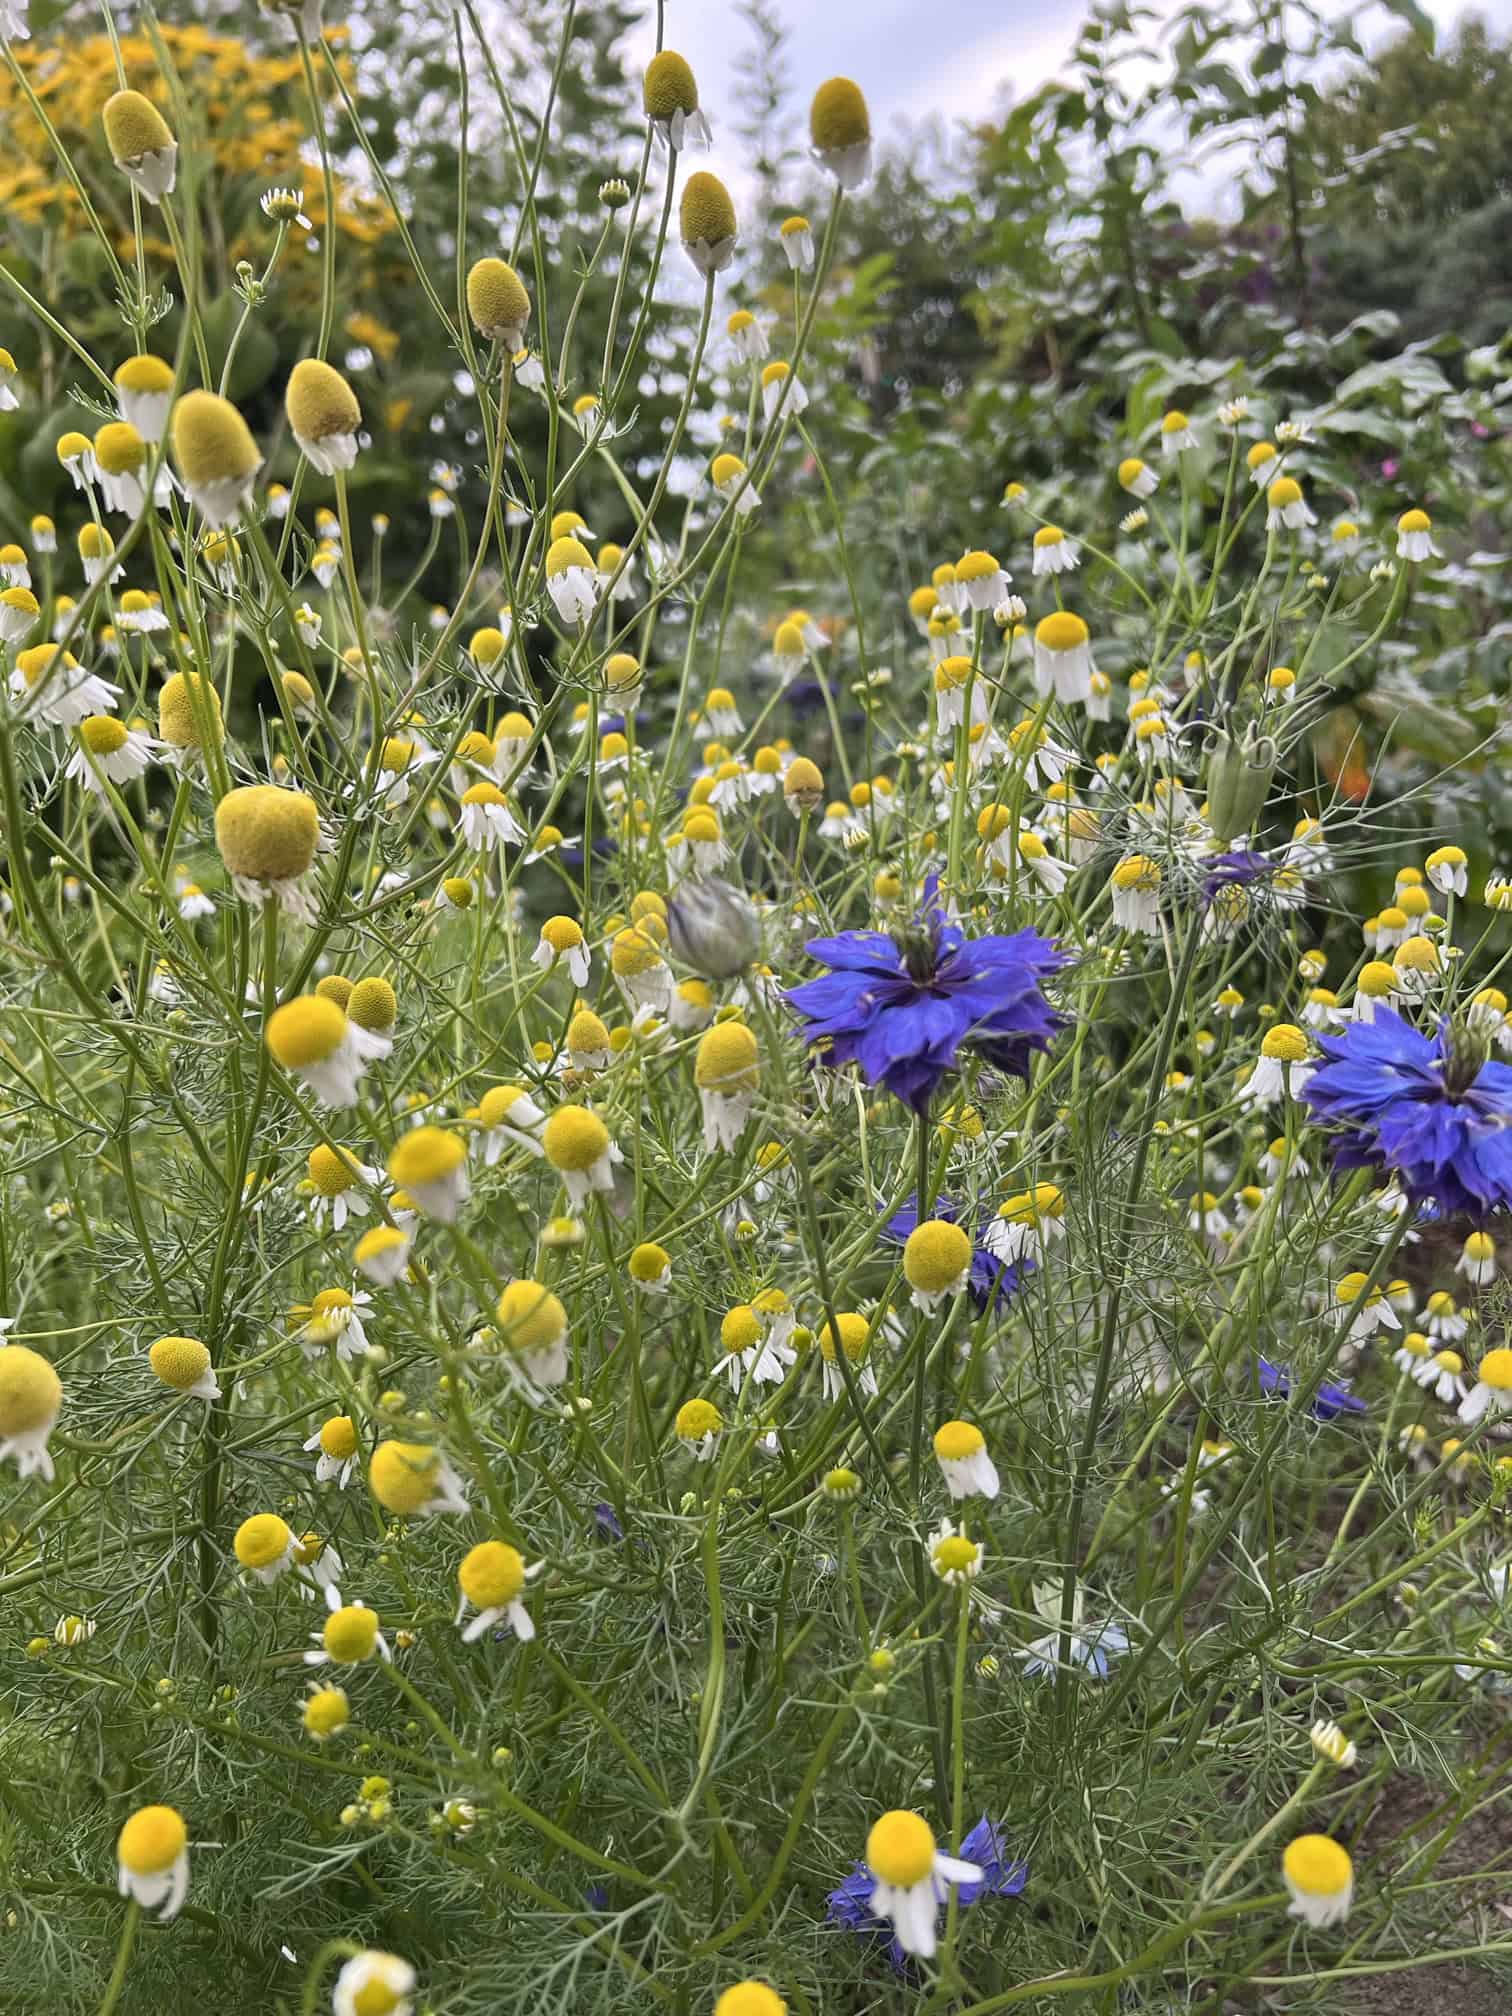
Chamomile ready to harvest in the Herb Garden at the Discovery Garden. © Photographer: Laura Kuhn
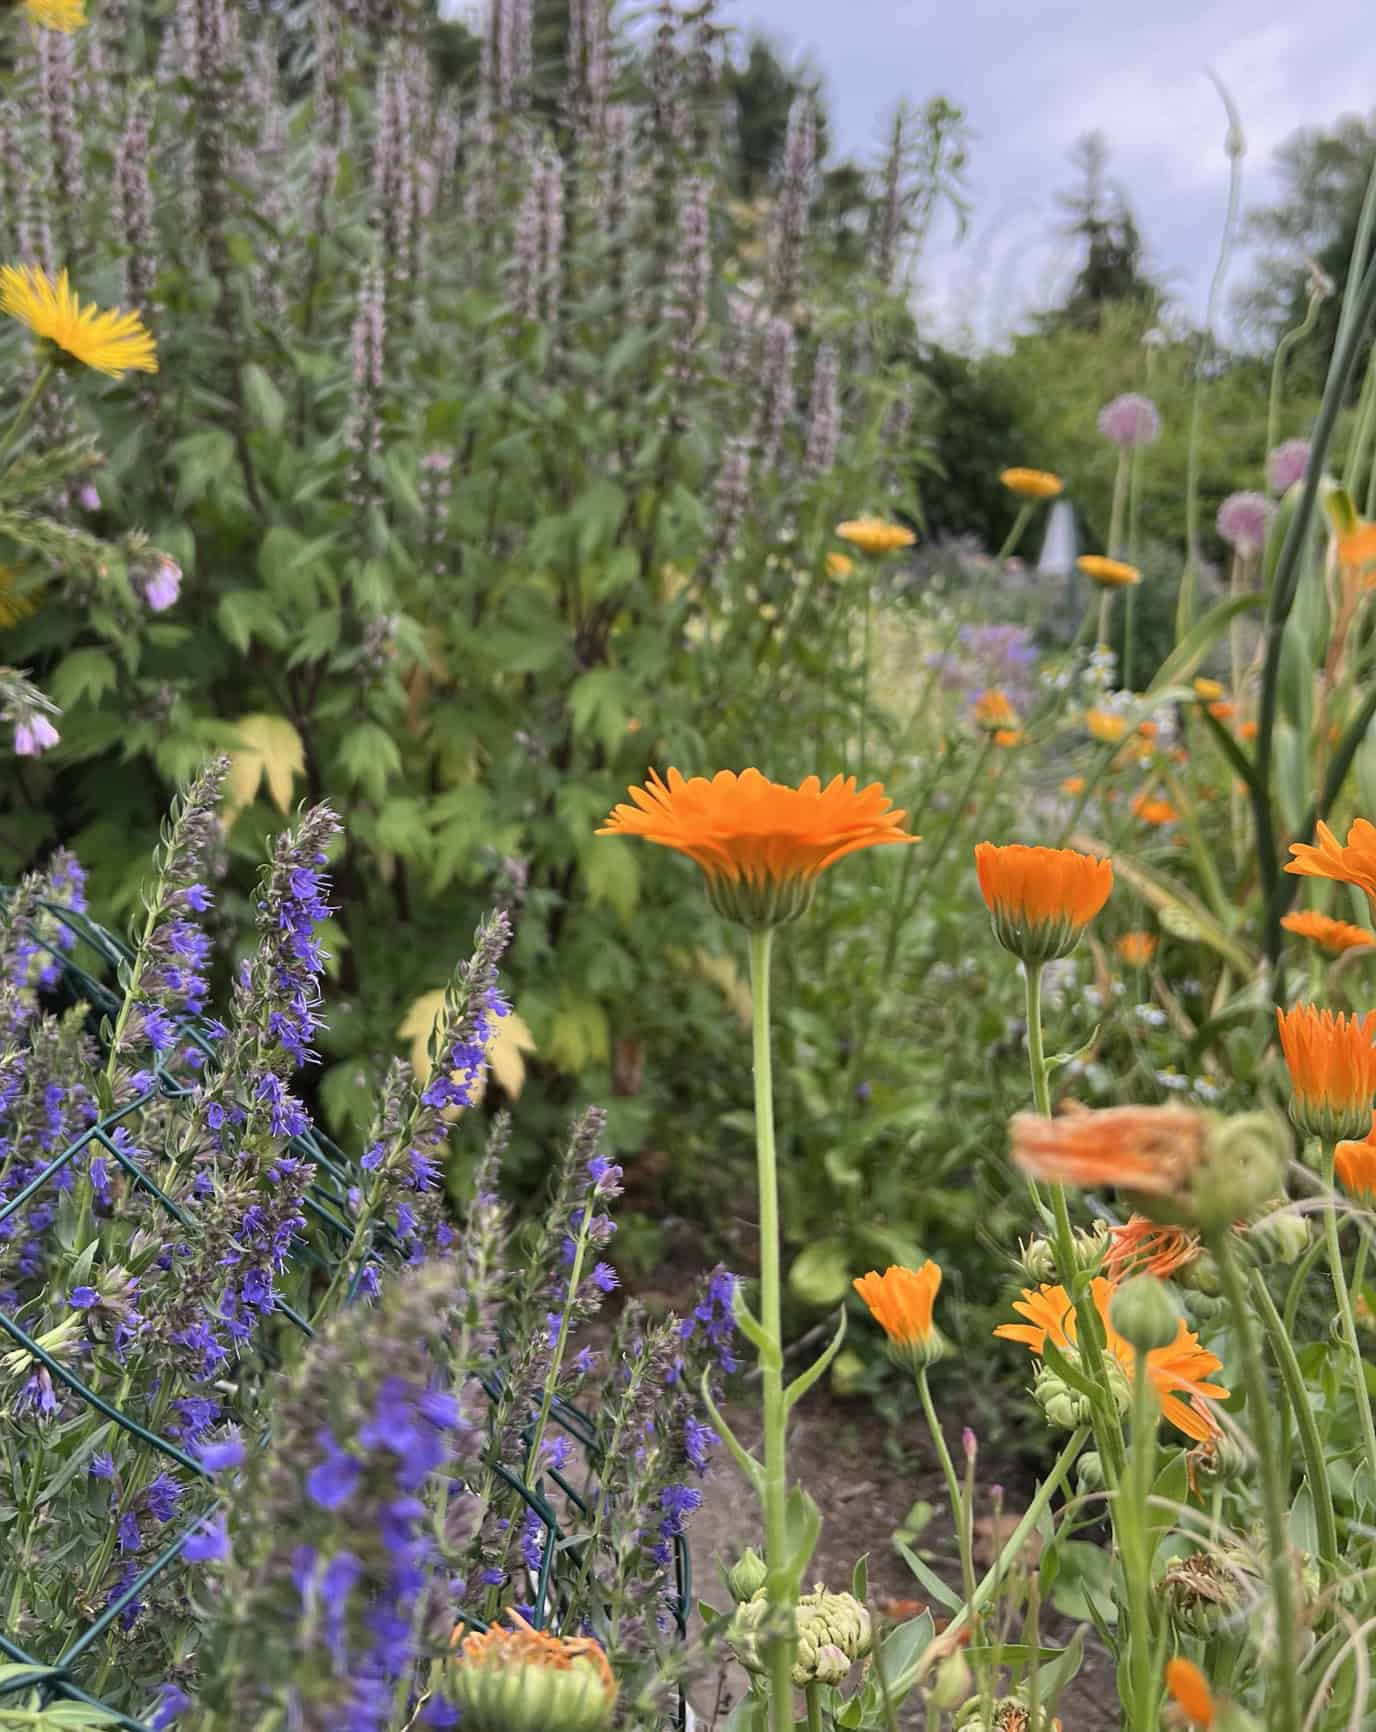
Calendula and various herbs in the Discovery Garden.  © Photographer: Laura Kuhn
Calendula and various herbs in the Discovery Garden. © Photographer: Laura Kuhn

Humidity levels in the Pacific Northwest, particularly western Washington, are a challenge to herb preservation and storage. Humidity levels should be 45-55 percent for proper drying and to avoid mold. Even during our drier summer months, average outdoor humidity levels are more than 60 percent. The water content in the herbs being dried is also a consideration. The more tender herbs, such as basil, tarragon, oregano, lemon balm, and mints, tend to have a higher water content. On the other hand, sage, thyme, parsley, and rosemary tend to be more “woody” and have a lower water content. Taking this into account before picking a preservation method increases the chances of success.

Drying with Air
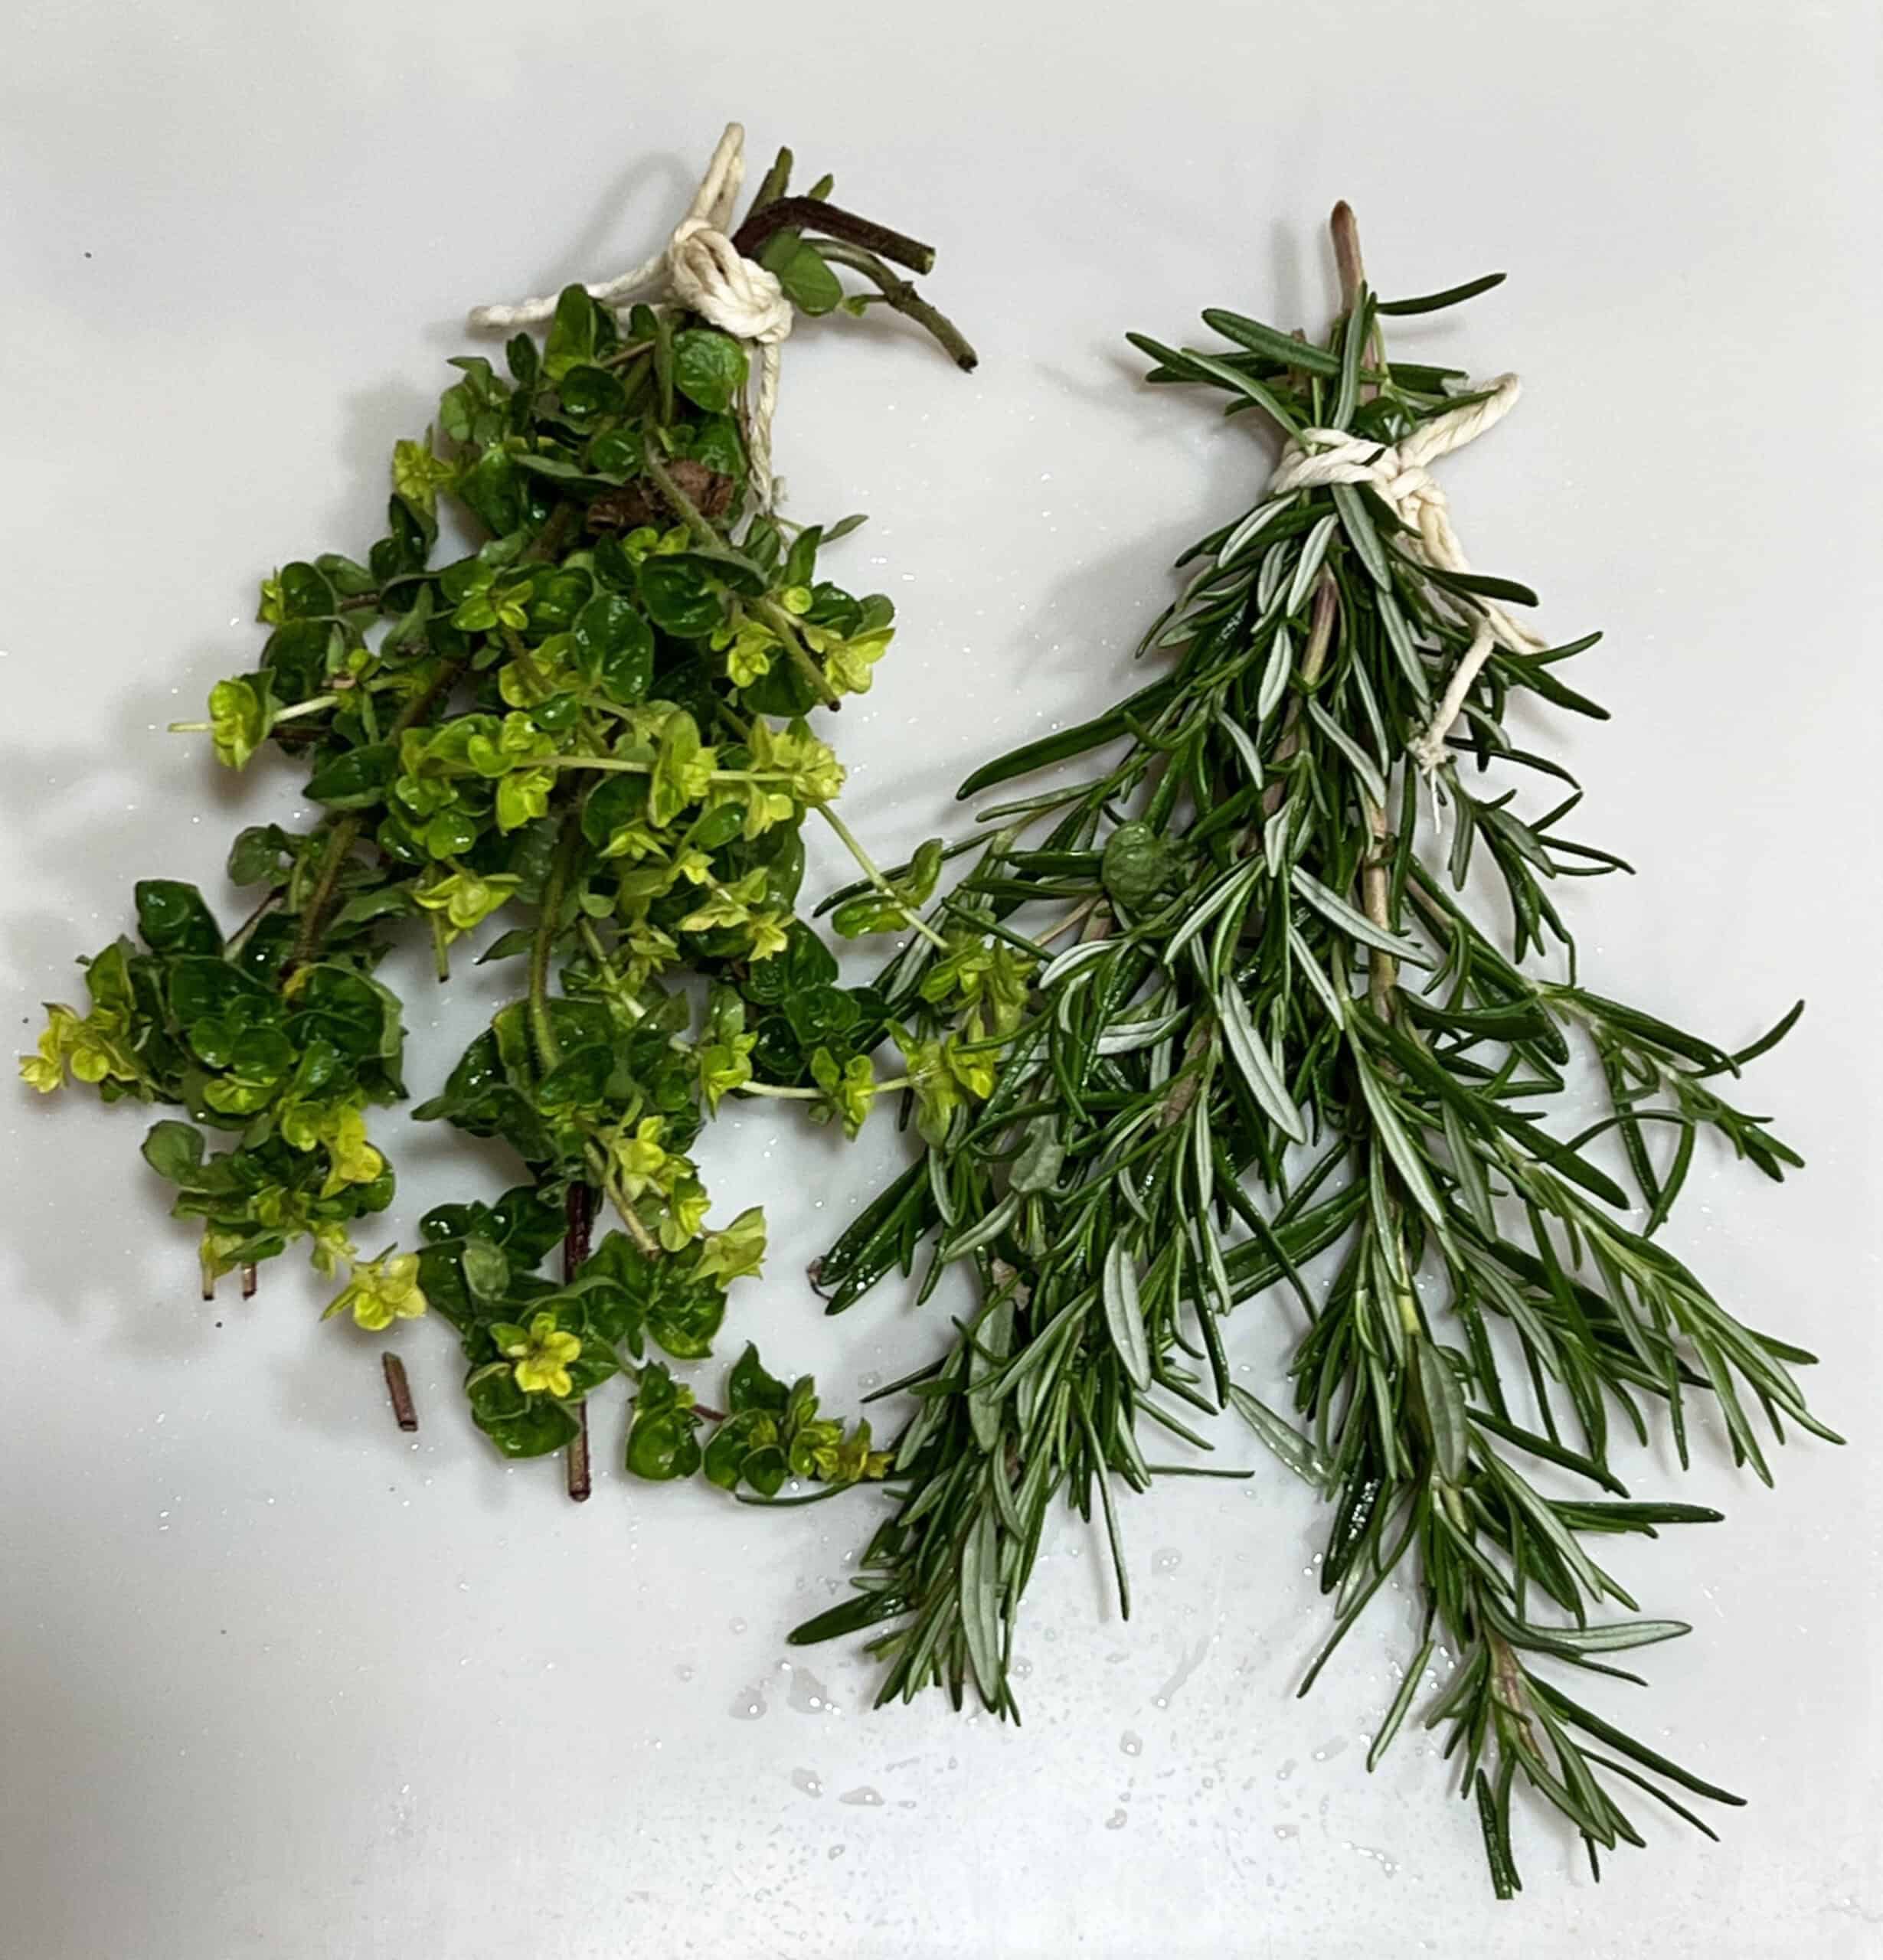
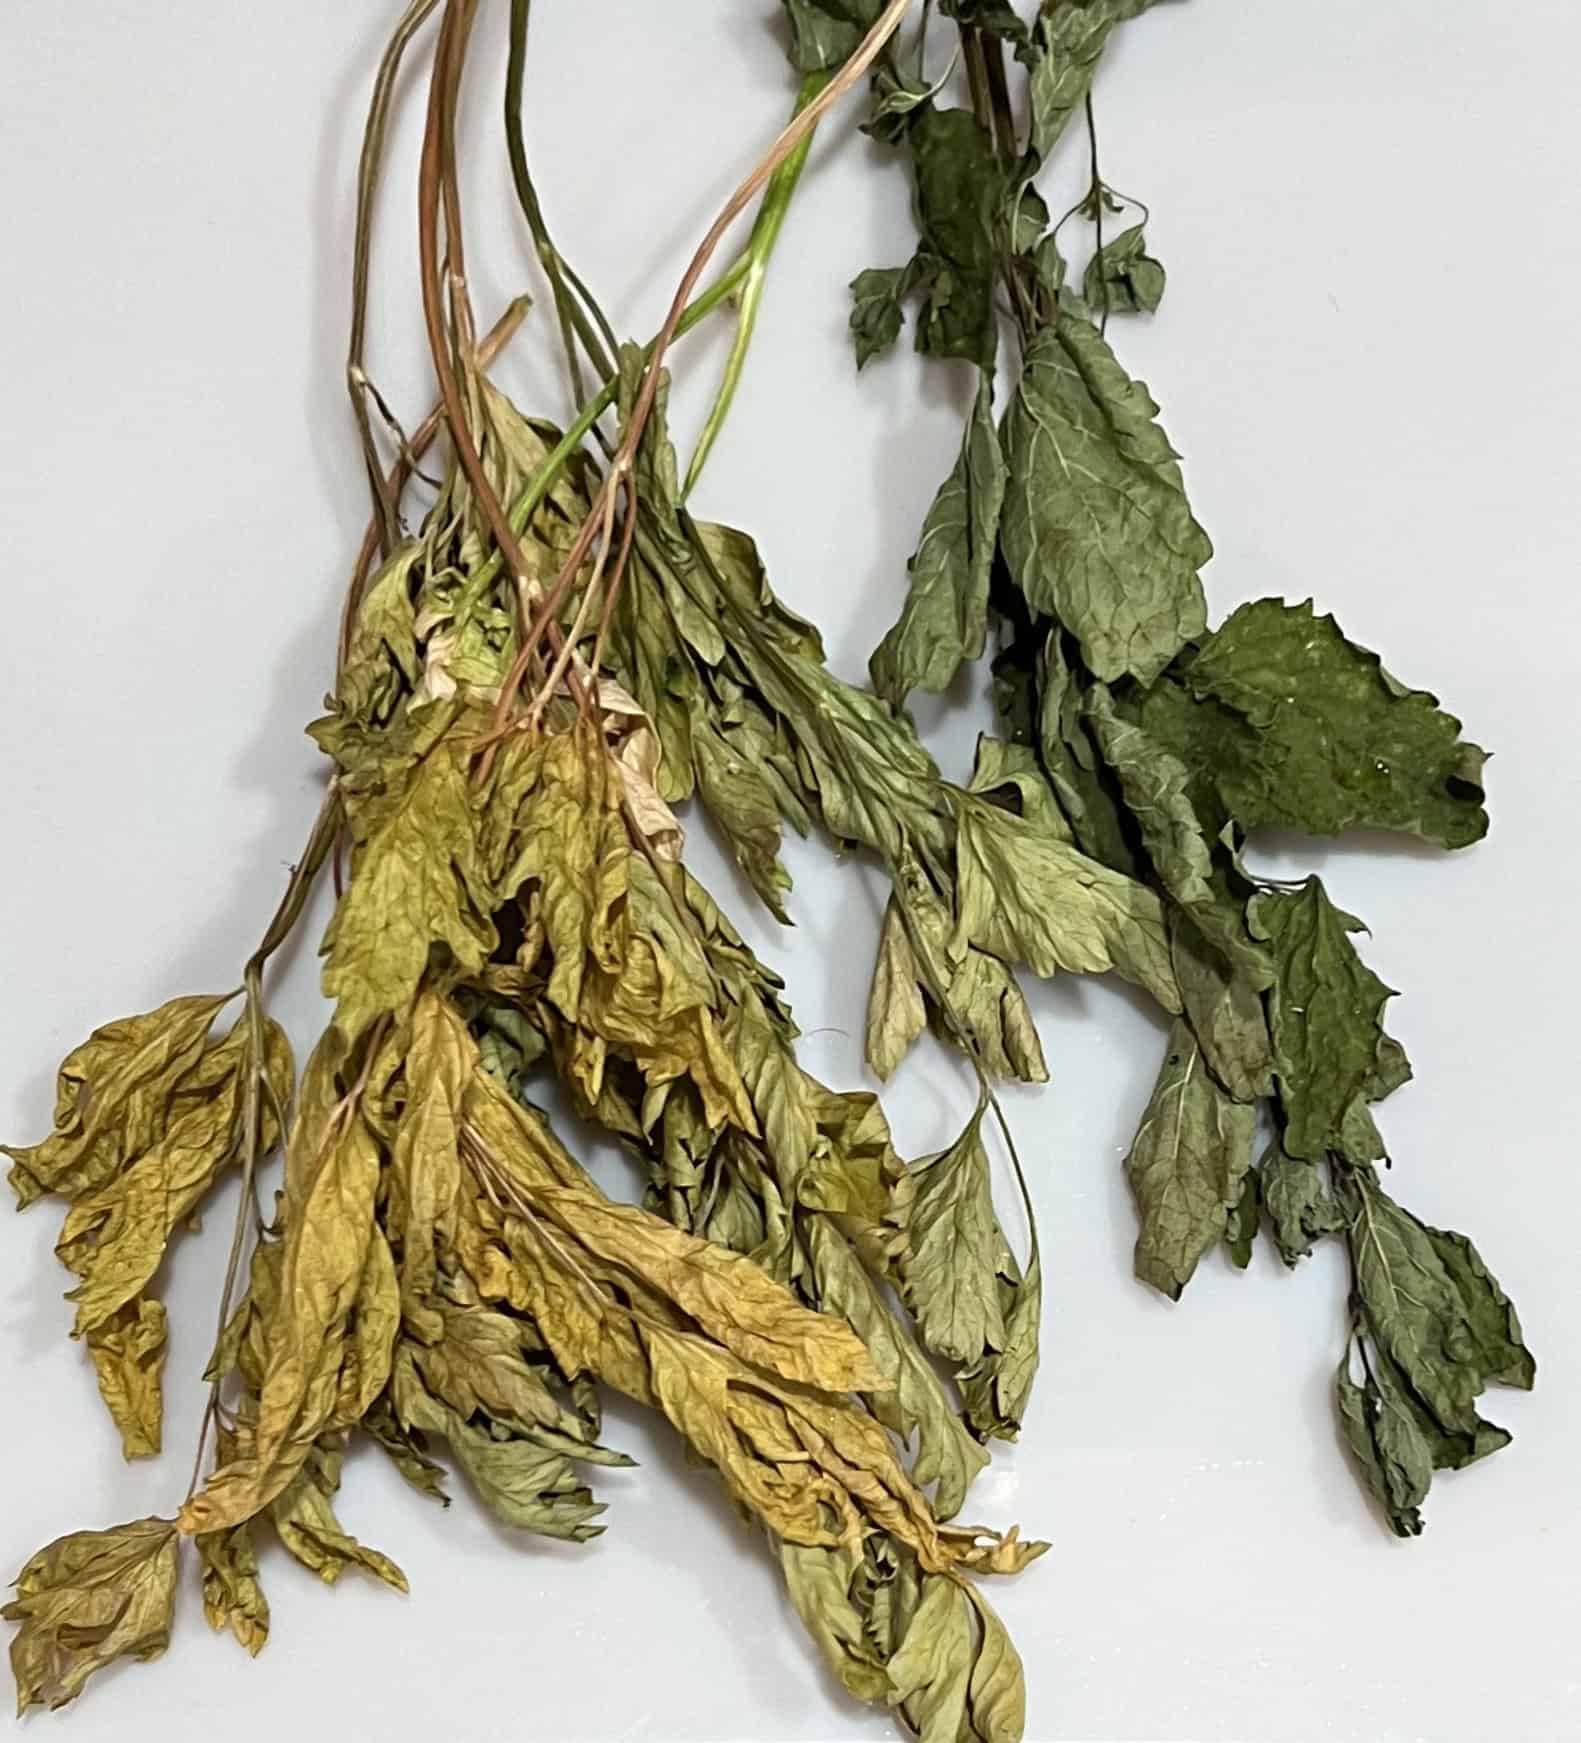
Drying with air is by far the easiest method of preserving herbs but difficult to master successfully given Pacific Northwest humidity levels. Mold can form on plants, or the dried product will be limp and discolored. Make small bunches of plant stems, wrap with butcher’s twine, and hang the bunches up. The drying area will need to have good ventilation (an oscillating fan works great). Avoid exposure to light during drying as it will affect the color. A barometer or humidity gauge helps decide if drying is possible. Woody plants such as rosemary and sage are best for this process due to humidity levels. The amount of time needed to dry the plants and crush the leaves will vary based on weather and drying conditions. Checking plants often is the best way to gauge if they are ready.
Bunches of herbs ready for hang drying. © Photographer: Laura Kuhn
Failed attempt at airdrying parsley and lemon balm. Conditions were too humid for effective drying. Note loss of color in parsley to the left. © Photographer: Laura Kuhn
Dehydrating with Heat
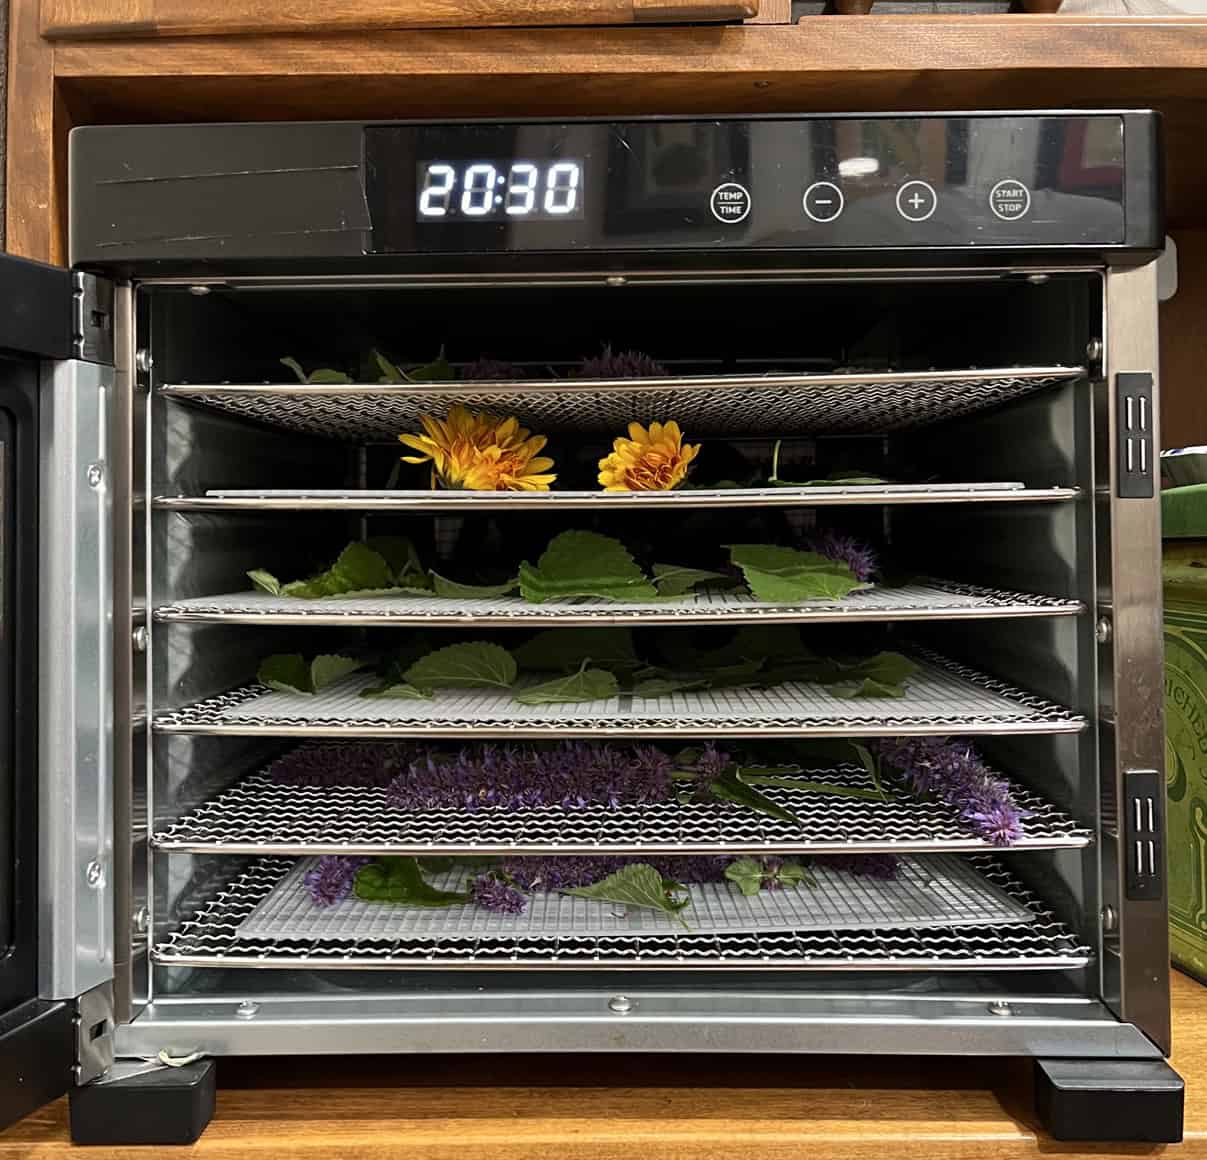
The National Center for Home Food Preservation recommends drying herbs at 95 to 115 degrees Fahrenheit. Lower temperatures are best for tender plants. Since most home ovens cannot achieve the recommended temperatures for herb drying, food dehydrators have become popular. Many dehydrators come with wire racks so air can flow through the leaves. Arrange the leaves/stems across the rack so they are not touching. Overcrowding during the drying process can result in longer dry times. You can use a mesh-style rack for small leaves to provide air circulation. A tip for selecting a decent food dehydrator is to make sure that it can adjust the drying temperature and time. Select a unit that can dry at as low a temperature as possible to provide the most control over the drying process and quality. Increased heat levels might be needed to compensate for humidity levels. Using heated air to dry herbs can result in a higher loss of essential oils than using air-dried herbs. The amount of time needed to achieve a crisp, dry product that can be easily crushed is variable. Humidity, plant water content, and temperature are all factors to consider. For this reason, I recommend checking on the plants often during the drying process.

For either drying method mentioned above, it is important to note that any moisture left in the plants after drying can lead to spoilage. If your drying space seems to be “too moist” meaning you cannot achieve a crisp dry texture, increase the temperature, and air circulation. A process of trial and error may be needed as the time of year and the water content of plants can vary.

To prepare the dried herbs for storage, the leaves are removed from stems and crushed to the desired size. A tip for this step is to place the dried herbs into a bag and push the leaves off the stems. Set aside stems as you push the leaves into the bag. When the biggest stems are removed, crush the leaves inside of the bag to the desired size. Sift through the dried product to remove smaller stems to achieve the best consistency for cooking. Rougher dried herbs can be used for teas. It really is up to personal preference as to how “clean” the final product will be. Some choose sifters or screens to further improve the visual appeal of the end product.

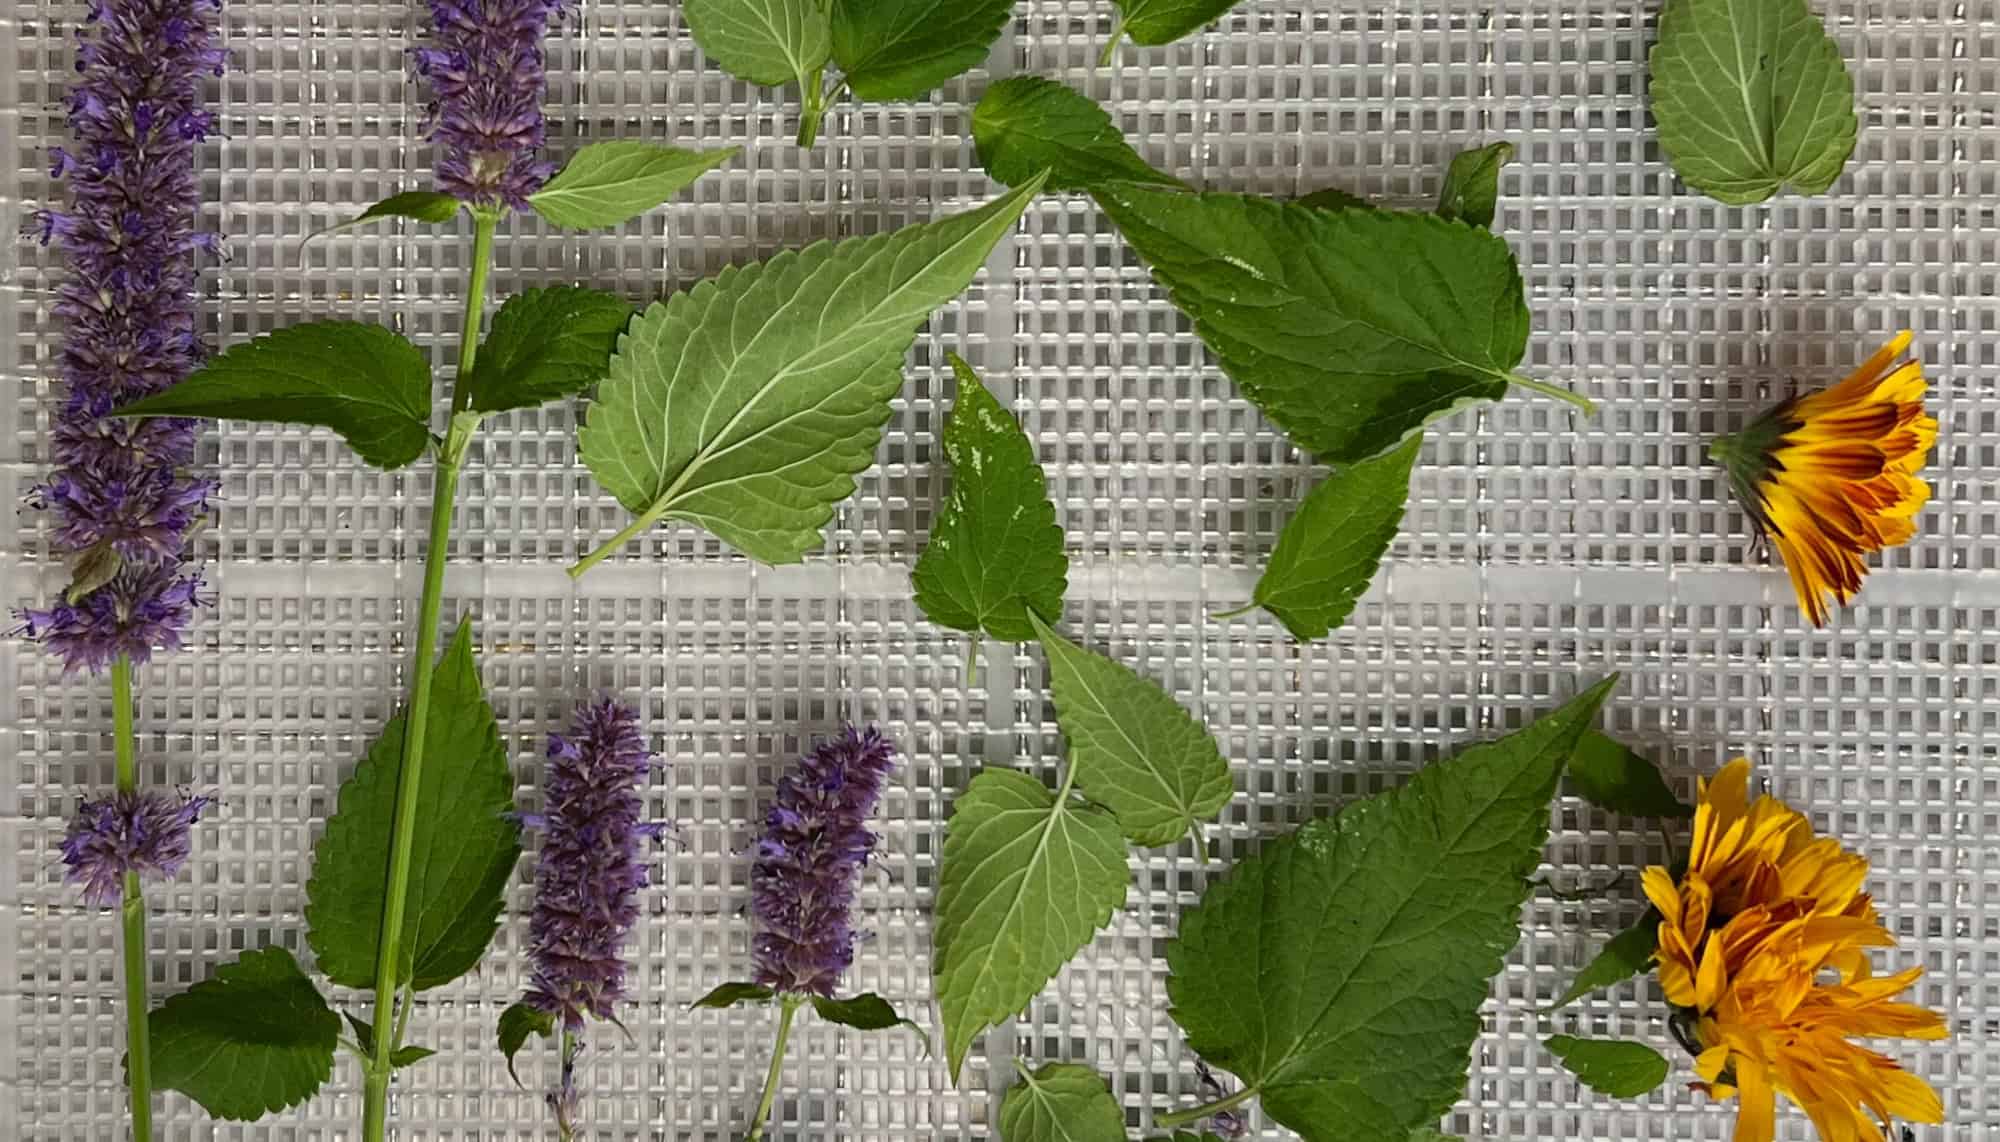
Dehydrator full of racks of calendula and anise hyssop. © Photographer: Laura Kuhn
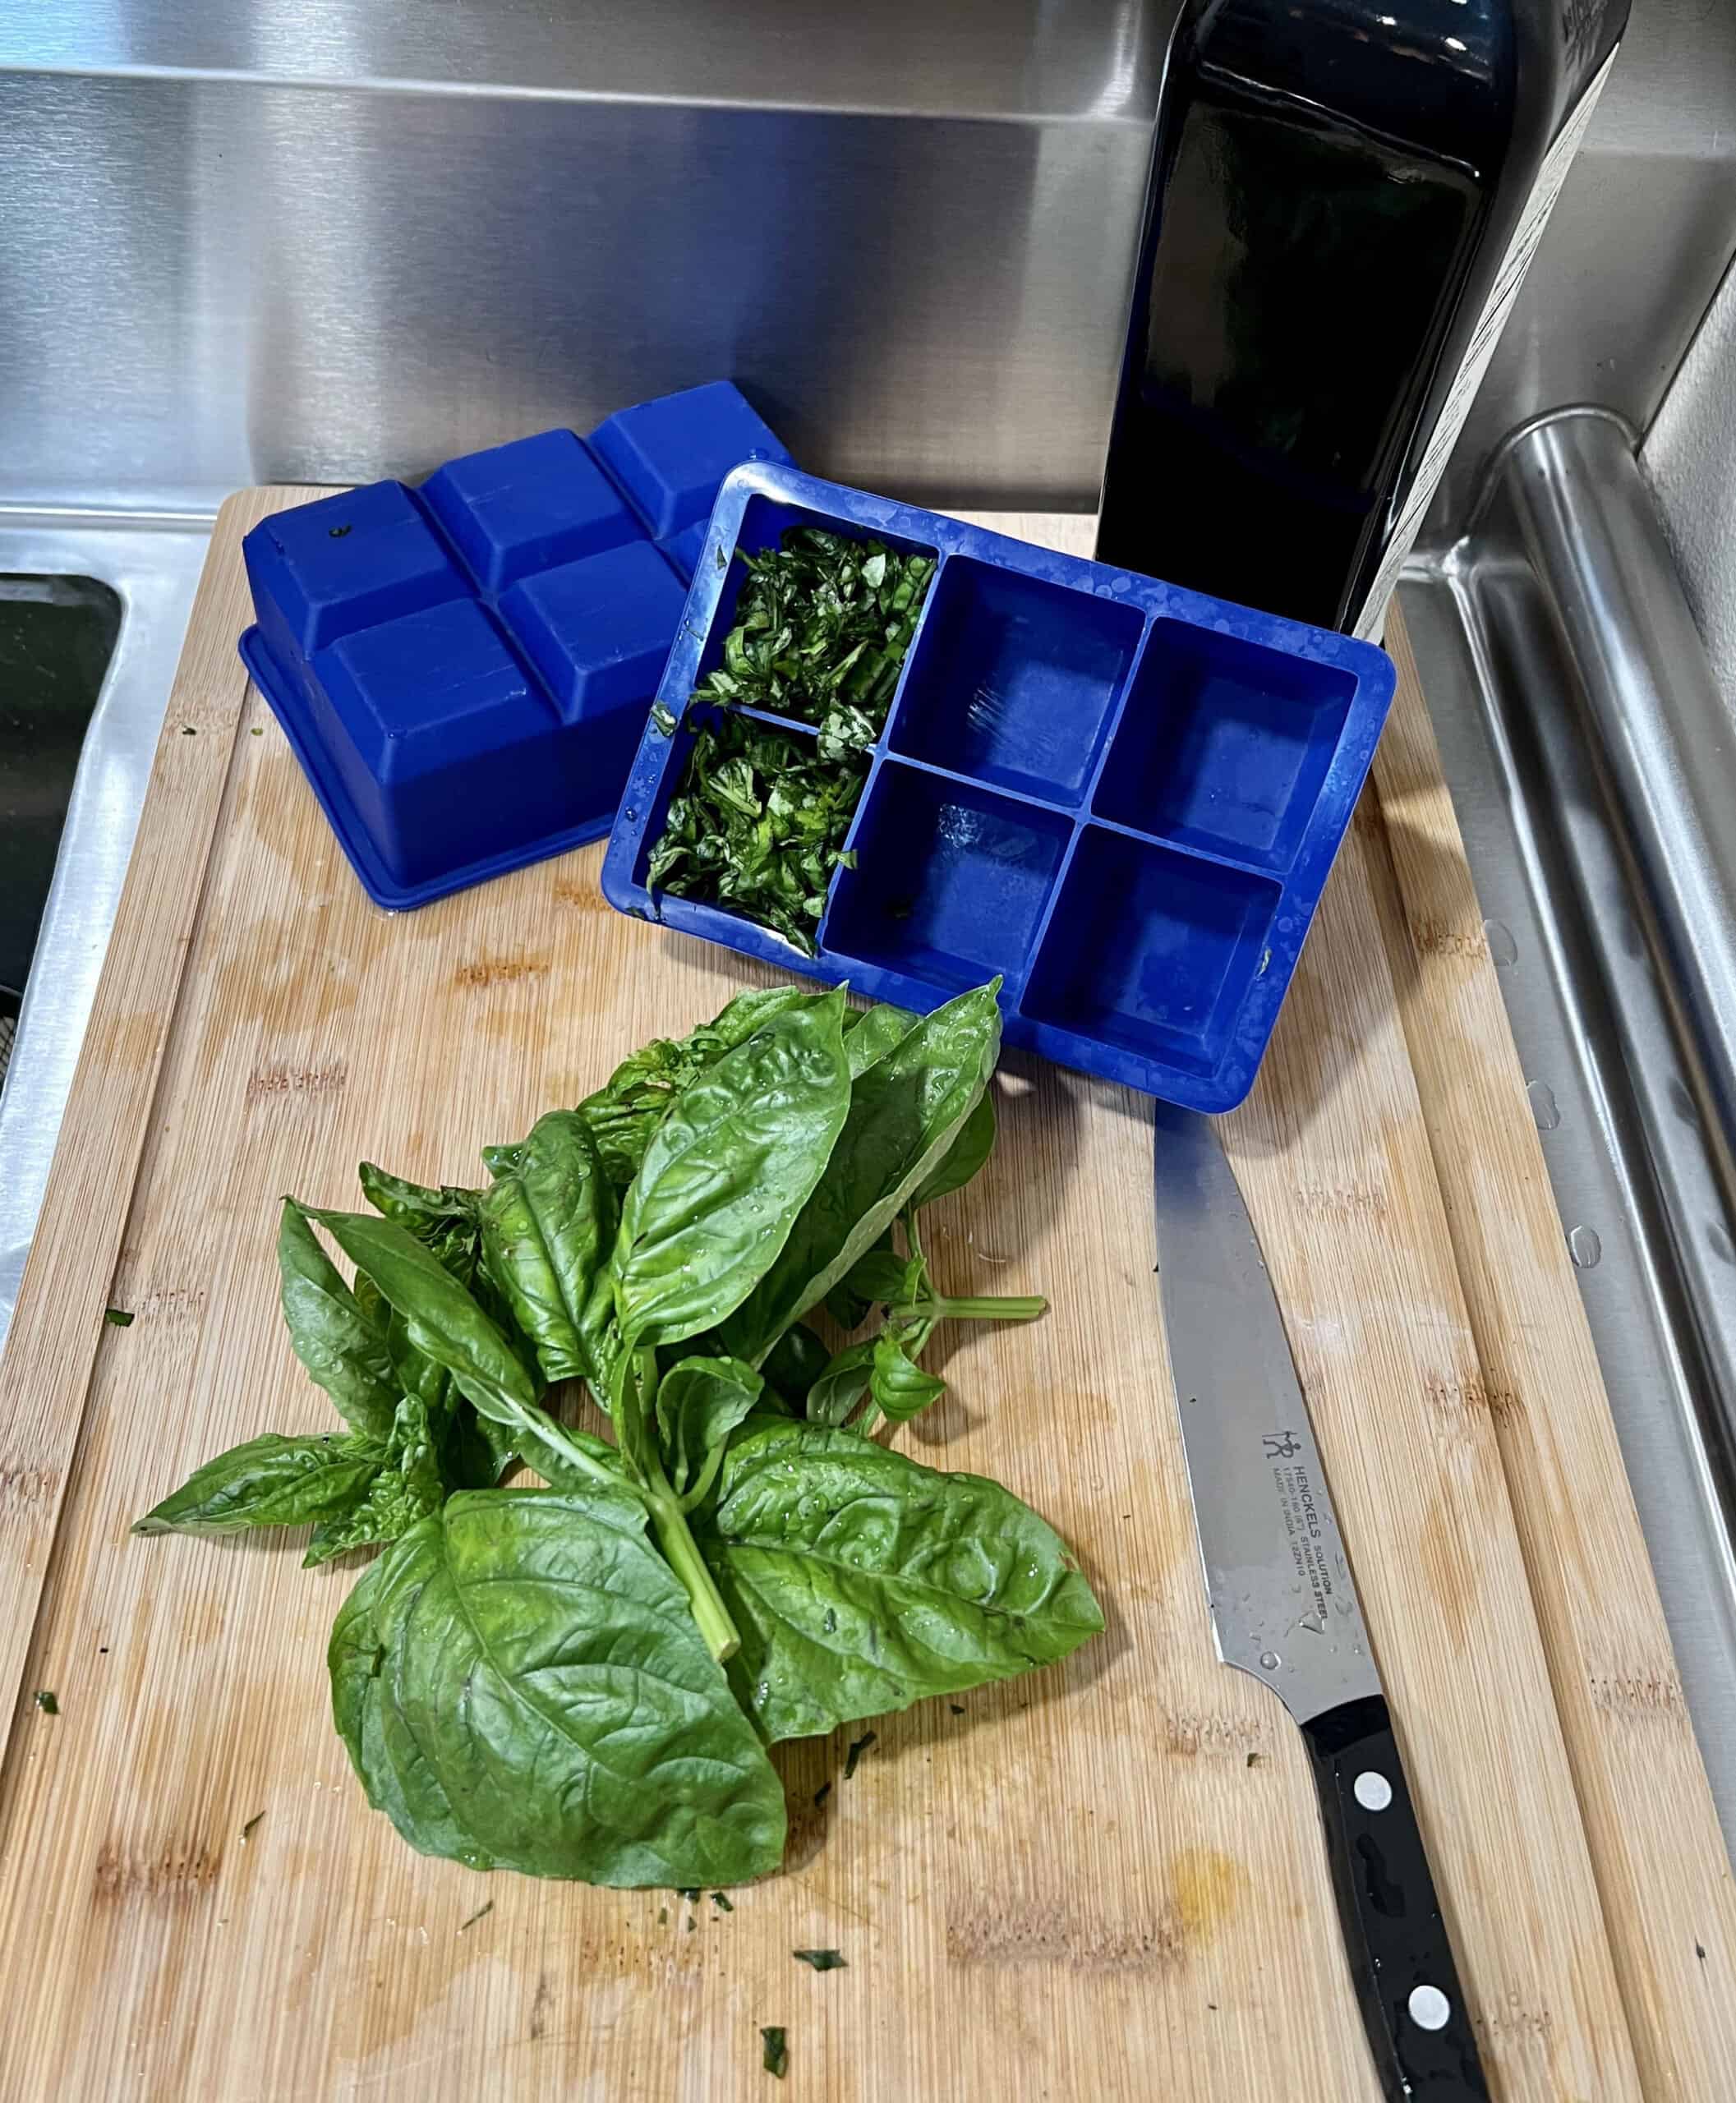
Fresh chopped basil freezes well when packed in ice cube trays then filled with water or oil. Once frozen, the basil cubes can be stored in a large freezer bag and used as needed. © Photographer: Laura Kuhn
Freezing
A quick and straightforward way to preserve herbs for later use in cooking is by freezing. Individual leaves can be placed in single layers on cookie sheets and then flash frozen. Cut chives work well this way. Once frozen, place the herbs into storage containers to reduce exposure to air. Another freezing method is to chop the herbs and load them into ice cube trays, then fill with water. Once frozen, put the cubes into storage containers and add them to recipes when needed. Alliums (onions and garlic) can be easily processed this way, also. The biggest downside to freezing is the required storage space in your freezer and a shorter shelf life.

Other methods include layering whole leaves in salt or oil. Herb essential oils can be transferred to other liquids for use in cooking. For example, herbs can be steeped to create herb-infused vinegars or oils. These methods take more time and care than can be covered here, so more research and preparation should be taken before trying these options. Microwaving takes a bit of trial and error to get the right cooking time for the type of herb used and varies with different types of machines.

Most herbs can be processed successfully in a variety of ways for different uses. A good tip is to experiment and see which techniques work best. Gardeners who experiment, find the methods that work best for their intended use.

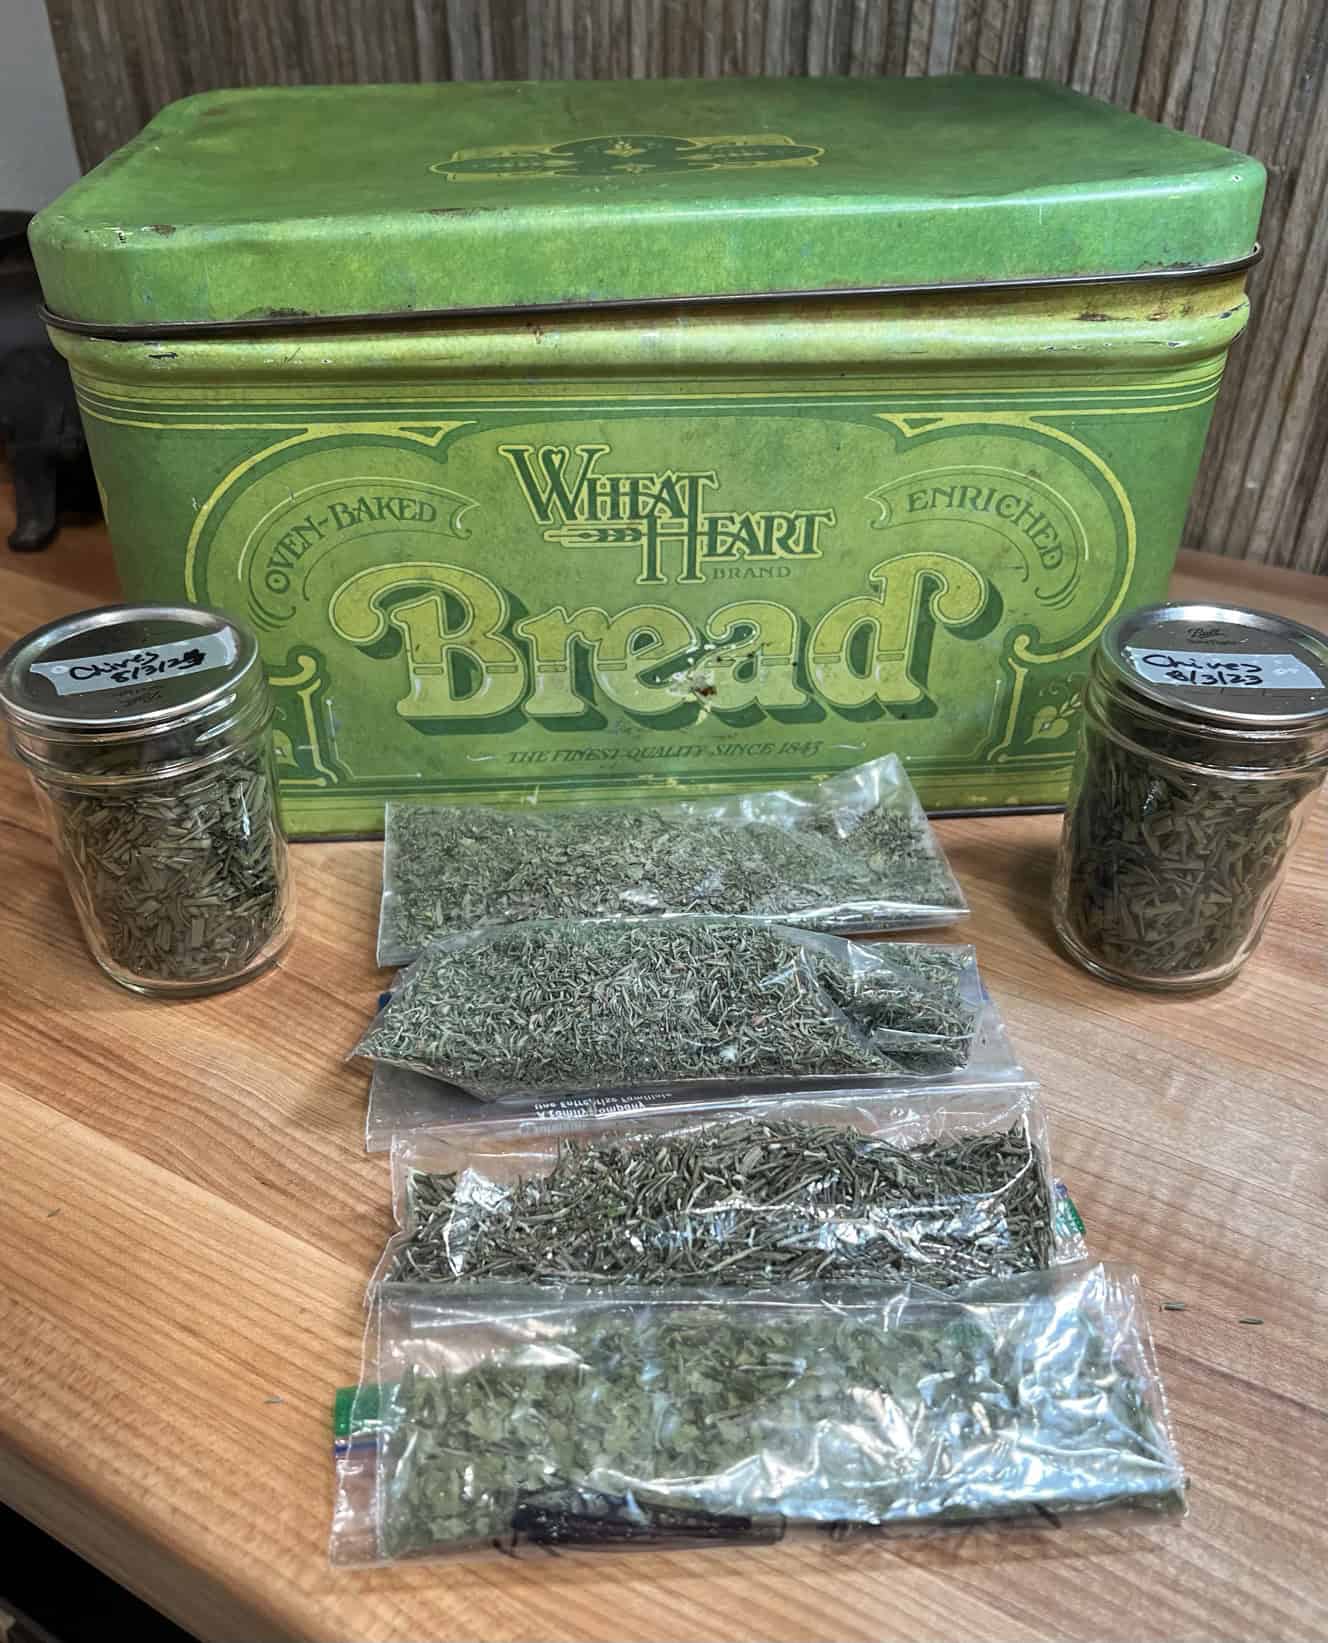
Air tight containers and light blocking storage bin for dried herbs. © Photographer: Laura Kuhn
Storing Herbs –
Dried or dehydrated herbs do not like exposure to light and air, especially moist air. A simple and effortless way to store extra dried herbs is to put them into marked zip lock bags or a vacuumed sealed mason jar. Once each herb is in its container, they will need to be placed in a dark area like inside of a canister or storage container. Keep your herbs in a cool dry area because exposure to heat during storage can affect essential oil content. Storage time will vary on the herb, but if stored properly, they can last for months or longer.

The two most important tips of all are to grow what you will use and grow from seed for the best plant selection.

REFERENCES AND RESOURCES:

Rodale’s Encyclopedia of Herbs, May 2000, Rodale Press

Drying: Herbs, National Center for Home Food Preservation, University of Georgia, no date cited. https://nchfp.uga.edu/how/dry/recipes/herbs/

Thamkaew, G., Sjöholm, I., & Galindo, F. G. (2020). A review of drying methods for improving the quality of dried herbs. Critical Reviews in Food Science and Nutrition61(11), 1763-1786. https://doi.org/10.1080/10408398.2020.1765309

Author: Laura Kuhn

ABOUT THE AUTHOR:
Laura is new to the Skagit Valley but has more than 30 years of experience growing in coastal, inland valley, and desert climates. She had fun trying to grow herbs while traveling full-time in an RV. Laura is a 2023 graduate of the Skagit County WSU Extension Master Gardener program.

Questions about home gardening or becoming a Master Gardener, may be directed to: Skagit County WSU Extension Office, 11768 Westar Lane, Suite A, Burlington, WA 98233; by phone: 360-428-4270; or via the website: https://extension.wsu.edu/skagit/mg/


A Second Act for Your Square 1-Gallon Pots at the Discovery Garden!

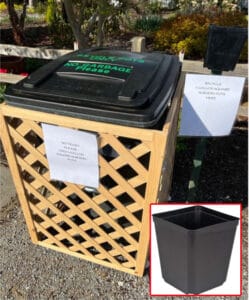
Bring your leftover square 1-gallon pots to the Discovery Garden (16650 State Route 536, Mount Vernon). The bin for recycling the square 1-gal pots is located in the parking lot, just north (to the right) of the main entrance.
We only need square 1-gallon pots like the ones pictured below (bottom right). The recycling bin will be available now through fall. Simply put your pots into the bin, and we take care of the rest!


pot recycling


AMGPost_header5
102023_Header

Plant Bulbs Now For Spring Color

Take the time in the fall to plant bulbs and enjoy the first signs of spring in late January.


              Subscribe to the Blog >

By Jessamyn Tuttle, Skagit County WSU Extension Master Gardener

Bulbs are an important part of the spring garden. They provide color and interest when it’s most appreciated, as well as food for early pollinators. After putting on a spectacular show throughout spring, bulbs then fade into dormancy and let the summer garden do its thing.

To make that happen, however, the work of planting bulbs needs to happen in the fall. It’s strangely satisfying to put dry, dormant bulbs into the garden on a blustery October day, knowing that in just a few short months they will be shooting up new growth and flowers.

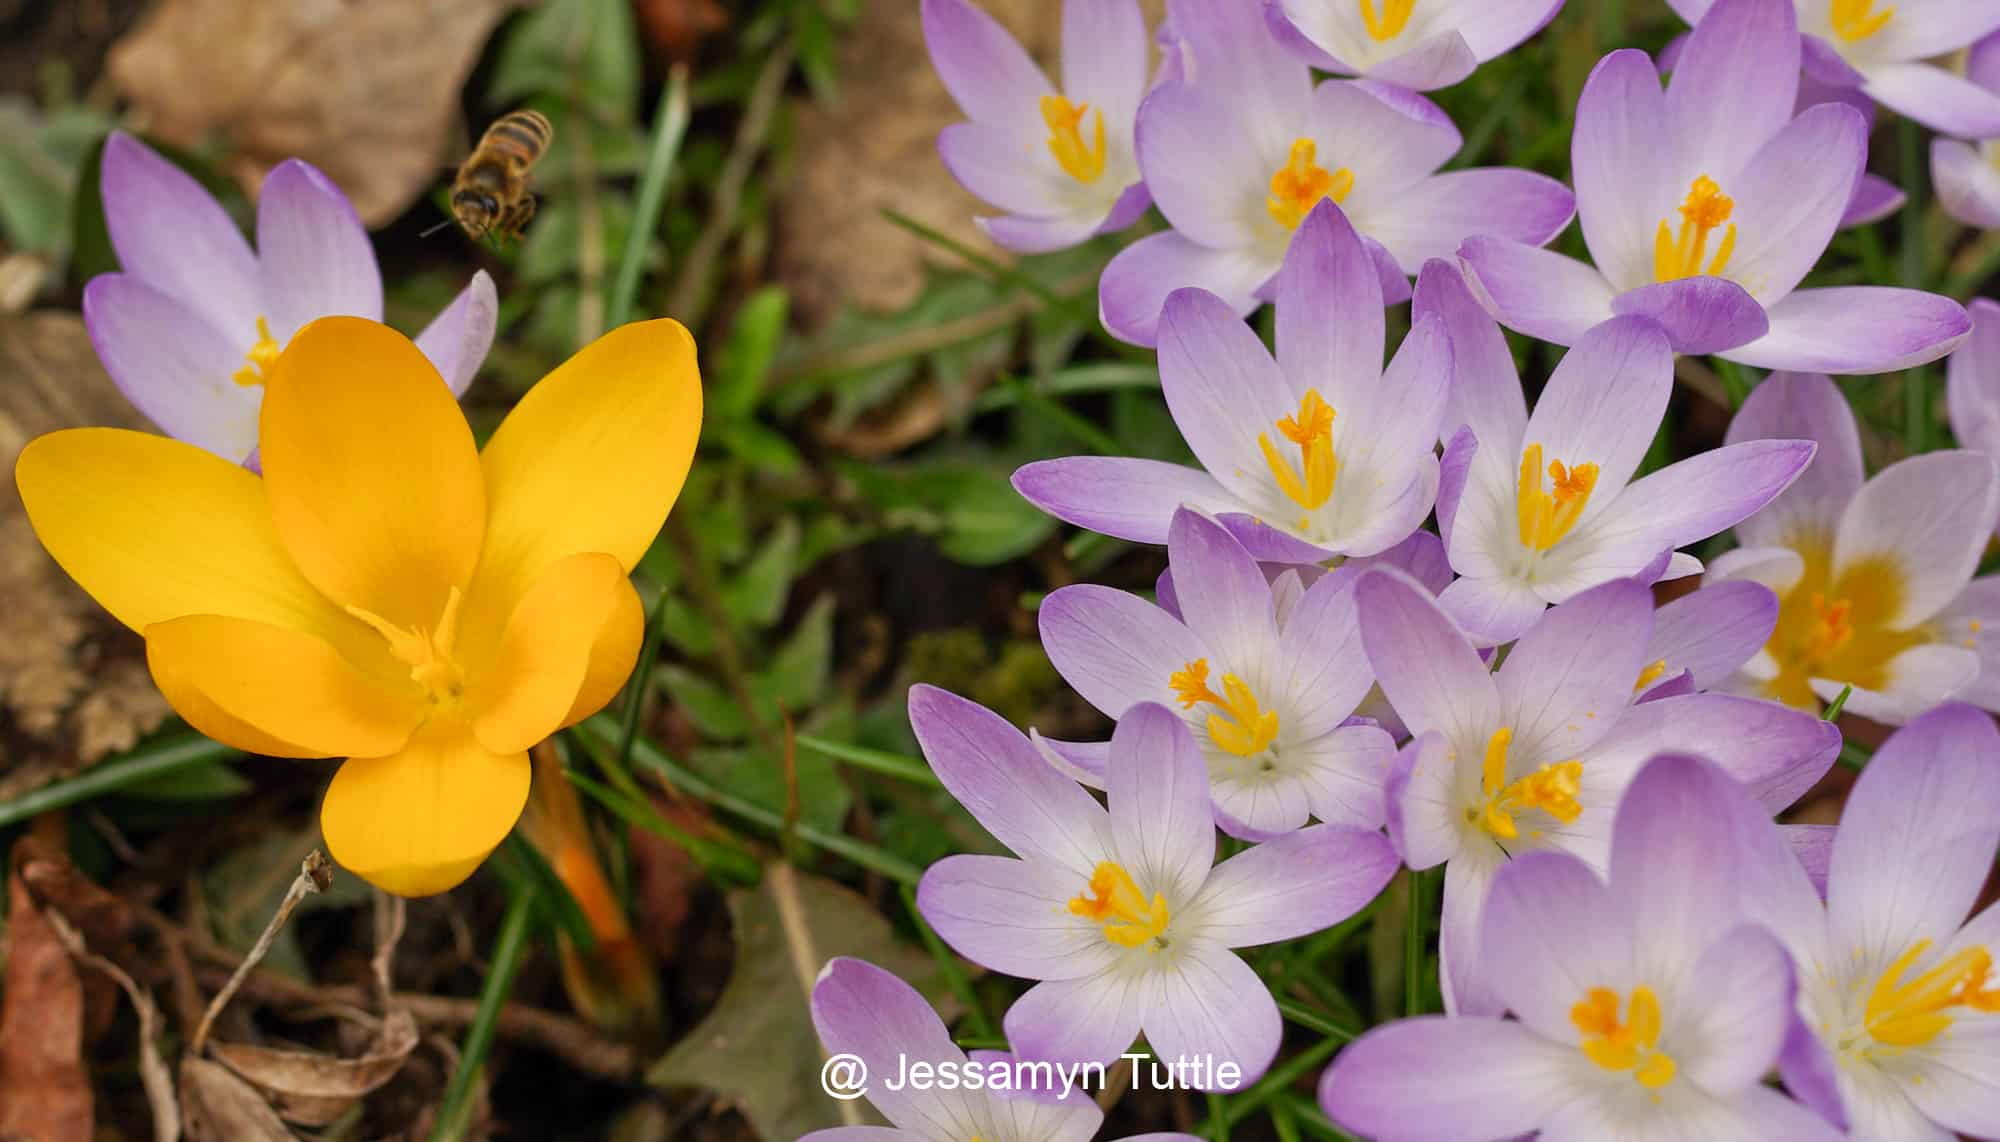
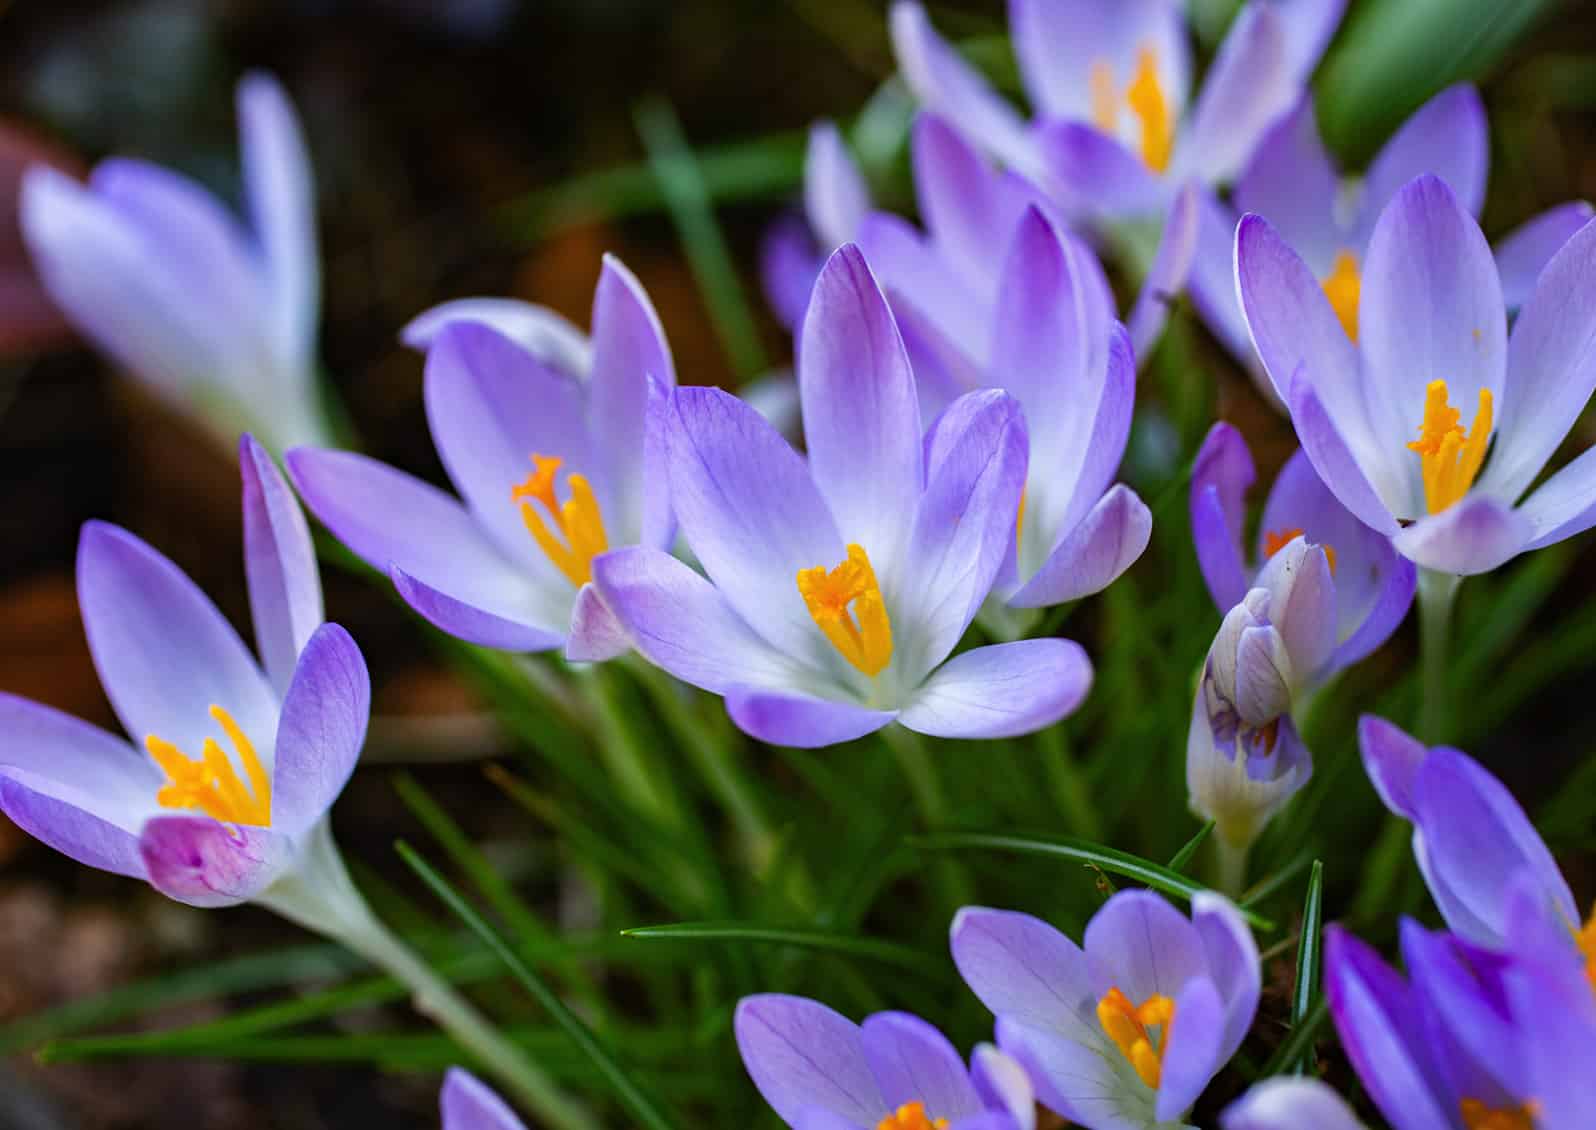
Crocus tommasinianus © Jessamyn Tuttle

Crocus tommasinianus © Jessamyn Tuttle

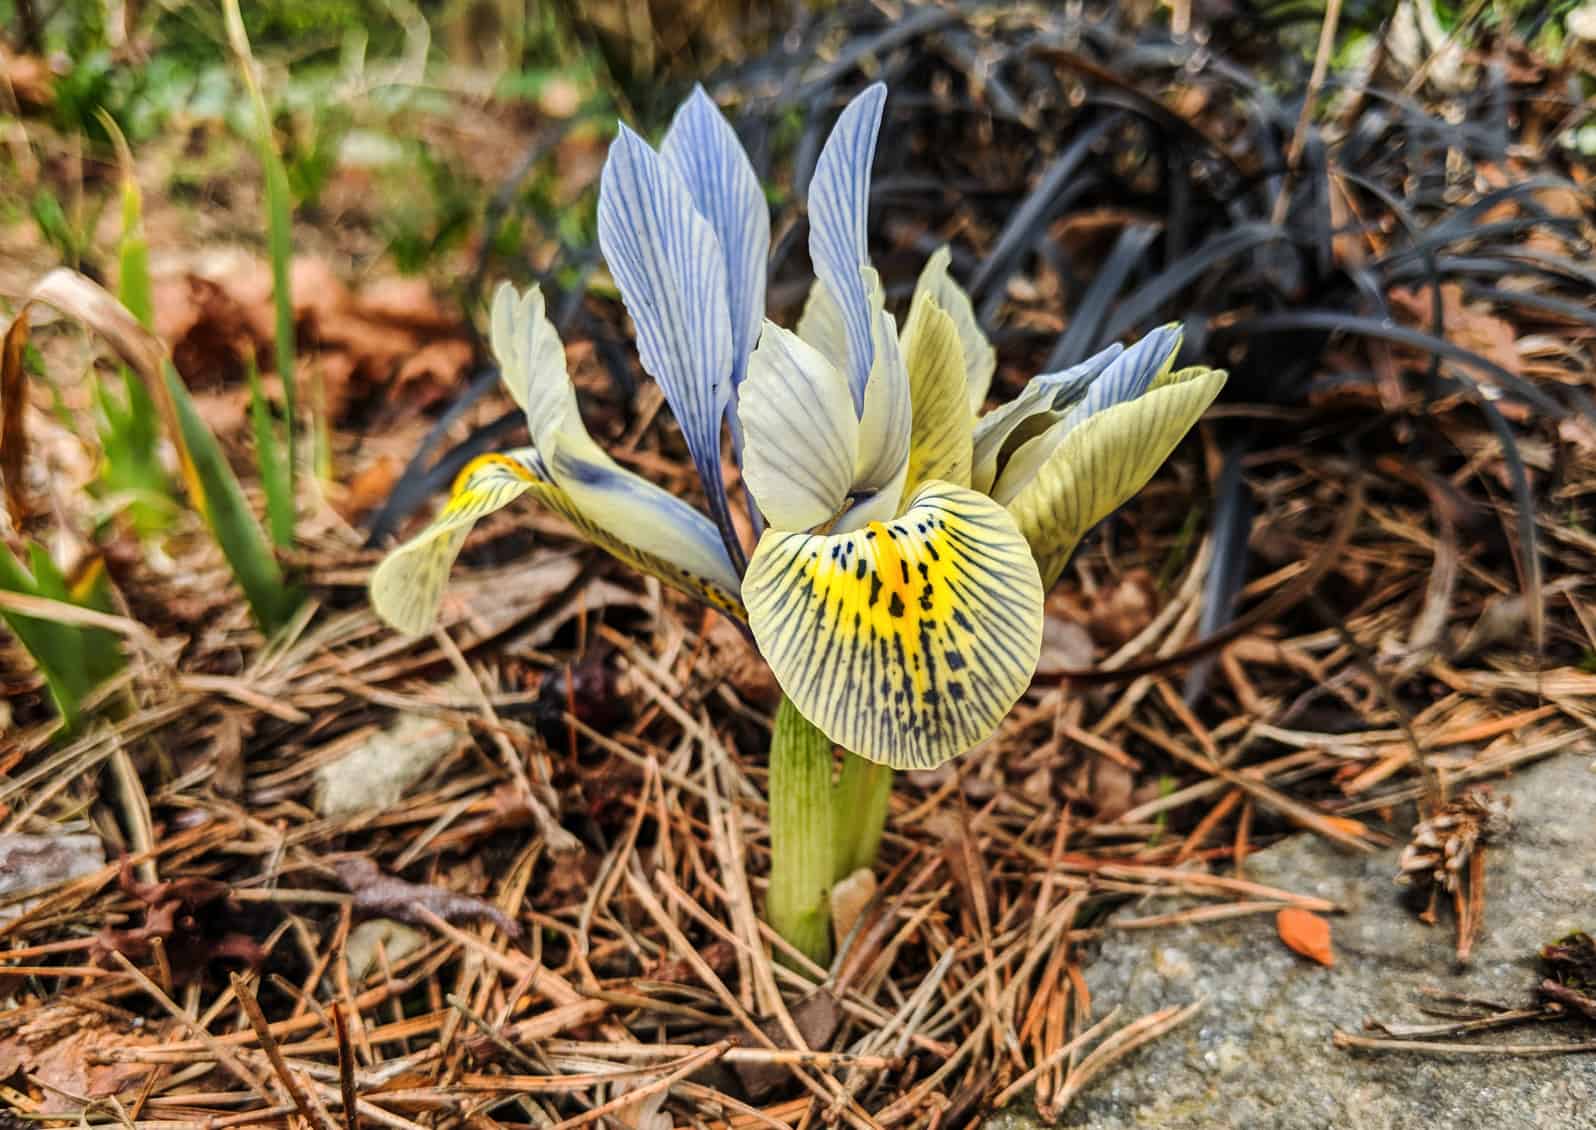
Iris histrioides 'Katharine Hodgkin' © Jessamyn Tuttle

Iris histrioidesKatharine Hodgkin’ © Jessamyn Tuttle

Early Bloomers
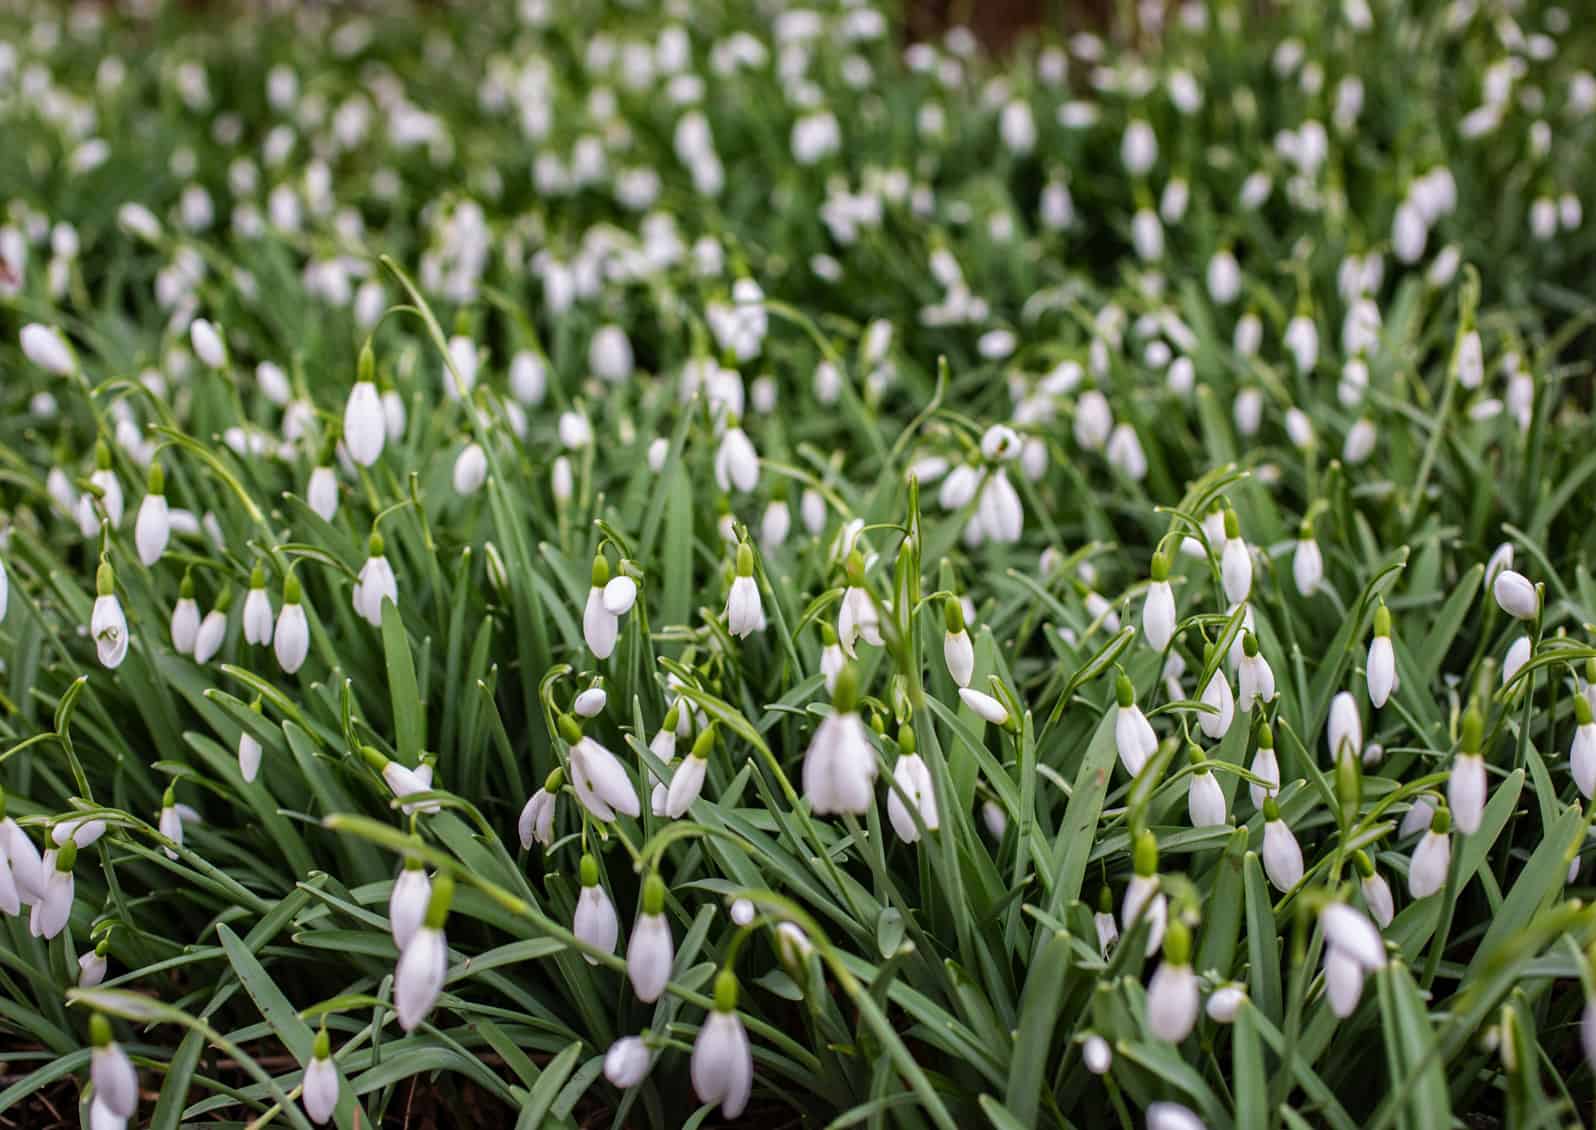
The first bulbs to bloom here in Western Washington are typically snowdrops (Galanthus spp.), often emerging in January but coming into their full bloom in late February. Whether planted in clumps or a massive drift, snowdrops are a sure sign that spring is on the horizon. Snowdrops are always white with green or yellow markings, the double-flowered varieties are particularly charming.

Winter aconite (Eranthis hyemalis) is a tuberous member of the buttercup family, providing a vivid spot of yellow surrounded by a frill of greenery. It blooms around the same time as snowdrops with a bonus in that it’s resistant to deer and rabbits.

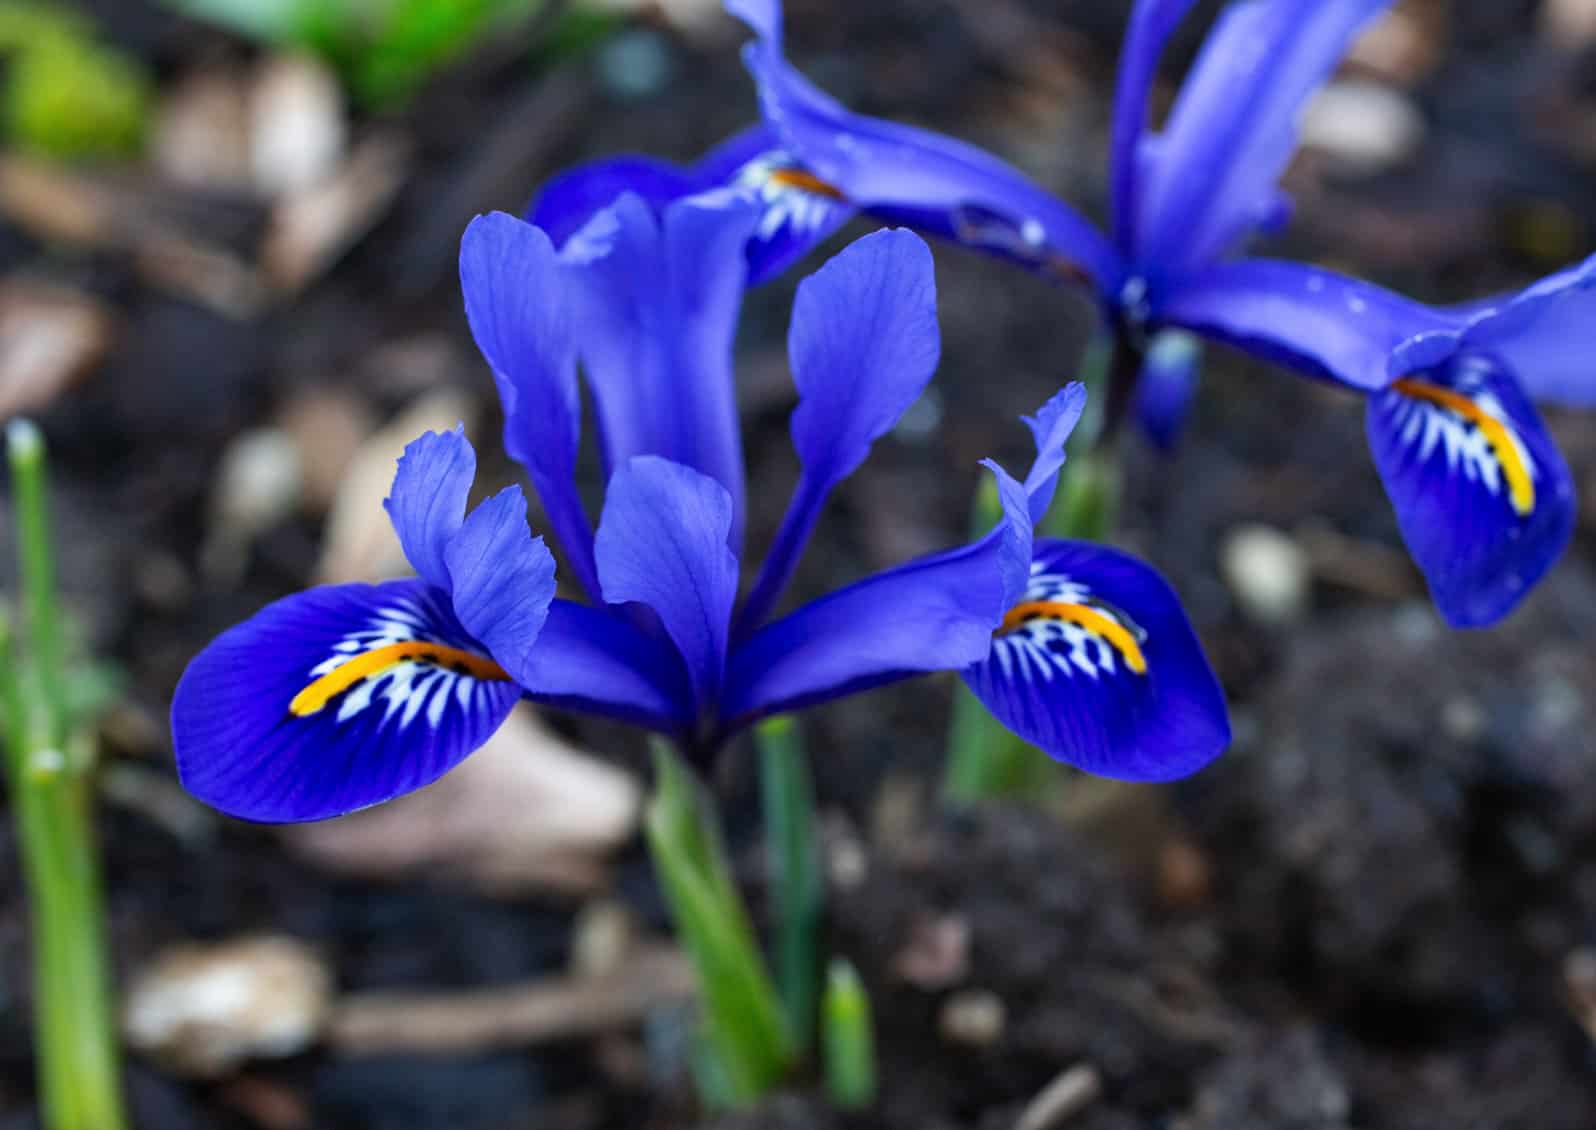
Iris reticulata 'Harmony', Discovery Garden © Jessamyn Tuttle

Iris reticulata ‘Harmony’ © Jessamyn Tuttle

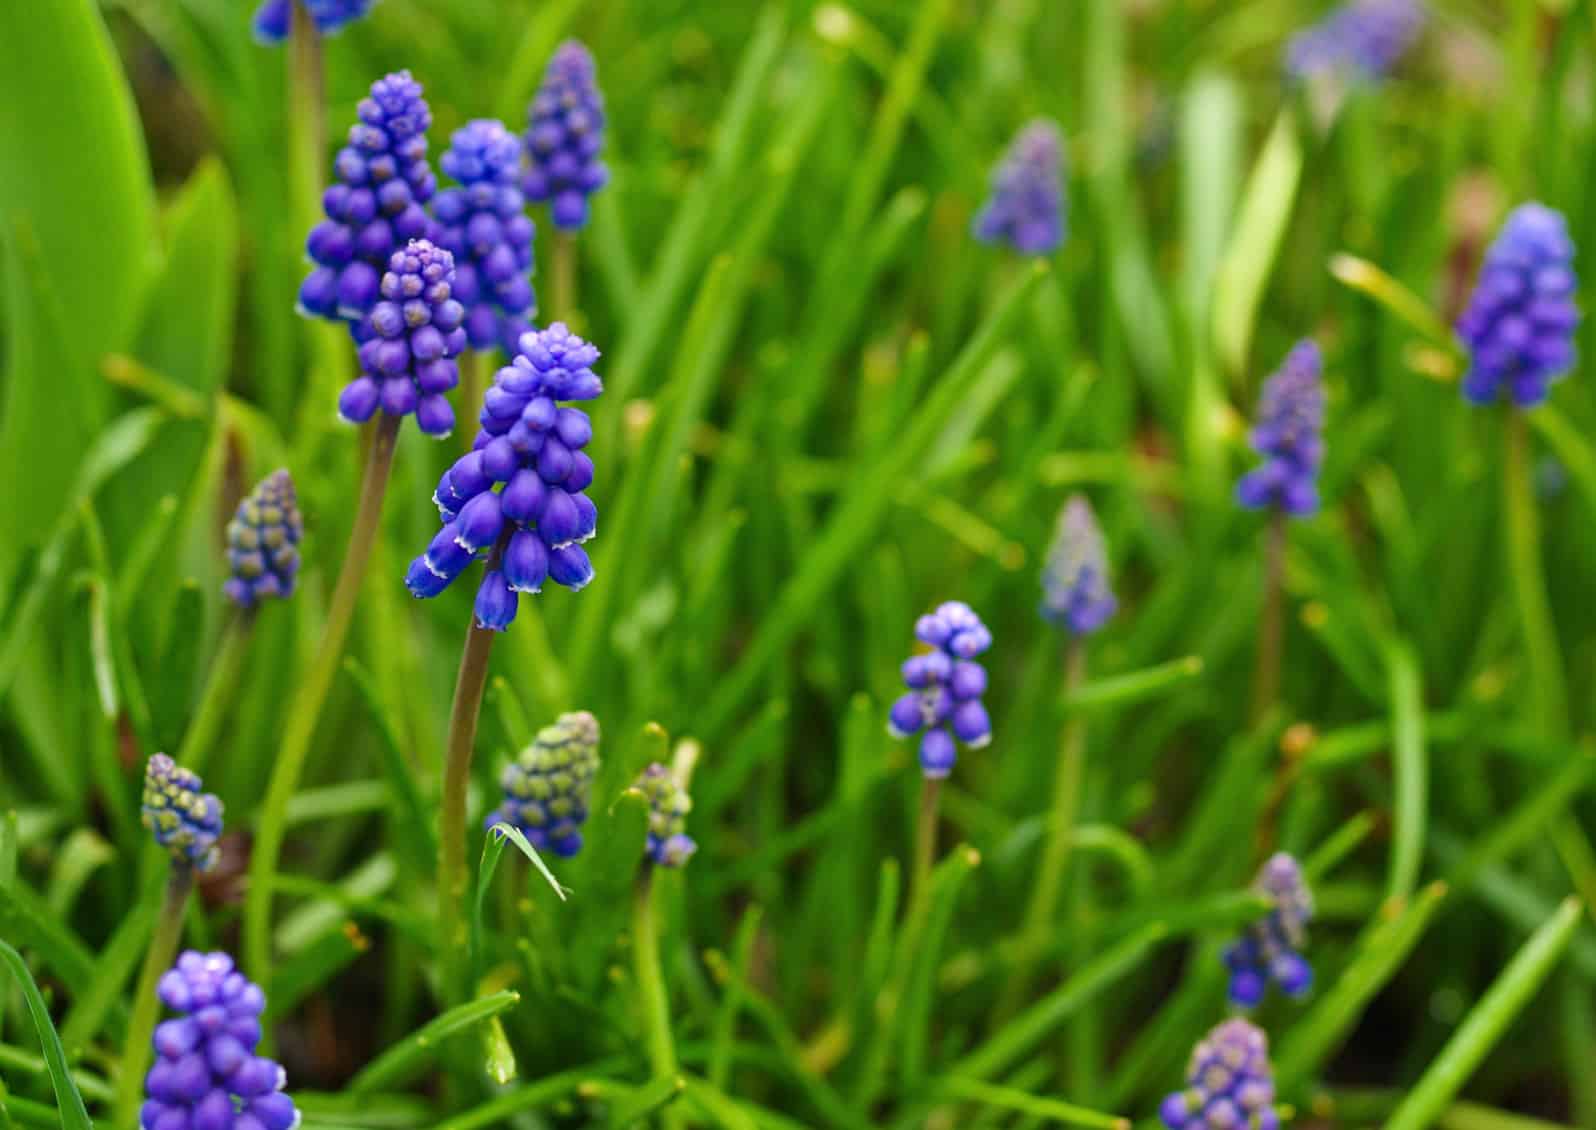
Muscari © Jessamyn Tuttle

Miniature iris, also called rock garden iris or bulbous iris, begin blooming in February. Unlike bearded irises, which grow from rhizomes, these come from small bulbs and are easy to slip into the garden wherever you have a bit of space between plants, especially those that go dormant in the winter. The miniature iris flowers are only a few inches across and sit on short stems. They are unfortunately wildly popular with slugs, so you may need to get out in the garden with slug bait earlier than usual to protect them. The most commonly available species, Iris reticulata, comes in white, blue, and purple. You can also find bright yellow I. danfordiae, or look for the fancy veining of I. histrioides (‘Katharine Hodgkin’ is a particular favorite.)

Crocuses pop up on the heels of snowdrops. Their grassy foliage comes up from the corm in February or March, followed quickly by delicate flowers in brilliant colors including white, yellow, lavender, and deep purple. They only open on sunny days, protecting their fragile petals from rain. The earliest varieties, commonly called snow crocus, include smaller-flowered species like Crocus chrysanthus and Crocus tommasinianus, which come in a lovely range of colors and patterns. The larger cultivars, sometimes called Dutch crocus, like C. vernus ‘Pickwick’ and ‘Jeanne d’Arc’ appear a few weeks later. Crocuses are deer-resistant, although not slug-resistant. Crocuses can be planted in swathes in lawns if you’re able to hold off on mowing until the foliage has ripened, otherwise, they fit nicely anywhere in the garden where they will get some sun.

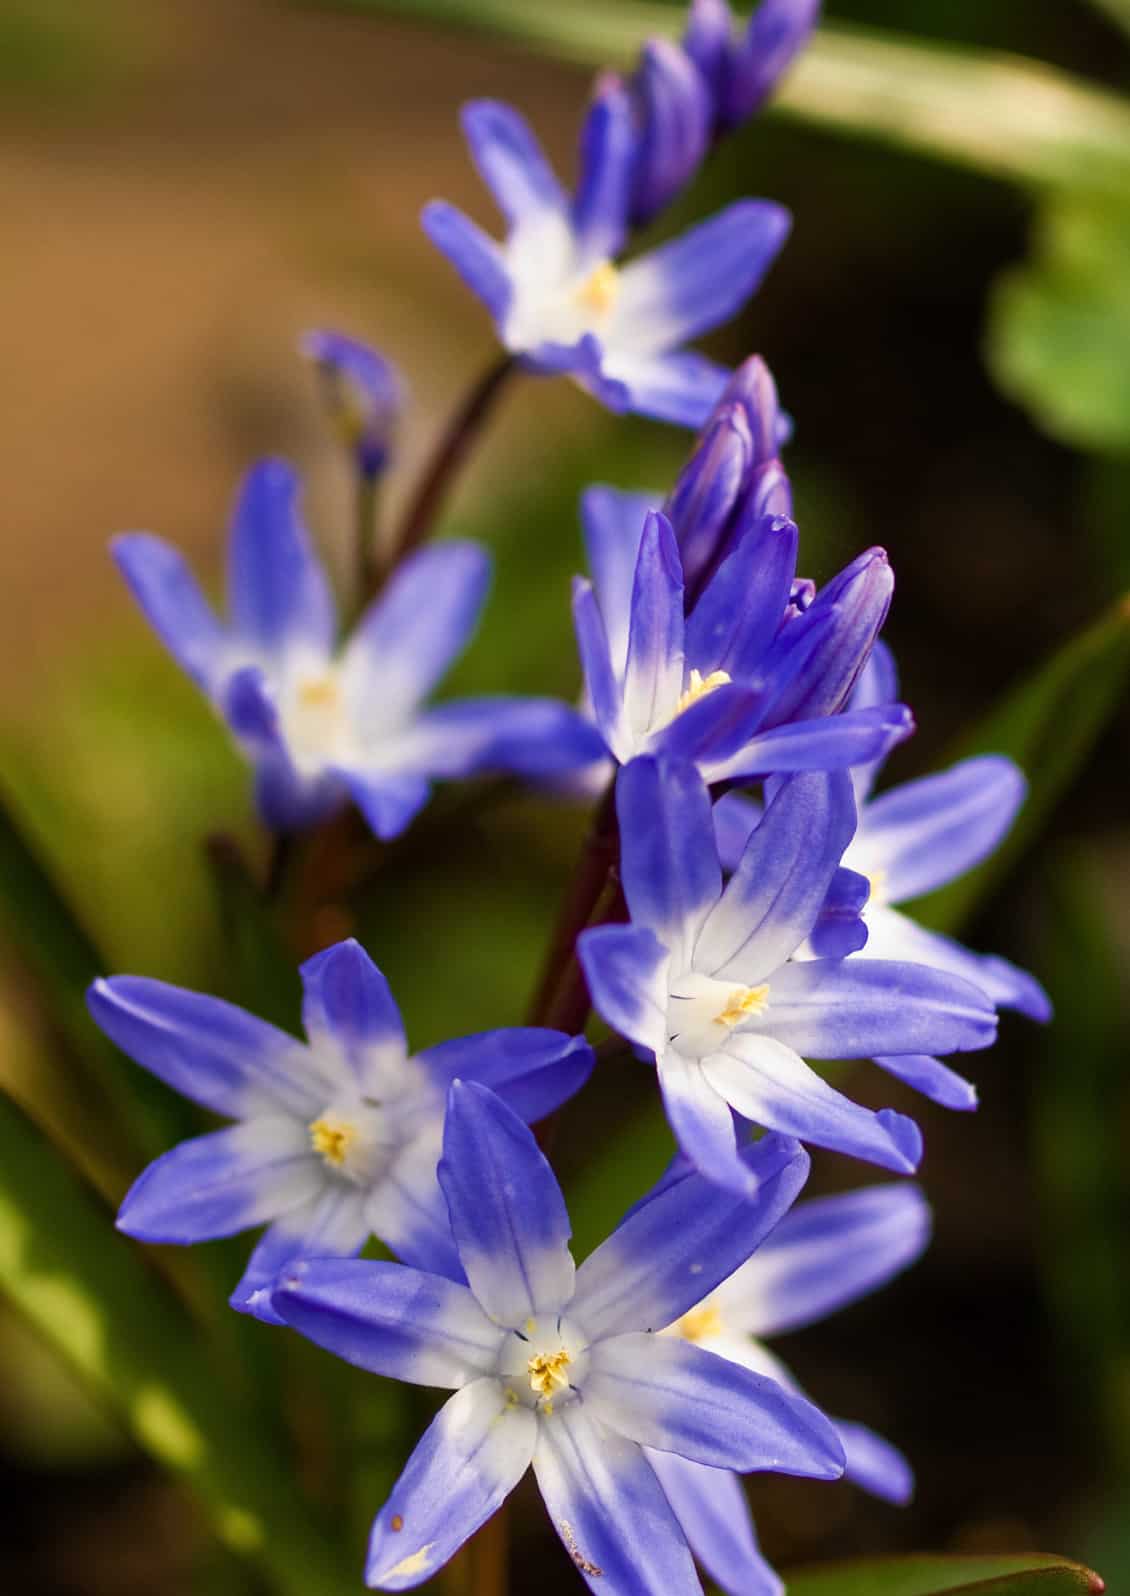
Muscari armeniacum, also known as grape hyacinth, is a wonderful addition to the spring garden thanks to its pure blue color (they also come in white, purple, and pink). Muscari spreads with enthusiasm by both seed and bulb offset, so be aware of the commitment you’re making when planting it. Blooming in March and April, it makes a perfect companion for daffodils. A slightly earlier option for blue flowers is Chionodoxa or Glory-of-the-Snow. These deceptively fragile little blossoms pop out of seemingly nowhere and look their best when planted en masse. Species include C. luciliae and C. forbesii, among others, and also come in pink and white.

Snowdrops in the Discovery Garden © Jessamyn Tuttle

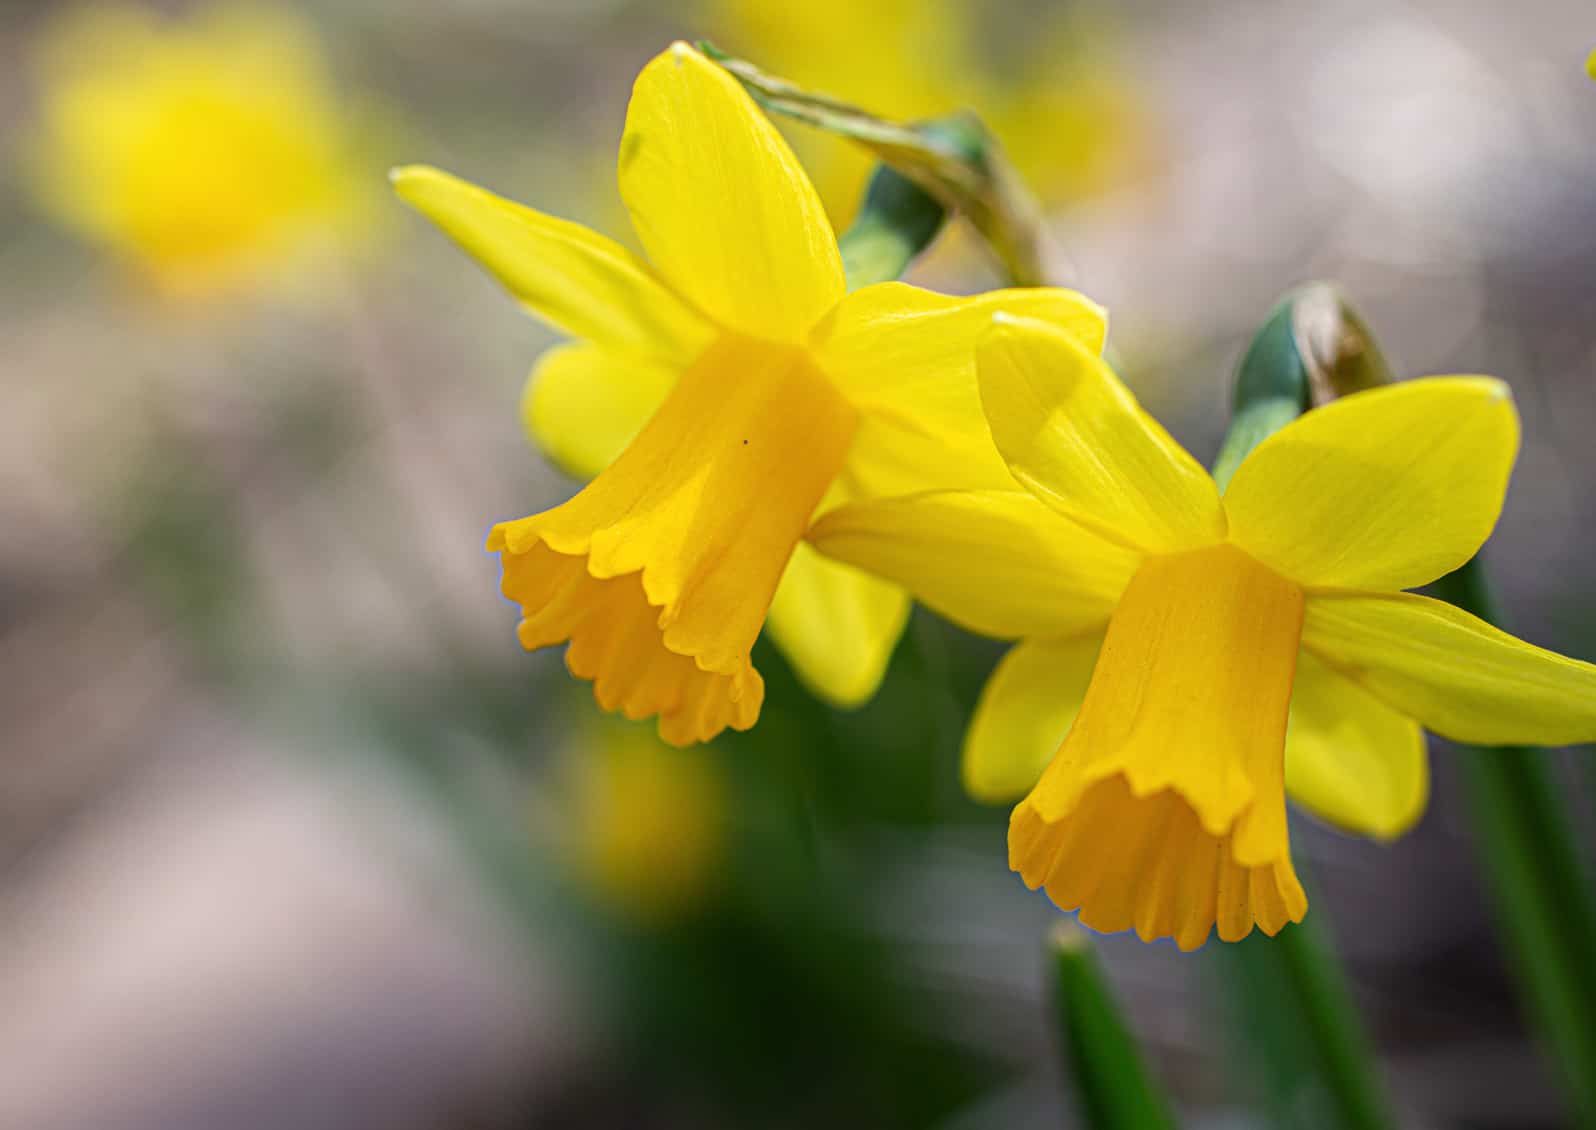
Tete a tete miniature Narcissus © Jessamyn Tuttle


Snowdrops in the Discovery Garden © Jessamyn Tuttle

Snowdrops © Jessamyn Tuttle


The Narcissus Family is Wide and Diverse
While the most commonly seen type of narcissus is the large yellow trumpet daffodil like ‘King Alfred’ or ‘Dutch Master,’ there are hundreds of varieties to choose from, including early blooming miniatures like ‘Tete a Tete,’ a tiny yellow trumpet narcissus, which is often available in pots very early in the season, but does just as well planted out in the garden, often coming up through a layer of snow. ‘February Gold’ is a slightly taller yellow miniature, while ‘Jack Snipe’ is a handsome dwarf Narcissus featuring a yellow trumpet surrounded by white, swept-back petals.

For a real punch, the distinctive Narcissus ‘Jetfire’ offers bright yellow and red-orange blooms. One of the very earliest daffodils, however, is ‘Rijnveld’s Early Sensation’ which produces a full-size trumpet daffodil flower a full month before other daffodils, an impressive show that sometimes gets cut abruptly short by a late winter snowfall or windstorm.

Later blooming varieties include the big trumpet daffodils but also the small cup, doubles, and large cup, like the classic ‘Ice Follies’ with its white petals and flat yellow cup, and the pretty, fragrant tazetta daffodils like the delightful white and orange cultivar ‘Geranium.’ Late season brings the delicate, backswept flowers of Narcissus poeticus var. recurvus, also known as ‘Pheasant Eye’ daffodil.

'Spring Green' tulip © Jessamyn Tuttle

Spring Green’ tulip © Jessamyn Tuttle

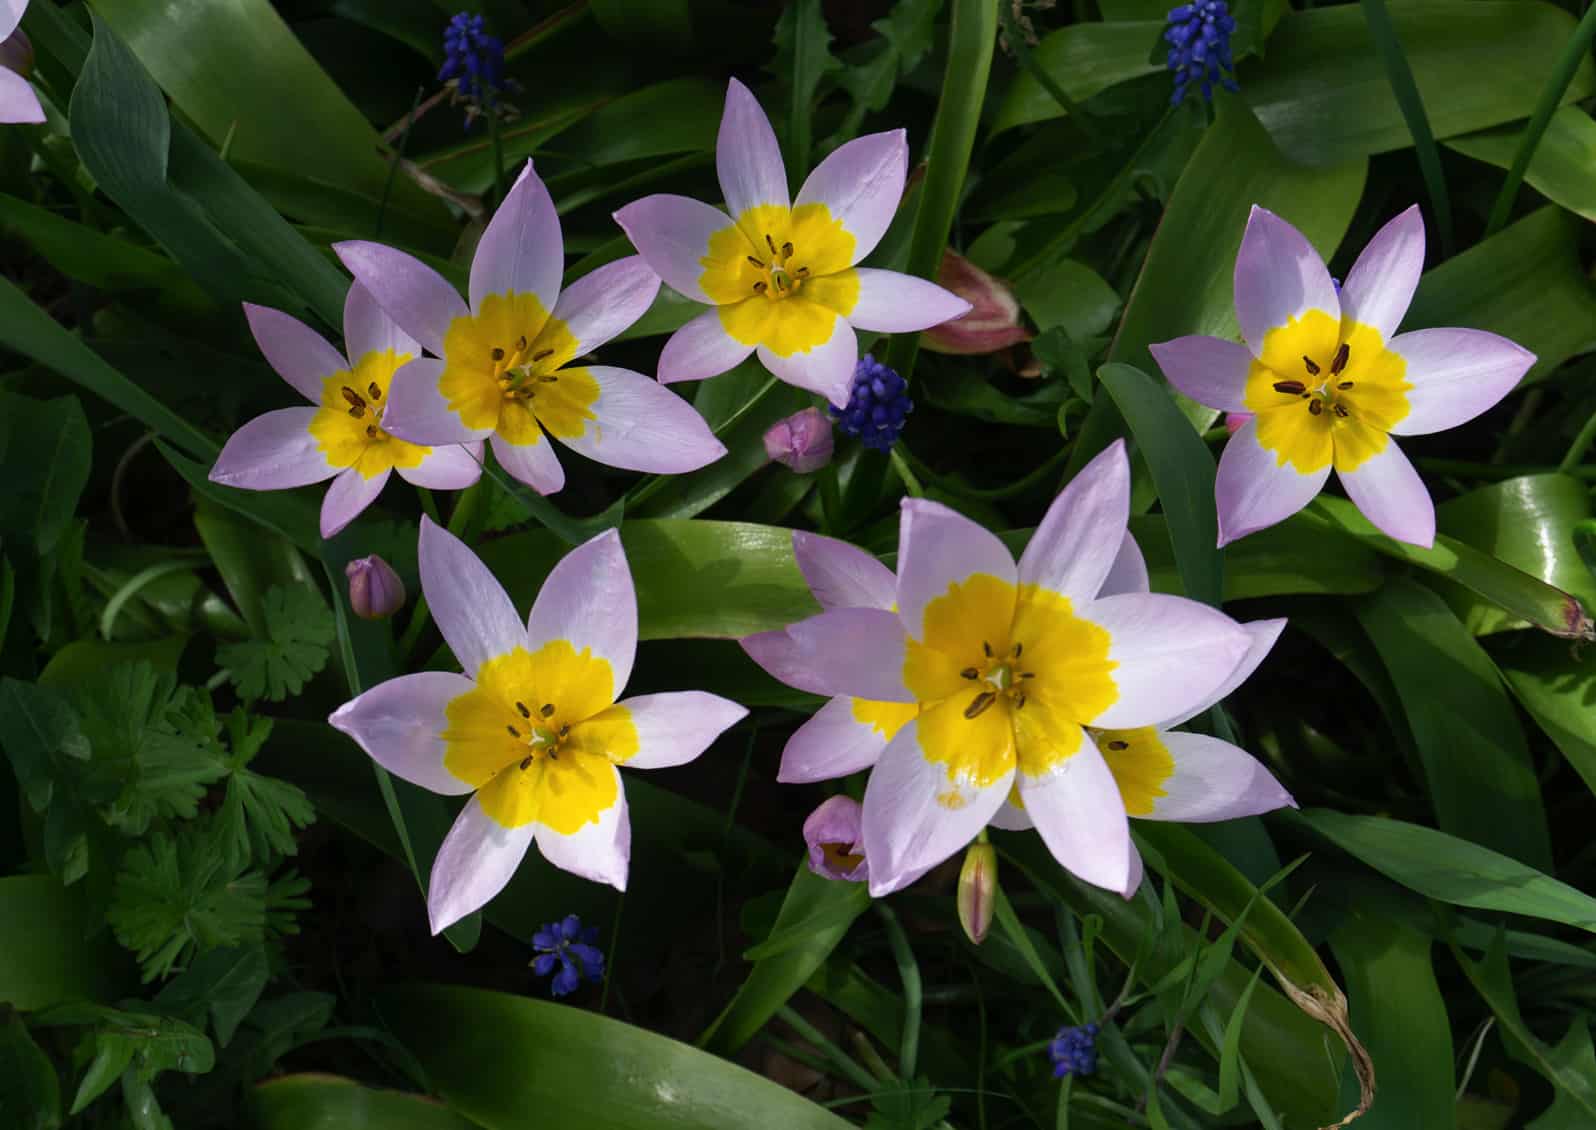
Tulipa saxatilis © Jessamyn Tuttle

Tulipa saxatilis © Jessamyn Tuttle

The Pinnacle of Spring
For many people, especially here in Skagit Valley, the pinnacle of spring is when the tulips bloom. There are many, many varieties of tulips, including single early, single late, doubles, parrots, triumph, Darwin hybrids, emperor, and fringed, each with its own bloom time and flower type. They come in every color except blue, from ‘Spring Green’, a white tulip with pale green stripes to the nearly black ‘Queen of Night.’

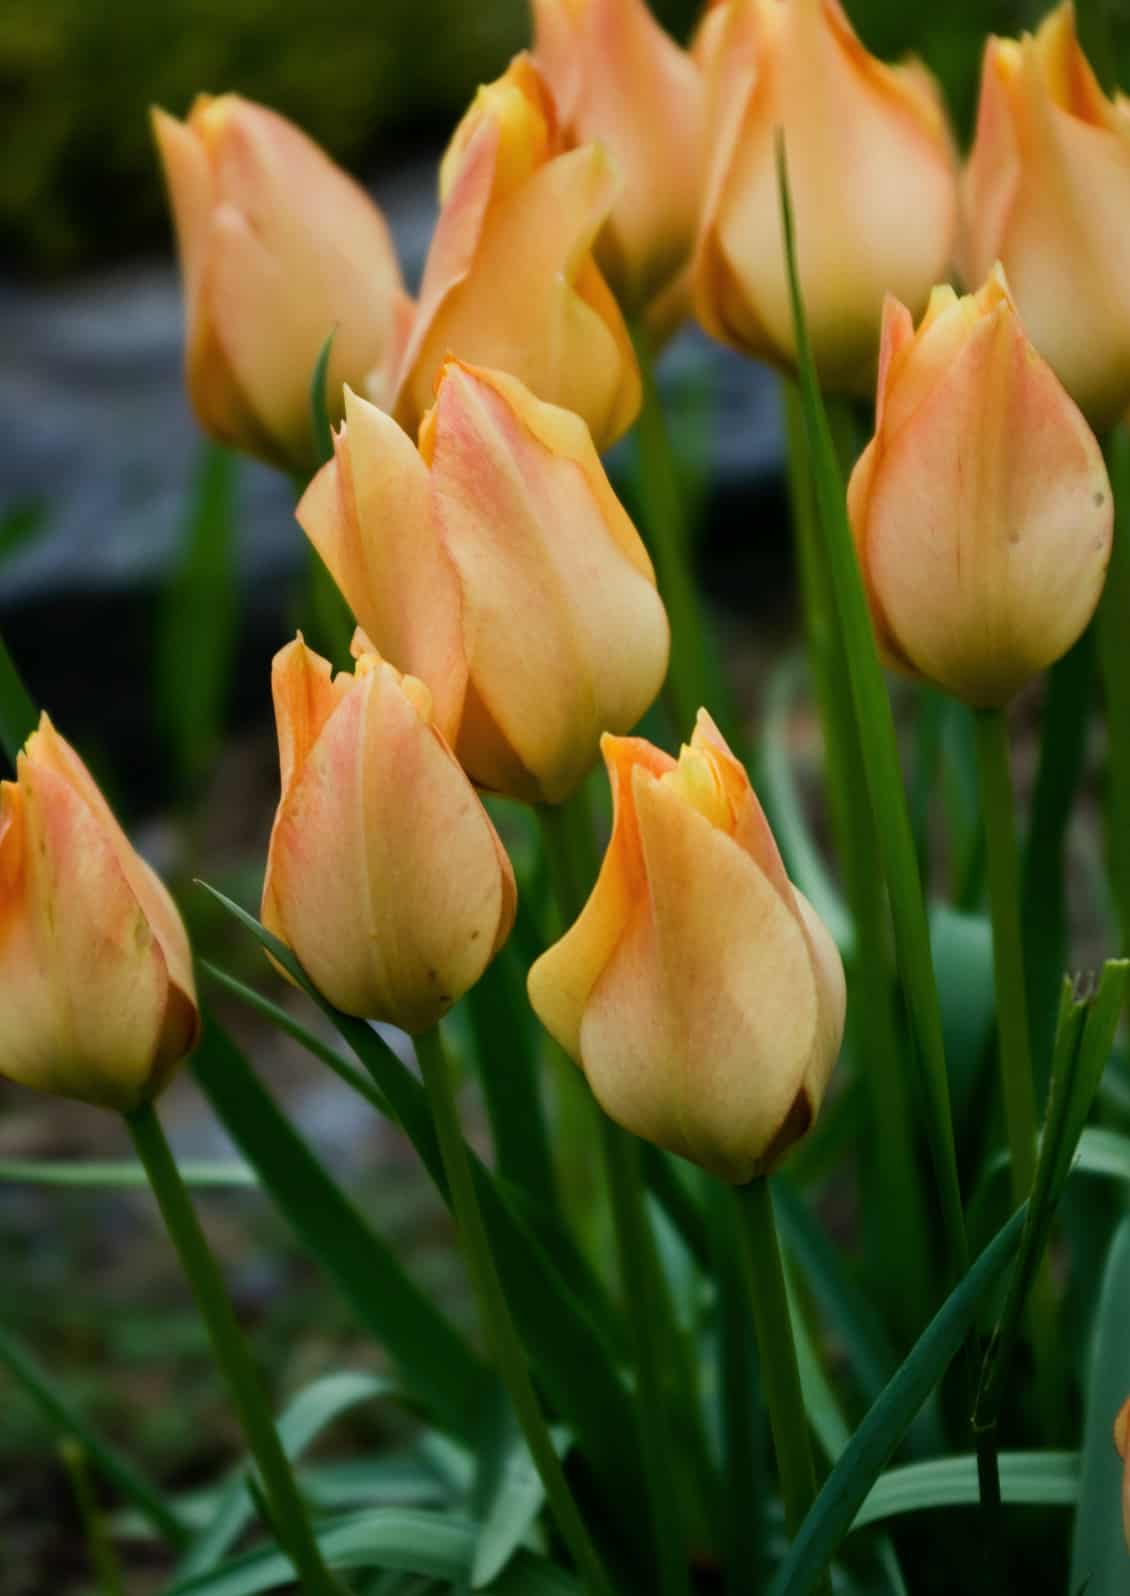
There are also species of tulips which are less showy than the big hybrids but very hardy and great for naturalizing in the garden. Tulipa saxatilis is a vigorous spreader that carpets the ground with showy lavender-pink flowers with brilliant yellow centers, while T. batalinii ‘Bright Gem’ has blue-green foliage topped with yellow or apricot flowers streaked with pink.

Chionodoxa, or Glory-of-the-Snow  © Jessamyn Tuttle

Chionodoxa, or glory-of-the-snow © Jessamyn Tuttle

Tulipa batalini 'Bright Gem' © Jessamyn Tuttle

Tulipa batalini ‘Bright Gem’ © Jessamyn Tuttle

Planting Spring Bulbs
The rule for most bulbs is to plant in late fall or early winter, setting them at a depth 2-3 times the size of the bulb. Not planting bulbs deep enough is often what causes them, especially tulips, to vanish instead of coming back year after year. Pick a spot with full or at least part sun, and well-draining soil. Bulbs do not do well in damp spots. You can add some bulb fertilizer to the soil while planting if you like. Small, early-blooming bulbs can be tucked in throughout a garden bed, but all bulbs look beautiful planted together in a group to make swathes of color in the spring.

Bulbs should be well watered at the time of planting and while actively growing and flowering but do best when allowed to stay mostly dry through their summer dormancy. And if you want your bulbs to come back next year, don’t cut the foliage down until it has ripened, since the leaves are what provide the bulb with food for the next season.

If you plant every bulb listed here, you should have a succession of colors starting in January until the rest of the garden fills out in May. Enjoy!


REFERENCES:

https://www.missouribotanicalgarden.org/Portals/0/Gardening/Gardening%20Help/Factsheets/Flowering%20%20Bulbs17.pdf

Botts, B. Early spring bulbs. Chicago Botanic Garden https://www.chicagobotanic.org/plantinfo/smart_gardener/early_spring_bulbs

Slade, N (2014). The plant lover’s guide to snowdrops. Timber Press.

Austin, C (2005). Irises: A gardener’s encyclopedia. Timber Press.


ABOUT THE AUTHOR:

Jessamyn Tuttle is a Skagit County WSU Extension Master Gardener, Class of 2017. She is co-manager of the Plant House and also coordinates the Iris Garden room in the Discovery Garden on Hwy 536 west of Mount Vernon.

_________

Questions about home gardening or becoming a Master Gardener, may be directed to: Skagit County WSU Extension Office, 11768 Westar Lane, Suite A, Burlington, WA 98233; by phone: 360-428-4270; or via the website: https://extension.wsu.edu/skagit/mg/


AMGPost_header5
100823_Header2

Seed Saving and Sharing

Open the door to learning about plants in a whole new way.

              Subscribe to the Blog >

By Sheri Rylaarsdam, Skagit County WSU Extension Master Gardener

Want to see an adult in an eight-foot-tall sunflower costume? Let your vegetables grow into monsters? Save some cold hard cash? Save an heirloom plant or design a new one?

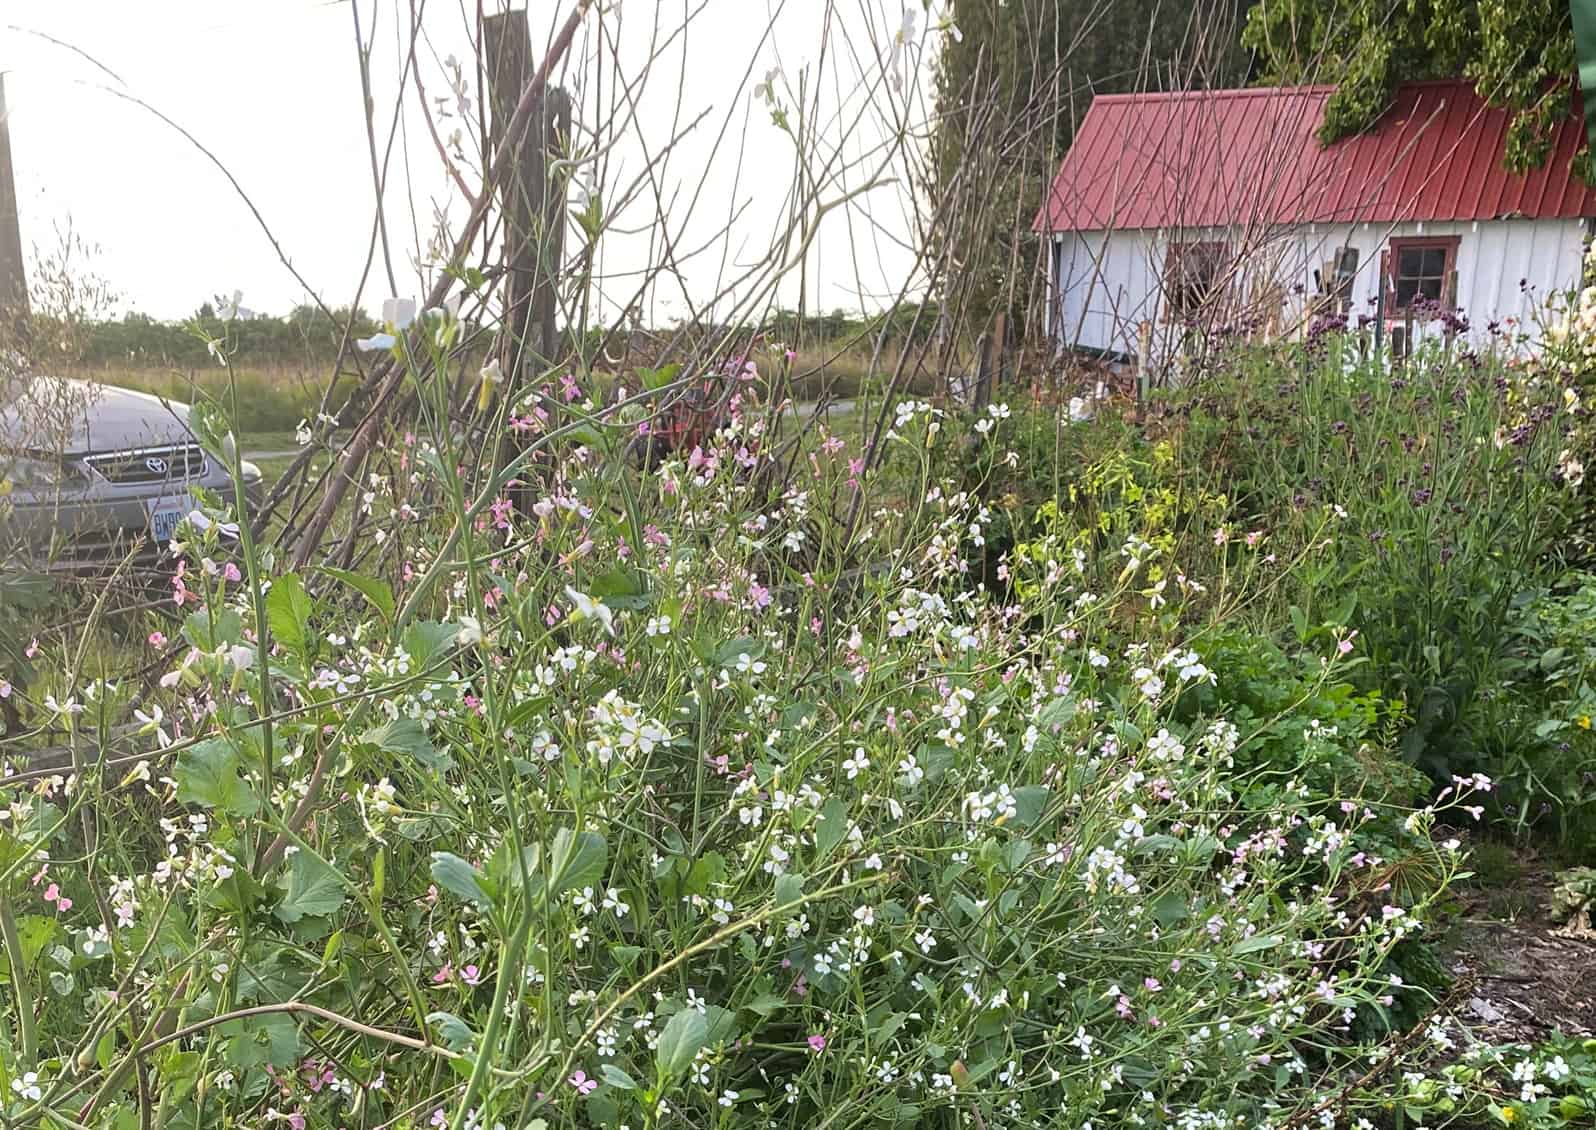
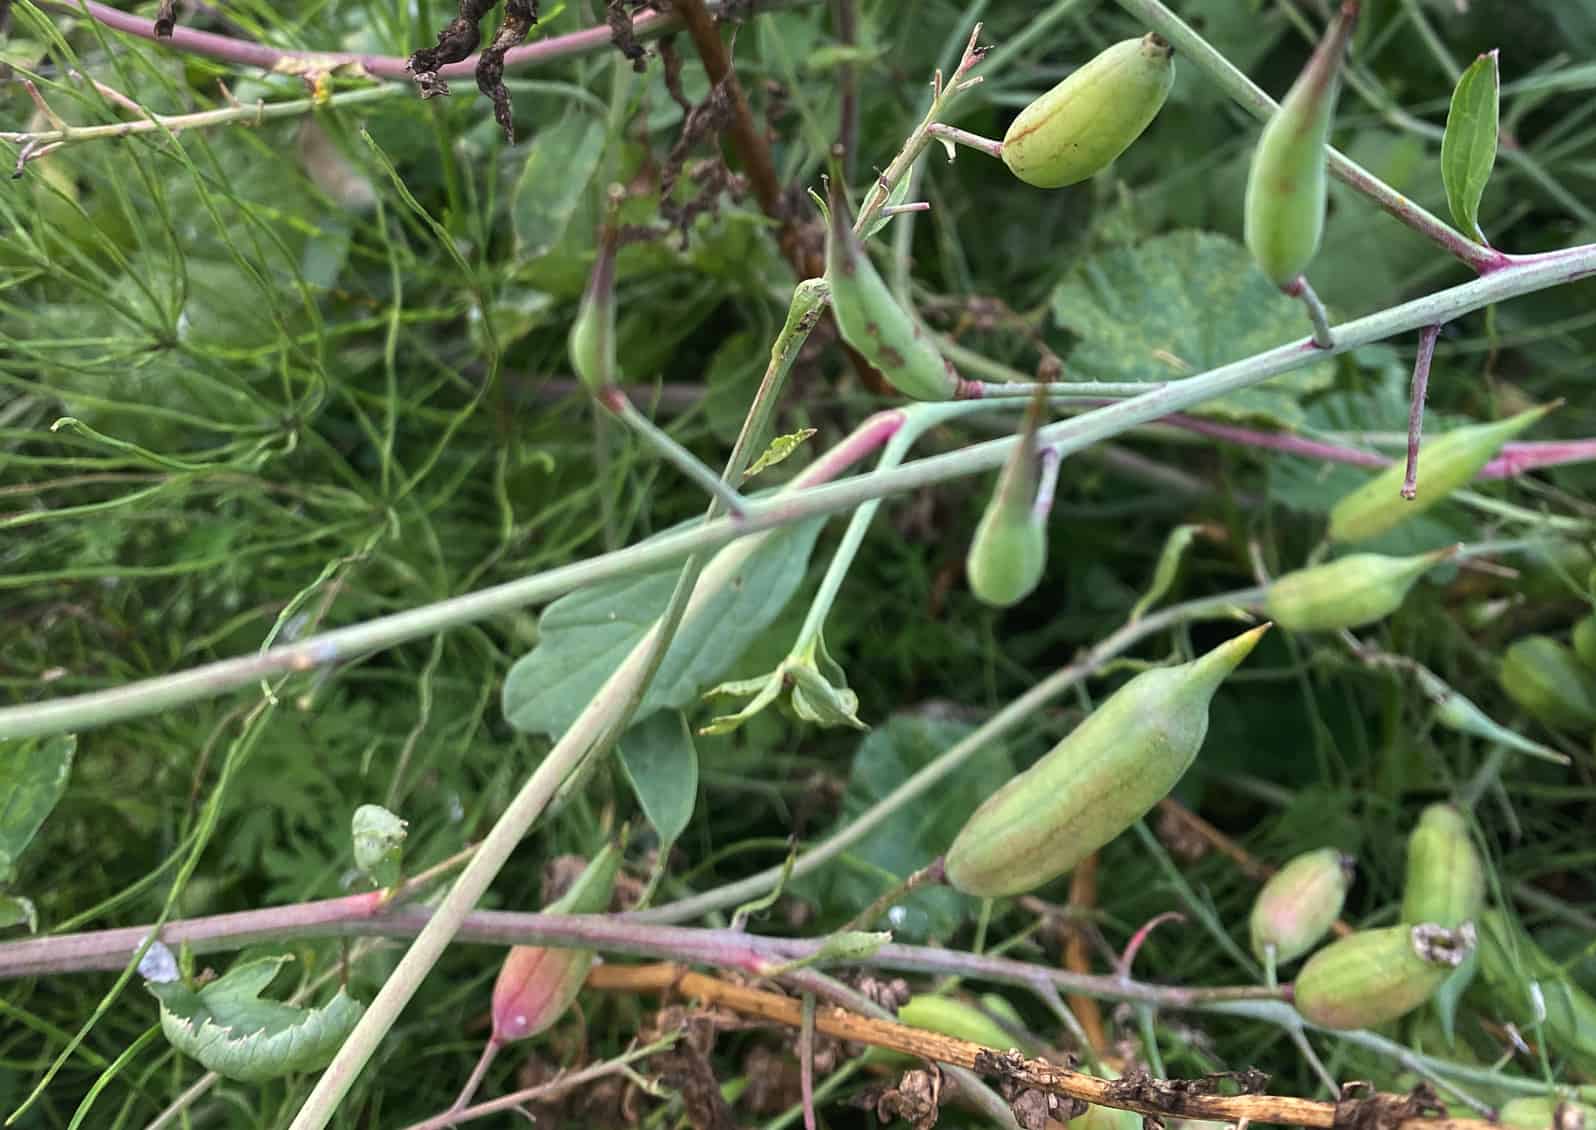
These are all possibilities once one starts down the road of seed saving. You can begin almost accidentally by not pulling all the radishes in the garden. Several weeks later you’ll notice they have grown six feet tall with multiple branches and hundreds of seedpods. The original radish is an unrecognizable nob at the bottom of the magnificent plant.

vegetable garden with plants gone to seed
Radish plants gone to seed in the author’s garden. © Photo by Sheri Rylaarsdam
Radish seed pods can be collected when they turn brown and look dried out. Interestingly, they are also edible. © Photo by Sheri Rylaarsdam

Now you know getting started is easy enough. So next you may be asking “What other vegetables produce harvestable seeds when left to grow?”

First, always save seeds from open-pollinated plants, not hybrids. Open-pollinated seeds are plants pollinated openly by wind, rain, or flying critters. Heirloom seeds are included in this category, named so because the saved seeds have produced ‘true to type’ plants for fifty years or more. The seeds collected from hybrid plants are sterile because they are a manually-produced cross between two varieties and will not grow true to form.

It is easiest to save inbred or self-pollinated seeds. These are seeds of plants whose pollen is transferred within the same flower or from one flower to the other within the same plant. Peas, beans, lettuce, and most tomatoes are examples of plants with inbred or self-pollinating seeds.

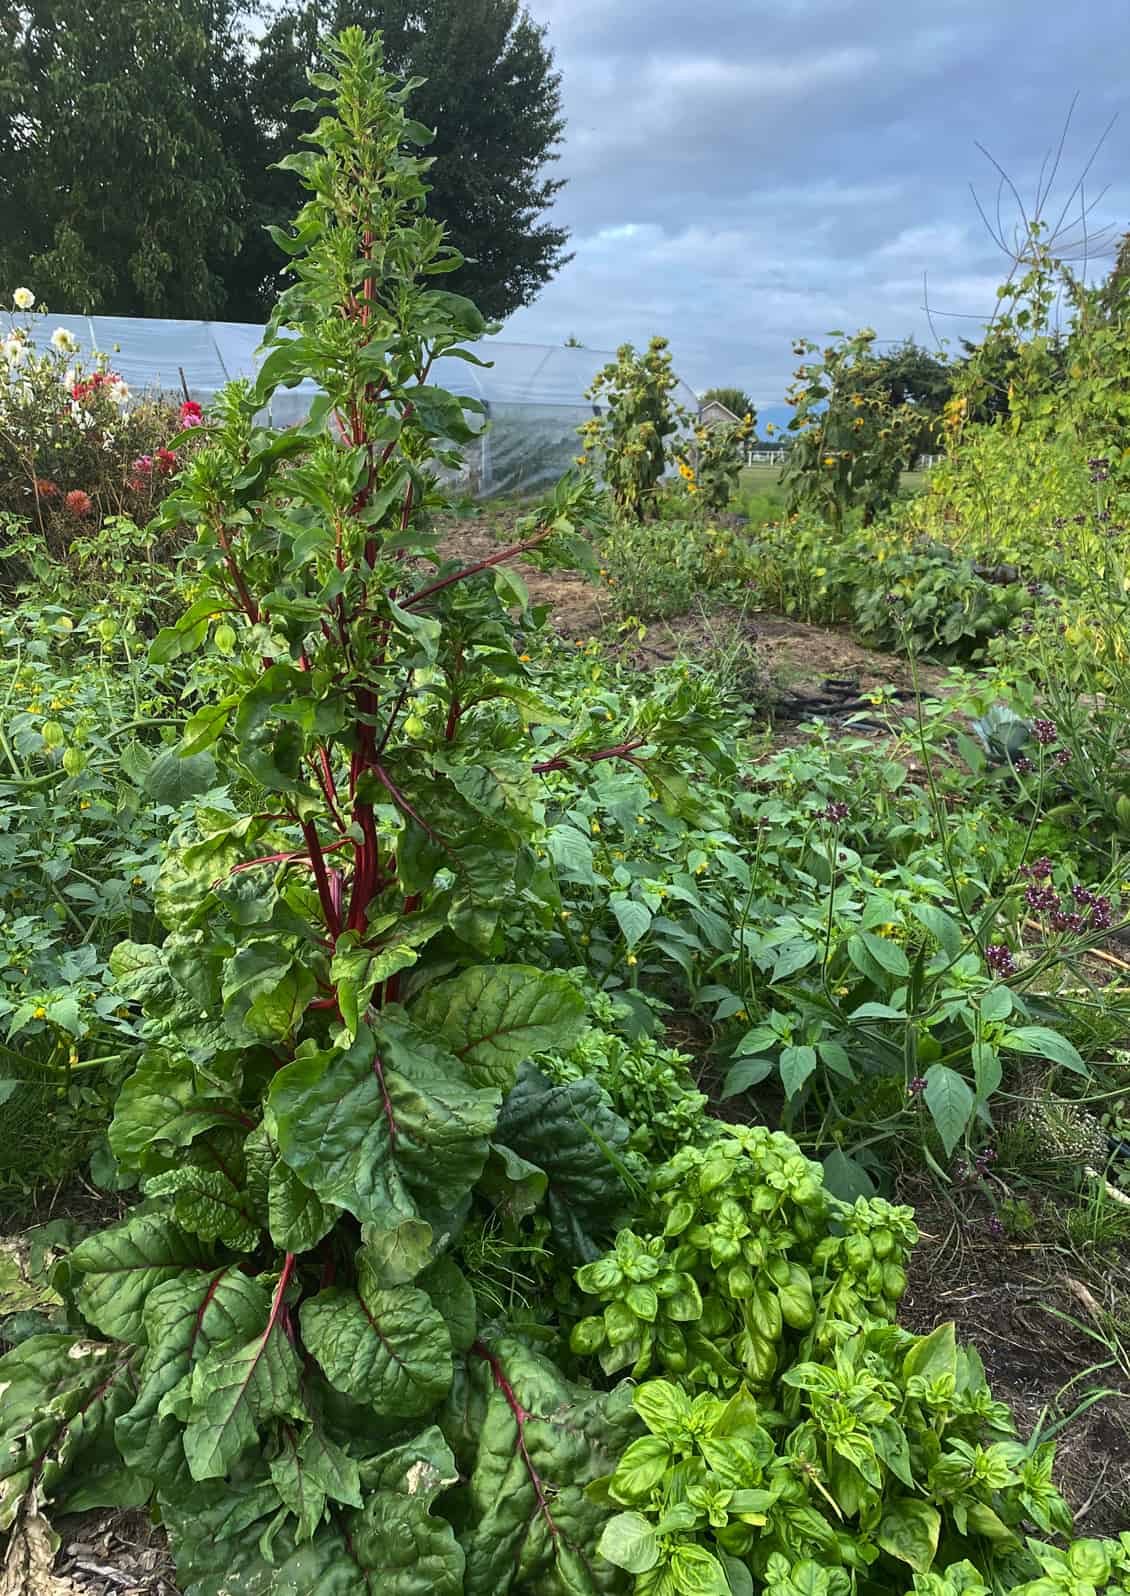
Beet plants grow tall when left to seed. © Photo by Sheri Rylaarsdam
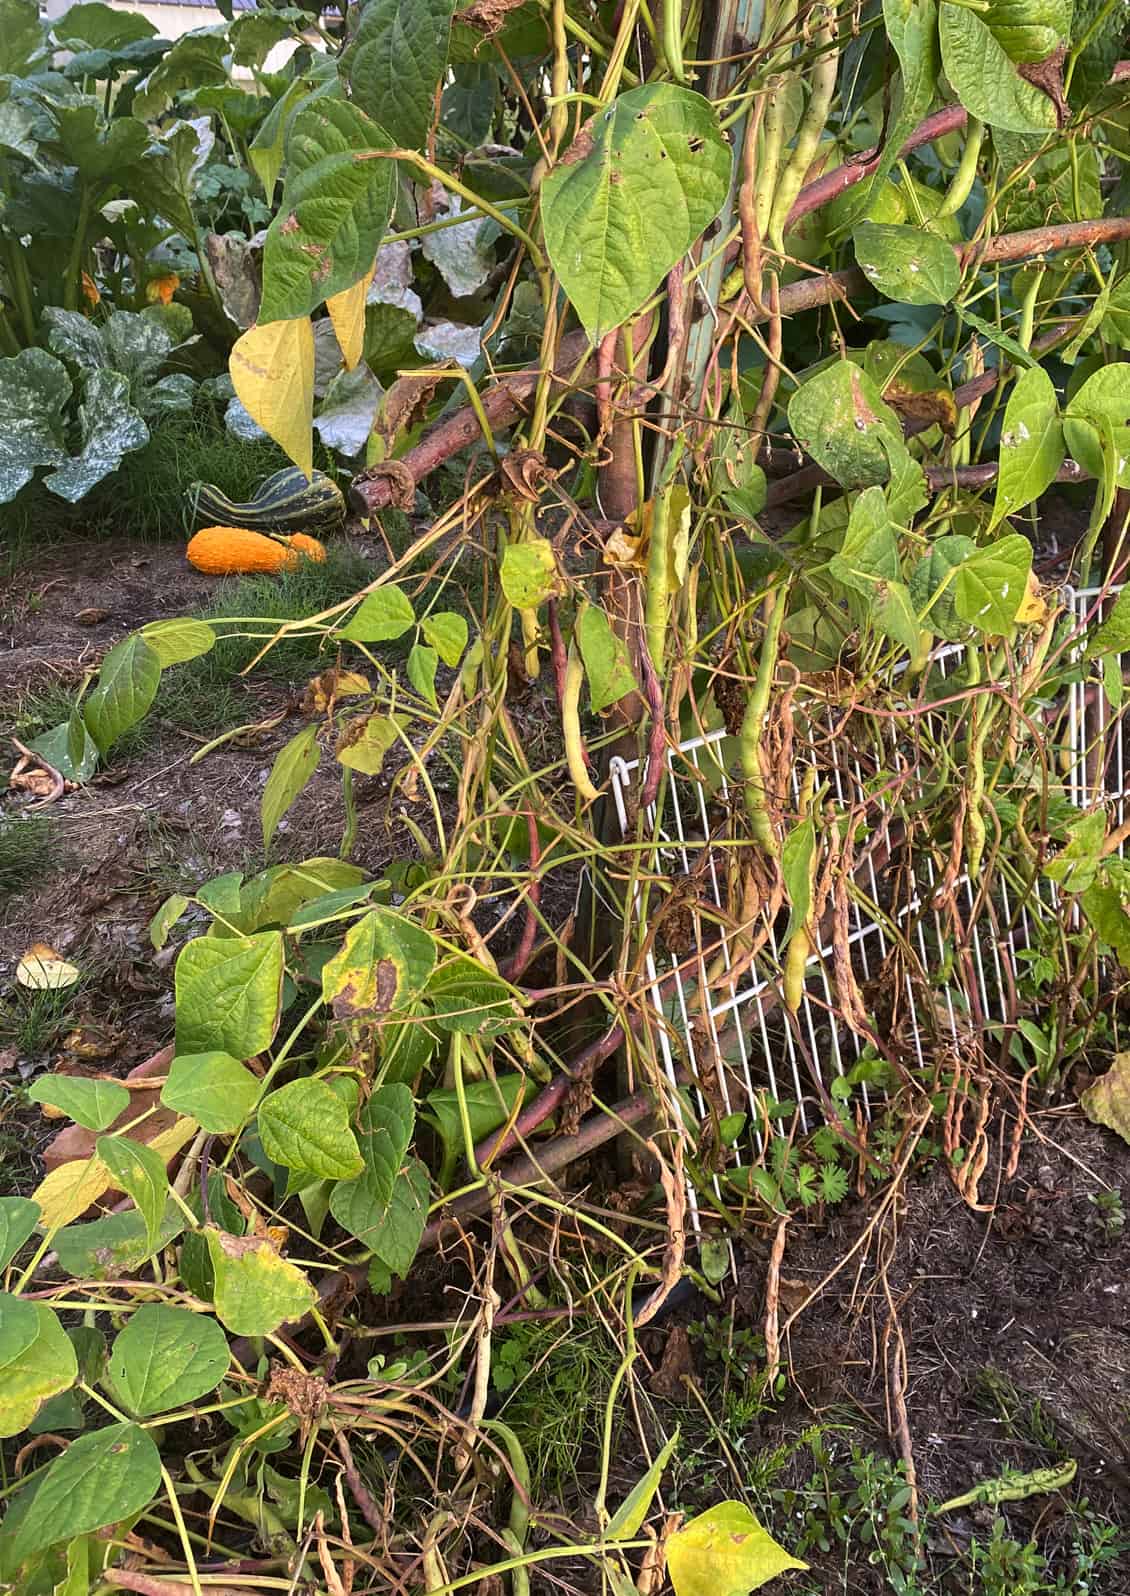
Cobra green pole beans going to seed. © Photo by Sheri Rylaarsdam

Grown from saved open-pollinated seed, this Hungarian Heart tomato is the largest the author has grown. © Photo by Sheri Rylaarsdam

Harvesting Self-Pollinating Seeds
Let beans and peas dry on the plant, then pick the pods to shell. Thresh the pods by hand. The chaff can be winnowed by tossing the pods in the wind and catching the seeds in a basin.

Lettuce seeds send up a seed stalk, ripening two to three weeks after flowering. Harvest daily by shaking the seeds into a paper bag. The lettuce feathers and chaff can then be separated from the seeds using a fine mesh screen.

To save seeds from tomatoes, choose fully ripe tomatoes. Cut across the equator of the tomato and scrape out the gel and seeds. Let the seeds ferment for a couple of days until a black or white mold forms on top. This helps remove any pathogens on the seed surface and also removes the natural germination inhibitor that coats the seed. Strain off the mold and rinse the seeds slowly and carefully. Drain in a fine mesh strainer and dry thoroughly on a saucer. Be sure to label the saved seeds with the name of the variety and the date they were saved. Since the viability of seeds is most affected by fluctuating temperature and moisture levels, it is important to store them in a cool, dry place-ideally in a tightly closed glass jar in the refrigerator.

Harvesting Wind-Pollinated Seeds
Varieties of wind-pollinated plants need to be separated by distance or mature at different times in order not to cross. Wind-pollinated plants include beets, chard, spinach, and corn. Corn pollen is light and can be carried long distances by the wind. A distance of two miles is the recommended isolation distance. A minimum of two hundred plants is needed to have enough genetic diversity.
Harvesting Seeds Pollinated by Bees
Bee-pollinated plants include many ornamental flowers and these vegetable families: Apiaceae (carrots, dill, parsley, cilantro, parsnip, chervil, caraway), Amaryllidaceae (onion, garlic, shallots, scallions, chives, leeks), Brassicaceae (cabbage, broccoli, cauliflower, Brussels sprouts, turnips, kale) and Cucurbitaceae (squash, pumpkins, gourds). If vegetables have the same Latin name they can cross. Avoid cross-pollination by allowing just one type of vegetable from each family to go to seed. For example, if one lets leeks go to seed, do not let onions, garlic, shallots, scallions, or chives go to seed at the same time. The seed-producing vegetable also needs to be isolated from other seed-producing vegetables in its family by one-half mile. Cucurbitaceae are often hand-pollinated. Professional seed savers often use a system of cages to avoid cross-pollination.

Carrots, cabbages, beets, and onions are examples of biennials. These should be left in the ground or stored over the winter and replanted in spring to produce seed in the second year.

Master Gardener Dixie Mitchell repurposes the silca gel packets that come with shipments to keep her seed collection dry until use. © Photo by Ginny Bode

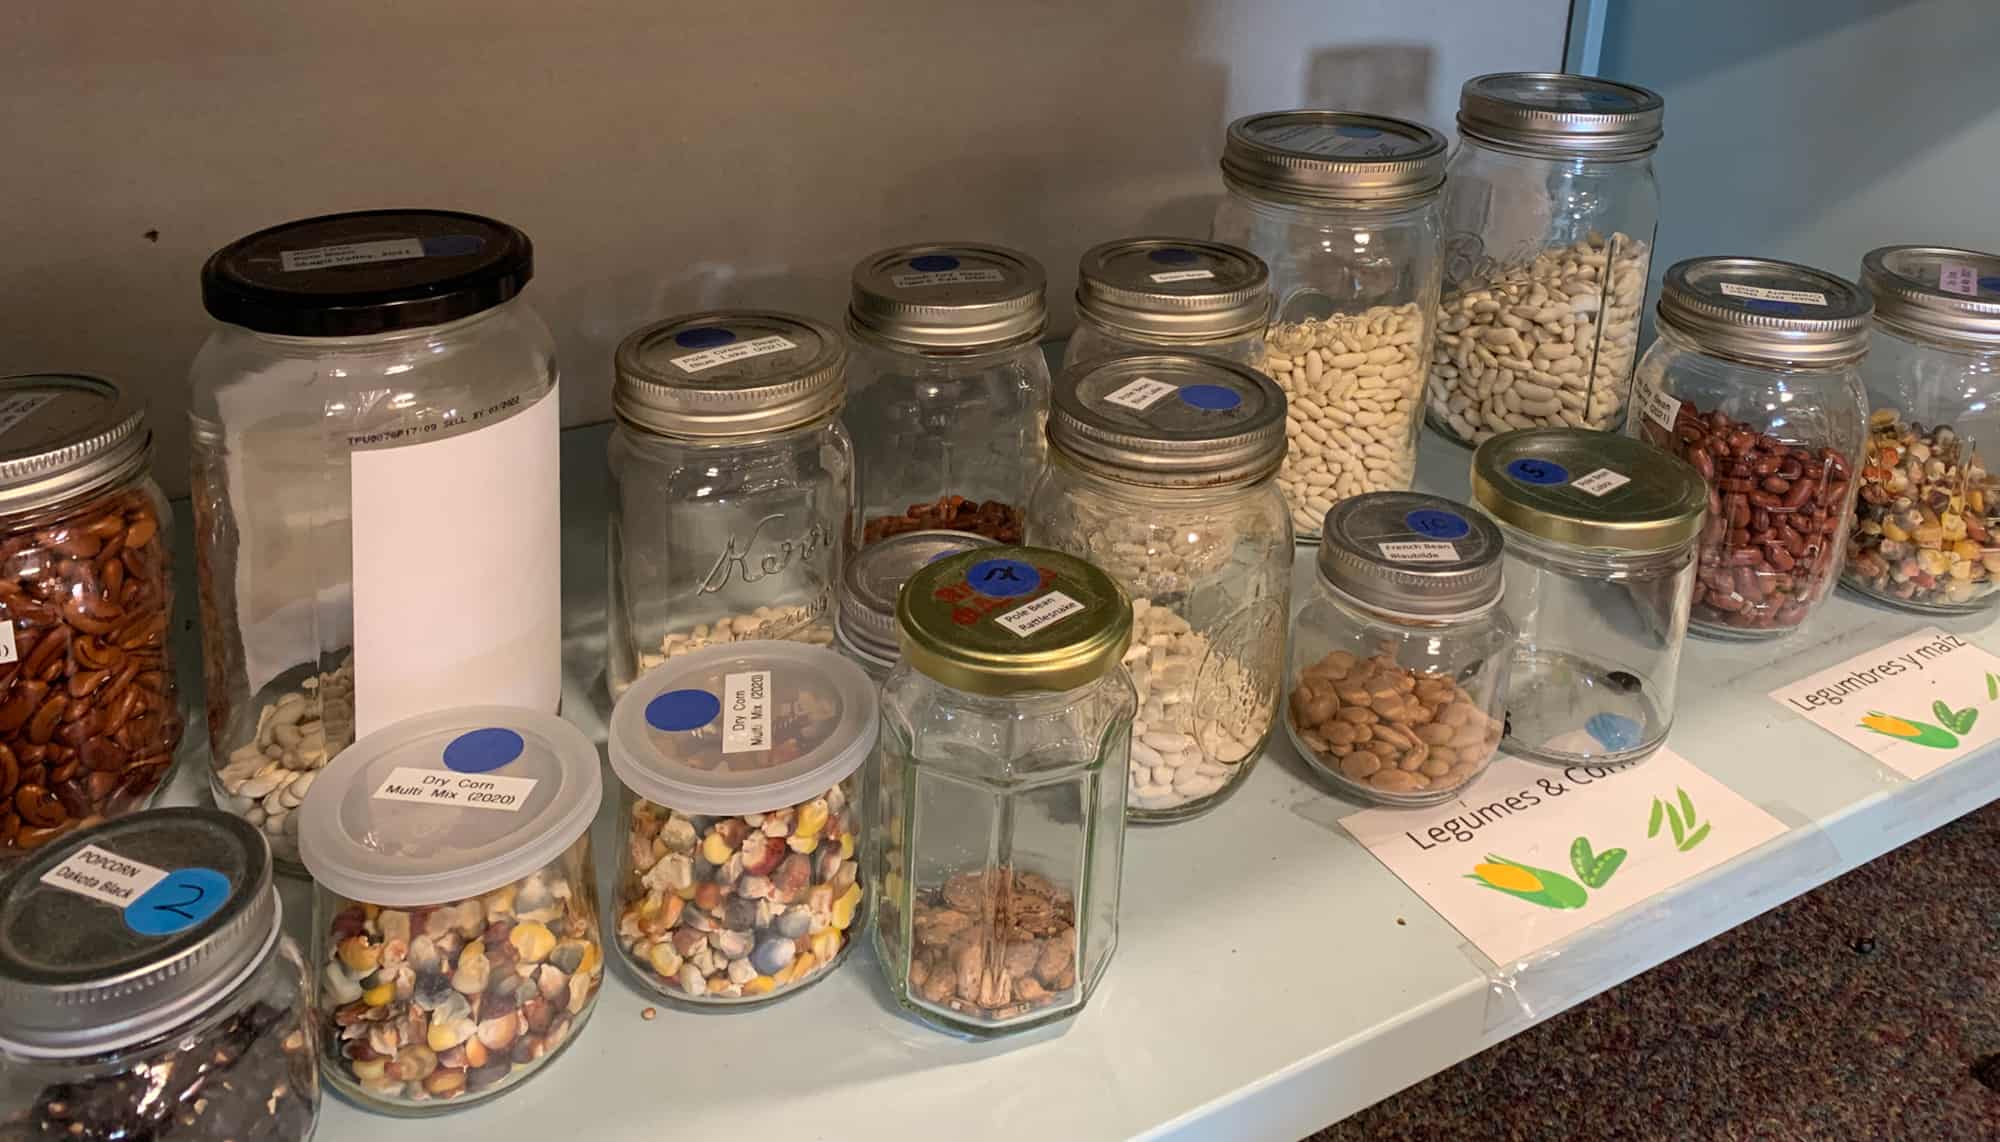
Start with something easy. Choose a variety of beans, peas, lettuce, or tomato that is delicious, grows vigorously, is a good producer, and is resistant to pests and diseases. Once you’ve started saving seeds, collect all the seeds you can. Then you’ll have plenty to plant next year, some to share, some to donate to a seed library or take to a seed swap.

Sharing seeds by donating to a seed library can make it easy for new gardeners to get started. Supplying seeds and information encourages gardeners to be out in nature, eat healthy food, and save money. Seed swaps are an excellent way to get seeds for the garden for the whole next year. Seed swap events usually have music, food, classes, and sometimes adults dressed up like sunflowers!

One can support biodiversity by supporting seed banks, buying from seed companies that increase biodiversity, and contributing to seed libraries and local seed guilds. The U.S. has lost a large percentage of its food plant biodiversity in the last 100 years. By saving seeds, you are doing your part to preserve the genetic diversity which is vital for the future of our food supply.

Seed stewards work to increase, not decrease, biodiversity. By saving and growing open-pollinated varieties of vegetables in the same area for many years and selecting for taste, disease resistance, and productivity, one can develop an improved vegetable. The selected variety will have the characteristics necessary to withstand unfavorable local conditions such as drought or heavy soil.

Seed saving is a gateway to learning about vegetables and flowers in a whole new way, witnessing their whole life cycle and how they interact with other plants. It has led to a new appreciation for nature’s abundance. Through seed sharing, I’ve contributed to altruistic causes that make a difference in the daily lives of people in our community. And I’ve met interesting people that make me smile-such as the fellow seed sharer wearing an eight-foot-tall sunflower costume.


REFERENCES:

Ashworth, Suzanne, 2002, Seed to Seed, Seed Savers Exchange

Gardening for Everyone: Seed Saving/WSU Lewis County Extension/ s3.wp.wsu.edu/uploads/sites/2057/2022/02/Seed-Saving-Handout.pdf

Op-ed: Saving Heirloom Seeds Can Protect Crop Diversity/civil eats/civileats.com/2022/01/27

Community Horticultural Fact Sheet #17/ WSU Jefferson County Extension/ extension.wsu.edu/jefferson/master-gardener-seed-library

Hubbard, Kristina K. January 11, 2019
https://civileats.com/2019/01/11/the-sobering-details-behind-the-latest-seed-monopoly-chart/


Sheri Rylaarsdam

ABOUT THE AUTHOR:

Sheri Rylaarsdam is a Skagit County WSU Extension Master Gardener, Class of 2019. She is an avid seed saver and vegetable grower.

_________

Questions about home gardening or becoming a Master Gardener, may be directed to: Skagit County WSU Extension Office, 11768 Westar Lane, Suite A, Burlington, WA 98233; by phone: 360-428-4270; or via the website: https://extension.wsu.edu/skagit/mg/


AMGPost_header5
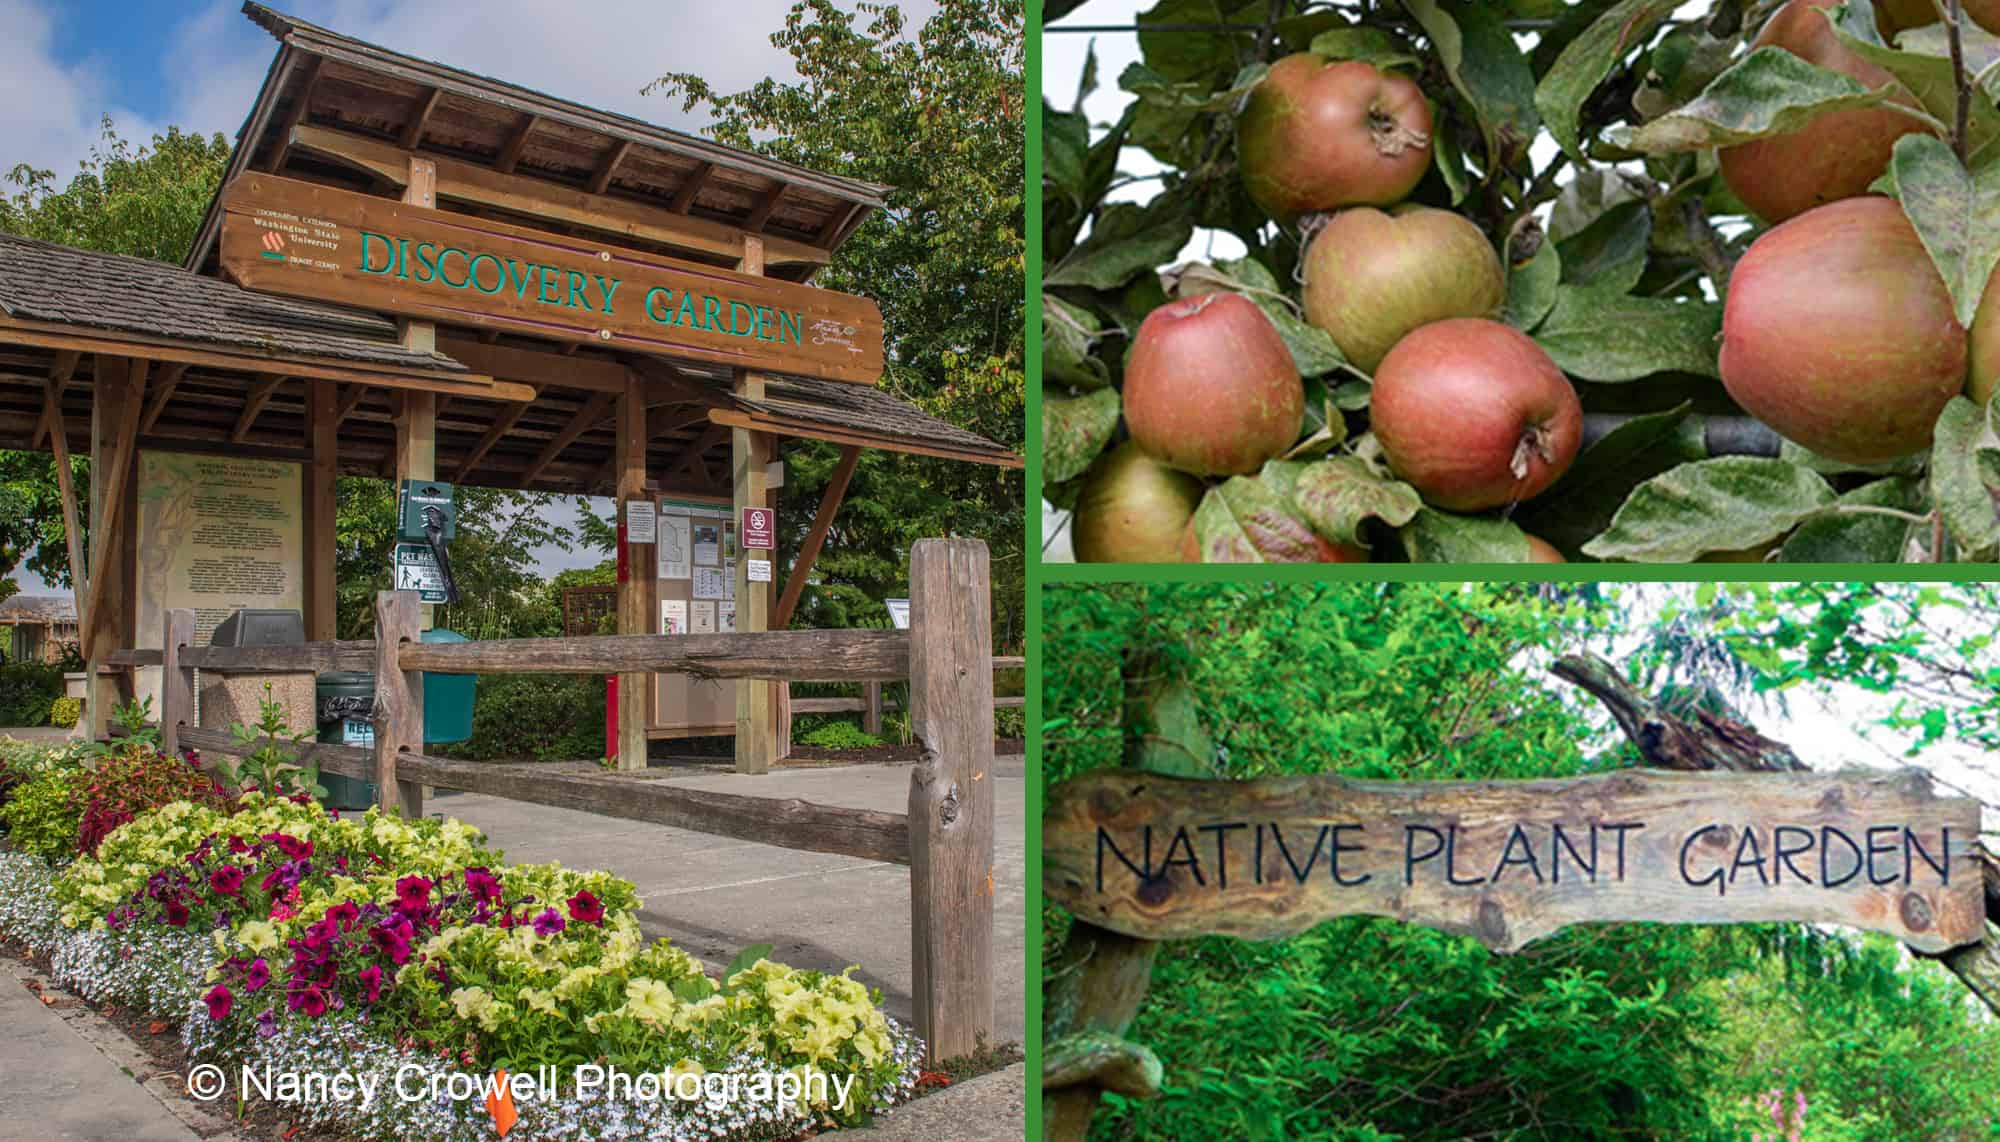
picture of Discovery Garden entrance apples, Salal Native Garden sign


Discover the Skagit Valley Display Gardens Open House

Discover the Discovery Garden, NW Fruit Garden, and the Salal Native Plant Garden

              Subscribe to the Blog >

By Janine Wentworth, Skagit County WSU Extension Master Gardener

June is the beginning of summer blooming, fruit and vegetable growth and early harvests.

Enjoy the summer gardens of Skagit Valley at the Discover the Display Gardens Open House. Skagit Valley is home to 8 acres of display gardens operated by volunteers as a learning resource for the public.

Discover the Display Gardens
Open House

June 24, 2023 · 10 am – 2 pm

Free Admission

  • Skagit County WSU Extension Master Gardener Discovery Garden
  • Western Washington Fruit Research Foundation
  • Salal Native Plant Garden

All three are nestled together in the green fields of the WSU Northwestern Washington Research and Extension Center west of Mount Vernon on HWY 536 (Memorial Hwy.)

While all three of these gardens are open to the public daily, the Annual Open House is focused on educating and inspiring visitors interested in many specific areas of interest, including pollination, water-wise gardening, native plants and raising fruits and vegetables in the Skagit area.

The Discovery Garden
Designed to support Skagit home gardeners by promoting science-based gardening practices, Skagit area WSU Extension Master Gardeners have created 30 garden rooms within the garden, featuring hundreds of plants chosen to flourish in Skagit Valley. Come and spend time with the volunteers who maintain the gardens and learn more about what they grow.

In addition to tours of the garden rooms, Master Gardeners will be on hand offering activities for all ages including:

  • Free garden tool sharpening
  • Solutions to plant problems
  • Plant identification– to help you know what you have
  • Expert advice on weed identification and management

While at the Discovery Garden, visit the small fruits garden and learn more about food you can grow in your own back yard. Photo © Nancy Crowell Photography
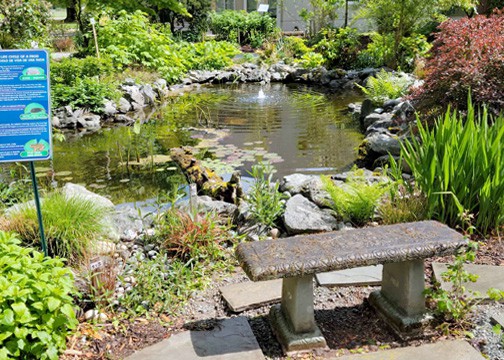
Visit the learning station near the pond in the Naturescape Garden. There you will see Koi fish and learn about pond maintenance and construction as well as drip irrigation.
Bring a blanket and picnic lunch and enjoy the day at the Discovery Garden. Photo © Nancy Crowell Photography

Learn about effective gardening at the 8 education stations located throughout the garden area. Master Gardeners will offer instruction on topics such as:

  • Developing healthy soil
  • Composting
  • Pollinator support
  • Fruit tree pruning and thinning
  • Gardening with native plants
  • Weed identification: Match examples of common weeds with their names so you can learn how to identify them and control them
  • Clean water and water conservation: Visit the learning station near the pond in the Naturescape Garden. There you will see Koi fish and learn about pond maintenance and construction as well as drip irrigation

Pollinators: Learn about plants that support pollinators from Master Gardeners who plant and care for the pollinator gardens and the pollinators that live in the garden. The pollinator station at the Open House will teach ways to help native bees and other pollinators thrive in home and community landscapes because pollination is an essential survival function.

Local Food: The Skagit County WSU Extension Master Gardeners offer extensive resources for local gardeners. During the Open House, Master Gardeners will be giving talks on drawing of food baskethealthy soils, growing your own vegetables, and weed identification and eradication. The Grow Your Own Food page at https://www.skagitmg.org/home/resources/food/ is also an excellent resource for gardeners getting started.

While at the Discovery Garden, visit the Vegetable, Small Fruits, and Doc’s Arbor garden rooms for ideas and examples of food-producing plants that grow well in the Skagit County area.

Educators from the Xerex Society will be at the Open House demonstrating techniques for making your garden pollinator friendly
Learn smarter vegetable gardening tips from the Master Gardeners who have research and tested a variety techniques that face gardeners in the North Puget Sound area.
Throughout the growing season, garden waste is sorted, chopped, and chipped-- the browns and greens are com­bined and turned, giving us nutrient-rich compost in a few months.
Throughout the growing season, garden waste is sorted, chopped, and chipped– the browns and greens are com­bined and turned, giving us nutrient-rich compost in a few months.

Composting: Curious about how to get started composting? Composting reduces waste and provides an inexpensive treatment for home gardens and landscapes. Healthy soil is essential to have healthy plants. Come talk to our soil experts and learn about your soil and what you can do to improve it.

Growing the Discovery Gardens since 1996
In 1994, the Skagit County WSU Extension Master Gardeners had a vision for a garden that would demonstrate best practices for gardening in the Skagit area. After two years of planning, the garden’s first structure of trees and fences was placed in the fall of 1996. Over the following two years, many committed WSU Extension Master Gardeners, along with the help of the community, planted the gardens.

MG-Healthy-People_Healthy-Planet-Diagram

The WSU Master Gardener Program addresses important sociologic and environmental issues by teaching research-based horticulture information. We want people to have important skills and abilities that help mitigate challenges and to understand that everyone has a role to play in creating and sustaining healthy and resilient communities.

Salal Native Plant Garden
The second garden participating in the Tri-Garden Open House is the Salal Native Plant Garden. Bordering the Discovery Garden to the south, the Salal Native Plant Garden is entered by walking through the Discovery Garden following the paths to the south. This labor of love and concern for native plants is manifested in an extensive and charming display garden.

Created twenty-five years ago as a collaborative effort between volunteers of the Salal Chapter of the Washington Native Plant Society and the Washington State University Agriculture Extension Agency at Mount Vernon (WSU), the Native Plant Garden is now a half-acre oasis that holds the seeds for the future of native plants in the lower Skagit Valley. The garden is a terrific resource for homeowners who want to learn how to incorporate more native plants into their landscaping.

Western Washington Fruit Research Foundation (NW Fruit)
The third garden on display is the fruit garden known as the Western Washington Fruit Research Foundation (or NWFruit.org). Here volunteers will answer questions about fruit trees. The 6-acre garden was designed and constructed by volunteers of the foundation and contains large informational signs and handouts based on the research conducted by Washington State University.

During the Open House volunteers will be on hand to explain examples of netting for bird control, a Tatura trellis, and answer questions about the expansive espalier display.

The fruit garden contains a large collection of fruiting plants with many unique varieties, including a collection of 17 variations of Gravenstein apples, a collection of antique apples from all over the world, and unusual fruits such as medlar and blue honeyberry. Located on the west side of the Discovery Garden the fruit garden is open to the public seven days a week from dawn to dusk.

Please join us for the Open House festivities on June 24, 2023 from 10 am – 2 pm. You are welcome to bring a blanket and picnic lunch and enjoy the day with family and friends.

The gardens are open and free to the public throughout the year, 7 days a week from dawn to dusk. Visit the gardens throughout the seasons to view the seasonal changes. Signage in each garden identifies plants and makes for interesting and educational self-guided tours.


RESOURCES:

ABOUT THE AUTHOR:

Janine Wentworth became a master gardener in 2018. She and Kay Torrance are co-chairs of the Discovery Garden Open House.


Questions about home gardening or becoming a master gardener may be directed to: Skagit County WSU Extension Office, 11768 Westar Lane, Suite A, Burlington, WA 98233; by phone: 360-428-4270; or via the website: www.skagit.wsu.edu/mg


AMGPost_header5
041923-header

2023 Skagit Master Gardener Plant Fair

Enjoy fun for the whole family – Saturday, May 13, 2023

              Subscribe to the Blog >

By Claire Cotnoir and Hank Davies, Skagit County WSU Extension Master Gardeners and Co-Chairs of the 2023 Plant Fair

Photo © Jessimine Tuttle

This exciting annual event kicks off the Skagit Valley gardener’s summer with thousands of quality garden plants for sale, all locally grown or selected by Master Gardeners and chosen for success in our Skagit Valley environment. The Annual Skagit County WSU Extension Master Gardener Plant Fair is set for Saturday, May 13, 8 AM – 2 PM at the Skagit County Fairgrounds located at 501 Taylor Street in Mount Vernon. Parking is free – admission is free and the fun and knowledge you will gain is free. Follow the signs to the County Fairgrounds South entrance on Taylor Street. Be sure to tell your friends and neighbors about this exciting annual event.

This year’s Plant Fair perennial flowers and annual starts feature some spectacular varieties. You will find starts for exciting plants such as the fabulous Lisianthus – which is very difficult to germinate (we have done the hard part for you!) and we are excited to offer these other exciting varieties at this year’s Plant Fair.

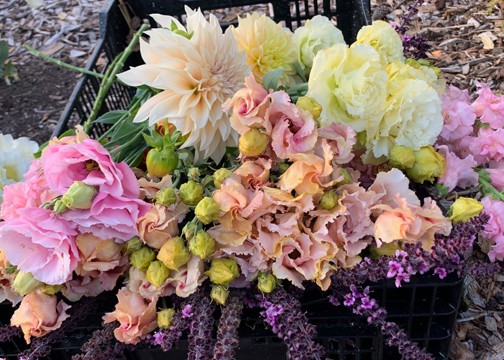
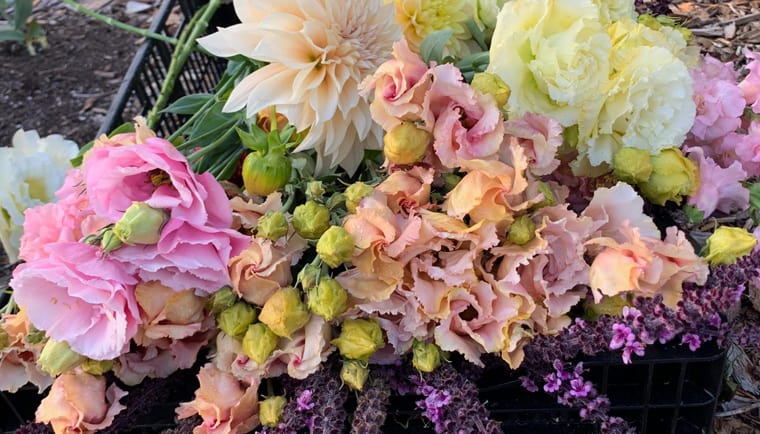
  • Lisianthus – a rare and beautiful rose-like plant! A wide variety of colors will be available including, Apricot, Beige Neo, Mint Green, Rouge, Gold, and Metallic Blue
  • Coleus in a rainbow of colors–great for containers and accent colors
  • Unusual and unique palette of Snapdragon flowers
  • Canterbury Bells
  • A beautiful collection of new Cosmos, including cupcake white, double click cranberry, and apricot lemonade
  • Amaranth, Zinnia varieties, and of course, Sunflowers
  • Bells of Ireland and Pumpkin on a Stick!

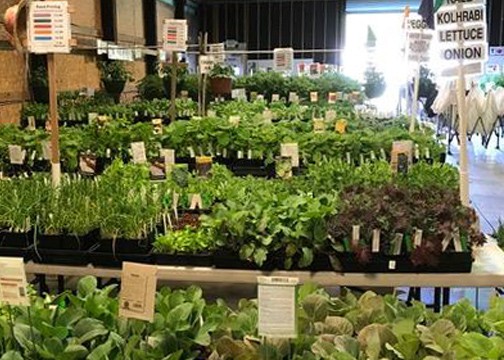
A wide variety of herbs and vegetables will be on sale including basil, dill, egg plant, Swiss chard, cabbage and leaf lettuces. Photo © Nancy Crowell
We're excited to offer Lisianthus, a beautiful cut flower in a variety of unusual colors including Apricot, Beige Neo, Mint Green, Rouge, Gold, and Metallic Blue Photo © My Thanh Kim
We’re excited to offer Lisianthus, a beautiful cut flower in a variety of unusual colors including Apricot, Beige Neo, Mint Green, Rouge, Gold, and Metallic Blue Photo © My Thanh Kim
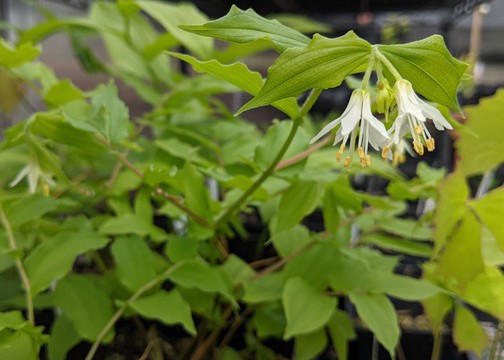
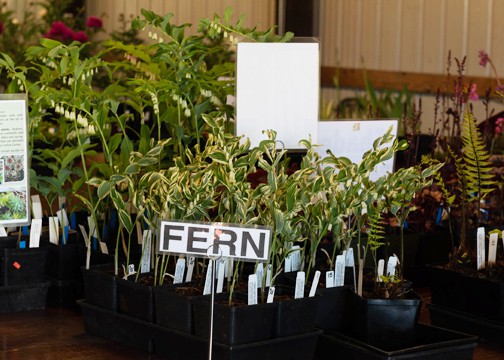
Find unusual shade plants like these Hookers Fairy Bells. Photo © Jessimine Tuttle

In the vegetable section, the Master Gardener Greenhouse team’s goal was to select varieties for uniqueness, plants that are award-winning, and have growing and producing habits that match our location and climate. We are offering plants that do not need a greenhouse to be successful, and that are as disease resistant as possible given our wet weather and short season. A few examples of the vegetable starts you will find include:

  • A wide variety of Basil including Dolce Fresca Genovese, an award-winning Basil that is compact, disease resistant, and reluctant to flower and bolt. Other Basils include Prospero Genovese, Deep Purple, and Thai.
  • A vast assortment of hearty and tender herbs including a Dill Leaf variety.
  • Many leaf lettuce varieties including arugula, Swiss chard, and a slow-to-bolt spinach variety that is also disease resistant.
  • Some fun Brassica – or you might know them as members of the cabbage family, and a wide variety of eggplant including early, high-yielding varieties of Italian, Asian, and white.
  • 7 varieties of peppers including many that are easy to grow and eager to produce including Bastan, an early ancho as well as Arapaho Cayenne. We are also offering this year Aji Rico, a medium hot award-winning conical pepper variety.

This year’s Plant Fair vendors will be selling bulbs, blooms, potted plants, locally sourced food, and drink in addition to the handcrafted items. Photo © Nancy Crowell

And finally, an array of early melon starts chosen for their flavor and hardiness. Please remember to make a list and bring your boxes as you are sure to leave with many more plants than you ever knew you wanted.

The 2023 Plant Fair covers the entire fairgrounds, both inside all the display buildings and outside. One entire building, Building D will be devoted just to tomatoes. Last year’s Skagit County WSU Extension Master Gardener Plant Fair featured over three thousand tomato plants. The tomato starts are very popular and have sold out in previous years. For a complete list of the tomato varieties with descriptions, please go to: https://www.skagitmg.org/home/events/plant-fair/plantfairtomatoes/

Building D, aka the “tomato house”, is staffed with veteran tomato experts to help you pick out the right plants for your garden based on your preferences and garden conditions. And they love to answer tomato questions.

In addition to the plants available for sale and the expertise available from knowledgeable veteran local Master Gardeners, Plant Fair visitors will enjoy a variety of vendors selling handcrafted wares like jewelry, glass/metal art, wood sculptures, and even more plants. This year’s vendors will be selling bulbs, blooms, potted plants, locally sourced food, and drink in addition to the handcrafted items.

And, we are pleased to announce, based on your suggestions, this year we will have a spot set up where you can park your purchases while you peruse the other garden sections for possibly additional goods you can’t live without.

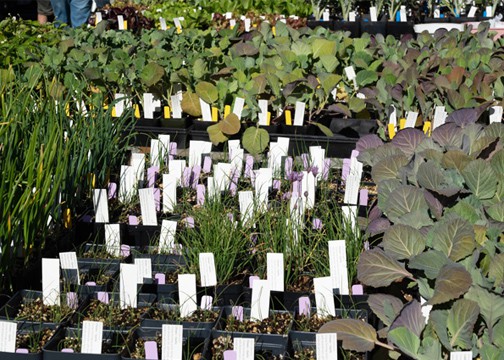
The Plant Fair offers a huge selection of locally grown plant starts, selected by Master Gardeners and chosen for success in our Skagit Valley environment. Photo © Nancy Crowell
Ferns and shade loving native plants Photo © Nancy Crowell
Iris varieties and many other flowering perennials will be for sale. Photo © Jessimine Tuttle

You should also try to make time to attend one of the short gardening presentations offered each half hour from 9 AM to 1 PM. They will be presented in Building B. We are excited to announce the inclusion of a Spanish language presentation on bees. Other topics that will be showcased and presented by our own Skagit County WSU Extension Master Gardeners include tomatoes, questions, and advice. Master Gardeners will also be available on-site including some of our Plant Clinic experts to help you with plant questions and problems. A full list of presentations during the Plant Fair can be found on our website at https://www.skagitmg.org/home/events/plant-fair/

The Master Gardener mission is to support home gardeners by promoting science-based gardening practices and education in a partnership with WSU extension. The proceeds generated from the Plant Fair allow Skagit County WSU Extension Master Gardeners to continue to support that mission.

Plant Clinics are held throughout the summer months and into the fall. You are encouraged to bring your plants and your questions to the Plant Clinics. Information on the dates and places for Plant Clinics will be available at the Plant Fair for reliable, science-based advice and help. For 50 years our WSU Extension Master Gardeners have been helping Washington communities with its gardening needs – providing science-based answers to plant production and plant problems and questions. Skagit County has had an active WSU Extension Master Gardener Program since 1977. For more information please go to our website here: https://extension.wsu.edu/skagit/mg/

Claire Cotnoir and Hank Davies,
SCMG Plant Fair Co-Chairs

ABOUT THE AUTHORS:
Claire Cotnoir and Hank Davies are the Co-Chairs of the Skagit County WSU Extension Master Gardener Plant Fair and are also co-cordinators of the Japanese Garden in the Discovery Garden on SR 536, west of Mount Vernon.

Questions about home gardening or becoming a Master Gardener, may be directed to: Skagit County WSU Extension Office, 11768 Westar Lane, Suite A, Burlington, WA 98233; by phone: 360-428-4270; or via the website: www.skagit.wsu.edu/mg


AMGPost_header5
031723-header2

Midnight Marauders

Managing Those Pesky Slugs and Snails


              Subscribe to the Blog >

By Diana Wisen, Skagit County WSU Extension Master Gardener

Pacific Northwest gardeners probably spend more time discussing slug damage than almost any other garden problem. Slugs require moisture in the soil and vegetation, both of which are abundant in our area.
During cold or dry weather, they can move down into the soil. Adult slugs and snails live through the winter in this region, seeking shelter underground. In dry or hot weather, they can borrow down as much as 6 feet to find cool dampness. They can seal themselves off with a parchment-like membrane for protection from the elements. They are Gastropods from the Greek meaning “belly foot”.

Most of the slugs and snails you see in your yard are non-native, invasive varieties. The native Banana slug, a good guy, is found mostly in wooded areas, not suburban landscapes, and tends to eat only decaying matter. There are many species of non-native slugs that attack your plants.

Diana Wisen

Two of the most destructive are the common gray field slug, genus Arion (several colors of these large slugs), and the brown snail that is becoming more common as it can survive drier conditions easier than slugs.

Slugs eat young vegetables starts, strawberries, daffodils and tulips, and many other things, with new dahlia shoots and marigolds being among their favorites. You have to start early and be vigilant in your efforts to manage the slug and snail population in your yard. There is no such thing as just one slug. Slugs can lay anywhere between 30 to 100 eggs at a time, several times a year, mostly in late summer. Slugs are hermaphrodites: adults have both female and male organs, so all can lay eggs. Sometimes the eggs hatch right away and other times they hatch the following spring. Look for clusters of tiny, pearl-like eggs beneath leaf debris, boards, garden pots, and other damp places and crush them immediately.

Those little eggs will soon turn into ravenous baby slugs which eat 30-40 times their body weight every day! Their teeth are like a rasp that shreds the vegetation as they glide along. Slugs tend to come out at night or on cloudy days when it is cool and damp. This is your clue as to when to head out to hand-pick. However, only about 5% of the slugs are above ground at any given time, thus making control efforts difficult and ongoing.

There are five main types of control and for best results, you may have to utilize all of them, though you will never be able to eliminate slugs completely.

Biological:
Some predators eat slugs. Toads, frogs, snakes, and beetles will eat small slugs, so encourage them in your yard. Sometimes chickens and wild birds will eat baby slugs, but gag on large slugs. Ducks and geese eat slugs, but this poultry solution is not for everyone.
Cultural:
Change the conditions so the area is not conducive to slugs. Keep the soil dry. Mow nearby meadows or grassy areas. Keep a 6-foot-wide strip of dry, bare ground around your vegetable garden, use arborist chips for pathways, till your soil in early spring to expose the slug eggs, and plant things that slugs tend not to eat. Crushed eggs shells, ashes, and diatomaceous earth do not work. The slug’s mucus thickens to protect it from sharp surfaces.
Mechanical:
People love to talk about their favorite tools for slug control.
– A sharp shovel or weeding tool, a Hori-Hori knife, an old kitchen knife or scissors, or a hoe. Keep them all handy. Many people regularly go out at night or early morning with a bucket of soapy water on a search and destroy mission. The frequency is up to you, but the more often the better the results. Be sure to wear disposable gloves as slugs carry diseases such as Salmonella. Be sure to keep a lid
on the container.
– A wide band (3″) of copper tape firmly attached around the base of containers and raised beds will prevent slugs from climbing up. They will not cross copper. But make sure there are no slug eggs in the soil already in the pot!
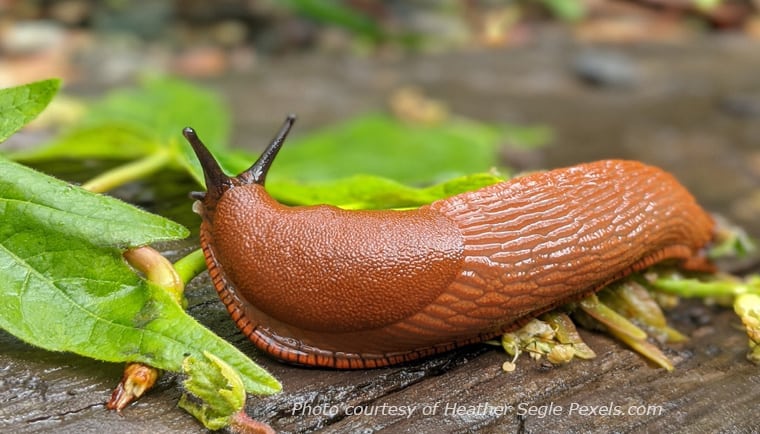
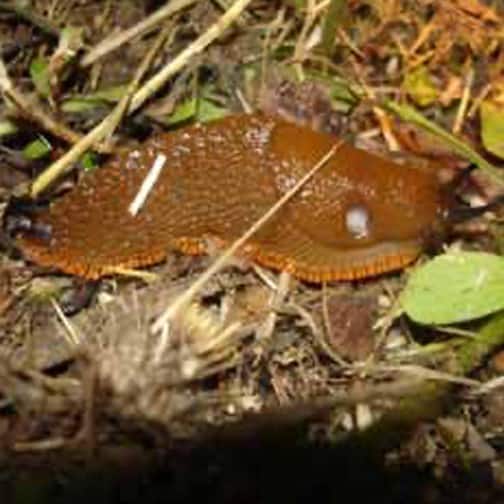
This large red slug (Arion rufus) is one of the larger slug varieties, with an appetite to
match. This photo shows the slug's round pneumostome (nose and breathing hole) and
the black optical tentacles protruding from its head. © Photo by Jason Miller.
This large red slug (Arion rufus) is one of the larger slug varieties, with an appetite to
match. This photo shows the slug’s round pneumostome (nose and breathing hole) and
the black optical tentacles protruding from its head. © Photo by Jason Miller.
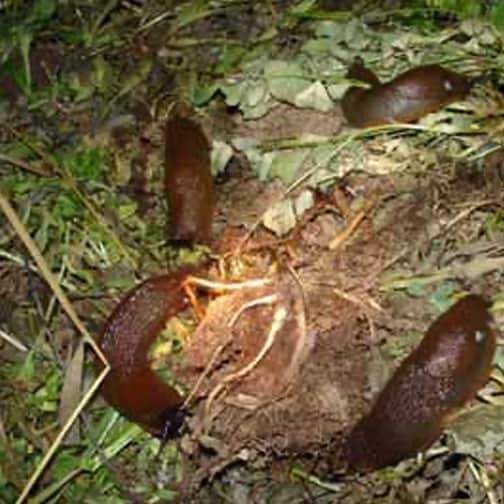
Large red slugs descend on a pile of discarded raspberry canes. With voracious appetites,
these slugs can devastate many small plants overnight, skeletonizing the leaves and
diminishing the plants' chances at survival. © Photo by Jason Miller.
Large red slugs descend on a pile of discarded raspberry canes. With voracious appetites,
these slugs can devastate many small plants overnight, skeletonizing the leaves and
diminishing the plants’ chances at survival. © Photo by Jason Miller.
Chemical:
There are many products on the market to kill slugs and snails. Read the label before purchasing and using it at home. Follow the directions exactly. The newer products are distributed differently than was done with the products of a few years back. Newer products use ferrous (iron) phosphate as the active ingredient and require only sprinkling sparsely over an area. Slugs are attracted to the bait, they eat it, and it makes them stop eating and slither away to die. You won’t see the dead bodies, but after a few days, you will notice the damage has stopped. These newer products remain active for up to 2 weeks, even if it rains. They are safe to use around children, pets, and wildlife.

There are some products available that use metaldehyde as the active ingredient and it works very well, but they can be poisonous to children, pets, and wildlife.

Home Remedies:
Do not use salt. Slugs rehydrate and salt damages your soil and plants. Fermenting yeast attracts slugs, so some people use beer. You provide the party, and the slugs show up, drink their fill and drown. It has its advantage. The slugs come to you; you don’t have to go out looking for them. You can use a cottage cheese carton, cut a couple of openings in the side, set it in the ground up to those holes, fill it with beer or your homemade brew, and put the lid on. Check and empty it every couple of days. Slugs are also attracted by the smell of dead slugs and show up to join the party. Keep your dog away since dogs are known to slurp up the whole thing, dead slugs, and all. You can use old beer, but not wine or stale beer. Apple vinegar sometimes works. You can also make your own fermenting recipe: 1 Tbsp brewer’s yeast or baking yeast, 1 Tbsp sugar, 2 Tbsp flour, and 2 cups tepid water. Mix and allowed to stand for an hour or so. It will last for 2 or 3 days.

Remember it takes regular attention and vigilance to manage slug and snail populations. Keep at it and over the years you will see a decline in the numbers you have in your yard.

About the Author:
Diana Wisen is a Skagit County WSU Extension Master Gardener and is the Coordinator of the Fuchsia Garden at the Discovery Garden on SR 536 in Mount Vernon.
References:
Gordon, David George. 2010. The Secret Life of Slugs and Snails-Life in the Slow Lane Sasquatch Books, Seattle, WA

“Managing Slugs and Snails” State University- 10-Minute University OSU Master Gardener Program and OSU Extension Service

Those Pesky Slugs” Article by Mary Robson King County Area Extension Agent (now retired) May 2000

Schenk, George. 2002. The Complete Shade Garden. Timber Press, Portland, OR

Questions about home gardening or becoming a master gardener, may be directed to:  WSU Skagit County Extension Office, 11768 Westar Lane, Suite A, Burlington, WA 98233; by phone: 360-428-4270; or via the website: www.skagit.wsu.edu/mg

Washington State University Extension helps people develop leadership skills and use research-based knowledge to improve economic status and quality of life. Cooperating agencies: Washington State University, U.S. Department of Agriculture, and Skagit County. Extension programs and policies are available to all without discrimination.  To request disability accommodations contact us at least ten days in advance.


AMGPost_header5
Web_headerLisianthus

How to Grow Lisianthus

A rose by any other name…

[sibwp_form id=]

By My Thanh Kim, Skagit County WSU Extension Master Gardener

Call it love at first sight. Four years ago, I fell hard for some mysterious flowers in a lobby of a hotel. They looked like roses except more striking with an abundance of green buds surrounding luxurious blooms. This was the beginning of an obsession.  I checked nurseries for plants but had no luck.  Over the next several years I saw them again, and then, while watching the 2020 (2021) Tokyo Summer Olympics, I saw my beauties, lisianthus flowers prominently displayed and my love affair with them started all over again.

While hard to find in flower nurseries it is possible to start lisianthus from seeds. Mastering the seed-starting techniques was a months-long process, but well worth it. In the end, I had nearly 2,000 plants and gave away buckets of beautiful blooms all summer long. These are the best flowers ever, and I want everyone to enjoy them.

Lisianthus, Eustoma grandiflorum, (commonly called prairie gentian, bluebell gentian) are valued for many reasons including their resemblance to roses, their long vase life as cut flowers, and their unique beauty. They come in many vibrant colors, romantic soft tones, and mysterious bicolor flowers.  In addition to their colors and shape, they are sought after by florists for their strong stems, lush succulent leaves, and graceful buds that continue to open in a vase for several weeks.  They are hardy in USDA hardiness zones 8-10. Lisianthus is not hard to grow, and starting them from seeds may be your best option if you want to have these gorgeous flowers blooming in your garden this summer.

Rosanne Green Lisianthus
Photo by My Thanh Kim
Rosanne Green Lisianthus
Photo by My Thanh Kim
Lisianthus stems can be 18-36" tall
Photo by My Thanh Kim
Lisianthus stems can be 18-36″ tall
Photo by My Thanh Kim
Lisianthus blooming in the author's garden. Photo by My Thanh Kim
Lisianthus blooming in the author’s garden. Photo by My Thanh Kim

January is the perfect time to start lisianthus seeds

It’s January. It’s dark and cold. Though it is too early to start many seeds indoors but it is not too early to start lisianthus. Since they need at least 6 months from planting to bloom, starting them early is a must. Growing lisianthus from seeds is not for the faint of heart. They need constant attention for several weeks if not months. You may need to try multiple times before you can master the skill.  Follow these tips and with some practice and patience, you’ll be able to get many beautiful plants for your garden.

My Thanh Kim, Skagit County Master Gardener

Get started with seeds, a container, seed starting mix

Make sure you get seeds from a reputable source. Lisianthus seeds can be challenging to germinate so make sure the seeds are fresh. The germination rate goes down with older seeds. You want to start with the best seeds possible. Seeds from reputable companies should come in pelleted form for easy handling. Seeds can also be collected from mature flowers. They must be handled with care because they are tiny like specs of dust.

Choose a container or tray that is at least 1.5″ deep to allow room for root growth unless you are starting them in soil blocks. Soil blocking is a method of starting seeds that allows for healthy root growth. Sterilize the container before planting the seeds to prevent diseases.

Don’t start in garden soil. Instead, choose a sterile seed starting mix that has either coco coir or peat moss. Since lisianthus seeds are so tiny, you’ll need a medium that is as fine as possible to allow for better contact with the seeds, sifting out all the large pieces before using it.

small seeds
Lisianthus seed pods contain tiny seeds.
Photo by My Thanh Kim
Lisianthus seedlings. Photo by My Thanh Kim
ABC purple, Voyage 2 green, ABC green, and Rosanne green lisianthus. Photo by My Thanh Kim

Light, temperature, and moisture are critical to seed germination

Lisianthus seeds are considered some of the most difficult to germinate but provided with the right conditions, you’ll have a better chance of success. One of the most important things to remember is that lisianthus seeds need light to germinate. Sow the seeds on the surface of the seed starting mix and do not cover them. Keep the seeds from drying out by misting them with a spray bottle several times a day. Cover the tray with a clear plastic cover until they germinate in 10-14 days. The seeds germinate best at a temperature of 70 degrees Fahrenheit.

Congratulate yourself when the seeds germinate

If the seeds have germinated, pat yourself on the back. You’ve done the hard part. When about 50% of the seeds have germinated, remove the plastic cover. Place the seedlings under grow lights and fertilize lightly every week. Seedlings can be planted in the garden when they have 4 sets of true leaves. Lisianthus can tolerate some frost so they can be planted outside 6 weeks before the date of your last frost. Plant them in a sunny location in well-drained soil and water when the soil is dry. If everything goes well you will have beautiful blooms in July or August.

Quick Summary Tips

Getting lisianthus seeds to germinate is not hard but requires commitment and patience. Here is a summary of the tips to help get the seeds to germinate.

  1. Fill a tray or container with some fine and sterile seed starting mix.
  2. Sow the seeds on the surface of the mix. They need light to germinate so do not cover them with the mix.
  3. Spray a few times a day to prevent the mix from drying out but do not over-water.
  4. Cover the tray with a clear plastic cover to retain moisture.
  5. Place under light to germinate. A desk lamp, LED light, or fluorescent shop light will work.
  6. Keep the tray at room temperature around 70 degrees Fahrenheit.
  7. Remove the plastic cover once about 50% of the seeds germinated (10-14 days).
  8. Feed lightly every week. Place under grow lights.
  9. Plant out in the garden or container once they have 4 sets of true leaves.
  10. It may take multiple attempts to be successful but keep practicing. They are worth it.

About the Author:

My Thanh Kim is a graduate of the Skagit County WSU Extension Master Gardener Class of 2022. She currently serves as the greenhouse co-manager for the SCMG. She has a BS in biochemistry from Tulane University and a teaching credential for San Diego State University.

Resources

https://sakataornamentals.com/wp-content/uploads/sites/13/2022/02/Lisianthus-Cut-Flower-0921-SAKATA.pdf

Zigler, Lisa Mason (2014) Cool flowers: How to grow and enjoy long-blooming hardy annual flowers using cool weather techniques. St. Lynn’s Press, Pittsburg, PA.

Questions about home gardening or becoming a master gardener, may be directed to:  WSU Skagit County Extension Office, 11768 Westar Lane, Suite A, Burlington, WA 98233; by phone: 360-428-4270; or via the website: www.skagit.wsu.edu/mg

Washington State University Extension helps people develop leadership skills and use research-based knowledge to improve economic status and quality of life. Cooperating agencies: Washington State University, U.S. Department of Agriculture, and Skagit County. Extension programs and policies are available to all without discrimination.  To request disability accommodations contact us at least ten days in advance.


AMGPost_header5
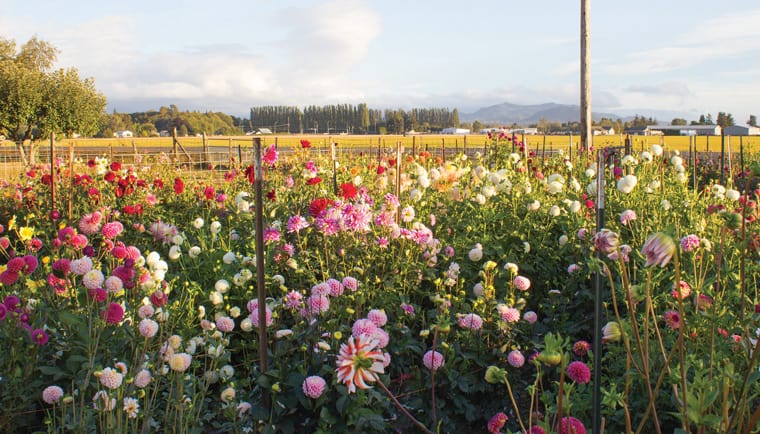
field featuring 100's of dahlia varieties grown for cutting

Master Gardeners share their overwintering techniques

By Anne Hays, Skagit County WSU Master Gardener

Photo of writer
Anne Hays is a resident of La Conner and a Skagit County Master Gardener

Dahlias, first imported from Mexico and Central America, provide a rich and enthusiastic floral display in Pacific Northwest gardens. Continuous hybridization of Asteraceae has resulted in the development of a plethora of colors, flower forms, and sizes. The blossoms can be as tiny as the minion under 2 inches, or as large as the giant or dinner plate size at over 10 inches. Conventional wisdom incorporated in most PNW and national reference guides for Dahlia growers just about universally recommend digging Dahlia tubers in the fall and storing them in a cool dry place. The reference materials I consulted noted that while dahlias are considered hardy in our zones – digging and storing is their preferred recommendation for overwintering dahlias in our Zones 8-9.
I then looked out my window. My street garden is abundant with tall, healthy dahlias, and I didn’t dig them last winter. So, I decided to do a very unscientific survey of WSU Extension Skagit County Master Gardeners to see what their preferences and protocols for digging dahlias and overwintering them indoors.

Master Gardeners are a treasure trove of local gardening knowledge, underscoring the depth of their experience and knowledge and differing opinions. Their gardens represent a variety of unique “microclimates” found in our area. The following is a brief synopsis of replies I received with a notation on where their garden is located.

Karen from Camano has ten years’ experience raising dahlias. At first, she was a Dahlia digger, but now she leaves them in the ground after struggling with mold issues trying to store them. She cuts her 150 Dahlia stalks after the first frost, covers them with a layer of mulch and then with sword ferns and rocks to keep water from rotting the dahlias.

Dahlia_3

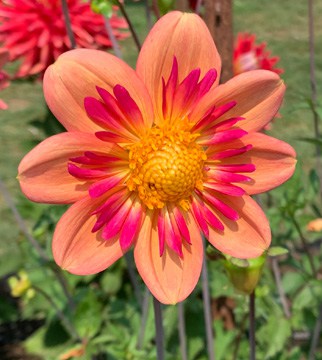
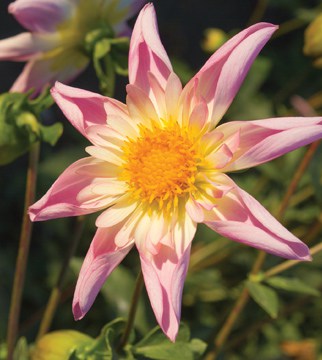
Among gardeners, selecting a favorite Dahlia is unique to each individual. Dahlias range in size from under 2″ to over 10″ and are classified into 18 categories by form. Photo by Anne Hayes

ThomasEdison

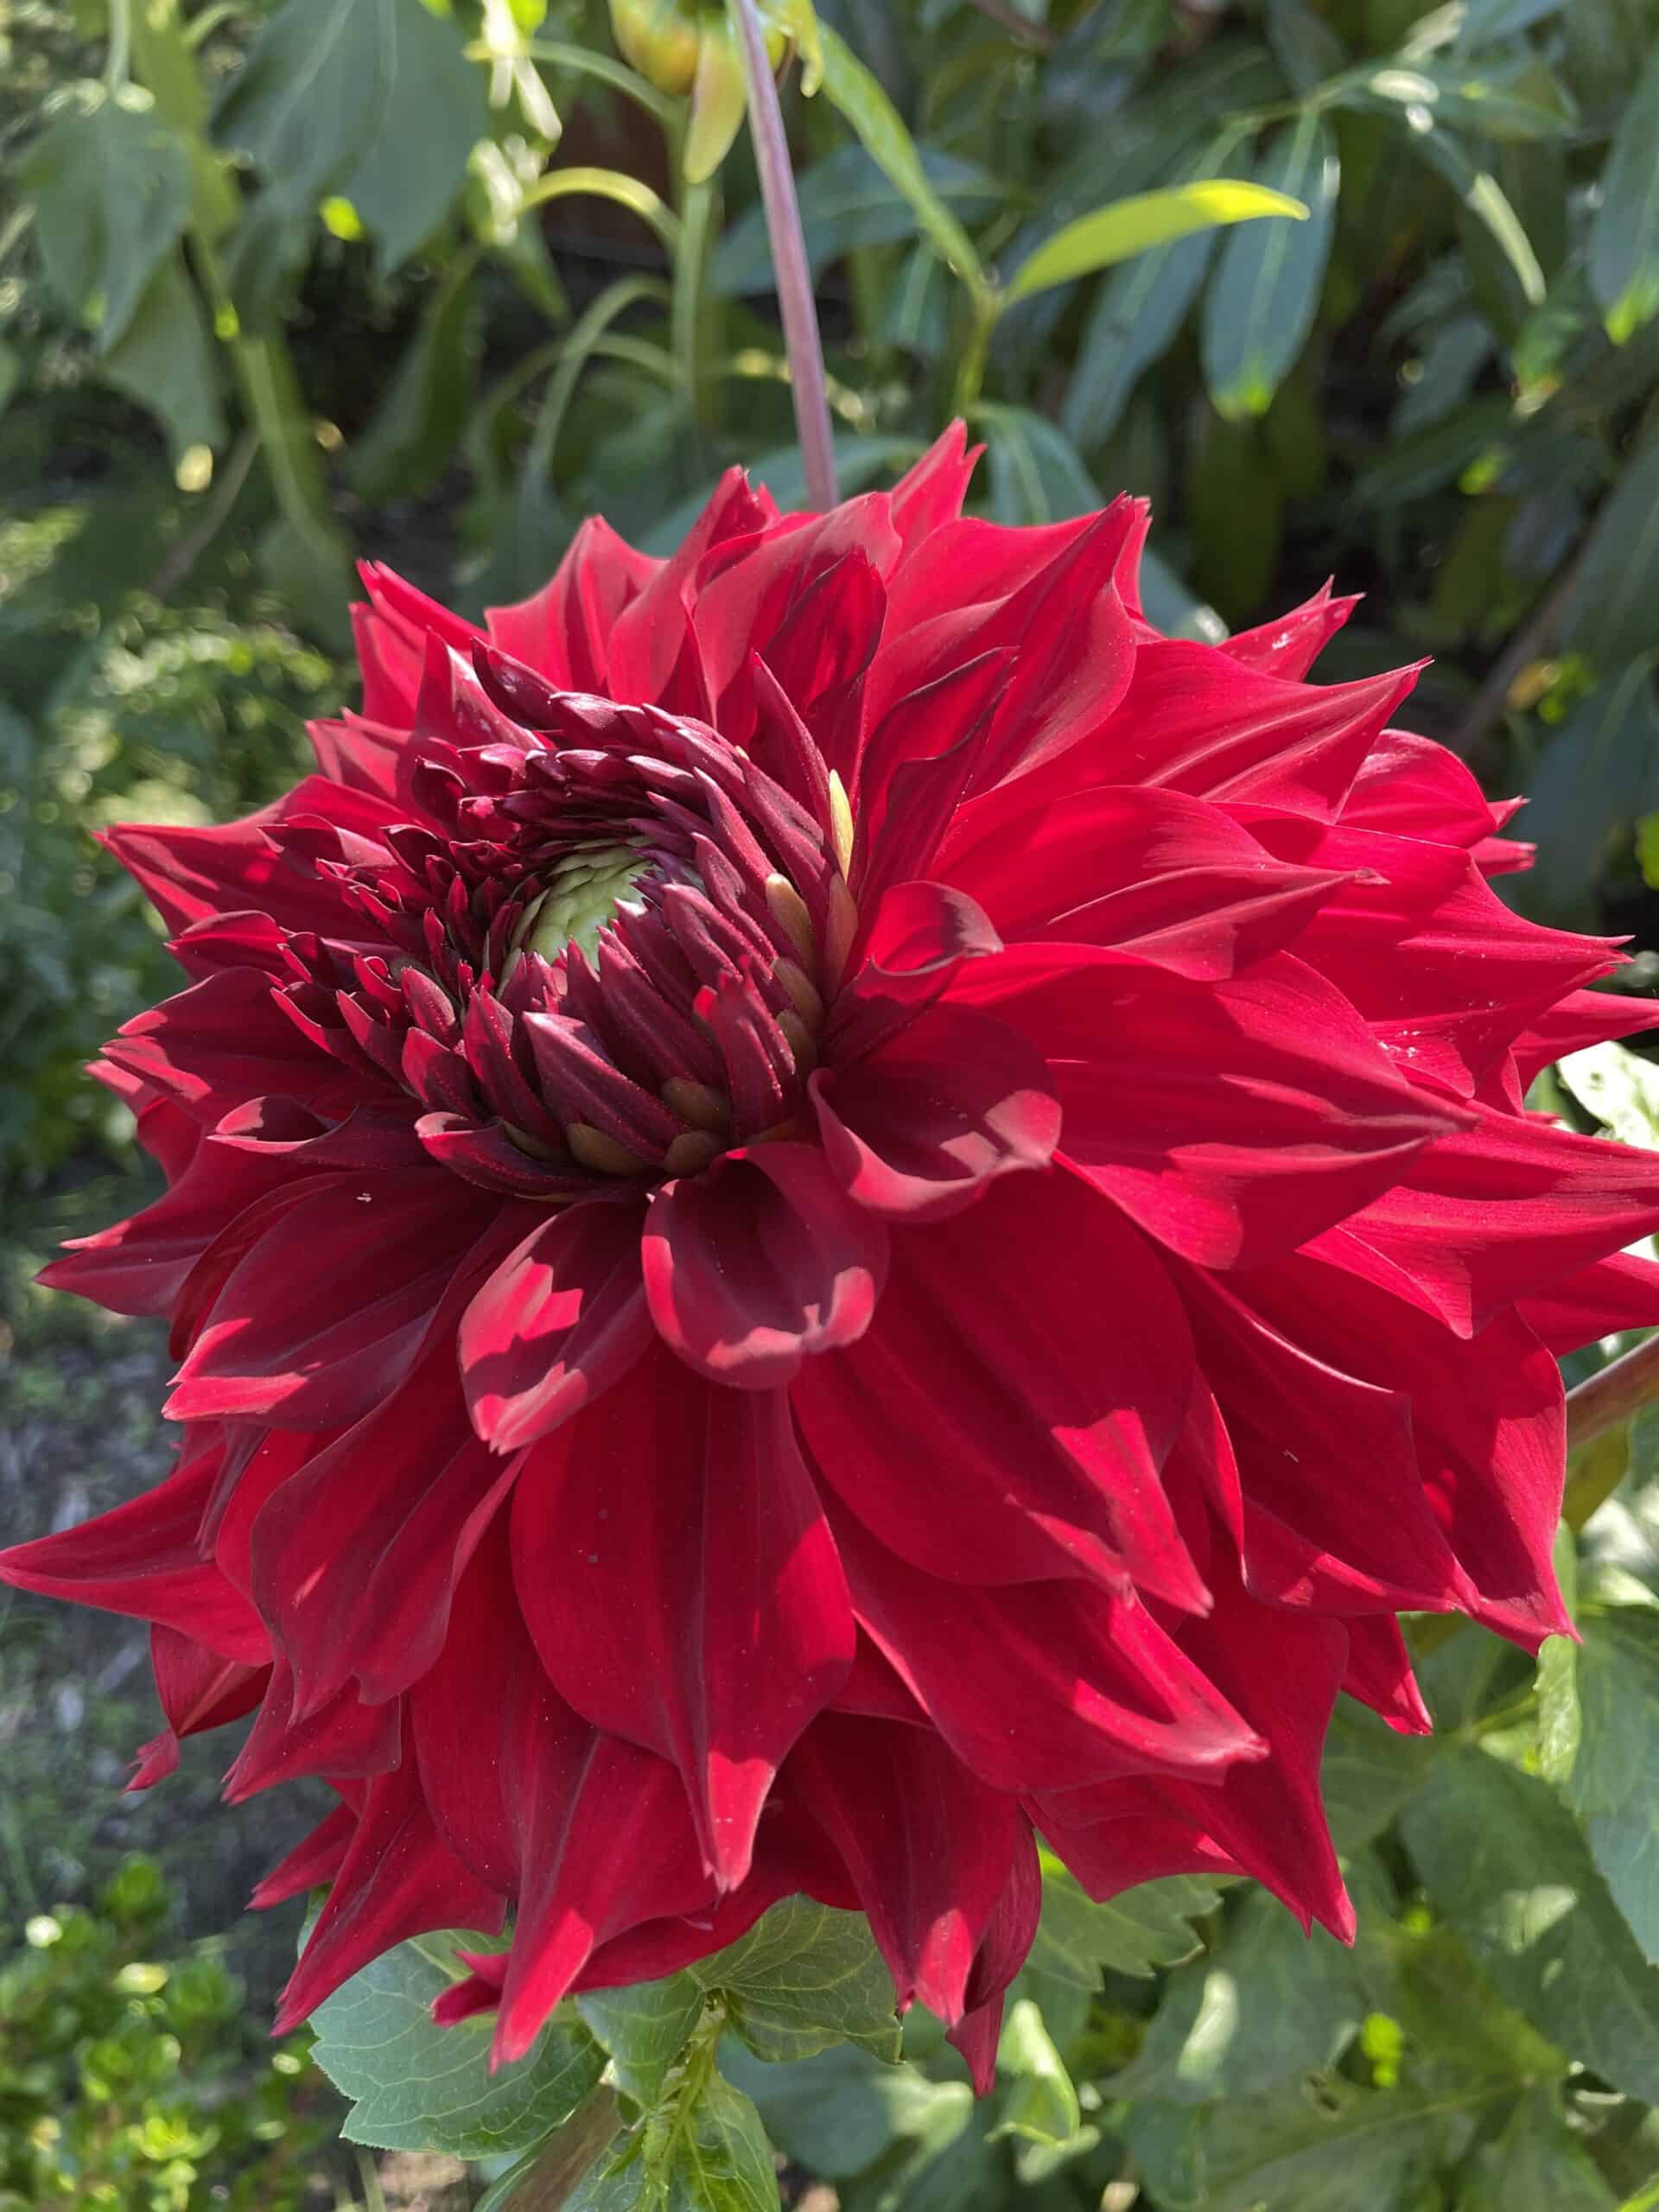
The Thomas Edison dahlia is a beautiful example of the deep vivid hues found among the fifteen different colors and color combinations recognized by the American Dahlia Society.  Photo by Anne Hayes

Dahlia_2

Though the dahlia’s origins can be traced back to the high mountains of Central America, the plants thrive in the moist, moderate climate of the Pacific Northwest, blooming from midsummer until the first frost.

Jan from La Conner is a recent convert to the in-ground overwintering school of thought. Until last year she routinely dug her dahlias, wrapped them in newspaper and stored them in plastic. She left them in the ground last season and intends to again, though she plans to cover the planting area with cardboard and heavy mulch.

Rin from Anacortes describes her soil as sandy and has determined her tubers do best when left in the ground — mostly because she hasn’t found an overwintering strategy that doesn’t result in mold issues.

Linda from Orcas Island digs her tubers, being careful not to damage or pierce the tubers. She then rinses the soil and lays them flat to dry for a day or two. She brushes the tubers – inspecting them for any signs of rot and places them in cardboard boxes using vermiculite. She places the top of the box on the tubers after barely moistening the vermiculite. She does not allow the tubers to touch and stores the box in her basement.

Allison on Samish Island digs her dahlias and stores them in cardboard with peat moss on top in a cool dry place in her garage.

Among all the WSU Extension Skagit County Master Gardeners I contacted, dividing dahlias is typically undertaken every three years in the spring. Many of the local Master Gardener’s caution that new Dahlia starts are “slug candy” and recommend careful slug containment and control at the start of a new Dahlia season. Dahlias need good soil, enriched with organic matter and some recommend bone meal. Planting depths vary from 6 inches to one foot, and many recommend placing stakes for larger varieties as you plant the tubers to avoid damaging the tubers.

I also asked each of the responders for their recommendations on their methods for placing cut dahlias in display vases. The consensus was to place them in water as soon as possible using a fresh cut and change the water frequently. Many mentioned using a floral preservative.

What was abundantly clear from the replies I received is the passionate enthusiasm among those in Dahlia growing communities! Color, abundance, ease of growing, all were mentioned as reasons to add dahlias to your garden. If you decide to include dahlias in your garden next spring, the WSU Extension Skagit County Master Gardeners are available at Plant Clinics throughout the county to offer guidance and answer questions. Please don’t hesitate to give us a call at 360-428-4270 to be directed to a Plant Clinic near you.


Resources:

Gardening in the Pacific Northwest, Carol Hall & Norman Hall, Timber Press, 2008 Ornamental

Bulbs, Corms & Tubers, A. R. Rees, C A B International, 1992

Sunset Western Garden Book, Sunset Publishing, Edited by Kathleen Norris Brenzel Gardening in the Pacific Northwest, Paul Bonine and Amy Campion, Timber Press


Questions about home gardening or becoming a master gardener, may be directed to:  WSU Skagit County Extension Office, 11768 Westar Lane, Suite A, Burlington, WA 98233; by phone: 360-428-4270; or via the website: www.skagit.wsu.edu/mg

Washington State University Extension helps people develop leadership skills and use research-based knowledge to improve economic status and quality of life. Cooperating agencies: Washington State University, U.S. Department of Agriculture, and Skagit County. Extension programs and policies are available to all without discrimination.  To request disability accommodations contact us at least ten days in advance.